Introduction
Are you facing the daunting task of replacing the screen on your Samsung S20? Whether it's due to an unfortunate accident or simply wear and tear, a cracked or malfunctioning screen can be a major inconvenience. However, with the right tools, a bit of patience, and a willingness to get your hands dirty, you can tackle this DIY project with confidence.
In this comprehensive guide, we will walk you through the step-by-step process of safely replacing the screen on your Samsung S20. By following these instructions, you can save time and money by avoiding a trip to the repair shop and gain the satisfaction of successfully completing the repair yourself.
Before diving into the process, it's essential to gather all the necessary tools and materials. This includes precision screwdrivers, a heat gun or hairdryer, a plastic opening tool, and a replacement screen specifically designed for the Samsung S20. Once you have everything you need, you can proceed with confidence, knowing that you are well-prepared for the task at hand.
With this DIY guide, you'll be equipped with the knowledge and skills to power off your Samsung S20, remove the back cover, disconnect the battery, carefully remove the old screen, install the new screen, reconnect the battery, and replace the back cover. Each step is crucial to ensuring a successful screen replacement while maintaining the integrity of your device.
By the end of this guide, you'll have the satisfaction of seeing your Samsung S20 restored to its former glory, with a pristine, fully functional screen. So, roll up your sleeves, gather your tools, and let's embark on this DIY journey to rejuvenate your Samsung S20.
Step 1: Gather Necessary Tools and Materials
Before embarking on the journey of replacing the screen of your Samsung S20, it's crucial to gather all the essential tools and materials. Having the right equipment at your disposal will not only streamline the repair process but also ensure that you can execute each step with precision and care.
Here's a comprehensive list of the tools and materials you'll need to have on hand:
-
Precision Screwdrivers: A set of precision screwdrivers is indispensable for removing the tiny screws that secure the components of your Samsung S20. Ensure that you have Phillips and flathead screwdrivers in various sizes to accommodate different screw types.
-
Heat Gun or Hairdryer: Applying heat to the adhesive securing the screen is essential for safe removal. A heat gun or hairdryer will help soften the adhesive, making it easier to detach the old screen without causing damage to the device.
-
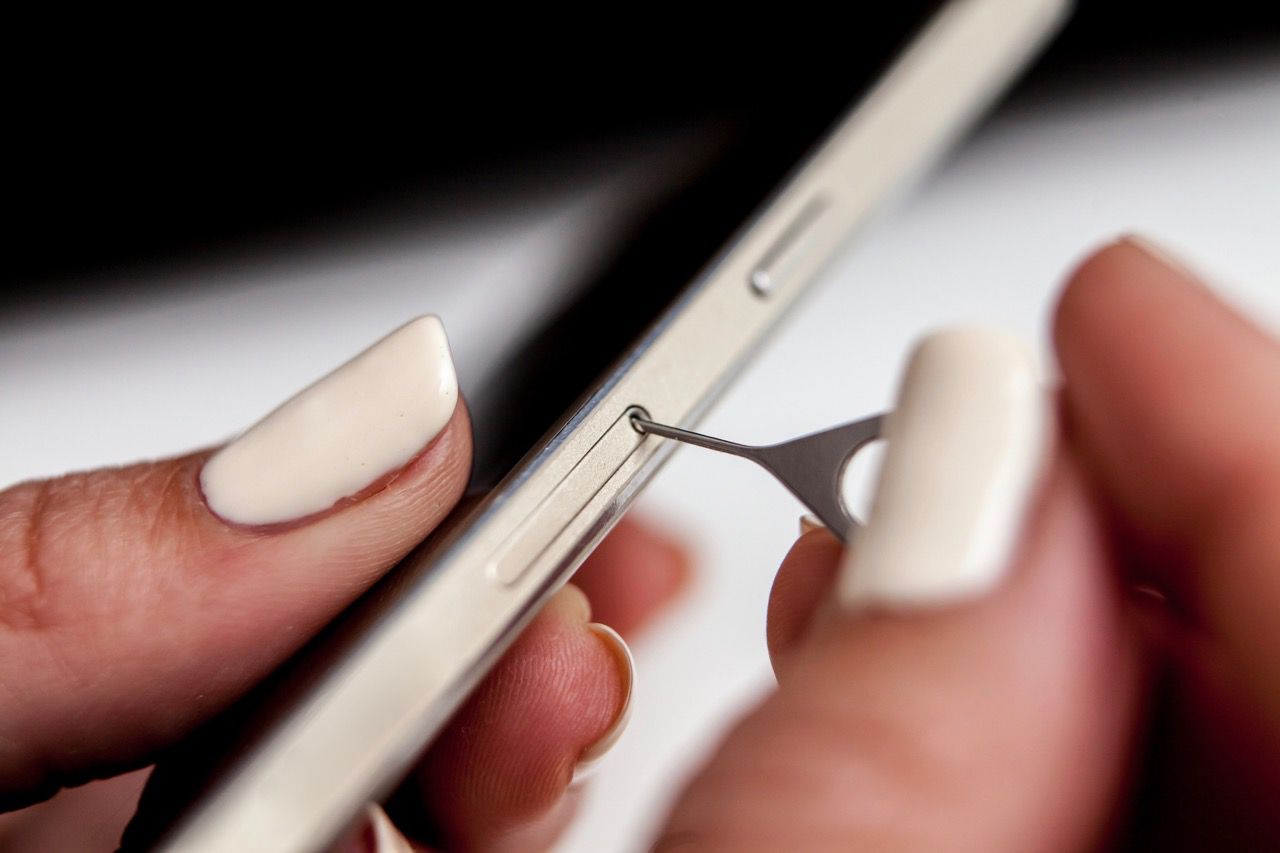
Plastic Opening Tool: This non-conductive tool is essential for prying open the device without risking damage to the internal components. Opt for a plastic opening tool with a thin, sturdy edge to navigate the intricate crevices of the Samsung S20.
-
Replacement Screen: It's imperative to acquire a high-quality replacement screen specifically designed for the Samsung S20. Ensure that the replacement screen is compatible with your device model to guarantee a seamless fit and optimal functionality.
-
Adhesive Strips: To affix the new screen securely to the device, you'll need adhesive strips that are designed for phone repairs. These strips provide the necessary adhesion to ensure the new screen remains firmly in place once installed.
-
Tweezers: Precision tweezers are invaluable for handling small components and delicate parts during the screen replacement process. They allow for meticulous maneuvering and placement of screws, connectors, and other intricate elements.
-
Microfiber Cloth: Keeping a microfiber cloth on hand is essential for maintaining a clean and dust-free work environment. This will help prevent debris from entering the device during the repair process, ensuring a pristine finish.
By ensuring that you have all these tools and materials at your disposal, you'll be well-prepared to tackle the screen replacement process with confidence and precision. With everything in place, you can proceed to the next step of powering off your Samsung S20 and initiating the repair process.
Step 2: Power Off Your Samsung S20
Before delving into the intricate process of replacing the screen on your Samsung S20, it's imperative to power off the device to ensure safety and prevent any potential damage during the repair. By following these steps, you can safely power down your device and prepare it for the subsequent stages of the screen replacement process.
-
Locate the Power Button: Begin by locating the power button on your Samsung S20. Depending on the specific model, the power button is typically situated on the side of the device. Familiarize yourself with the location of the power button to ensure a smooth power-off process.
-
Press and Hold the Power Button: Once you've identified the power button, press and hold it until the power-off menu appears on the screen. This menu provides options to power off the device, restart it, or enter other related functions. By holding down the power button, you initiate the power-off sequence, preparing the device for the subsequent repair steps.
-
Select "Power Off": Within the power-off menu, tap on the "Power Off" option to commence the shutdown process. This action prompts the device to begin powering down, ensuring that all active processes and components are safely deactivated.
-
Confirm Power-Off: After selecting the "Power Off" option, the device will prompt you to confirm the action. Verify your decision to power off the Samsung S20, ensuring that you are prepared to proceed with the screen replacement process.
-
Wait for Shutdown: Once the power-off command is confirmed, the Samsung S20 will initiate the shutdown sequence. Allow the device a few moments to complete the power-off process, ensuring that all internal operations come to a halt before proceeding with the repair.
By meticulously following these steps to power off your Samsung S20, you can ensure that the device is safely deactivated and ready for the subsequent stages of the screen replacement process. With the device powered down, you can confidently proceed to the next step of removing the back cover, setting the stage for the intricate repair journey that lies ahead.
Step 3: Remove the Back Cover
Removing the back cover of your Samsung S20 is a crucial step in the screen replacement process. This intricate procedure requires precision and care to ensure that the device's internal components remain unharmed during the disassembly. By following these detailed steps, you can safely remove the back cover and gain access to the internal components of the device.
-
Power Off Confirmation: Before proceeding with the back cover removal, it's essential to verify that the Samsung S20 is powered off completely. Confirm that the device's screen is inactive and that all power-related functions have been deactivated to prevent any potential electrical hazards during the disassembly process.
-
Identify the Notch: Begin by locating the small notch or groove along the edge of the device where the back cover meets the main body of the Samsung S20. This notch serves as the entry point for prying open the back cover and gaining access to the internal components. Carefully examine the edges of the device to pinpoint the precise location of the notch.
-
Utilize the Opening Tool: With the notch identified, use a plastic opening tool to gently insert it into the groove, creating a slight separation between the back cover and the main body of the Samsung S20. Exercise caution and apply gentle pressure to avoid damaging the internal components or the back cover itself. Slow and steady movements are key to a successful back cover removal.
-
Navigate Around the Edges: Once the opening tool is inserted, carefully navigate it along the edges of the device, gradually releasing the clips that secure the back cover in place. Take your time and ensure that the separation is uniform across all edges to prevent any undue stress on the back cover or the internal components.
-
Lift Off the Back Cover: As the clips are disengaged, gently lift the back cover away from the main body of the Samsung S20. Exercise caution and be mindful of any cables or connectors that may still be attached to the back cover. If necessary, use a plastic opening tool to carefully detach any remaining connections, ensuring a smooth and controlled removal process.
By meticulously following these steps, you can successfully remove the back cover of your Samsung S20, gaining access to the internal components and setting the stage for the subsequent stages of the screen replacement process. With the back cover safely removed, you are now prepared to proceed with the intricate task of disconnecting the battery and advancing further in the repair journey.
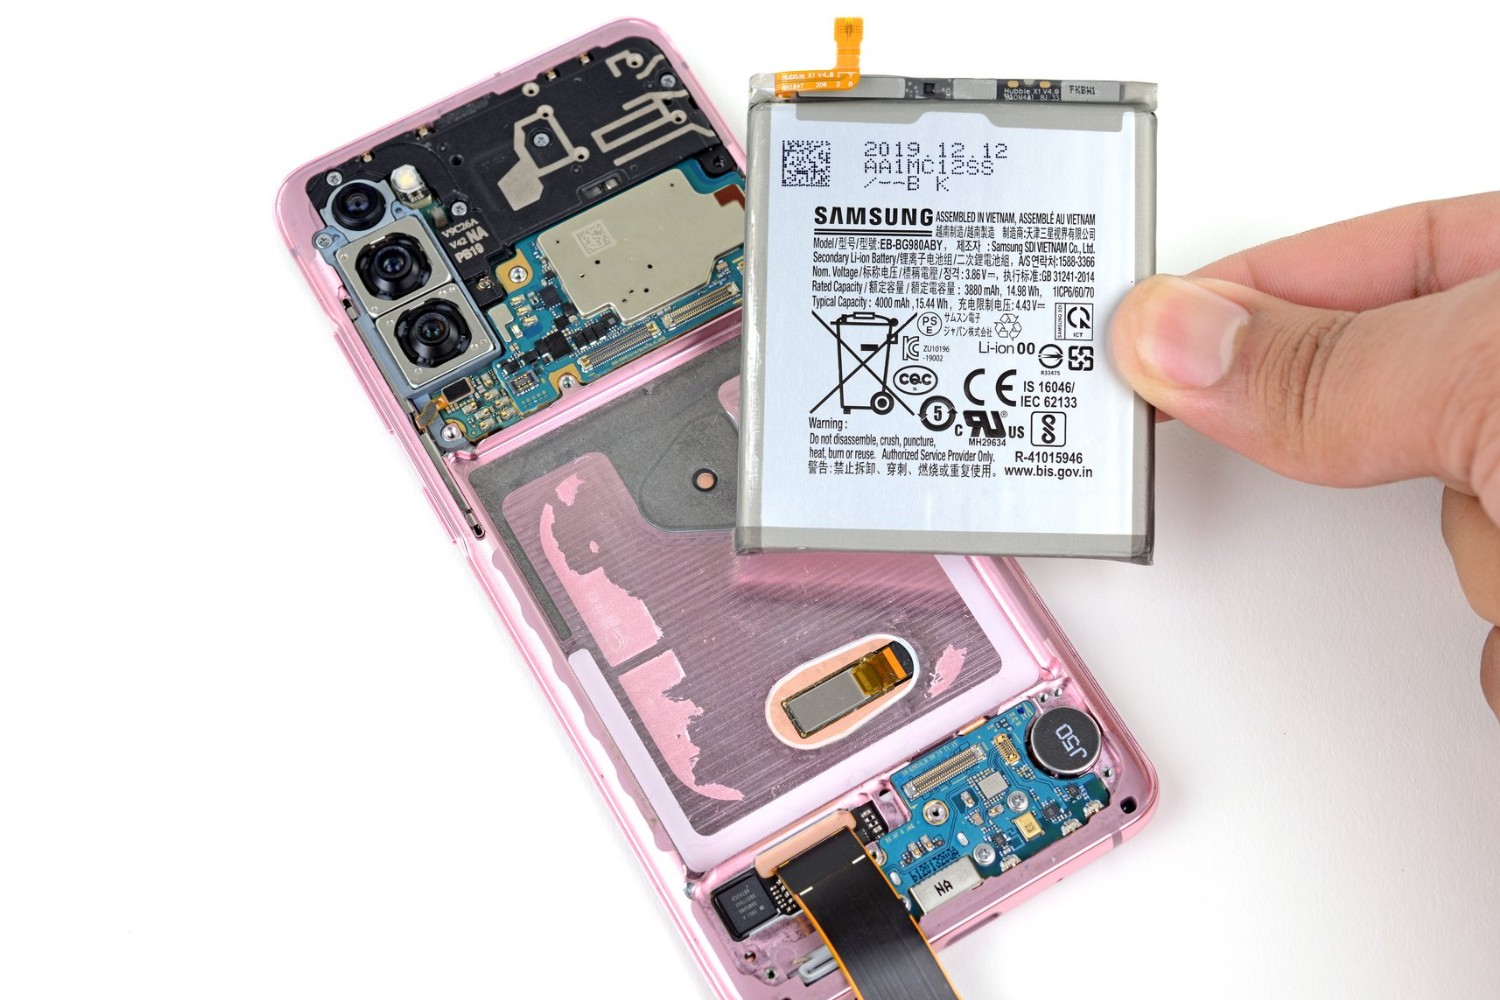
Step 4: Disconnect the Battery
Disconnecting the battery of your Samsung S20 is a critical step in ensuring the safety and integrity of the device during the screen replacement process. By following these detailed instructions, you can effectively disconnect the battery and mitigate the risk of electrical mishaps or damage to the device's internal components.
-
Confirm Power Off: Prior to disconnecting the battery, it is imperative to verify that the Samsung S20 is completely powered off. Ensure that the device's screen is inactive, and all power-related functions have been deactivated to prevent any potential electrical hazards during the disassembly process.
-
Identify the Battery Connector: The battery connector is typically located near the center of the device's internal structure. It is essential to identify the specific location of the battery connector to ensure accurate disconnection without inadvertently tampering with other components.
-
Use Precision Tools: Employ precision screwdrivers to carefully remove any screws or fasteners securing the battery connector in place. Exercise caution and precision to avoid causing damage to the surrounding components or the connector itself.
-
Detach the Battery Connector: Gently detach the battery connector from its corresponding socket by applying even pressure and utilizing a non-conductive tool if necessary. Ensure that the disconnection is performed smoothly and without excessive force to prevent any damage to the connector or the device's internal circuitry.
-
Verify Disconnection: Once the battery connector is detached, visually inspect the connection to confirm that it has been effectively disconnected. Ensure that there are no residual signs of electrical activity and that the battery is safely isolated from the device's power supply.
By meticulously following these steps to disconnect the battery of your Samsung S20, you can safeguard the device against potential electrical hazards and proceed with the subsequent stages of the screen replacement process with confidence. With the battery safely disconnected, you are now prepared to advance further in the repair journey, ensuring a seamless and secure screen replacement for your Samsung S20.
Step 5: Remove the Old Screen
With the battery safely disconnected and the internal components accessible, the next pivotal step in the screen replacement process is the meticulous removal of the old screen from your Samsung S20. This intricate procedure demands precision, patience, and a methodical approach to ensure that the old screen is detached without causing damage to the device's delicate components. By following these detailed instructions, you can effectively remove the old screen and pave the way for the seamless installation of the new screen.
-
Assess Adhesive Bond: Begin by carefully examining the edges of the old screen to assess the adhesive bond securing it to the device. Take note of the areas where the adhesive is most prominent, as these will require focused attention during the removal process.
-
Apply Heat: Utilize a heat gun or hairdryer to apply gentle heat to the edges of the old screen. The application of heat serves to soften the adhesive, making it more pliable and easing the separation of the screen from the device. Exercise caution and ensure that the heat is applied uniformly to avoid overheating any specific areas.
-
Insert Opening Tool: With the adhesive softened, delicately insert a plastic opening tool between the old screen and the main body of the Samsung S20. Slowly maneuver the opening tool along the edges, gradually loosening the grip of the adhesive without exerting excessive force. Patience is key to a successful and damage-free screen removal.
-
Navigate Around the Edges: As the opening tool progresses along the edges, maintain a steady and controlled movement to ensure uniform separation. Take care to avoid sudden or jerky motions that could potentially damage the device's internal components or the old screen itself. Continuously assess the level of adhesion and adjust the application of heat as needed.
-
Lift Off the Old Screen: Once the adhesive bond has been sufficiently loosened, gently lift the old screen away from the main body of the Samsung S20. Exercise caution and be mindful of any cables or connectors that may still be attached to the old screen. If necessary, use a plastic opening tool to carefully detach any remaining connections, ensuring a smooth and controlled removal process.
By meticulously following these steps, you can successfully remove the old screen from your Samsung S20, setting the stage for the subsequent installation of the new screen. With the old screen safely detached, you are now prepared to proceed with the intricate task of installing the new screen, ensuring a seamless and secure transition that rejuvenates your Samsung S20 to its former glory.
Step 6: Install the New Screen
With the old screen successfully removed, the pivotal moment arrives to install the new screen and breathe new life into your Samsung S20. This critical step demands precision, attention to detail, and a methodical approach to ensure that the new screen is seamlessly integrated, providing a pristine display and optimal functionality for your device.
Align the New Screen
Begin by carefully aligning the new screen with the main body of the Samsung S20, ensuring that it fits snugly into the designated position. Take note of any subtle grooves or alignment markers that facilitate the accurate placement of the new screen. Exercise patience and precision to achieve a seamless fit, setting the stage for the subsequent attachment process.
Reconnect Cables and Components
Once the new screen is aligned, delicately reconnect any cables and components that were detached during the removal of the old screen. Exercise caution and ensure that each connection is secure and properly seated, minimizing the risk of connectivity issues or malfunctions once the device is reassembled. Meticulously verify each connection to guarantee a robust and reliable integration of the new screen.
Affix the New Screen
With the cables reconnected, carefully affix the new screen to the main body of the Samsung S20, ensuring that it sits flush and secure. If adhesive strips are required, meticulously apply them to the designated areas, providing the necessary adhesion to firmly secure the new screen in place. Exercise precision and attention to detail to achieve a seamless and stable attachment, setting the stage for the subsequent reassembly of the device.
Test Functionality
Before proceeding with the final reassembly, conduct a preliminary test to verify the functionality of the new screen. Power on the device and ensure that the display is responsive, vibrant, and free from any anomalies or irregularities. Verify touch sensitivity and display clarity to confirm that the new screen is functioning optimally, providing a seamless user experience.
Prepare for Reassembly
With the functionality confirmed, prepare the Samsung S20 for the final reassembly by ensuring that all components are securely in place and that no loose connections or components remain. Take a moment to verify the overall integrity of the device, ensuring that the new screen is seamlessly integrated and ready for the subsequent stages of reassembly.
By meticulously following these steps, you can successfully install the new screen on your Samsung S20, rejuvenating the device with a pristine display and optimal functionality. With the new screen seamlessly integrated, you are now prepared to proceed with the subsequent stages of reassembly, ensuring a seamless and secure transition that restores your Samsung S20 to its former glory.
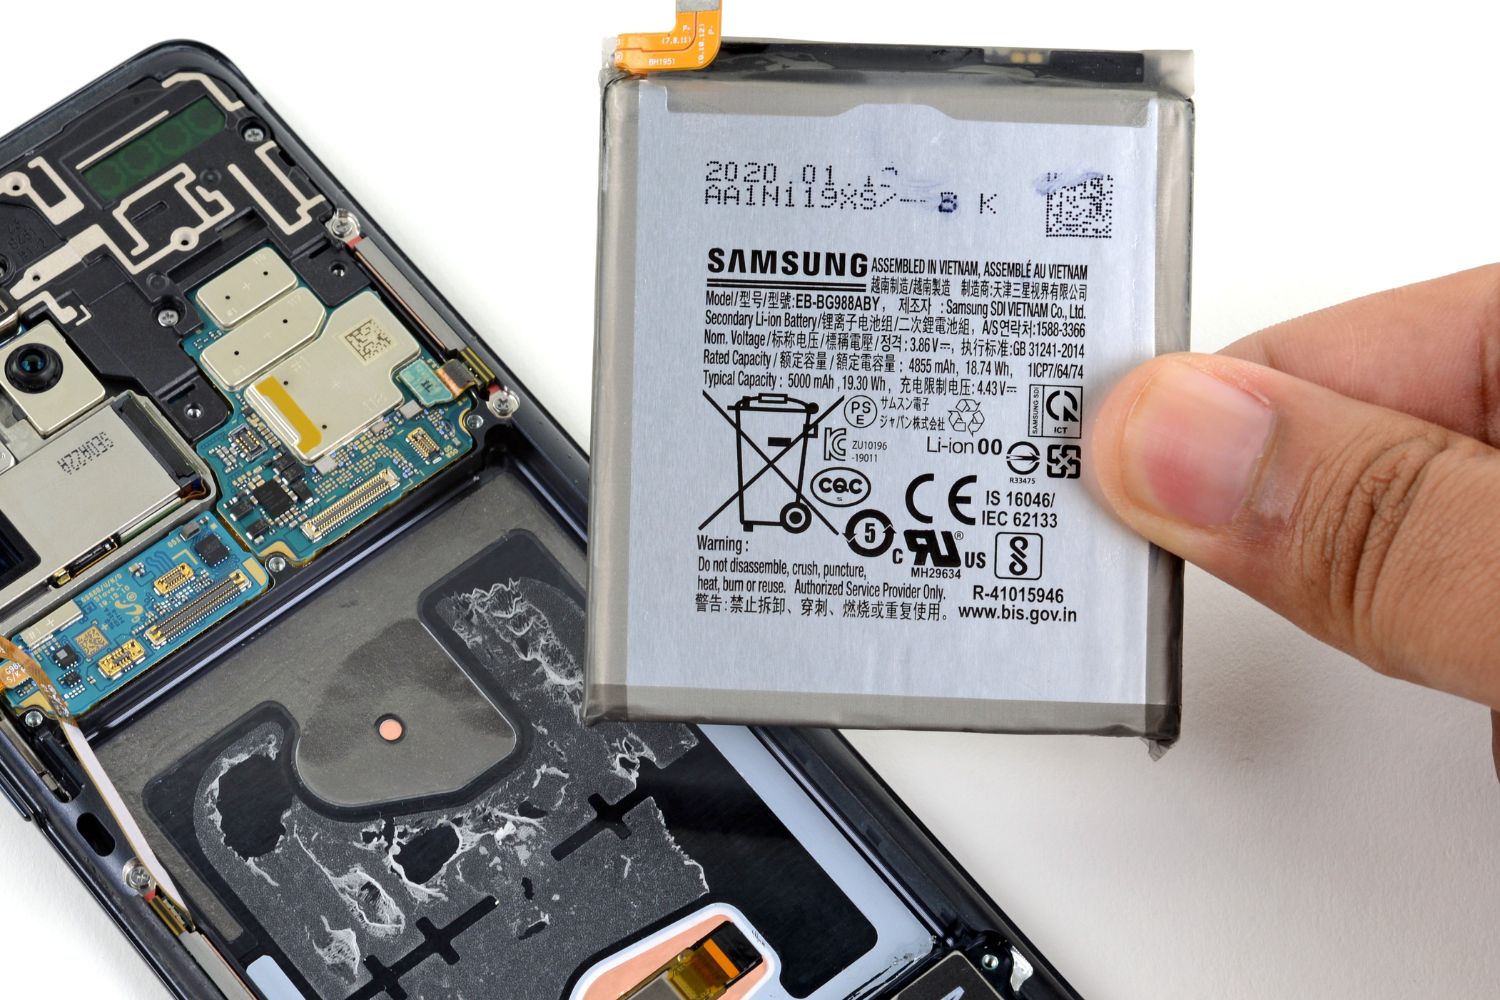
Step 7: Reconnect the Battery
After successfully installing the new screen on your Samsung S20, the next crucial step in the screen replacement process is to reconnect the battery. This pivotal task ensures that the device is powered and ready to undergo the final stages of reassembly, culminating in the restoration of full functionality and seamless operation.
Verify New Screen Functionality
Before proceeding with the reconnection of the battery, it is essential to conduct a comprehensive assessment of the new screen's functionality. Power on the device and meticulously examine the display, ensuring that it exhibits vibrant colors, crisp clarity, and responsive touch sensitivity. Verify that all display elements, including pixels and touch controls, are fully operational, providing an immersive and seamless user experience.
Locate the Battery Connector
Identify the specific location of the battery connector within the device's internal structure. The battery connector is typically situated near the center of the device, featuring a secure socket designed to accommodate the battery's connection. Take note of any surrounding components or cables to ensure a clear and unobstructed path for the reconnection process.
Align and Reconnect the Battery
Carefully align the battery connector with its corresponding socket, ensuring a precise and secure fit. Exercise caution and precision to avoid any undue force or misalignment during the reconnection process. Gently press the battery connector into place, ensuring that it is seated securely and that all contact points are effectively engaged.
Secure Fasteners and Components
If the battery connector is secured by screws or fasteners, utilize precision screwdrivers to meticulously reattach and secure these components. Ensure that each fastener is tightened to the appropriate level, providing a robust and reliable connection that safeguards against potential dislodgment or connectivity issues. Exercise precision and attention to detail to guarantee a secure and stable reconnection of the battery.
Verify Power-Up Sequence
Once the battery is securely reconnected and any associated fasteners are properly secured, initiate the power-up sequence to verify that the device powers on without any issues. Observe the device's response as it boots up, ensuring that all functions and features are operational, and that the new screen displays the device's interface seamlessly.
By meticulously following these steps to reconnect the battery of your Samsung S20, you can ensure that the device is powered and ready for the final stages of reassembly. With the battery securely reconnected, you are now prepared to proceed with the subsequent stages, culminating in the seamless and secure restoration of your Samsung S20 to its former glory.
Step 8: Replace the Back Cover
With the new screen securely installed and the battery reconnected, the final step in the screen replacement process for your Samsung S20 is to replace the back cover. This critical task not only ensures the aesthetic integrity of the device but also provides essential protection for the internal components, culminating in a seamless and secure reassembly.
Align the Back Cover
Begin by carefully aligning the back cover with the main body of the Samsung S20, ensuring that it fits precisely into the designated position. Take note of any subtle grooves or alignment markers that facilitate the accurate placement of the back cover. Exercise patience and precision to achieve a seamless fit, setting the stage for the subsequent attachment process.
Secure the Back Cover
Once the back cover is aligned, gently press it into place, ensuring that it sits flush and secure against the main body of the Samsung S20. Take care to apply uniform pressure across the surface of the back cover, guaranteeing a consistent and stable attachment. Verify that all edges and corners are securely seated, providing comprehensive protection for the internal components.
Reattach Fasteners and Components
If the back cover is secured by screws or fasteners, utilize precision screwdrivers to meticulously reattach and secure these components. Ensure that each fastener is tightened to the appropriate level, providing a robust and reliable connection that safeguards against potential dislodgment or instability. Exercise precision and attention to detail to guarantee a secure and stable reattachment of the back cover.
Verify Overall Integrity
Once the back cover is securely in place, take a moment to verify the overall integrity of the Samsung S20. Ensure that all components are securely housed within the device, and that no loose connections or components remain. Conduct a comprehensive visual inspection to confirm that the back cover is seamlessly integrated, providing essential protection for the internal circuitry and components.
Final Checks
Before concluding the reassembly process, conduct a final check to ensure that the back cover is securely attached and that all components are in place. Power on the device and verify that the new screen displays the device's interface seamlessly, indicating a successful and comprehensive screen replacement. With the back cover securely in place, your Samsung S20 is now restored to its former glory, ready to deliver a pristine display and optimal functionality.
By meticulously following these steps to replace the back cover of your Samsung S20, you can ensure a seamless and secure reassembly, culminating in the successful restoration of your device. With the back cover securely attached, your Samsung S20 is now poised to resume its role as a reliable and visually stunning companion in your daily endeavors.
Conclusion
Congratulations on successfully completing the intricate process of replacing the screen on your Samsung S20! By embarking on this DIY journey, you have not only rejuvenated your device but also gained valuable insights and skills in smartphone repair. As you reflect on the meticulous steps you've taken to disassemble, replace, and reassemble the screen, it's evident that your dedication and attention to detail have resulted in a seamless and secure restoration of your Samsung S20.
Throughout this comprehensive guide, you've navigated through the essential stages of the screen replacement process with precision and care. From gathering the necessary tools and materials to meticulously disconnecting the battery, removing the old screen, installing the new screen, and finally replacing the back cover, each step has contributed to the successful rejuvenation of your device.
By embracing the DIY approach to screen replacement, you've not only saved time and money but also empowered yourself with the knowledge and confidence to tackle similar repair tasks in the future. The satisfaction of witnessing your Samsung S20 restored to its former glory, with a pristine, fully functional screen, is a testament to your determination and resourcefulness.
As you power on your Samsung S20 and behold the vibrant display of the new screen, you can take pride in the accomplishment of a task that may have initially seemed daunting. Your willingness to engage in hands-on repair has not only revitalized your device but also deepened your understanding of its internal components and functionality.
Moving forward, the skills and experience gained from this endeavor will serve as a valuable foundation for future DIY projects and repairs. Whether it's addressing other smartphone issues or exploring additional technical pursuits, the confidence and expertise you've acquired will undoubtedly prove beneficial in various aspects of your technological journey.
As you reacquaint yourself with the seamless functionality and captivating display of your Samsung S20, take a moment to appreciate the dedication and perseverance that have led to this successful outcome. Your commitment to excellence and your willingness to embrace the DIY spirit have culminated in a remarkable achievement that showcases your resourcefulness and ingenuity.
With your Samsung S20 now restored to its optimal state, you can confidently navigate the digital landscape, knowing that you possess the skills and knowledge to overcome technical challenges and embark on future DIY endeavors with assurance and proficiency. Your journey to replace the screen on your Samsung S20 has not only revitalized your device but has also empowered you with the confidence and capability to conquer new technological frontiers.