Introduction
Zelle is a popular digital payments platform that allows users to send and receive money quickly and securely. With just a few clicks on your smartphone or computer, you can transfer funds to friends, family, or even businesses. However, there may be instances where you need to cancel a Zelle payment. Whether it’s due to an incorrect recipient, a change in purchase plans, or any other reason, understanding how to cancel payments can be useful.
In this article, we will guide you through the process of cancelling a Zelle payment specifically through Truist, a leading financial institution. Truist offers online banking services to its customers, making it convenient to manage your Zelle transactions from the comfort of your own home.
From logging into your Truist online banking account to confirming the cancellation, we will provide you with step-by-step instructions on how to cancel a Zelle payment. Additionally, we will cover alternative options and provide guidance on contacting Truist customer support if you encounter any difficulties.
So, if you find yourself in a situation where you need to cancel a Zelle payment through Truist, continue reading to discover the necessary steps and information you need to know.
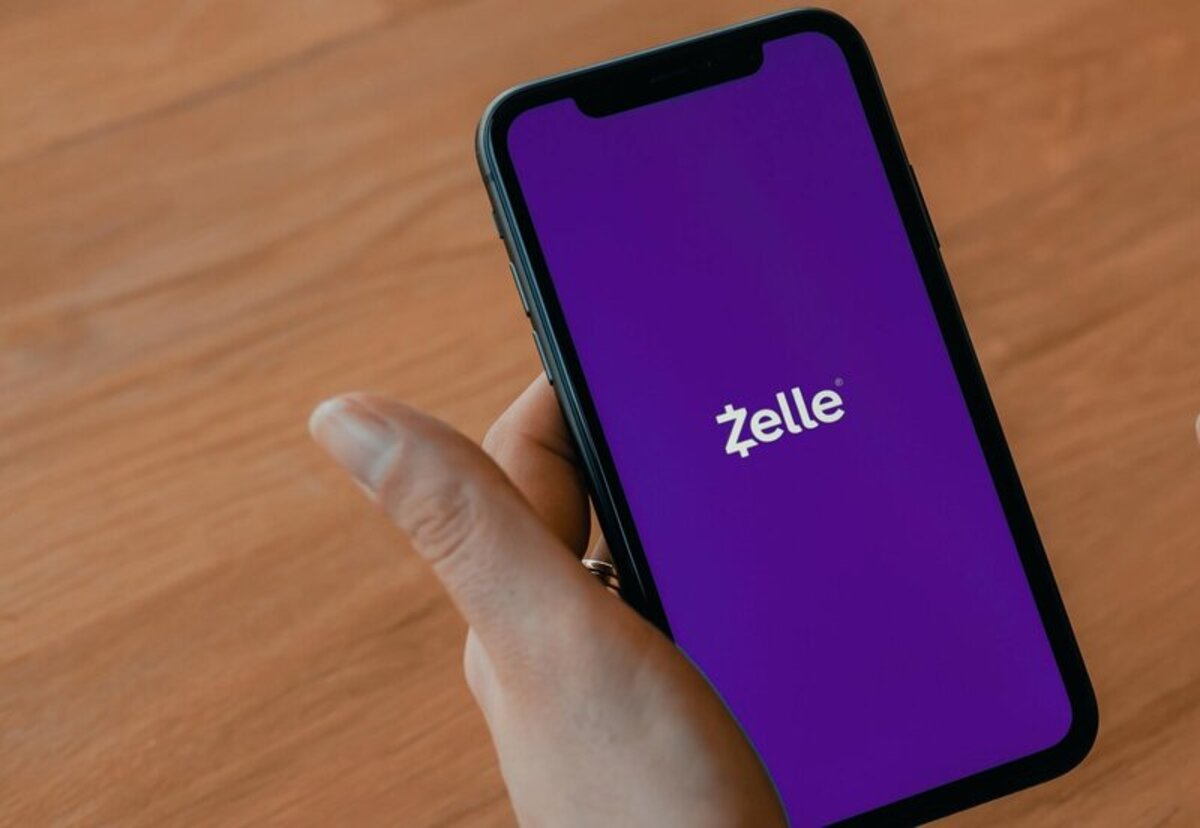
What is Zelle?
Zelle is a digital payments platform that enables users to send and receive money quickly and securely. It allows individuals to transfer funds from their bank accounts directly to another person’s bank account using their email address or mobile phone number. This eliminates the need for cash or checks and provides a convenient way to split bills, pay rent, or send money to friends and family.
Zelle operates as a network that connects over a thousand banks and credit unions across the United States. This means that if both the sender and recipient have accounts with participating financial institutions, they can easily use Zelle to conduct transactions.
The platform is known for its simplicity and efficiency. Transactions made through Zelle are usually completed within minutes, providing immediate access to funds. This is particularly beneficial for urgent situations, such as emergency payments or last-minute expenses.
Security is a top priority for Zelle, and the platform uses industry-standard encryption and authentication protocols to protect users’ financial information. Additionally, Zelle offers built-in fraud protection measures to ensure safe and secure transactions.
It is worth noting that while Zelle facilitates the transfer of money, it is not a banking institution itself. Instead, it acts as a convenient intermediary between banks and their customers, enabling seamless peer-to-peer payments.
Now that you have a better understanding of what Zelle is and how it operates, let’s explore the reasons why you might want to cancel a Zelle payment.
Why would you want to cancel a Zelle payment?
There are various reasons why you may find yourself needing to cancel a Zelle payment. It’s important to be aware of these circumstances to ensure that you can take appropriate action when necessary. Some common scenarios where you might want to cancel a Zelle payment include:
1. Incorrect recipient details: If you accidentally entered the wrong email address or mobile phone number, the payment could be directed to the wrong person. In such cases, cancelling the payment is crucial to prevent the funds from reaching the unintended recipient.
2. Change in purchase plans: Perhaps you made a payment to a seller for a product or service, but the transaction falls through or you decide not to proceed with the purchase. Cancelling the payment in this situation allows you to retain your funds.
3. Unauthorized payment: If you notice a Zelle payment on your account that you did not authorize, it is essential to cancel the payment immediately. This could be a sign of fraudulent activity, and cancelling the transaction can help protect your financial security.
4. Payment dispute: Sometimes, a payment made through Zelle may be associated with a dispute, such as a disagreement over the quality of a product or service. Cancelling the payment can help resolve the dispute and prevent any further financial complications.
5. Duplicate payments: In rare cases, technical glitches or user errors can result in duplicate payments. If you accidentally sent multiple payments for the same transaction, cancelling the duplicates ensures that you are not charged more than intended.
Overall, it’s essential to review your Zelle payment details carefully before confirming the transaction. However, mistakes can happen, and being aware of the reasons to cancel a Zelle payment allows you to take prompt action and safeguard your finances.
Understanding your options
When it comes to cancelling a Zelle payment, it’s important to understand the available options and choose the one that best suits your situation. Here are the main options you can consider:
- Cancelling through your bank’s online banking platform: Many banks offer their own online banking platforms where you can manage your Zelle transactions. This option allows you to initiate and cancel payments directly through your bank account.
- Contacting customer support: If you’re unable to cancel a payment through your bank’s online platform or require additional assistance, contacting customer support is another option. Your bank’s customer service team can guide you through the cancellation process or provide further solutions.
- Reversing the payment: In some cases, if you’re unable to cancel the payment before it is processed, you may be able to reverse the transaction. It’s important to note that not all banks offer this option, and it may be subject to specific rules and conditions.
- Resolving the issue with the recipient: If the payment was made in error or under a dispute, you may want to reach out to the recipient directly to discuss the situation. They may agree to return the funds or work out a resolution.
It’s crucial to keep in mind that Zelle transactions are processed quickly, and once the funds are successfully deposited into the recipient’s account, it can be challenging to retrieve them. Therefore, it is advisable to act swiftly if you need to cancel a payment.
Understanding your options and the specific procedures provided by your bank will empower you to take the necessary steps to cancel a Zelle payment successfully. In the following sections, we will guide you through the process of cancelling a Zelle payment specifically through Truist, ensuring you have a clear understanding of the required steps.
Cancelling a Zelle payment through Truist
Truist, a leading financial institution, offers online banking services that allow customers to manage their Zelle transactions conveniently. If you have made a Zelle payment through Truist and need to cancel it, follow these step-by-step instructions:
- Step 1: Log into your Truist online banking account: Access your Truist online banking account using your username and password. Ensure that you have the necessary login credentials beforehand.
- Step 2: Navigate to the Zelle section: Once you’re logged in, locate the Zelle section within your online banking dashboard. This section may vary depending on the specific layout and features of Truist’s online platform.
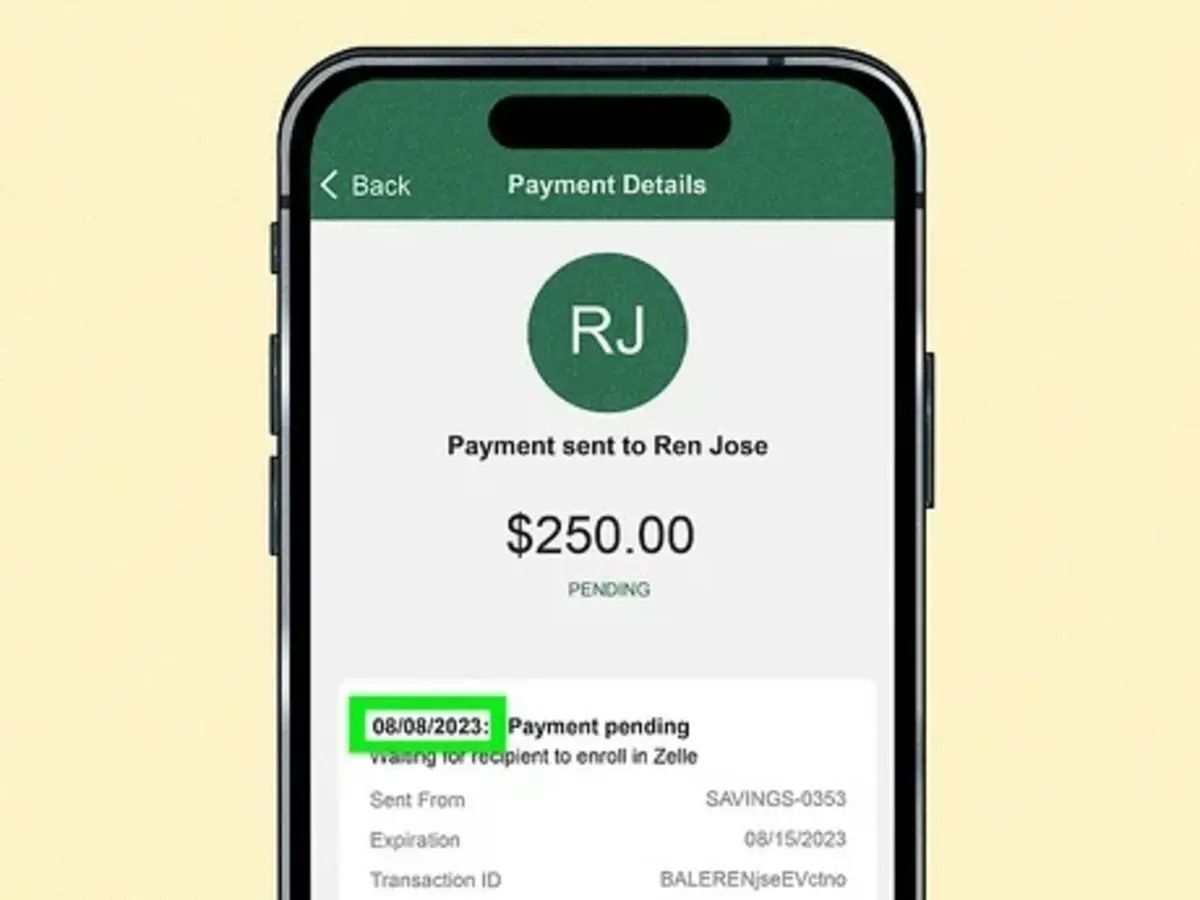
- Step 3: Select the payment you want to cancel: Within the Zelle section, you should be able to view a list of your recent Zelle payments. Identify the payment you wish to cancel and select it for further actions.
- Step 4: Confirm the cancellation: After selecting the payment, you should find an option to cancel or delete the transaction. Click on the appropriate button to initiate the cancellation process.
- Step 5: Verify the cancellation status: Once you have successfully cancelled the payment, it’s essential to check the status to ensure the cancellation was processed. Look for any confirmation messages or notifications indicating the cancellation was completed.
By following these steps, you should be able to cancel a Zelle payment made through Truist’s online banking platform. However, it’s important to note that the exact process may vary slightly depending on any updates or changes implemented by Truist. If you encounter any difficulties during the cancellation process or have further questions, it’s always recommended to reach out to Truist’s customer support for assistance.
Now that you know how to cancel a Zelle payment through Truist, it’s essential to understand how to contact Truist’s customer support in case you need further guidance. We will cover this topic in the next section.
Step 1: Log into your Truist online banking account
The first step to canceling a Zelle payment through Truist is to log into your online banking account. Here’s how you can do it:
- Open your preferred web browser on your computer or mobile device.
- Go to the Truist website and locate the login section. You can find it on the homepage or by navigating through the menu options.
- Enter your Truist online banking username and password in the designated fields. If you haven’t registered for online banking, you’ll need to do so before proceeding.
- Click on the “Log In” or “Sign In” button to access your Truist online banking account.
Once you’ve successfully logged in, you’ll have access to your Truist account dashboard, where you’ll be able to manage your Zelle transactions and initiate the cancellation process for any unwanted payments.
It’s important to ensure that you have the correct login credentials for your Truist online banking account. If you’ve forgotten your username or password, Truist provides options for account recovery, such as password reset via email or phone verification. Make sure to follow the appropriate steps to regain access to your account if needed.
Now that you’re logged into your Truist online banking account, you can proceed to the next step of cancelling your Zelle payment, which is navigating to the Zelle section. We’ll cover this in detail in the next section.
Step 2: Navigate to the Zelle section
After logging into your Truist online banking account, the next step in canceling a Zelle payment is to navigate to the Zelle section. The exact location of this section may vary based on Truist’s online banking platform, but here are some general guidelines to help you find it:
- Once you’re logged in, look for a menu or navigation bar that provides access to different features and services within your Truist online banking account.
- Explore the menu options and icons to locate anything related to Zelle or peer-to-peer payments.
- You may find the Zelle section under a separate category like “Payments,” “Transfers,” or “Send Money.”
- If you’re having trouble finding the Zelle section, consider using the search functionality within your online banking platform. Simply enter “Zelle” as the search term, and it should direct you to the relevant section.
Remember, different banks may organize their online banking platforms differently, so it’s important to familiarize yourself with Truist’s specific interface to find the Zelle section quickly.
Once you locate the Zelle section, click on it to access the Zelle overview or transaction history. This is where you’ll be able to view and manage your Zelle payments, including the option to cancel any pending or recent transactions.
In the next section, we will discuss the step-by-step process of selecting the payment you want to cancel within the Zelle section of your Truist online banking account.
Step 3: Select the payment you want to cancel
Once you have navigated to the Zelle section within your Truist online banking account, the next step is to select the specific payment that you want to cancel. Here’s how you can do it:
- Within the Zelle section, you should be able to view a list or history of your recent Zelle payments. This list typically includes details such as the recipient’s name, transaction date, and payment amount.
- Review the list and locate the payment that you want to cancel. You may need to scroll through the list or use search filters to find the specific transaction.
- Click on the payment to select it. In some cases, there may be a checkbox or select button next to each transaction that you can tick or click on to indicate your selection.
- Once you have selected the payment you wish to cancel, look for options or buttons that are specifically related to cancellation or deletion. These options may be labeled as “Cancel,” “Delete,” or something similar.
- Click on the appropriate button to initiate the cancellation process for the selected payment.
It’s important to note that the user interface and available options may vary depending on the specific Truist online banking platform you are using. If you are having difficulty finding the option to select and cancel a payment, refer to the platform’s help documentation or consider reaching out to Truist’s customer support for assistance.
Once you have successfully selected the payment and initiated the cancellation process, you can proceed to the next step, which involves confirming the cancellation. We will discuss this step in detail in the following section.
Step 4: Confirm the cancellation
After selecting the Zelle payment you wish to cancel within your Truist online banking account, the next step is to confirm the cancellation. Here’s how you can do it:
- Once you have clicked on the appropriate button to initiate the cancellation process, a confirmation prompt or screen should appear. This confirmation prompt will typically indicate the details of the payment you selected for cancellation.
- Review the information displayed on the confirmation screen to ensure that it matches the payment you want to cancel. Double-check the recipient’s name, transaction amount, and other relevant details.
- If everything is accurate, confirm your decision to cancel the payment. This may involve clicking on an “Confirm” or “Cancel Payment” button.
- Depending on the online banking platform, you may be prompted to provide an additional verification, such as entering a one-time password or confirming your identity through a security question.
- Follow the instructions provided on the confirmation prompt to complete the cancellation process.
It’s important to be cautious during this step to avoid any unintended cancellations or errors. Carefully review the payment details and ensure that you are canceling the correct transaction. Additionally, make sure to follow any security measures required for verification purposes.
Once you have confirmed the cancellation, the Zelle payment should be marked as canceled or deleted within your Truist online banking account. However, it’s essential to verify the cancellation status to ensure that it has been successfully processed. We will discuss this verification process in detail in the next section.
Now that you have confirmed the cancellation of the selected payment, you can proceed to the next step to verify the cancellation status and ensure that your Zelle payment has been successfully canceled.
Step 5: Verify the cancellation status
After confirming the cancellation of a Zelle payment within your Truist online banking account, it’s important to verify the cancellation status to ensure that it has been successfully processed. Here’s how you can do it:
- Once you have completed the cancellation process, navigate back to the Zelle section of your Truist online banking account.
- Look for any notifications, messages, or indicators that confirm the cancellation of the selected payment. These indicators may vary depending on the specific online banking platform, but they typically include a status update or confirmation message.
- If available, review the payment history or transaction details for the canceled payment. It should show that the transaction has been successfully canceled or deleted.
- Pay attention to any timestamps or timestamps that indicate when the cancellation was processed. This information can be useful for tracking purposes and confirming the timeframe of the cancellation.
- If you’re unable to find any confirmation of the cancellation or have any doubts, consider contacting Truist’s customer support for further assistance. They can verify the cancellation status of the payment and provide guidance if there are any issues.
Verifying the cancellation status is crucial to ensure that the Zelle payment has been successfully canceled and that the funds will not be transferred to the recipient’s account. It provides peace of mind and reassurance that the cancellation request was processed correctly.
By following these steps and verifying the cancellation status, you can confidently conclude the cancellation process for a Zelle payment made through Truist. However, if you still encounter any difficulties or have additional questions, it’s always recommended to reach out to Truist’s customer support for further assistance.
Contacting Truist customer support for further assistance
If you encounter any difficulties during the process of canceling a Zelle payment through Truist, or if you have any questions or concerns, it’s important to reach out to Truist’s customer support for further assistance. Here’s how you can contact them:
- Locate the customer support contact information for Truist. This information can typically be found on their website, in the online banking platform, or on your account statements.
- Use the provided contact methods to get in touch with Truist customer support. This may include options such as phone, email, or online chat. Choose the method that is most convenient for you.
- When contacting customer support, be prepared to provide relevant details related to your Zelle payment and the issue you are experiencing. This may include information like your account number, transaction details, and the specific problem you need assistance with.
- Explain your situation clearly and concisely to the customer support representative. Be patient and polite while they assist you with your query or concern.
- Take note of any reference numbers, ticket numbers, or case numbers provided by customer support. These can be useful for tracking the progress of your inquiry or referring back to your conversation in the future.
Truist’s customer support team is there to assist you and provide guidance through any challenges you may encounter. They have the knowledge and expertise to address your concerns, answer your questions, and provide additional assistance, if needed.
It’s important to keep in mind that customer support availability may vary based on Truist’s operating hours and policies. Be sure to check their website or contact them during their designated business hours to ensure prompt and effective support.
By reaching out to Truist’s customer support, you can receive the necessary help to resolve any issues you encounter while cancelling a Zelle payment or obtain further information and guidance to ensure a smooth process.
Conclusion
Cancelling a Zelle payment through Truist is a straightforward process, thanks to their user-friendly online banking platform. By following the step-by-step instructions provided in this guide, you can successfully cancel a Zelle payment if the need arises.
It’s important to remember that double-checking payment details and being cautious during the cancellation process can prevent unintended cancellations or errors. Additionally, verifying the cancellation status ensures that the payment has been successfully canceled and provides peace of mind.
If you encounter any challenges, don’t hesitate to contact Truist’s customer support for further assistance. Their knowledgeable representatives are available to guide you through any difficulties and provide solutions to your concerns.
Understanding Zelle and how to navigate the cancellation process empowers you to take control of your digital payments and maintain financial security. Whether it’s correcting an error or resolving a dispute, being familiar with the options available to you ensures a seamless experience with Zelle and Truist.
As always, it’s essential to keep your online banking credentials secure and to regularly monitor your transactions to detect any unauthorized activity. By practicing good online security habits, you can protect yourself against potential risks and enjoy the benefits of convenient and secure digital payments.