Introduction
A loud CPU fan can be a nuisance, especially when you’re trying to concentrate or enjoy a quiet environment. It’s not only irritating, but it can also be a sign of underlying issues with your computer’s cooling system. Understanding why your CPU fan gets so loud is crucial in order to address the problem effectively.
When your CPU fan starts to make excessive noise, it usually indicates that your computer is running hotter than usual and the fan is working harder to cool it down. This could be due to a variety of reasons, ranging from dust accumulation to inadequate cooling. By identifying the root cause, you can take the necessary steps to fix the issue and prevent any further damage to your computer.
In this article, we will explore the common causes of a loud CPU fan and provide some practical solutions to help you resolve the problem. Whether you’re an avid gamer, a professional who relies on their computer for work, or simply an everyday user, understanding how to address a loud CPU fan is essential for maintaining optimal performance and prolonging the lifespan of your computer.
Causes of a Loud CPU Fan
A loud CPU fan can be attributed to several factors. By understanding these causes, you can pinpoint the specific issue and take appropriate measures to resolve it. Here are the most common causes of a loud CPU fan:
-
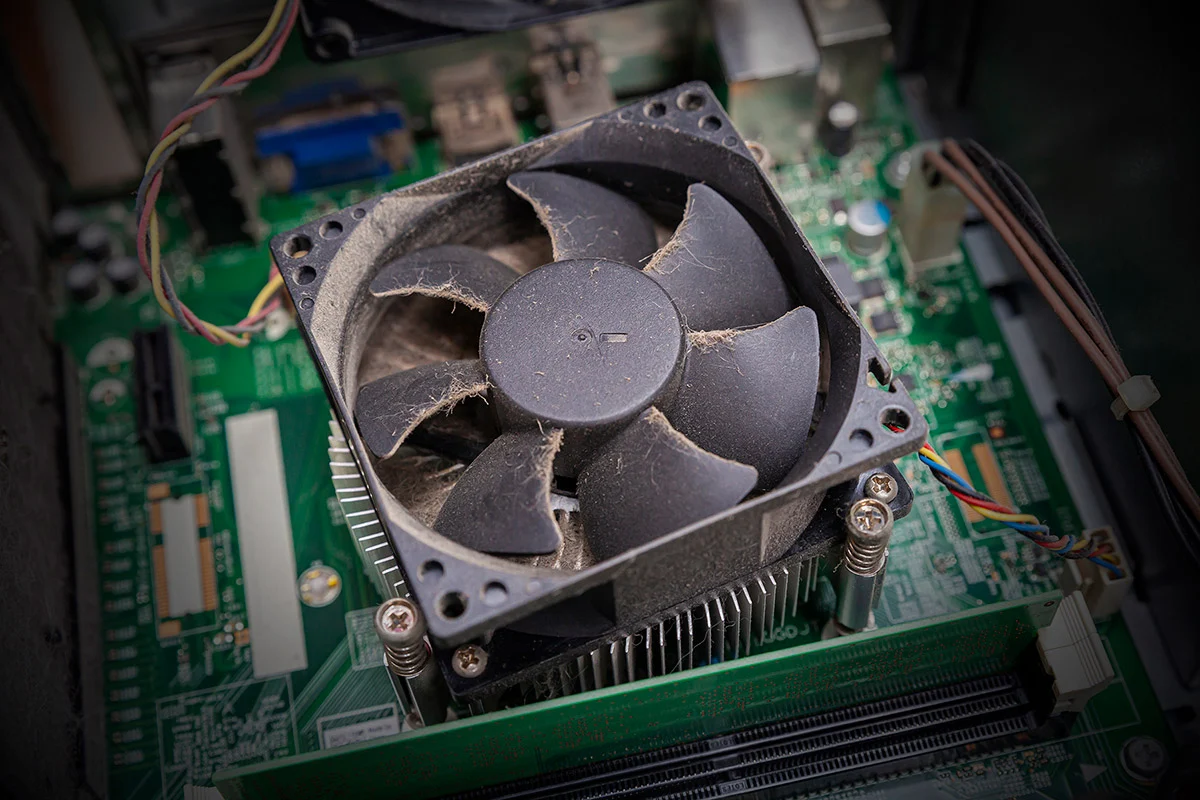
Dust Accumulation: Over time, dust and debris can accumulate inside your computer, especially within the CPU fan and heatsink. This can restrict airflow and increase the temperature inside the system, causing the fan to work harder and generate more noise.
-
Overheating: When your computer experiences excessive heat, the CPU fan kicks into high gear to dissipate the heat and cool down the system. Factors such as inadequate cooling, heavy usage, or overclocking can lead to overheating, triggering the loud fan noise.
-
Inadequate Cooling: If your computer’s cooling system, including the CPU fan and heatsink, is not functioning optimally, it can lead to a buildup of heat. This may be due to insufficient thermal paste, improper mounting of the heatsink, or a malfunctioning fan.
-
Faulty Fan: As your computer ages, the fan may wear out or develop mechanical issues. A faulty fan can result in increased noise production as it struggles to spin properly or maintain consistent speed.
-
High CPU Usage: Intensive tasks such as gaming, video editing, or running multiple applications simultaneously can strain your CPU, causing it to generate more heat. This prompts the CPU fan to work harder, resulting in a louder noise.
Identifying the cause of your loud CPU fan is essential for finding an appropriate solution. Once you have determined the underlying issue, you can proceed with the necessary troubleshooting steps to alleviate the problem and restore a quieter working environment.
Dust Accumulation
Dust accumulation is one of the leading causes of a loud CPU fan. Over time, dust particles can settle on the fan blades, heatsink, and other components within your computer. This buildup restricts airflow, obstructs heat dissipation, and forces the CPU fan to work harder, resulting in increased noise levels.
To tackle this issue, you’ll need to clean the dust from your computer’s internals. Here’s a step-by-step guide:
-
Power off: Ensure your computer is completely powered off and unplugged to avoid any risk of electric shock.
-
Open the case: Depending on your computer model, you may need a screwdriver to remove the side panel. Carefully open the case to access the internal components.
-
Locate the CPU fan and heatsink: The CPU fan is typically located on top of the CPU and is connected to the heatsink. Identify these components within your computer.
-
Remove the dust: Gently use compressed air or a soft brush to remove the dust from the fan blades, heatsink, and surrounding areas. Be careful not to apply excessive pressure or damage any delicate components.
-
Reassemble: Once you’ve removed the dust, reassemble the case by securing the side panel back in place.
Regularly cleaning the dust from your computer’s internals can significantly improve airflow, reduce noise, and prevent overheating. Aim to clean your computer every few months or whenever you notice a significant buildup of dust. By maintaining a clean and dust-free environment, you can help prolong the life of your CPU fan and ensure optimal performance.
Overheating
Overheating is a common cause of a loud CPU fan. When your computer generates excessive heat, the CPU fan kicks into high gear to cool down the system. This increased fan speed results in louder noise levels. Several factors can contribute to overheating:
Inadequate cooling: If your computer lacks proper cooling mechanisms, such as case fans or liquid cooling systems, it can lead to inadequate heat dissipation. As a result, the CPU temperature rises, causing the fan to work harder and produce more noise.
Heavy CPU usage: Intensive tasks such as gaming, video editing, or running resource-intensive applications can put a significant strain on your CPU. The CPU generates more heat when it’s under heavy load, requiring the fan to spin faster to maintain optimal temperatures. This increased fan speed results in a louder noise output.
To address the issue of overheating and reduce the noise from your CPU fan, consider the following solutions:
-
Ensure proper ventilation: Make sure that your computer is well-ventilated by keeping it in a well-ventilated area, away from obstacles that may restrict airflow. Additionally, ensure that the vents and air intakes are clean and unblocked to facilitate proper heat dissipation.
-
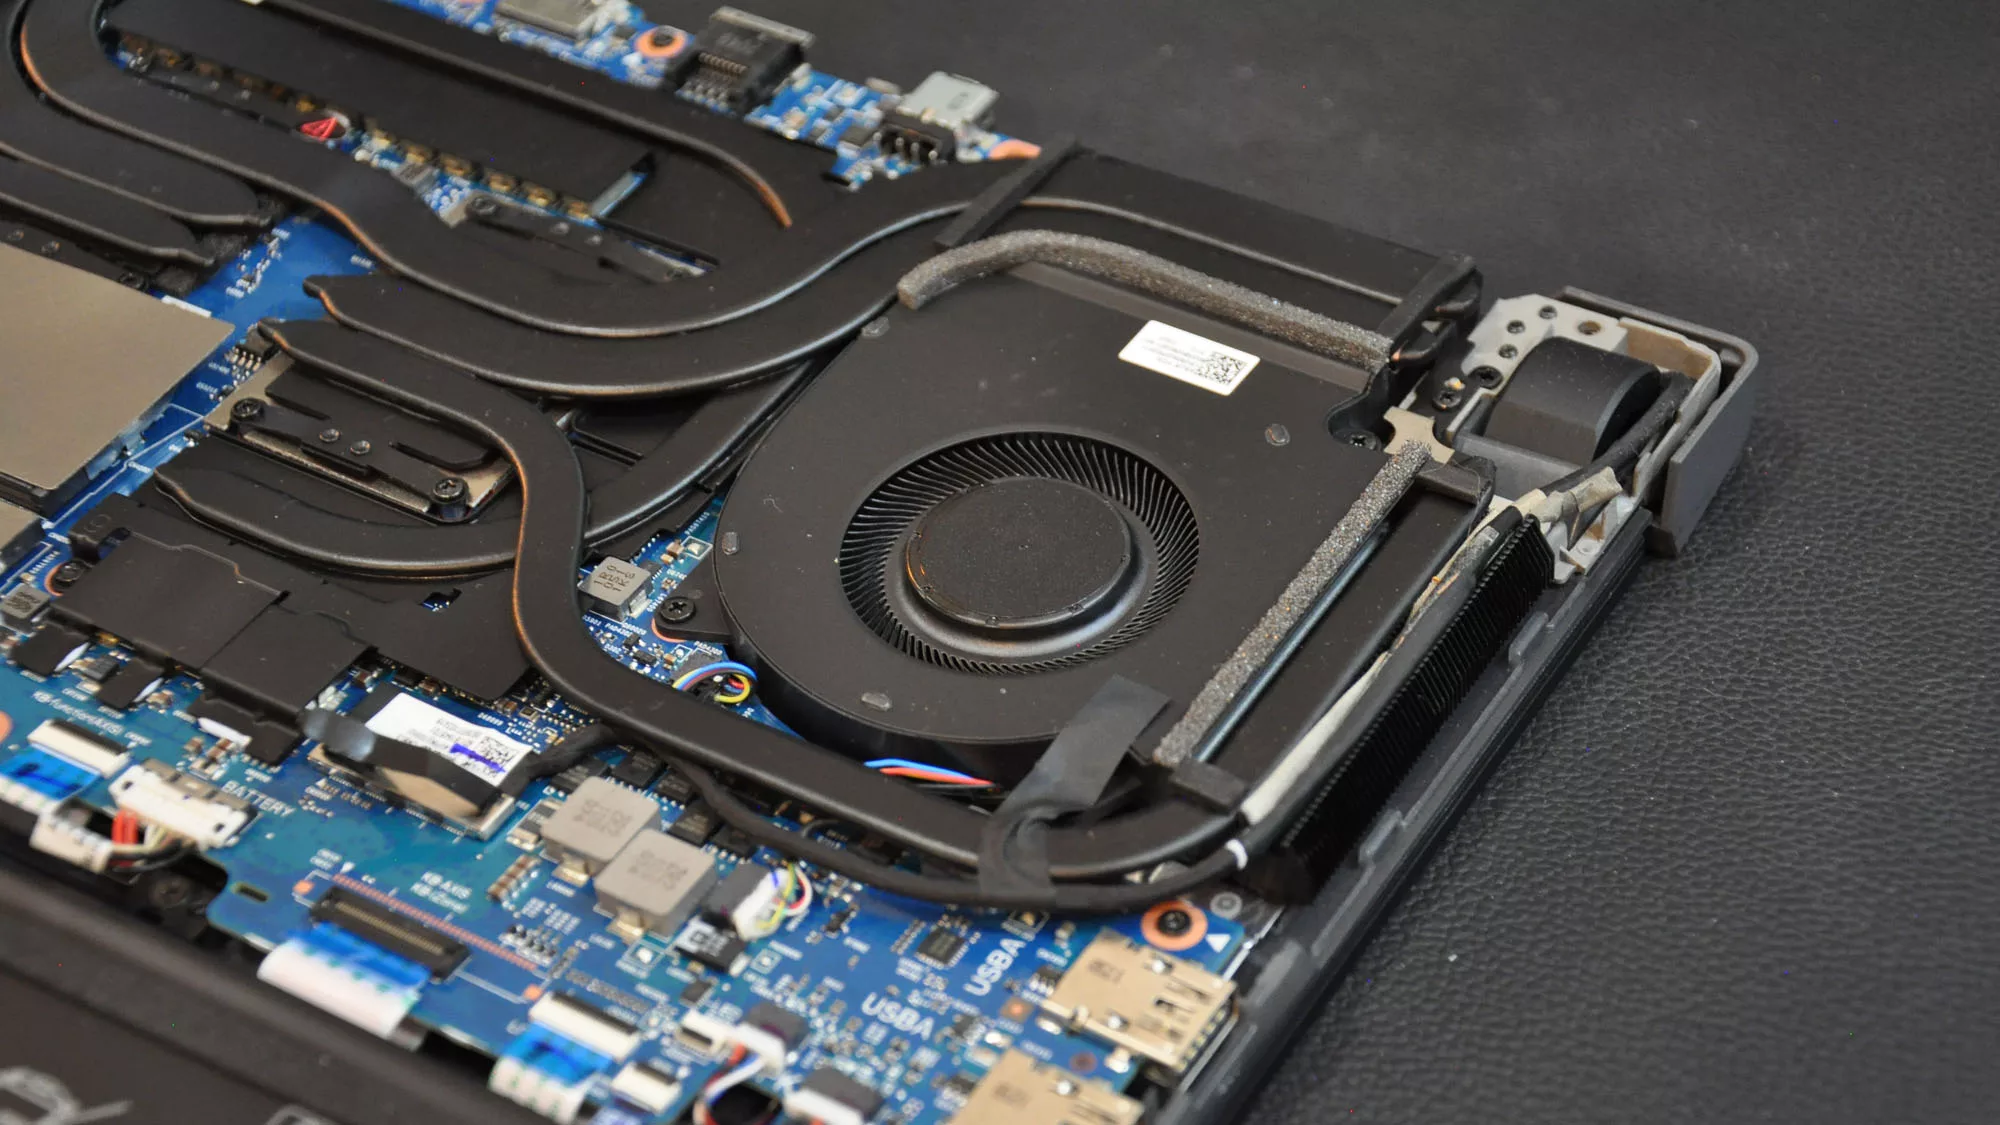
Use a laptop cooling pad: If you’re using a laptop, consider investing in a cooling pad. These pads feature built-in fans that help to improve airflow around the laptop, assisting in cooling down the CPU and reducing the fan noise.
-
Monitor and manage CPU usage: Keep an eye on your CPU usage and close any unnecessary applications or processes that may be running in the background and causing excessive strain on the CPU. Adjusting power settings and optimizing resource usage can help mitigate overheating and lessen fan noise.
By implementing these solutions, you can help keep your CPU temperatures in check, prevent overheating, and consequently reduce the noise generated by the CPU fan. It’s important to strike a balance between temperature control and noise reduction to ensure optimal performance and a quieter computing experience.
Inadequate Cooling
Inadequate cooling can be another major factor contributing to a loud CPU fan. If your computer’s cooling system is not functioning optimally, it can lead to increased noise levels from the fan. Here are some common causes of inadequate cooling:
Insufficient thermal paste: Thermal paste is a material applied between the CPU and heatsink to improve thermal conductivity. If the thermal paste is not applied correctly or has dried up over time, it can affect heat dissipation, leading to higher CPU temperatures and a louder fan.
Improper mounting of the heatsink: If the CPU heatsink is not firmly attached to the CPU, it can result in poor heat transfer and inadequate cooling. This can force the CPU fan to work harder, increasing noise levels.
Malfunctioning fan: A faulty CPU fan can also contribute to inadequate cooling. If the fan is not spinning at the correct speed or stops working altogether, heat cannot be efficiently dissipated, causing the fan to become louder as it compensates for the cooling shortfall.
To address inadequate cooling and minimize the noise from your CPU fan, you can take the following steps:
-
Reapply thermal paste: If you suspect that the thermal paste has dried up or was not adequately applied, carefully remove the CPU heatsink, clean off the old thermal paste, and apply a fresh, thin layer of thermal paste before reattaching the heatsink.
-
Check the heatsink mounting: Ensure that the CPU heatsink is securely and properly mounted. Verify that all screws or clips are tightened correctly to establish a good connection with the CPU.
-
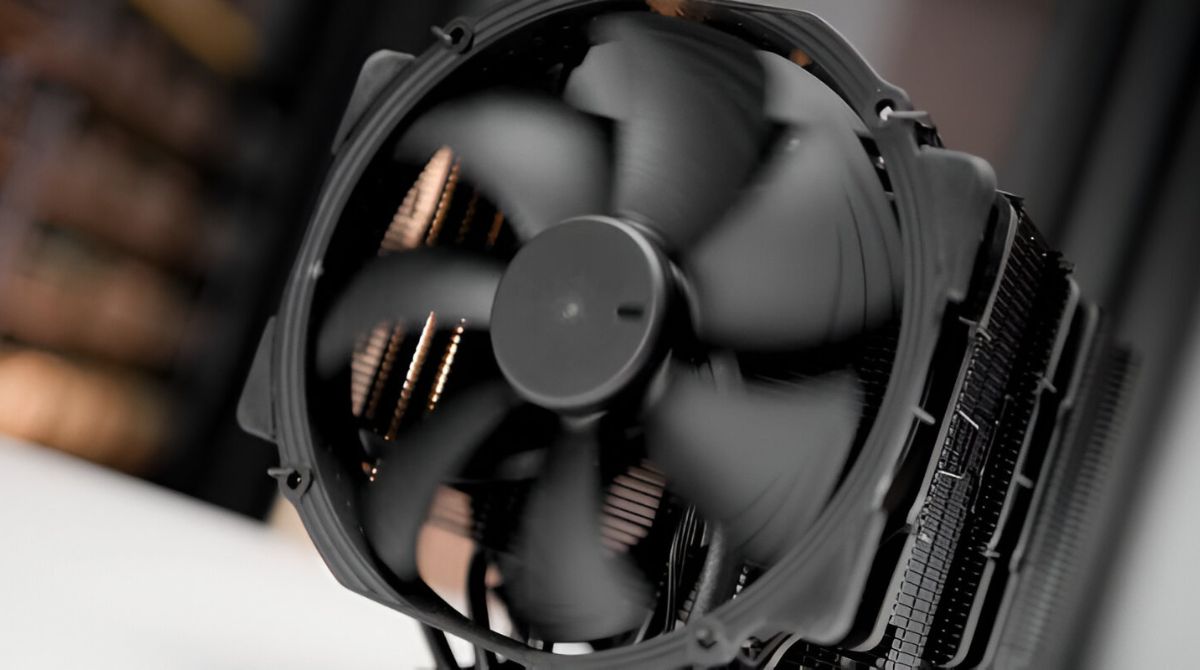
Replace the fan: If you suspect that the CPU fan is faulty and not functioning as it should, consider replacing it with a new one. Choose a fan that is compatible with your CPU socket and meets your cooling requirements.
By addressing inadequate cooling issues, you can improve the overall temperature management of your computer and reduce the noise generated by the CPU fan. Regular maintenance and proper installation of cooling components are essential for ensuring optimal performance and a quieter computing experience.
Faulty Fan
A faulty CPU fan can be a significant cause of excessive noise. Over time, the fan motor may wear out, leading to irregular spinning or inconsistent speed. This can result in a loud and annoying noise coming from your CPU fan. Here are some signs that you may have a faulty fan:
Unusual noises: If your CPU fan is making grinding, clicking, or rattling sounds, it’s a clear indication that the fan motor may be malfunctioning and needs to be replaced.
Inconsistent airflow: Irregular airflow or sudden changes in fan speed can also be a sign of a faulty fan. If you notice that the fan speed varies significantly or the airflow feels weak, it may be time to replace the fan.
Constant high-speed operation: If your CPU fan is constantly running at its maximum speed, even when the computer is idling or not under heavy load, it suggests that the fan’s speed control mechanism is not functioning properly.
To address a faulty CPU fan and reduce noise levels, you can try the following steps:
-
Clean the fan: Dust and debris can cause the fan blades to become unbalanced, leading to increased noise. Carefully clean the fan blades using compressed air or a soft brush. If the noise persists, move on to the next step.
-
Replace the fan: If cleaning the fan doesn’t resolve the issue, it’s likely that the fan motor is faulty. Purchase a compatible replacement fan and install it according to the manufacturer’s instructions. Ensure that the new fan is properly connected to the CPU fan header.
-
Consult a professional: If you’re unsure about replacing the fan yourself or if the noise persists even after installing a new fan, it’s advisable to seek help from a computer technician. They can diagnose the issue more accurately and provide the necessary repairs or replacements.
Faulty CPU fans can not only produce excessive noise but also pose a risk to your computer’s functioning and longevity. Addressing the issue promptly by replacing the faulty fan will not only reduce noise but also ensure proper cooling and extend the lifespan of your CPU.
High CPU Usage
High CPU usage can be another culprit behind a loud CPU fan. When your computer’s CPU is under heavy load and working at its maximum capacity, it generates more heat. To cool down the CPU, the fan spins at a faster speed, resulting in increased noise levels. Here are some scenarios that can lead to high CPU usage:
Intensive tasks: Performing resource-intensive tasks like gaming, video editing, or running complex software can put a significant strain on your CPU, causing it to work harder and generate more heat. This triggers the fan to spin faster and creates a louder noise output.
Background processes: Certain background processes and applications may consume a substantial amount of CPU resources without your knowledge. These processes can increase CPU usage and result in higher heat production, leading to a louder fan noise.
To address high CPU usage and reduce the noise generated by the fan, you can try the following solutions:
-
Close unnecessary applications: Identify and close any unnecessary programs or processes running in the background. This frees up CPU resources and helps reduce the overall heat generated, allowing the fan to operate at a lower speed and produce less noise.
-
Optimize power settings: Adjusting your computer’s power settings can help manage CPU usage. Setting the power plan to balanced or power saver mode can limit the CPU’s maximum speed, reducing heat generation and fan noise.
-
Upgrade hardware: If high CPU usage is a frequent occurrence due to demanding tasks, consider upgrading your computer’s hardware. A more powerful CPU or additional RAM can help handle intensive tasks more efficiently, leading to lower CPU usage and reduced fan noise.
By managing CPU usage effectively, you can reduce the strain on your CPU and minimize the noise generated by the fan. It’s important to strike a balance between performance and noise reduction to ensure optimal system functionality and a quieter computing experience.
How to Fix a Loud CPU Fan
Dealing with a loud CPU fan can be frustrating, but fortunately, there are several steps you can take to address and resolve the issue. Here are some practical solutions to fix a loud CPU fan:
-
Clean the fan and ventilation system: Dust accumulation can hinder proper airflow and cause the fan to work harder. Regularly clean the fan blades, heatsink, and other components to remove dust and debris. Additionally, ensure that the ventilation system, including vents and air intakes, is clean and unobstructed.
-
Ensure proper ventilation: Make sure your computer is in a well-ventilated area and not placed against a wall or obstructed by other objects. Good airflow helps in heat dissipation, reducing the workload on the fan and minimizing noise.
-
Use a laptop cooling pad: If you’re using a laptop, consider using a laptop cooling pad. These pads come equipped with additional fans that improve airflow around the laptop, helping to cool down the CPU and reduce fan noise.
-
Replace the fan: If the fan is faulty and cleaning doesn’t resolve the issue, consider replacing it. Purchase a compatible CPU fan and install it according to the manufacturer’s instructions. This can restore optimal cooling and significantly reduce noise levels.
-
Monitor and manage CPU usage: Keep an eye on your CPU usage and close any unnecessary applications or processes that may excessively strain the CPU. Adjusting power settings and optimizing resource usage can help minimize heat generation and resultant fan noise.
By following these steps, you can address the underlying causes of a loud CPU fan and effectively reduce the noise. It’s important to note that regular maintenance and proactive cooling measures, such as cleaning and ensuring adequate ventilation, can help prevent the reoccurrence of a loud CPU fan in the future.
Clean the Fan and Ventilation System
One of the primary causes of a loud CPU fan is the accumulation of dust and debris in the fan and ventilation system. Over time, these particles can obstruct airflow, causing the fan to work harder and produce more noise. Cleaning the fan and ensuring proper ventilation can significantly reduce fan noise and improve cooling efficiency. Here’s how you can clean the fan and ventilation system:
-
Power off and unplug your computer: It’s crucial to turn off your computer and unplug it from the power source before cleaning to prevent any electrical accidents.
-
Open the computer case: Depending on your computer model, you may need to remove screws or slide a latch to open the case. Consult your computer’s manual for specific instructions.
-
Identify the CPU fan and heatsink: Locate the CPU fan and associated heatsink within your computer. The fan is usually positioned on top of the CPU and connected to the heatsink.
-
Clean the fan and heatsink: Use a can of compressed air to blow away the dust and debris from the fan blades, heatsink fins, and surrounding areas. Alternatively, use a soft brush to gently remove the dust. Be careful not to apply excessive force or damage any components.
-
Clean the ventilation system: Check the vents and air intakes on the computer case. Wipe away any dust or dirt using a microfiber cloth or a soft brush. Ensure that the vents are not blocked by nearby objects, as this can impede proper airflow.
-
Reassemble the computer: Once you’ve cleaned the CPU fan and ventilation system, carefully put the computer case back together, making sure that all connections are secure.
Regularly cleaning the fan and ventilation system is essential for maintaining optimal cooling performance and reducing fan noise. Aim to clean your computer every few months or whenever you notice a significant buildup of dust. By keeping these components free from dust and debris, you can ensure proper airflow, reduce heat buildup, and enjoy a quieter computing experience.
Ensure Proper Ventilation
Proper ventilation is crucial for maintaining optimal cooling performance and reducing the noise generated by a CPU fan. When your computer has adequate airflow, it promotes efficient heat dissipation and prevents the fan from working harder than necessary. Here are some steps to ensure proper ventilation:
-
Keep your computer in a well-ventilated space: Position your computer in an area with good air circulation. Avoid placing it in enclosed spaces or against walls, as this can restrict airflow and trap heat around the system.
-
Clear obstructions: Ensure that the vents on your computer case are free from obstructions such as papers, cables, or other objects. These blockages can impede the flow of air and hinder heat dissipation.
-
Elevate the computer: If you’re using a desktop computer, consider placing it on a raised stand or using rubber feet to create space underneath. This allows air to circulate more effectively, especially if your computer’s intake vents are located at the bottom.
-
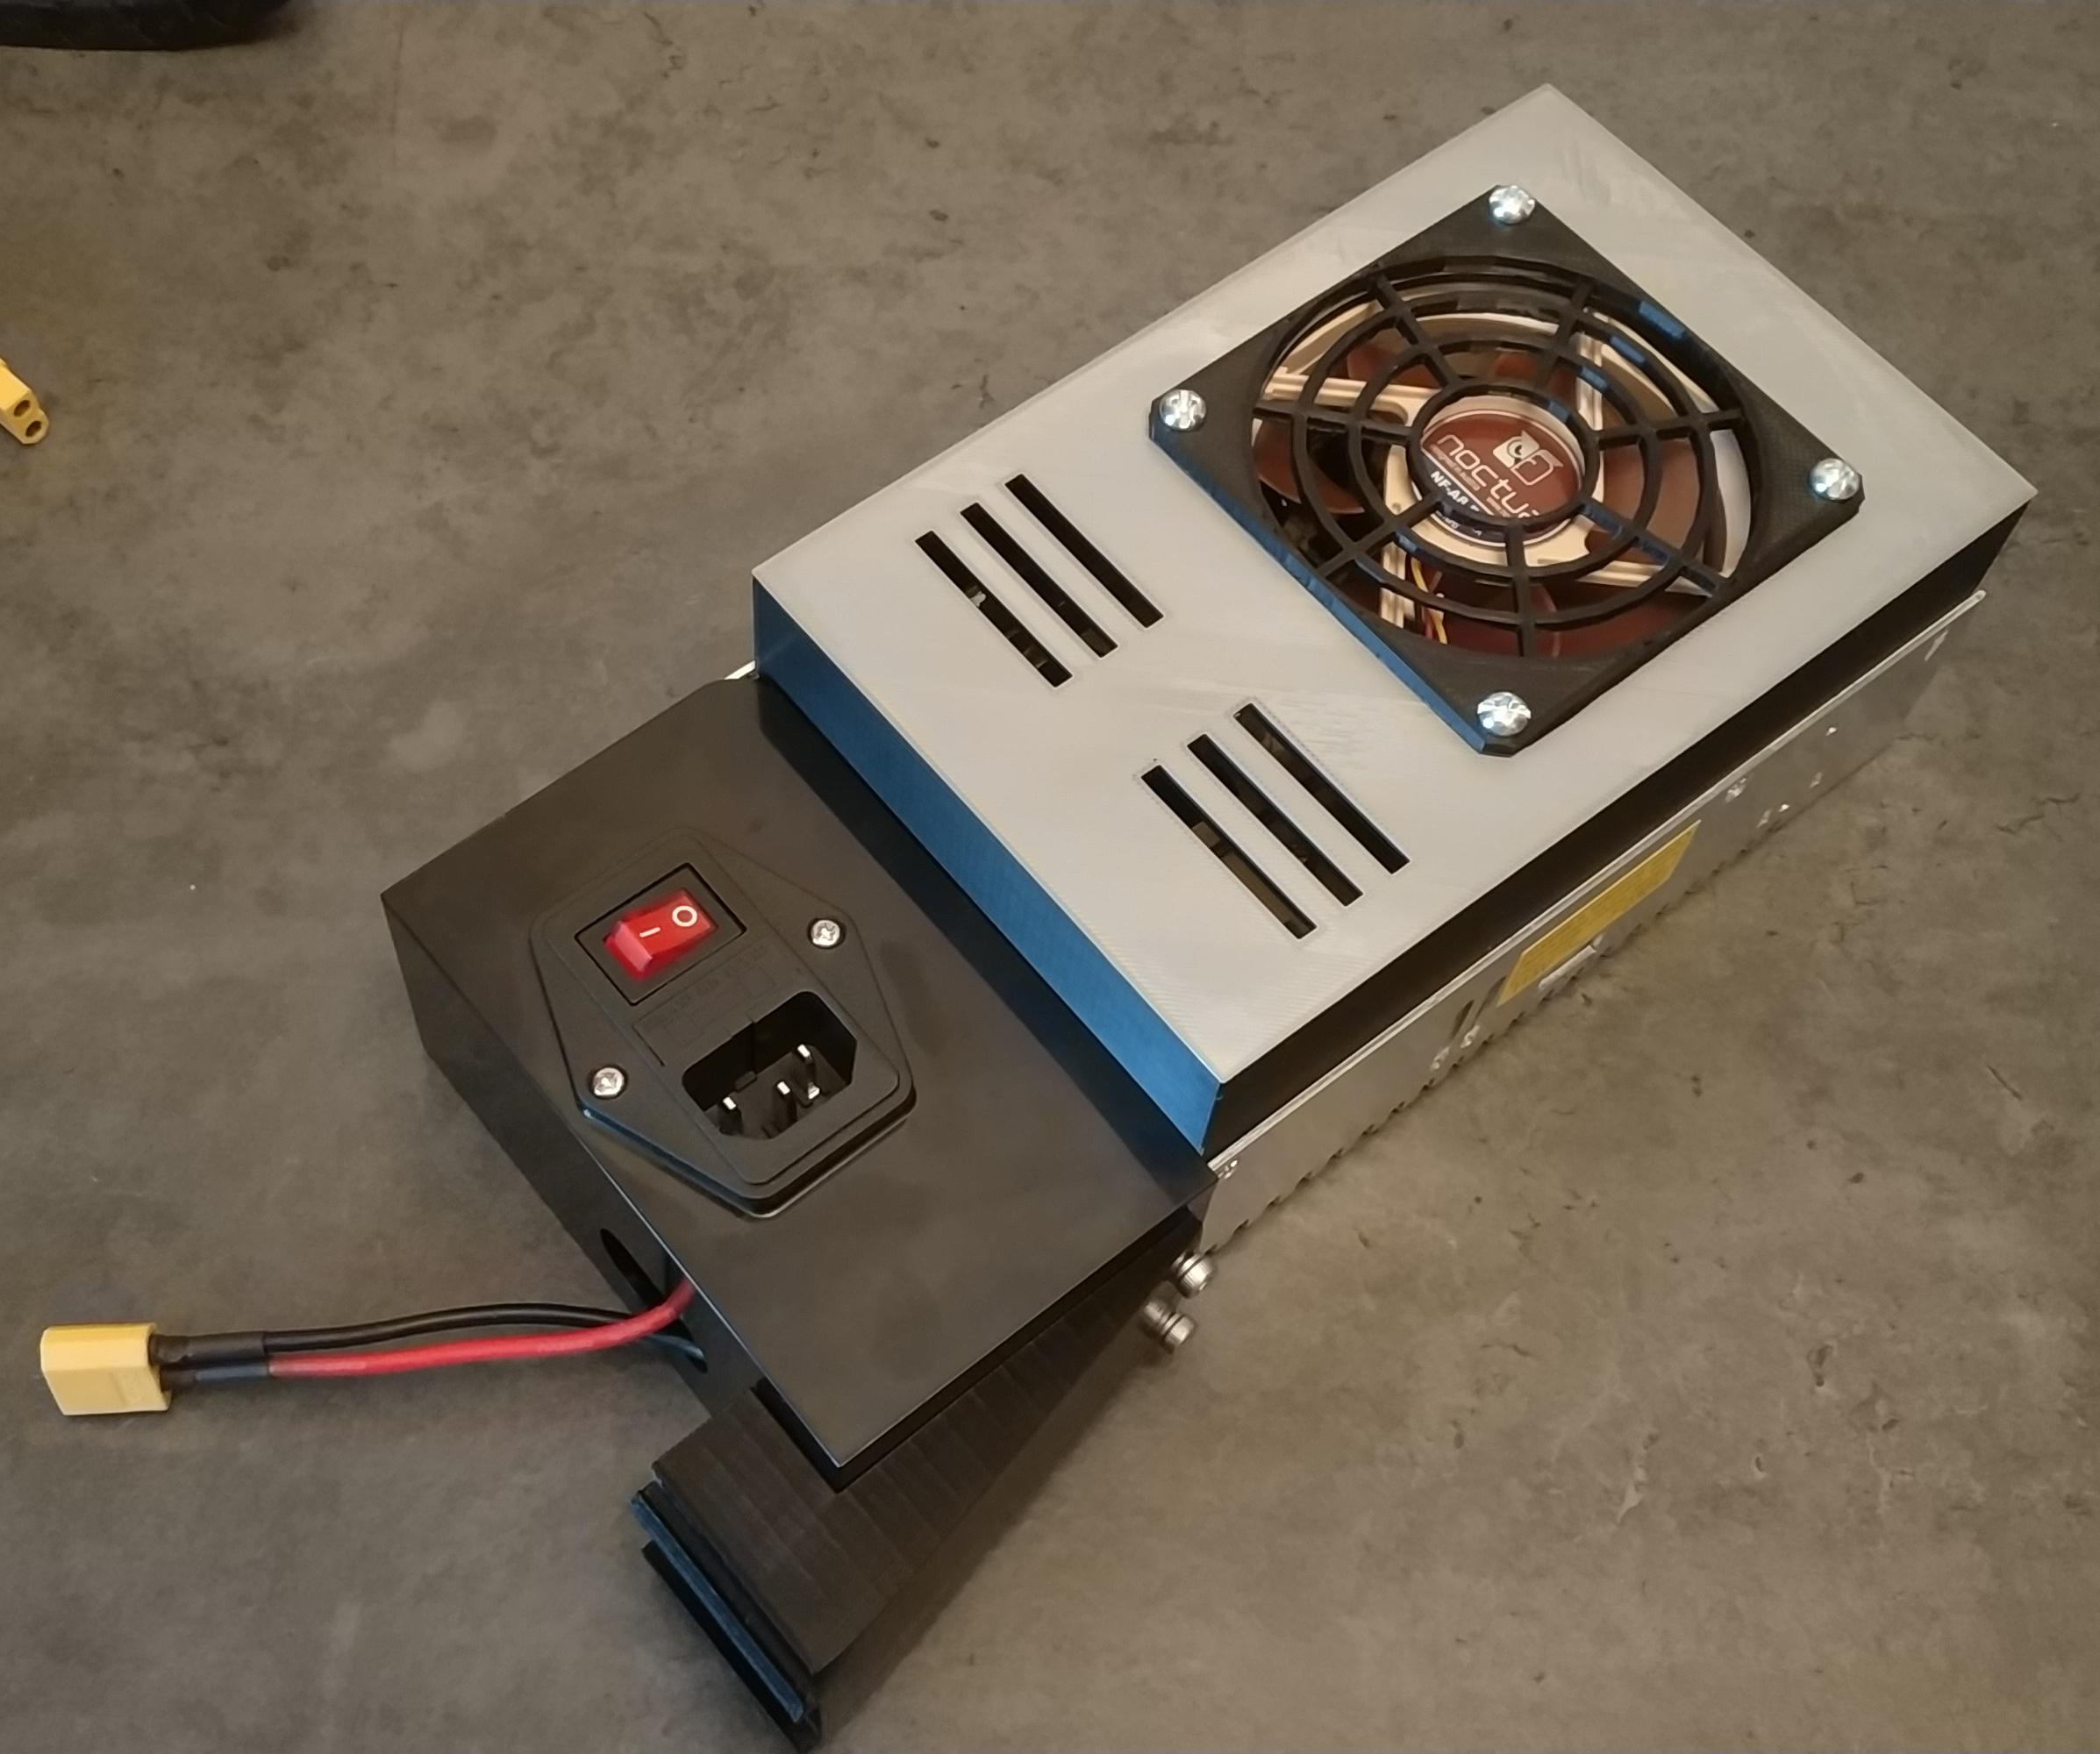
Use additional case fans: If your computer case has extra fan mounts, consider installing additional case fans. These fans can improve airflow by exhausting hot air and drawing in cool air, thereby reducing overall system temperature and the burden on the CPU fan.
-
Manage cable clutter: Neatly organize and manage your cables to create a tidy and unobstructed airflow path inside the case. This minimizes the chances of cables impeding the flow of air and ensures better overall ventilation.
By ensuring proper ventilation, you allow cool air to reach the CPU, aid in heat dissipation, and reduce the workload on the CPU fan. This results in optimized cooling performance and reduced fan noise levels. Remember to periodically check and clean the ventilation system to prevent dust buildup and maintain uninterrupted airflow.
Use a Laptop Cooling Pad
If you’re using a laptop computer, a simple and effective solution to reduce the noise generated by a loud CPU fan is to use a laptop cooling pad. A laptop cooling pad is a device designed to improve airflow around your laptop, helping to keep the CPU and other components cool. Here’s how it can help:
Enhanced airflow: Laptop cooling pads usually feature built-in fans or an elevated surface with perforations, which helps to increase the airflow around the laptop. This additional airflow assists in cooling down the CPU and reduces the workload on the internal fan, resulting in lower fan speeds and decreased noise.
Elevation and ergonomics: Laptop cooling pads also provide an ergonomic benefit by raising your laptop to a more comfortable viewing angle. This elevated position allows for better air circulation underneath the laptop, aiding in heat dissipation and reducing CPU temperature.
Portability and convenience: Laptop cooling pads are lightweight and portable, making them easy to carry and set up wherever you use your laptop. They often connect via USB for power, eliminating the need for an additional power source.
To use a laptop cooling pad effectively, follow these steps:
-
Select a suitable cooling pad: Choose a cooling pad that is compatible with your laptop size and has good build quality and positive reviews.
-
Place the cooling pad under your laptop: Set up the cooling pad and position your laptop on top of it. Ensure that the laptop’s airflow vents align with the cooling pad’s fans or perforations.
-
Connect the cooling pad: Plug the cooling pad’s USB cable into your laptop’s USB port to provide power to the cooling fans.
-
Adjust fan speed if available: Some cooling pads feature adjustable fan speed settings. Experiment with different fan speed levels to find the balance between noise reduction and cooling efficiency.
A laptop cooling pad can significantly improve the cooling performance of your laptop, reduce CPU temperatures, and subsequently decrease the noise produced by the CPU fan. It is an affordable and user-friendly solution for improving the overall comfort and performance of your laptop while minimizing fan noise.
Replace the Fan
If you have attempted to clean the CPU fan and the noise persists, it may be an indication that the fan itself is faulty or nearing the end of its lifespan. In such cases, replacing the fan can effectively reduce the noise and restore proper cooling. Here are the steps to replace the CPU fan:
-
Determine the correct replacement fan: Identify the specific type and size of the CPU fan that is compatible with your computer’s CPU socket. Refer to the manufacturer’s specifications or consult the computer’s manual for this information.
-
Gather the necessary tools: Prepare the necessary tools, such as a screwdriver and thermal paste, to safely replace the CPU fan.
-
Power off and unplug the computer: Ensure that your computer is completely powered off and unplugged from the power source to prevent any accidents.
-
Open the computer case: Depending on your computer model, you may need to remove screws or slide a latch to access the CPU fan. Be sure to follow the manufacturer’s instructions for opening the case.
-
Disconnect the old CPU fan: Disconnect the power cable and any other cables connected to the old CPU fan. Unscrew and remove the screws or clips securing the fan to the CPU socket or heatsink.
-
Install the replacement fan: Carefully align the replacement fan with the CPU socket or heatsink and secure it in place with screws or clips. Ensure that the fan’s power cable is properly connected to the appropriate header on the motherboard.
-
Apply thermal paste: If necessary, clean off the old thermal paste from the CPU and apply a fresh, thin layer of thermal paste before attaching the heatsink to the CPU fan.
-
Reassemble the computer: Close the computer case, making sure all connections are secure. Plug in the power cable and power on the computer to test the functionality of the new CPU fan.
Replacing the CPU fan can be a more advanced process, so if you’re unsure about your technical skills, it’s recommended to seek assistance from a professional or a knowledgeable friend. A new fan should provide improved cooling and quieter operation, significantly reducing the noise generated by the CPU fan.
Monitor and Manage CPU Usage
High CPU usage can lead to increased heat generation and subsequently louder fan noise. Monitoring and managing CPU usage can help mitigate this issue and provide you with a quieter computing experience. Here are some steps to monitor and manage CPU usage:
-
Monitor CPU usage: Utilize task manager or other monitoring software to keep an eye on your CPU usage. This will help you identify applications or processes that are placing a heavy load on your CPU.
-
Close unnecessary applications: Identify and close any unnecessary applications or processes running in the background that are consuming substantial CPU resources. This will help decrease the overall CPU workload and subsequently reduce heat generation and fan noise.
-
Manage startup programs: Review and manage the applications that are set to start automatically when you boot up your computer. Disabling unnecessary startup programs will prevent them from consuming CPU resources unnecessarily.
-
Optimize power settings: Adjust your computer’s power settings to balance performance and energy efficiency. Choosing power-saving or balanced modes can help limit the maximum CPU speed, reducing heat generation and fan noise.
-
Upgrade hardware if necessary: If your computer consistently experiences high CPU usage during regular tasks, it may be worth considering a hardware upgrade. Upgrading your CPU, adding more RAM, or opting for a faster storage drive can help improve performance and reduce strain on your CPU.
-
Use task scheduling: For resource-intensive tasks, consider utilizing task scheduling to run them during periods of lower CPU usage. This allows you to manage CPU resources more effectively and reduce the impact on system performance and fan noise.
By actively monitoring and managing CPU usage, you can optimize system performance, prevent excessive heat buildup, and reduce fan noise. Finding the right balance between performance and noise reduction will ensure a smoother and quieter computing experience.
Conclusion
A loud CPU fan can be a frustrating and distracting issue, but it is typically a symptom of underlying problems that can be addressed. By understanding the causes and implementing the appropriate solutions, you can effectively reduce fan noise and create a quieter computing environment.
Dust accumulation, overheating, inadequate cooling, a faulty fan, and high CPU usage are common factors that contribute to a loud CPU fan. Cleaning the fan and ventilation system, ensuring proper ventilation, using a laptop cooling pad, replacing a faulty fan, and monitoring and managing CPU usage are all effective methods for resolving the issue.
Regular maintenance, such as cleaning the fan and ensuring proper ventilation, is crucial for preventing excessive dust buildup and optimizing cooling performance. Additionally, being mindful of your computer’s power settings and managing CPU usage can help prevent overheating and reduce fan noise. If necessary, consider upgrading hardware components or seeking professional assistance to tackle more complex issues.
Remember that the goal is to strike a balance between system performance and noise reduction. By implementing these solutions, you can enjoy a quieter computing experience while maintaining optimal cooling and prolonging the lifespan of your CPU and other components.