Introduction
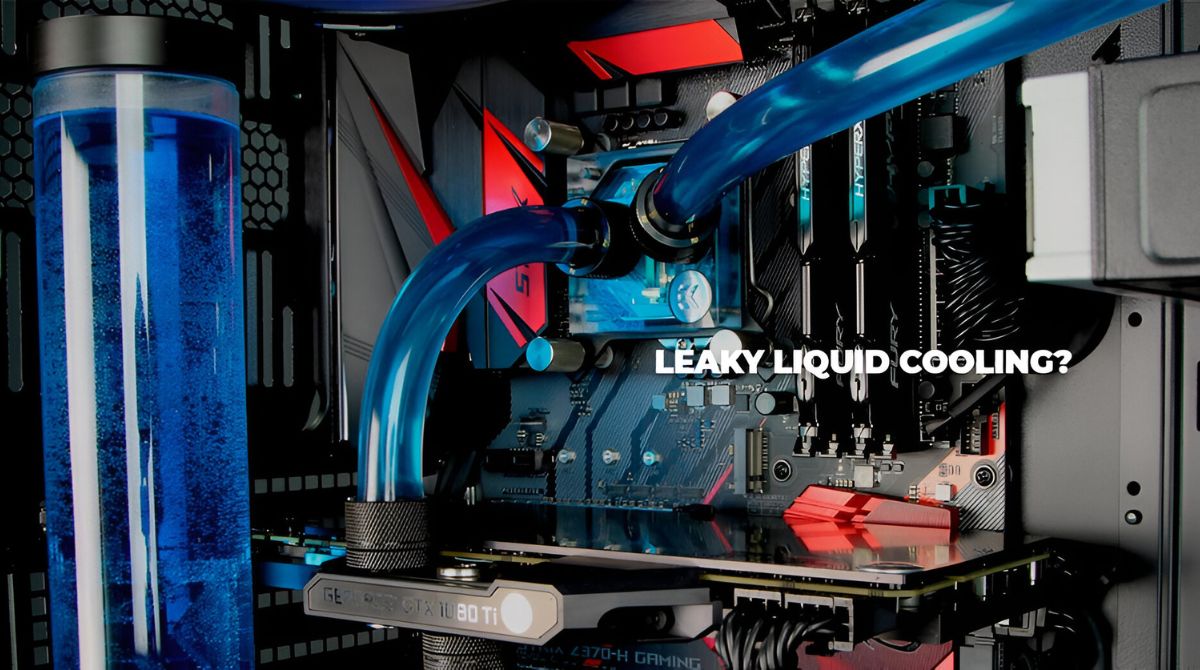
A liquid CPU cooler is a popular choice among computer enthusiasts and overclockers for its ability to efficiently cool down the central processing unit (CPU), allowing for higher performance and better overall system stability. However, like any complex piece of hardware, liquid CPU coolers are not without their issues. One of the most concerning problems that can occur with liquid CPU coolers is leakage.
When a liquid CPU cooler leaks, it can result in serious damage to the computer system, potentially causing short circuits, electrical fires, and ruining valuable components. Understanding the reasons behind these leaks and learning how to prevent them is crucial for any system builder or user relying on liquid cooling.
This article will delve into the causes of liquid CPU cooler leaks, including poor manufacturing quality, installation errors, hose and tubing damage, corrosion and wear over time, coolant evaporation, and overheating and pressurization. Alongside this, we will explore the signs to look out for that indicate a leaking liquid CPU cooler and provide practical tips to prevent such leaks from occurring. By the end of this article, you will have a better understanding of the risks associated with liquid CPU cooler leaks and the necessary precautions to safeguard your computer system.
Understanding Liquid CPU Coolers
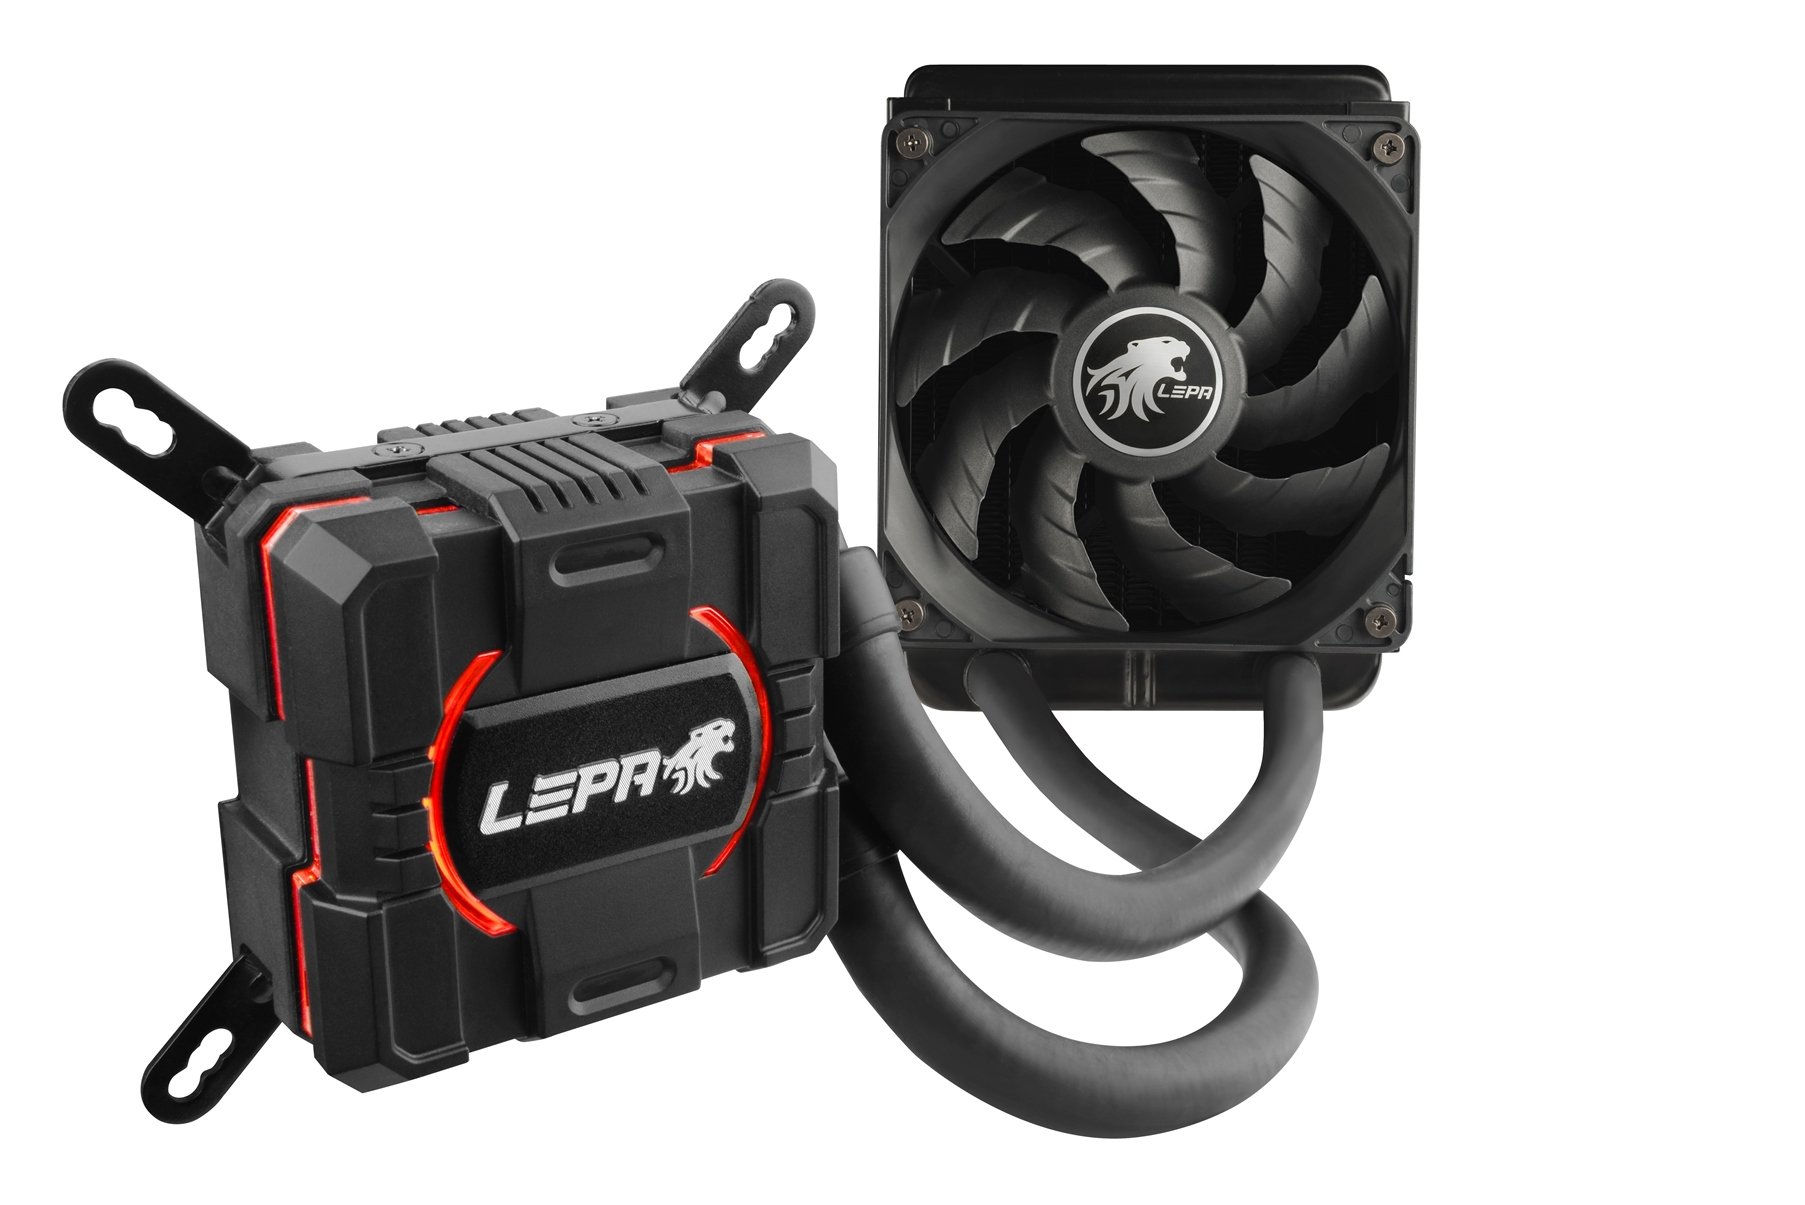
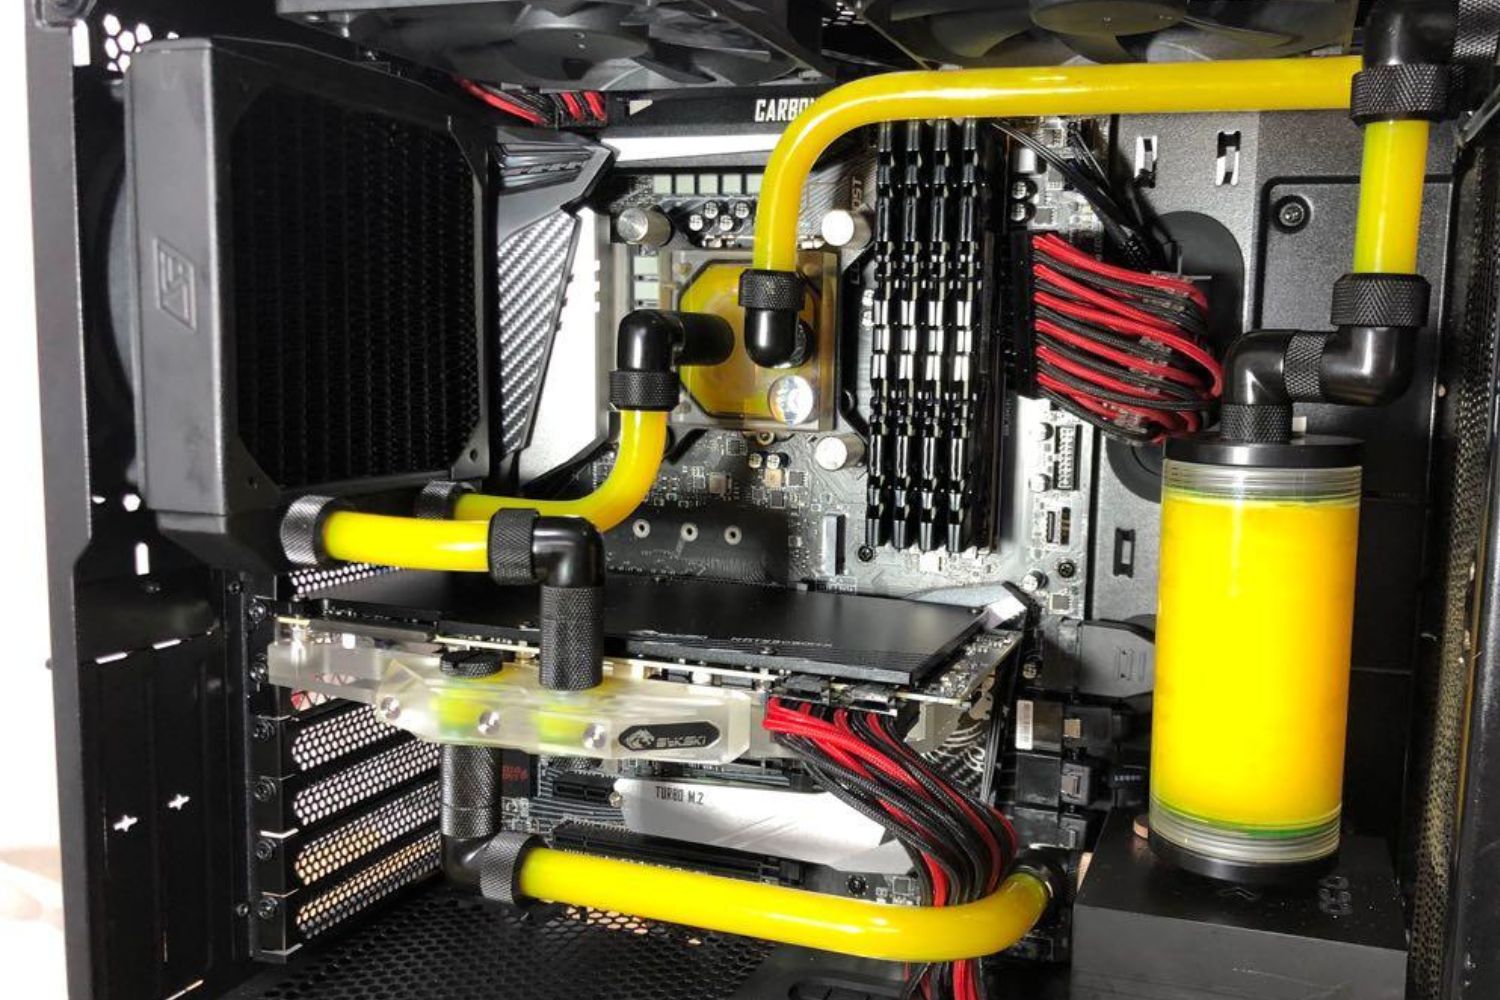
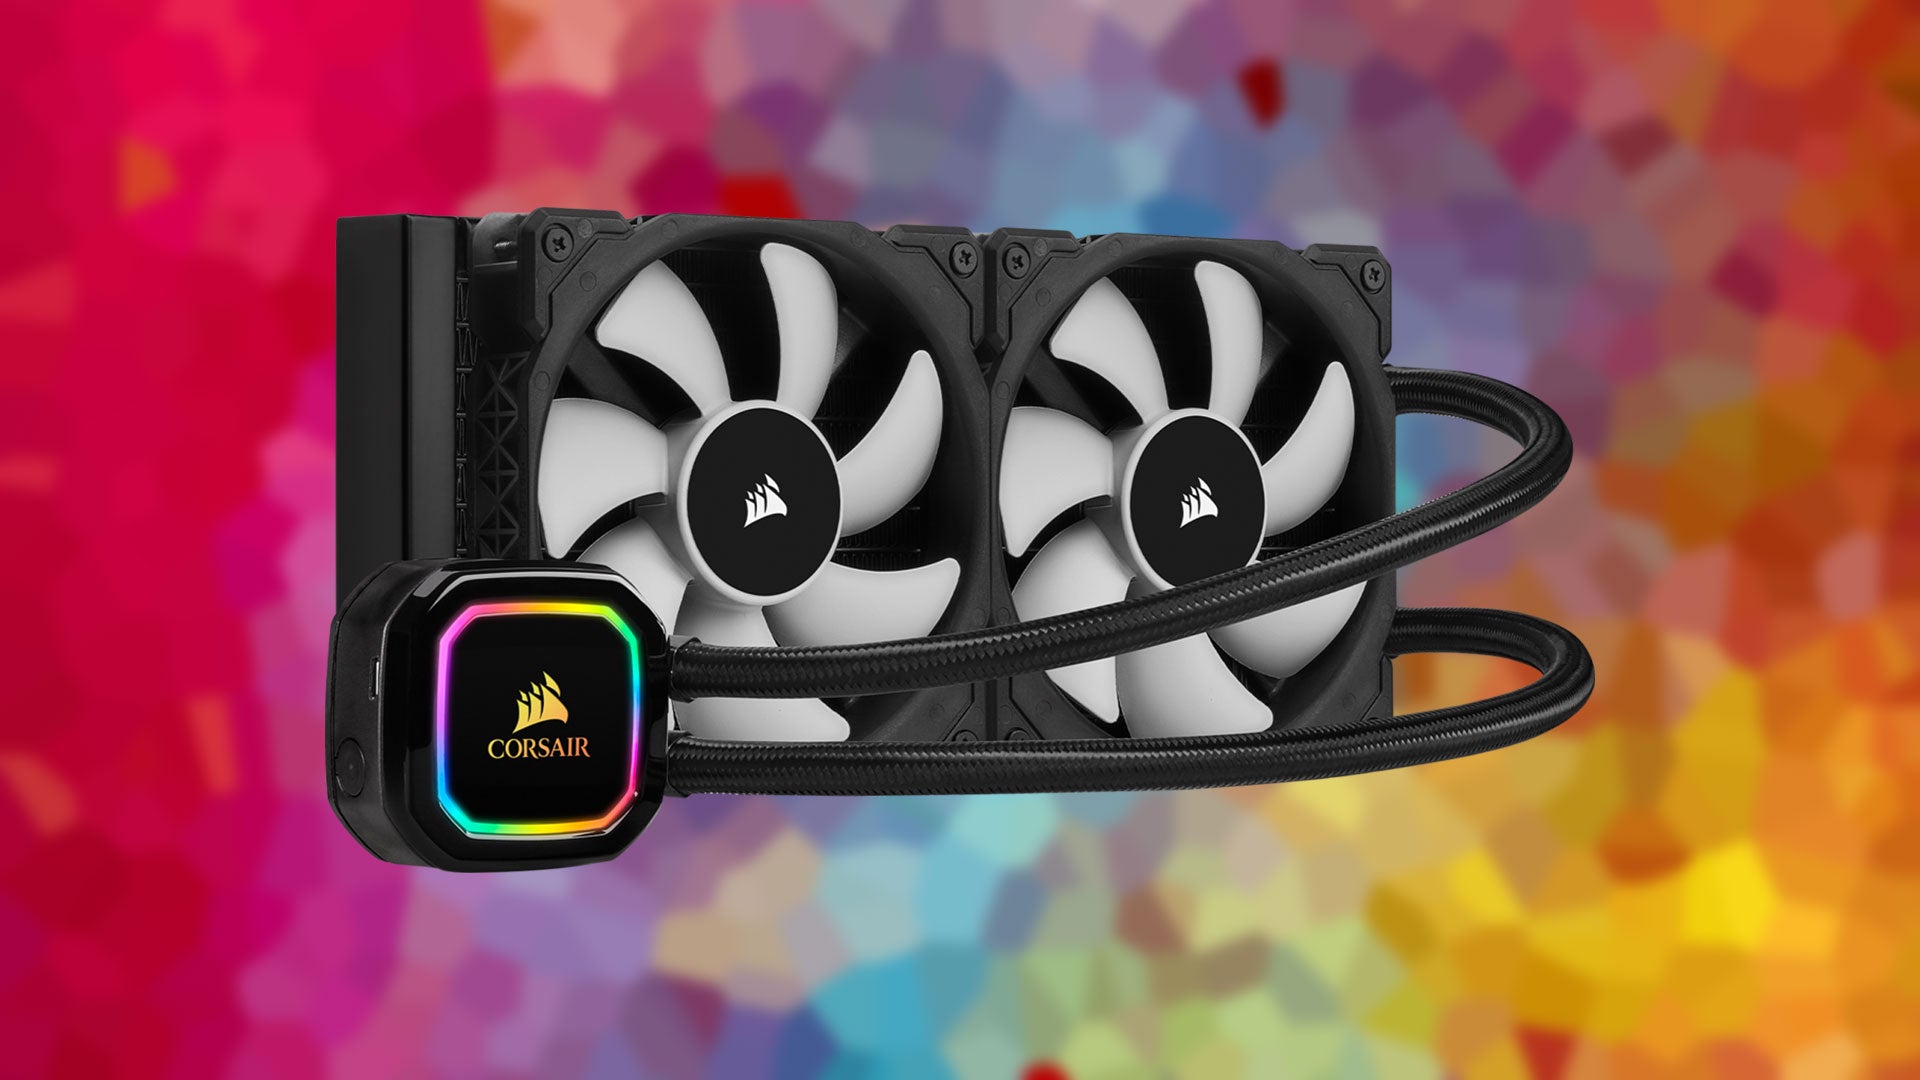
Liquid CPU coolers, also known as closed-loop coolers or all-in-one (AIO) coolers, are a type of cooling solution designed specifically for CPUs. Unlike traditional air coolers that rely on a heatsink and fan to cool the CPU, liquid CPU coolers use a combination of a pump, radiator, and liquid coolant to dissipate heat.
The basic principle behind a liquid CPU cooler is heat transfer. The CPU generates heat as it performs tasks, and this heat needs to be effectively dissipated to prevent overheating and performance degradation. The liquid inside the cooler absorbs the heat from the CPU through a copper or aluminum block known as the cold plate. The heated liquid then flows through tubes to the radiator, where the heat is transferred to the surrounding air through the radiator’s fins. A fan or fans attached to the radiator help in expelling the heat, thus cooling the liquid down. The now-cooled liquid then returns to the CPU block to continue the cycle.
The main advantage of liquid CPU coolers over air coolers is their superior heat dissipation capability. Liquid coolant can carry heat away from the CPU more efficiently than air, resulting in lower operating temperatures for the CPU. This is particularly beneficial for individuals who engage in heavy CPU-intensive tasks such as gaming, video editing, and 3D rendering, where consistent and reliable cooling is essential for optimum performance.
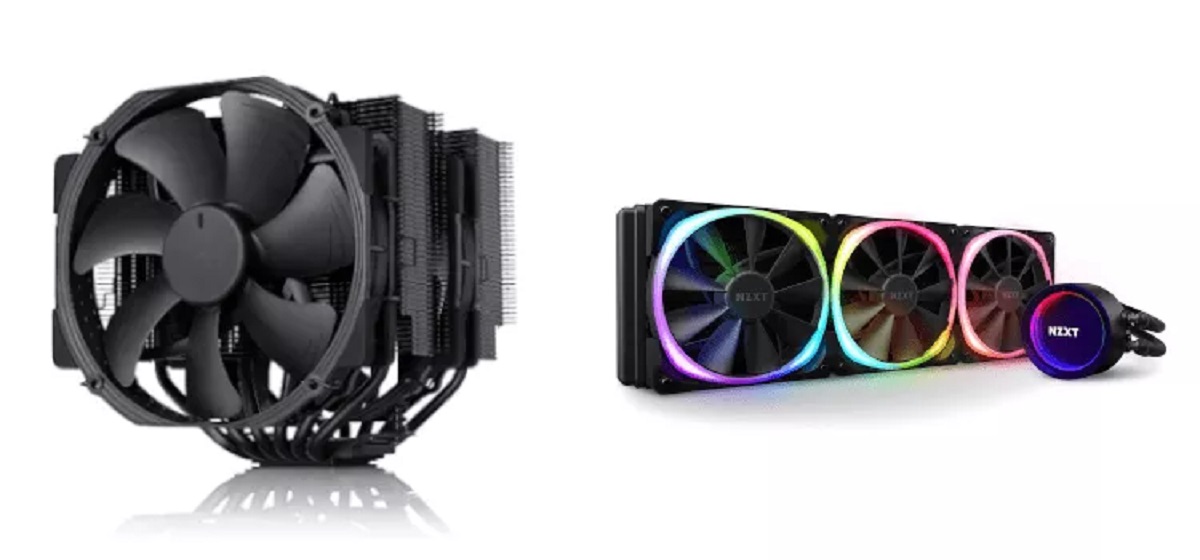
Liquid CPU coolers also offer flexibility in terms of installation. They come in different sizes and configurations, ranging from single-fan compact models to multiple-fan setups, allowing users to choose the one that fits their case and cooling requirements. Additionally, liquid CPU coolers can be quieter compared to high-end air coolers, as they can operate at lower fan speeds while still providing effective cooling.
However, it’s worth noting that liquid CPU coolers are generally more expensive than air coolers, and their installation can be more complex, involving mounting the radiator, positioning the pump and block, and connecting the tubing properly. They also require regular maintenance and monitoring for leaks, coolant evaporation, and potential pump failures.
How Do Liquid CPU Coolers Work?
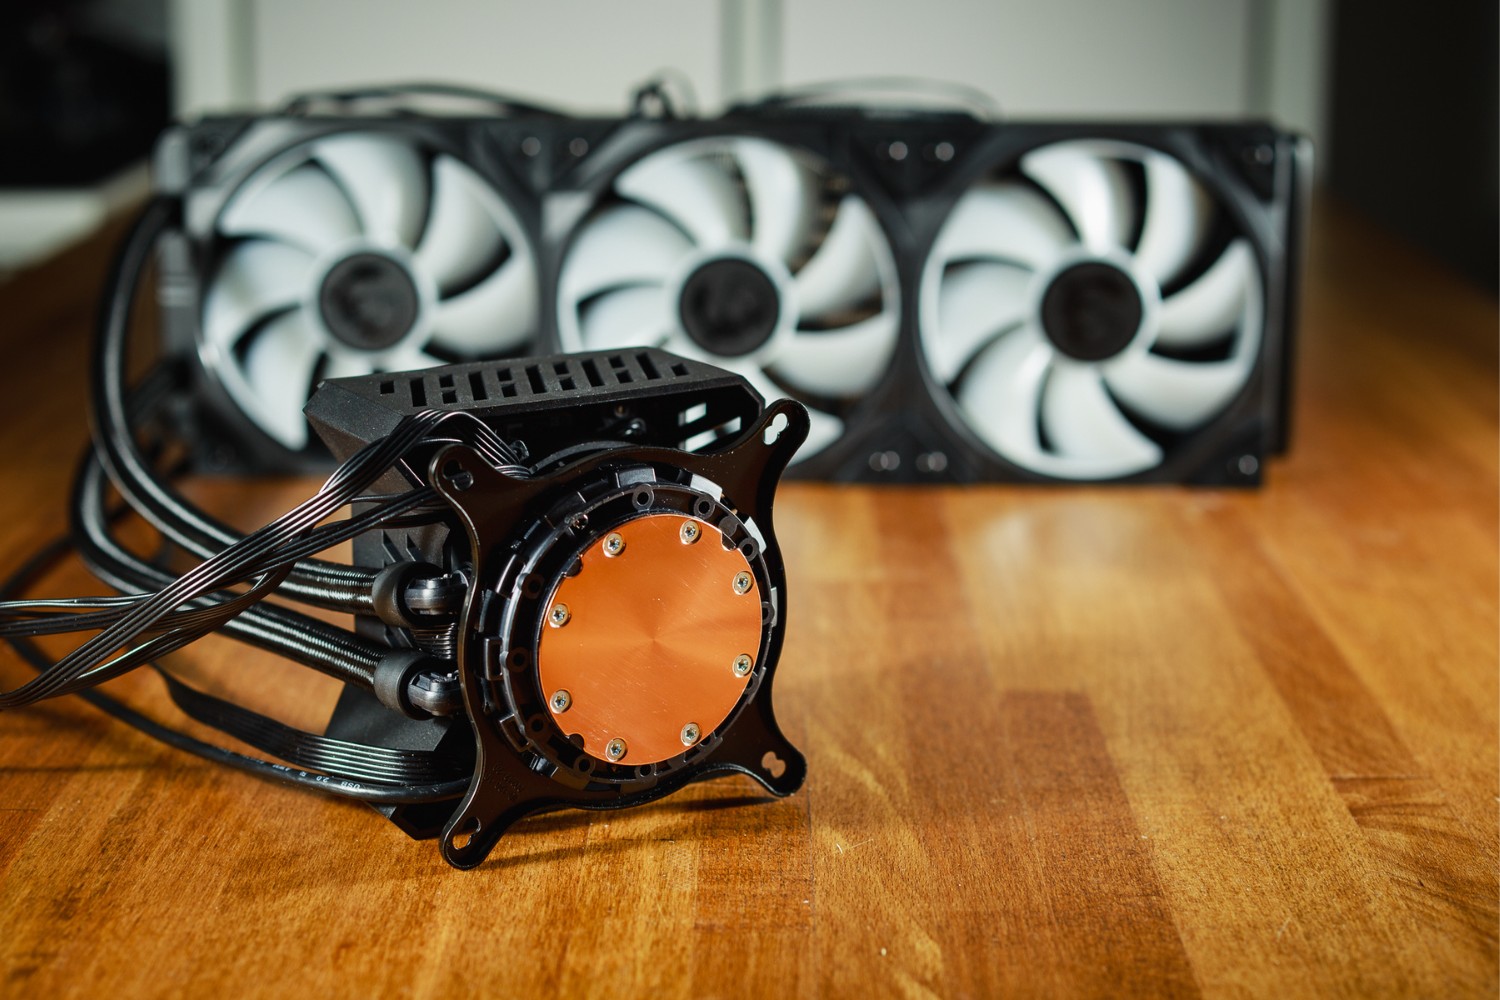
Liquid CPU coolers operate on the principles of thermodynamics and heat transfer to effectively cool down the CPU. The key components that make up a liquid CPU cooler include a pump, a radiator, liquid coolant, tubing, and a CPU block with a cold plate.
The process begins with the pump, which is responsible for circulating the liquid coolant through the system. The pump creates a continuous flow, pushing the coolant from the CPU block to the radiator and back again. Some liquid CPU coolers have an integrated pump located in the CPU block, while others have a separate pump unit.
The CPU block, often made of copper or aluminum, is mounted directly on top of the CPU. It features a cold plate, which is in direct contact with the CPU’s heat-spreading metal cap. The cold plate transfers the heat generated by the CPU to the liquid coolant.
The liquid coolant, typically a mixture of water and additives like anti-corrosion agents and biocides, absorbs the heat from the CPU. As the liquid passes through the CPU block, it warms up, reaching a higher temperature. The heated coolant is then carried through the tubing to the radiator.
The radiator acts as a heat exchanger. It is made up of thin metal fins that increase the surface area for heat dissipation. The heated liquid flows through the radiator’s tubes, while a fan or fans blow air across the fins, carrying away the heat from the liquid. This process cools down the liquid coolant.
Once the liquid coolant has been cooled, it returns to the CPU block to repeat the cycle. The continuous circulation of the liquid coolant allows the liquid CPU cooler to maintain the CPU’s temperature at an optimal level, preventing overheating and promoting stable performance.
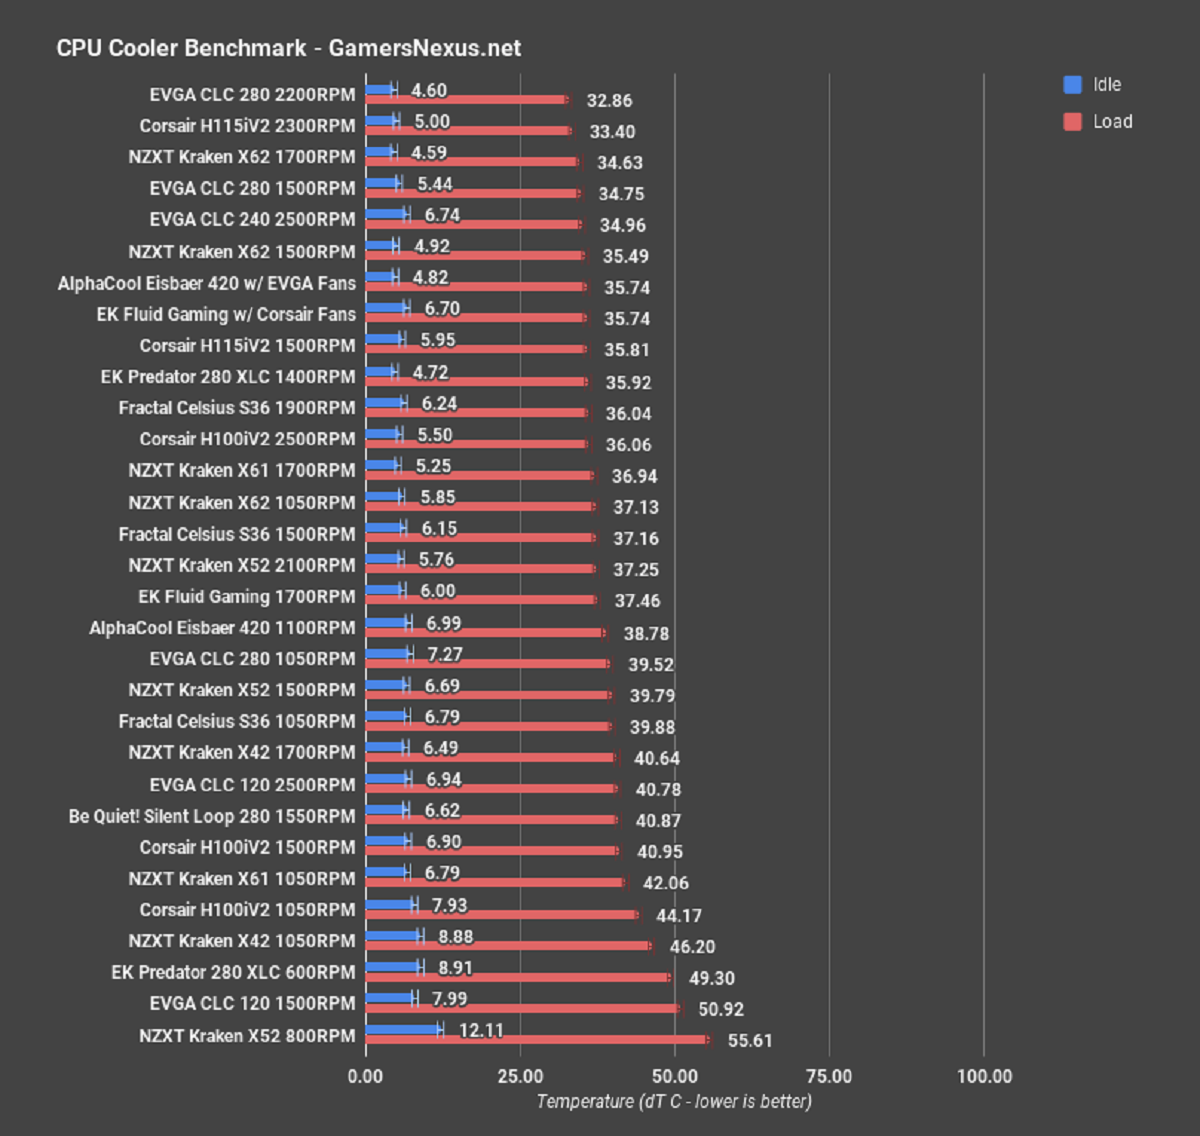
It’s important to note that the effectiveness of a liquid CPU cooler relies on factors such as the efficiency of the pump, the design and size of the radiator, the quality of the thermal interface material between the CPU and the cold plate, and the airflow provided by the fans.
Overall, the intricate design and functionality of liquid CPU coolers enable them to efficiently transfer heat away from the CPU, providing better cooling performance for demanding applications and enhancing the overall lifespan and reliability of the system.
Reasons for Liquid CPU Cooler Leaks
Liquid CPU cooler leaks can be quite concerning as they have the potential to damage computer components and lead to system failure. Understanding the reasons behind these leaks is crucial for proactive prevention. Here are some common causes of liquid CPU cooler leaks:
- Poor Manufacturing Quality: In some cases, leaks can occur due to manufacturing defects or poor quality control during the production process. Faulty seals, weak joints, or subpar materials used in the construction of the cooler can lead to leaks over time.
- Installation Errors: Incorrect installation of the liquid CPU cooler can also be a culprit. Improper mounting of the pump, block, or radiator, or incorrectly connecting the tubing can create stress on the components and cause leaks. It is crucial to carefully follow the manufacturer’s instructions when installing a liquid CPU cooler.
- Hose and Tubing Damage: The hoses and tubing used in liquid CPU coolers are vulnerable to damage. Excessive bending, kinks, or sharp edges can cause the tubing to weaken or rupture, leading to leaks. It is important to handle the tubing with care during installation and avoid any unnecessary stress on the components.
- Corrosion and Wear Over Time: Liquid coolants often contain additives to prevent corrosion. However, over an extended period, these additives can degrade, leaving the cooling system vulnerable to corrosion and potential leaks. Additionally, constant exposure to heat and moisture can cause wear and tear on the cooling system, leading to leaks.
- Coolant Evaporation: Liquid CPU coolers rely on a sealed system where the coolant does not evaporate under normal operation. However, in rare cases, coolant evaporation can occur if there is a breach in the system, which can lead to reduced coolant levels and potential leaks.
- Overheating and Pressurization: Excessive heat can cause various issues in a liquid CPU cooler system, including pressurization. When the coolant reaches high temperatures, it can expand and create excess pressure, potentially leading to leaks. Overclocking, insufficient cooling airflow, or a malfunctioning pump can contribute to increased heat levels within the system.
Understanding these potential causes of liquid CPU cooler leaks can help users take the necessary precautions to prevent them. Regular maintenance, careful installation, and monitoring of the cooling system can significantly minimize the risk of leaks and maintain the stability and performance of the computer system.
Poor Manufacturing Quality
Poor manufacturing quality is one of the common reasons why liquid CPU coolers may experience leaks. When manufacturers prioritize speed and cost over quality control, it can lead to faulty components and subpar construction, increasing the risk of leaks occurring.
Manufacturing defects can manifest in various ways, such as improperly sealed joints, weak connections, or the use of low-quality materials. For example, a poorly sealed joint between the tubing and the pump or radiator can result in leaks over time as the system operates under pressure. Weak connections between different components of the cooler, such as the pump or the CPU block, can also lead to leaks as the system undergoes constant vibrations and thermal cycles.
In addition to faulty seals and connections, the use of subpar materials in the construction of the cooler itself can contribute to leaks. Weak or brittle materials are more likely to develop cracks or break under stress, which can result in coolant leakage. Manufacturers may cut corners and opt for cheaper materials to lower production costs, but this compromises the durability and reliability of the cooler.
To mitigate the risk of leaks due to poor manufacturing quality, it is essential to choose reputable brands and models known for their high-quality construction and rigorous quality control processes. Researching user reviews and seeking professional recommendations can help identify brands and models that have a track record of reliable performance and minimal issues with leaks.
Regular monitoring and maintenance can also help detect any potential manufacturing issues early on. By keeping an eye out for signs of leaks, such as visible drips or wet spots around the cooler, users can catch any defects or weaknesses in the manufacturing early before they escalate into more severe leaks and system damage.
When purchasing a liquid CPU cooler, it is crucial to invest in a quality product that prioritizes manufacturing excellence. By choosing a cooler from a reputable manufacturer with a strong reputation for quality control, users can reduce the likelihood of experiencing leaks and potential damage to their computer system. A well-constructed cooler can provide efficient and reliable cooling, ensuring the longevity and stability of the CPU and the overall system.
Installation Errors
Improper installation of a liquid CPU cooler is a common cause of leaks and can lead to various issues within the cooling system. It is essential to follow the manufacturer’s instructions carefully during the installation process to ensure a proper and secure setup.
One common installation error is the incorrect mounting of the pump, CPU block, or radiator. If these components are not properly secured to the motherboard or the case, it can create stress and strain on the seals and connections, potentially causing leaks over time. It is crucial to use the correct mounting hardware provided by the manufacturer and ensure a firm and stable installation.
Another installation error is the improper connection of the tubing. The tubing carries the coolant from the CPU block to the radiator and back, and any loose or insecure connections can result in leaks. It is important to make sure that the tubing is securely attached to the appropriate fittings and that clamps or fasteners are properly tightened to maintain a tight seal.
Bending or kinking the tubing during installation can weaken the material and make it more prone to leaks. Care should be taken to avoid sharp bends or folds that can disrupt the fluid flow and cause the tubing to fail. Proper routing of the tubing to avoid any unnecessary strain or tension can help prevent leaks as well.
During the installation process, it is crucial to handle the cooler components with care to avoid damaging any part of the system. Mishandling the pump, CPU block, or radiator can result in cracks, dents, or other forms of damage that can lead to leaks. Additionally, using excessive force when tightening fasteners or adjusting fittings can also cause damage to the components or compromise the integrity of the seals.
To avoid installation errors and minimize the risk of leaks, it is recommended to carefully read and follow the manufacturer’s instructions step by step. Double-checking all connections and ensuring a secure and firm installation can go a long way in preventing leaks and maintaining the overall effectiveness and efficiency of the liquid CPU cooler.
If unsure about the installation process, seeking guidance from professionals or experienced system builders can provide valuable insight and assistance to ensure a proper and leak-free installation.
Hose and Tubing Damage
The hoses and tubing in a liquid CPU cooler are critical components responsible for carrying the coolant and maintaining the integrity of the system. Any damage to the hoses or tubing can result in leaks and compromise the overall performance of the cooler.
One common cause of hose and tubing damage is excessive bending or twisting. When the tubing is bent at sharp angles or subjected to continuous twisting, it can weaken the material and make it more susceptible to cracks or breaks. It is important to handle the tubing with care during installation and ensure that it has a smooth and gentle curvature without any kinks or sharp bends.
Another potential source of damage is if the tubing comes into contact with sharp edges or abrasive surfaces. This can occur during the installation process or due to the movement of the case, fans, or other nearby components. The friction between the tubing and these surfaces can cause abrasion, resulting in pinholes or tears in the material. To prevent this, it is recommended to use protective measures such as adhesive cable clips or rubber grommets to create a buffer between the tubing and any potentially abrasive surfaces.
The use of overly tight or inappropriate clamps can also cause damage to the hoses or tubing. Clamps that are too tight can cause the material to deform or cut into the tubing, leading to leaks. On the other hand, clamps that are too loose can result in the tubing slipping off the fittings, causing coolant to spill. It is important to choose the correct size and type of clamps recommended by the manufacturer and to adjust them to the appropriate level of tightness to ensure a secure but not overly constrictive grip.
In addition to external causes of damage, the internal condition of the coolant and the presence of contaminants can also impact the integrity of the hoses and tubing. Over time, the coolant can degrade, and the additives used within it can break down, potentially corroding the internal surface of the tubing. Additionally, trapped air bubbles or particles in the coolant can cause blockages or create pressure points that weaken the tubing. Regular maintenance and periodic replacement of the coolant can help mitigate these issues.
To minimize the risk of hose and tubing damage, it is crucial to handle the components carefully during installation and ensure proper routing and secure connections. Regular inspection of the hoses and tubing for signs of wear, such as cracks, bulges, or discoloration, can help identify potential issues before they escalate into leaks. Any damaged or compromised hoses or tubing should be promptly replaced to maintain the integrity and reliability of the liquid CPU cooler.
Corrosion and Wear Over Time
Corrosion and wear over time can significantly impact the performance and longevity of a liquid CPU cooler. The continuous exposure to heat, moisture, and various elements can cause deterioration of the components, leading to leaks and decreased effectiveness.
One of the primary factors contributing to corrosion is the interaction between the coolant and the materials used in the cooler, such as copper, aluminum, or other metals. Over time, the coolant can introduce corrosive agents or contaminants into the system, which can result in the degradation of the metal surfaces. This corrosion can lead to the formation of weak spots, pinholes, or cracks, compromising the integrity of the cooler and resulting in coolant leaks.
When corrosion occurs, it can also lead to the development of galvanic corrosion, where dissimilar metals in the system create a chemical reaction. This reaction intensifies the corrosion process and can accelerate the degradation of the cooler’s components, including the radiator, tubing, and fittings.
Wear and tear over time can also contribute to the deterioration of a liquid CPU cooler. Constant exposure to heat and thermal cycling can cause material fatigue and weaken the structural integrity of the cooler’s components. This wear and tear can lead to cracks, fractures, or compromised seals, allowing coolant to escape and leaks to occur.
To mitigate the effects of corrosion and wear, regular maintenance and monitoring of the liquid CPU cooler are essential. This includes inspecting the cooler for any signs of corrosion, such as discoloration, rust, or pitting on the metal surfaces. If corrosion is identified, steps should be taken to treat and protect the affected areas, such as applying corrosion inhibitors or using coolants with anti-corrosion additives.
Proper coolant maintenance is crucial in minimizing the risk of corrosion. Coolant should be regularly tested and replaced according to the manufacturer’s recommendations to ensure that it remains effective in preventing corrosion. It is also important to choose coolants that are compatible with the materials used in the cooler to minimize the risk of chemical reactions and galvanic corrosion.
Periodic inspection of the tubing, fittings, and seals for any signs of wear or damage is also recommended. Any compromised components should be replaced promptly to prevent leaks and maintain the efficiency of the cooler.
By implementing proactive maintenance and monitoring practices, users can mitigate the effects of corrosion and wear over time. This helps to ensure the longevity and reliability of the liquid CPU cooler, reducing the risk of leaks and maximizing performance.
Coolant Evaporation
Coolant evaporation is a rare but potential issue that can occur within a liquid CPU cooler. Generally, liquid CPU coolers are designed as sealed systems, meaning that the coolant should remain contained within the cooler without evaporating. However, certain circumstances can lead to coolant evaporation, resulting in reduced coolant levels and potentially leading to leaks.
If there is a breach in the cooling system, such as a damaged seal, loose fitting, or a crack in the tubing, it can create an opening for the coolant to escape through evaporation. This scenario is uncommon in high-quality liquid CPU coolers, but it is still important to be aware of the risk.
It’s worth noting that the coolant used in liquid CPU coolers is typically a mixture of water and additives, such as anti-corrosion agents and biocides. When the coolant evaporates, these additives may become more concentrated, potentially leading to issues like reduced corrosion protection or the growth of bacteria within the system.
To reduce the risk of coolant evaporation, regular maintenance and monitoring are crucial. Check the coolant levels periodically, and if there is a noticeable decrease, investigate for any potential leaks or breaches in the system. Look for visible signs of coolant residue or wet spots around the cooler that may indicate a leak has occurred.
Furthermore, it is essential to follow the manufacturer’s guidelines for maintenance and coolant replacement. Over time, coolant additives can degrade, reducing their effectiveness and potentially increasing the risk of evaporation or other issues. Regularly replacing the coolant according to the manufacturer’s recommendations can help maintain the integrity of the system and minimize the risk of coolant evaporation.
If there is evidence of coolant evaporation or a suspected leak in the liquid CPU cooler, it is recommended to contact the manufacturer or seek assistance from a professional. They can help diagnose the issue, repair any breaches, or replace any damaged components to ensure the proper functioning of the cooler.
While coolant evaporation is uncommon in high-quality liquid CPU coolers, it is still a possibility that should be monitored and addressed promptly. By staying proactive and vigilant in coolant maintenance and system inspection, users can minimize the risk of coolant evaporation and potential leaks within their liquid CPU coolers.
Overheating and Pressurization
Overheating and pressurization are two factors that can contribute to leaks in a liquid CPU cooler. Excessive heat can cause various issues within the cooling system, while pressurization can create additional stress on the cooler’s components, potentially leading to leaks.
When a liquid CPU cooler fails to effectively dissipate heat from the CPU, the temperature of the system rises. This can occur due to inadequate cooling airflow, improper fan operation, a malfunctioning pump, or overclocking. As the temperature increases, the coolant inside the cooler can reach high temperatures, causing it to expand.
The expansion of the coolant creates pressure within the closed-loop system, leading to pressurization. If this pressure exceeds the tolerances of the cooler’s components or creates stress on the tubing, fittings, or seals, leaks can occur. Weakened seals or connections can be particularly vulnerable to failure under increased pressure, resulting in coolant leakage.
Overheating and pressurization often go hand in hand, as excessive heat leads to the expansion of the coolant and subsequent pressurization. It is crucial to address any issues related to overheating promptly to minimize the risk of leaks.
To prevent overheating, ensure proper airflow within the computer case. Make sure fans are functioning correctly and are free from dust or debris that may obstruct airflow. Additionally, properly apply thermal paste between the CPU and the cooler to ensure efficient heat transfer.
If the liquid CPU cooler is not keeping the CPU temperature within acceptable limits, consider whether the cooler is appropriate for the specific CPU model and its heat dissipation requirements. Upgrading to a larger or more efficient liquid CPU cooler may be necessary for enhanced cooling performance.
Keep in mind that overclocking can significantly increase the heat output of the CPU, putting additional strain on the cooler. If overclocking is causing frequent overheating and pressurization, it may be necessary to dial back the overclocking settings or consider alternative cooling solutions.
Regular monitoring of temperatures and performance can help identify potential overheating issues early on. Utilize software tools or BIOS settings to monitor CPU temperatures and ensure they remain within acceptable ranges. If significant temperature increases or fluctuations are detected, it may indicate a problem with the cooling system that requires further investigation.
By addressing overheating concerns, maintaining sufficient cooling airflow, and monitoring system temperatures, the risk of pressurization and subsequent leaks in a liquid CPU cooler can be minimized. Effective cooling is essential for a stable and reliable computer system, ensuring optimal performance and longevity of components.
Signs of a Leaking Liquid CPU Cooler
It’s important to be aware of the signs that may indicate a leaking liquid CPU cooler. Detecting a leak early can help prevent damage to your system and allow for timely repairs. Here are some common signs to watch out for:
- Persistent Moisture: If you notice moisture or wet spots around the liquid CPU cooler, particularly around the pump, tubing, or radiator, it could be a sign of coolant leakage. Be attentive to any consistent dampness or pooling of liquid in the vicinity of the cooler.
- Visible Coolant Drips: Look for visible drips or drops of coolant on or near the liquid CPU cooler. These droplets may appear as a colorful liquid, depending on the type of coolant used. If you observe these drips, it is a clear indication of a coolant leak.
- Corrosion or Discoloration: Inspect the surrounding areas of the liquid CPU cooler for any signs of corrosion, rust, or discoloration. Coolant leaks can lead to chemical reactions with the metal components of the cooler, causing visible damage or changes in color.
- Unusual Sounds: Leaking coolant may cause gurgling or bubbling sounds within the liquid CPU cooler. These sounds are a result of air bubbles or the movement of the coolant escaping through the leak. Pay attention to any abnormal noises emanating from the cooler.
- System Instability or Failure: Coolant leakage can lead to overheating of the CPU and other components, resulting in system instability, frequent crashes, or even complete system failure. If you are experiencing system issues that cannot be attributed to other factors, a leaking liquid CPU cooler could potentially be the cause.
It is important to note that some signs may be subtle, and coolant leaks can develop gradually over time. Regularly inspecting your liquid CPU cooler, especially during routine system maintenance or upgrades, can help catch any signs of leakage early on.
If you suspect a coolant leak, it is crucial to take immediate action to prevent further damage. Disconnect power from your computer, remove any affected components, and address the leak by repairing or replacing the cooler or affected parts as necessary.
Remember, prevention is key. Conduct regular checks and maintenance of your liquid CPU cooler to minimize the risk of leaks. This includes periodic inspections for signs of wear, monitoring coolant levels, and ensuring proper installation and secure connections. By staying vigilant, you can maintain the efficiency and reliability of your liquid CPU cooler and avoid potential damage caused by leaks.
How to Prevent Liquid CPU Cooler Leaks
Preventing liquid CPU cooler leaks is crucial to maintaining the stability and longevity of your computer system. By following a few key steps and best practices, you can reduce the risk of leaks and ensure optimal performance of your liquid CPU cooler. Here are some effective ways to prevent liquid CPU cooler leaks:
- Regular Maintenance and Inspection: Conduct regular maintenance and inspections of your liquid CPU cooler. This includes checking for any signs of wear, such as cracks, leaks, or damage to the tubing, fittings, or seals. Clean the cooler and remove any dust or debris that may obstruct airflow or cause damage over time.
- Proper Installation Techniques: Ensure proper installation of the liquid CPU cooler by following the manufacturer’s instructions carefully. Pay attention to the mounting process, ensuring that the pump, block, and radiator are securely placed and properly connected. Double-check the tubing connections to ensure they are secure and leak-free.
- Choosing a High-Quality Cooler: Invest in a high-quality liquid CPU cooler from a reputable manufacturer. Research and choose a cooler with a track record of reliability and positive user reviews. A well-constructed cooler with quality materials and components will minimize the risk of leaks and perform efficiently.
- Monitor Coolant Levels: Regularly monitor the coolant levels in your liquid CPU cooler. If you notice a significant decrease in coolant levels over time, it may indicate a leak. Promptly investigate and address any potential breaches, such as damaged seals or loose fittings, to prevent further issues.
- Use Compatible Coolants: Use coolants that are compatible with the materials used in your liquid CPU cooler. Selecting the appropriate coolant can minimize the risk of chemical reactions and galvanic corrosion that can lead to leaks. Follow the manufacturer’s recommendations for coolant selection and replacement intervals.
- Avoid Overclocking: Extreme overclocking can generate excessive heat and put additional strain on the liquid CPU cooler. Avoid pushing your CPU beyond recommended limits to reduce the risk of overheating and potential leaks. Ensure proper cooling airflow within the system and consider alternative cooling solutions if necessary.
- Monitor Temperatures: Regularly monitor CPU temperatures using software tools or BIOS settings. If temperatures consistently exceed acceptable limits, it may indicate a problem with the cooling system. Investigate and identify the cause promptly to prevent possible leaks or system damage.
By implementing these preventive measures, you can significantly reduce the risk of liquid CPU cooler leaks. Regular maintenance, proper installation, and vigilant monitoring are key to ensuring the efficiency and reliability of your cooling system. It is essential to take proactive steps to prevent leaks and address any issues promptly to protect your computer system from potential damage.
Regular Maintenance and Inspection
Regular maintenance and inspection are vital for the proper functioning and longevity of a liquid CPU cooler. By incorporating these practices into your routine, you can proactively prevent potential leaks and ensure optimal performance. Here are some key aspects of regular maintenance and inspection:
- Frequent Cleaning: Dust and debris can accumulate on the radiator, fans, and other components of the liquid CPU cooler over time. Regularly clean these areas using compressed air or a soft brush to remove any obstructions that could impede airflow or cause damage.
- Tubing and Fitting Checks: Inspect the tubing and fittings for any signs of wear, such as cracks, bulges, or discoloration. Check for loose connections and tighten them as necessary. Pay close attention to areas where the tubing bends or comes into contact with other components, as these areas are more prone to stress or damage.
- Seal Inspection: The seals play a critical role in preventing leaks in a liquid CPU cooler. Regularly check the seals around the pump, CPU block, and radiator for signs of damage or deterioration. Ensure that the seals are properly seated and have not become loose or dislodged.
- Coolant Level Monitoring: Inspect the coolant levels in the reservoir or pump unit regularly. If there is a noticeable decrease in coolant levels over time, it may indicate a leak. Investigate and address any potential breaches promptly to prevent further issues.
- Check for Corrosion: Look for signs of corrosion or rust on the metal components of the liquid CPU cooler. Corrosion can weaken the structural integrity of the cooler and potentially lead to leaks. If corrosion is detected, take appropriate steps to treat and protect the affected areas to prevent further damage.
- Replace Coolant As Needed: Coolant degrades over time, losing its effectiveness and potentially increasing the risk of leaks. Follow the manufacturer’s recommendations for coolant replacement intervals and adhere to them accordingly. Regularly replacing the coolant will help maintain its proper performance and minimize the risk of deterioration.
- Stay Up-to-Date with Manufacturer Guidelines: Manufacturers may provide specific maintenance and inspection guidelines for their liquid CPU coolers. Stay informed by consulting the manufacturer’s documentation or visiting their website for any updates, tips, or recommendations. Following these guidelines can further optimize the performance and reliability of your cooler.
Regular maintenance and inspection not only help identify and prevent potential leaks but also contribute to overall system stability and efficiency. By incorporating these practices into your routine, you can extend the lifespan of your liquid CPU cooler and maximize its cooling capabilities.
Remember to conduct these maintenance and inspection procedures in a clean and controlled environment. Take caution to avoid any damage to the components or any electrostatic discharge (ESD) that could harm sensitive parts.
By dedicating time and attention to regular maintenance and inspection, you can ensure that your liquid CPU cooler operates optimally, providing reliable and efficient cooling for your computer system.
Proper Installation Techniques
Proper installation of a liquid CPU cooler is crucial for its effective performance and to minimize the risk of leaks. By following the manufacturer’s instructions and employing correct installation techniques, you can ensure a secure and reliable cooling solution. Here are some key factors to consider:
- Thoroughly Read the Instructions: Start by thoroughly reading and understanding the manufacturer’s instructions specific to your liquid CPU cooler model. Each cooler may have its own unique installation requirements and guidelines that must be followed.
- Prepare the Mounting Surface: Before installing the cooler, prepare the mounting surface on the motherboard. Ensure that the surface is clean and free from any residue, including thermal paste from previous installations.
- Apply Thermal Paste Correctly: Properly applying thermal paste is important to ensure optimal heat transfer between the CPU and the cooler. Follow the recommended method, typically applying a small amount near the center of the CPU and spreading it evenly using a credit card or similar tool.
- Mount the Pump and CPU Block: Carefully mount the pump or CPU block onto the CPU, aligning it according to the manufacturer’s instructions. Apply even pressure while securing it to ensure proper contact with the CPU surface.
- Secure the Radiator: Securely mount the radiator in the appropriate position within the case, ensuring a secure fit using screws or other mounting hardware provided by the manufacturer. Ensure that the radiator is properly aligned and that there is adequate space for airflow.
- Connect the Tubing: Connect the tubing from the pump or CPU block to the corresponding ports on the radiator. Ensure that the tubing is properly inserted into the fittings and that any clamps or fasteners are correctly tightened to avoid any potential leaks.
- Proper Cable Management: Pay attention to proper cable management around the liquid CPU cooler. Position cables in a way that does not obstruct or interfere with airflow or put excessive strain on the tubing, fittings, or cooler components.
- Double-Check Connections: Double-check all connections, including those between the pump, tubing, and radiator. Ensure that they are secure and properly tightened. Loose connections can lead to leaks or compromised cooling performance.
- Test for Stability and Leaks: After installation, test the stability of the liquid CPU cooler by gently moving the case and observing any movement or vibrations. Additionally, carefully inspect the cooler and surrounding areas for any signs of leaks or drips.
It is important to adhere to the manufacturer’s instructions as improper installation can lead to premature failure, inadequate cooling, or leaks. If you are unsure about any aspect of the installation process, consult the manufacturer’s support resources or seek assistance from a professional.
By employing proper installation techniques, you can enhance the reliability and performance of your liquid CPU cooler, ensuring effective cooling for your CPU and minimizing the risk of leaks.
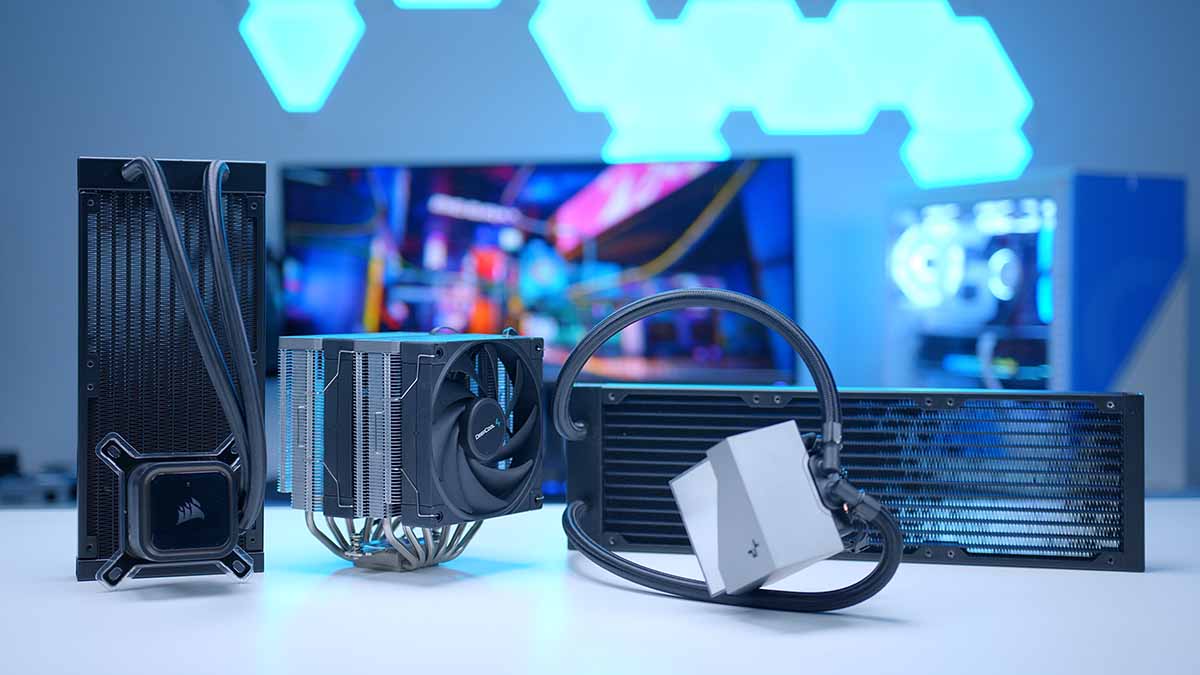
Choosing a High-Quality Cooler
Choosing a high-quality liquid CPU cooler is essential to ensure optimal cooling performance and minimize the risk of leaks. With several options available in the market, selecting the right cooler requires careful consideration. Here are some factors to keep in mind when choosing a high-quality liquid CPU cooler:
- Reputation and Reviews: Research the reputation of the manufacturer and read reviews from reputable sources or other users. Look for positive feedback and comments regarding the cooler’s design, performance, and reliability. A well-established and reputable brand is more likely to produce high-quality coolers.
- Cooling Capacity: Consider the cooling capacity of the cooler in relation to your CPU’s heat output. Ensure that the cooler is capable of effectively dissipating heat from your specific CPU model, especially if you plan to engage in intensive tasks such as gaming or overclocking.
- Size and Compatibility: Determine the available space in your computer case and choose a cooler that fits properly. Consider the dimensions of the radiator, fan(s), and pump to ensure compatibility with your case and motherboard. Improper fitment can lead to installation issues or inadequate cooling performance.
- Noise Levels: Evaluate the noise levels of the cooler, particularly if you prefer a quieter computing environment. Look for coolers that have low noise ratings or come with additional features such as fan speed controls or noise dampening technologies.
- Build Quality: Examine the build quality of the cooler. Look for materials such as copper or aluminum for the base plate and quality construction for the pump, radiator, and tubing. Robust build quality ensures durability, reliability, and longevity.
- Warranty and Support: Consider the warranty provided by the manufacturer. A longer and comprehensive warranty is indicative of the manufacturer’s confidence in their product. Additionally, check for the availability of customer support and technical assistance.
- Price vs. Value: Evaluate the price of the cooler in relation to its features and performance. Balance your budget with the performance and reliability you desire. Remember that investing in a high-quality cooler is a long-term investment that ensures effective cooling and protects your system.
Taking the time to research and choose a high-quality liquid CPU cooler will pay off in terms of performance, reliability, and longevity. A well-constructed cooler with quality materials and components is less likely to develop leaks or encounter issues that could compromise the cooling efficiency of your CPU.
Use reliable sources, such as professional reviews and user feedback, to gather information and make an informed decision. Additionally, consider seeking advice from experienced system builders or computer hardware enthusiasts who can provide valuable insights based on their own experiences.
Ultimately, selecting a high-quality liquid CPU cooler that meets your specific requirements will help ensure efficient and reliable cooling for your CPU, minimize the risk of leaks, and contribute to the overall stability and longevity of your computer system.
Conclusion
Liquid CPU coolers offer efficient and effective cooling solutions for high-performance computer systems. However, potential leaks can pose risks to the stability and integrity of your system. Understanding the causes of liquid CPU cooler leaks, such as poor manufacturing quality, installation errors, hose and tubing damage, corrosion, coolant evaporation, and overheating, is crucial for prevention and maintenance.
By following proper installation techniques, conducting regular maintenance and inspection, and choosing a high-quality cooler, you can minimize the risk of leaks and optimize the performance of your liquid CPU cooler. Paying attention to signs of leaks, such as persistent moisture, visible coolant drips, or system instability, allows for early detection and prompt action to address potential leaks before they cause significant damage.
Regularly monitoring coolant levels, maintaining clean tubing and fittings, and replacing coolant according to the manufacturer’s recommendations contribute to the long-term reliability and performance of your cooler. Implementing these preventive measures reduces the likelihood of leaks, mitigates the risk of damage to valuable components, and promotes stable and efficient operation of your computer system.
Remember to choose a liquid CPU cooler that matches your CPU’s heat output, fits your case properly, and is made with high-quality materials. Conduct thorough research, consider reputable brands, and read reviews to ensure you select a cooler that meets your specific needs and budget.
By taking these measures and adopting good maintenance practices, you can enjoy the benefits of a liquid CPU cooler while minimizing the risks associated with leaks. A well-maintained and properly installed liquid CPU cooler will help keep your CPU cool, prolong the life of your system, and ensure its reliable performance even during demanding tasks.