Introduction
Welcome to Windows 10, where technology seamlessly integrates into our daily lives. One of the key features of Windows 10 is the ability to customize your computer experience, and one way to do that is by managing the programs that start up when you turn on your computer. Whether you want to add your favorite applications to the startup process or remove unnecessary ones, understanding the whereabouts of the Startup folder is essential.
The Startup folder is a hidden directory in Windows 10 that contains a list of programs that are automatically launched when you log into your computer. By managing the contents of this folder, you can personalize your startup experience and optimize the performance of your system.
In this article, we will guide you through the process of finding the Startup folder in Windows 10 and show you different methods to access it. We will also discuss how to add programs to the Startup folder and remove them when needed.
Whether you are a seasoned tech-savvy user or a beginner navigating the Windows 10 operating system, this article will provide you with the information you need to easily find and manage the Startup folder on your computer.
What is the Startup folder?
The Startup folder is a special directory in Windows 10 that contains a list of programs or shortcuts that are automatically launched when you log into your computer. These programs or shortcuts run in the background, allowing them to start functioning as soon as your computer boots up.
The Startup folder is a convenient feature that allows you to customize and streamline your computer experience. It gives you the ability to have your favorite programs or utilities ready for use immediately after your computer starts, saving you time and effort. For example, you can add applications like email clients, productivity tools, or even a music player to the Startup folder, ensuring that they open automatically every time you log in.
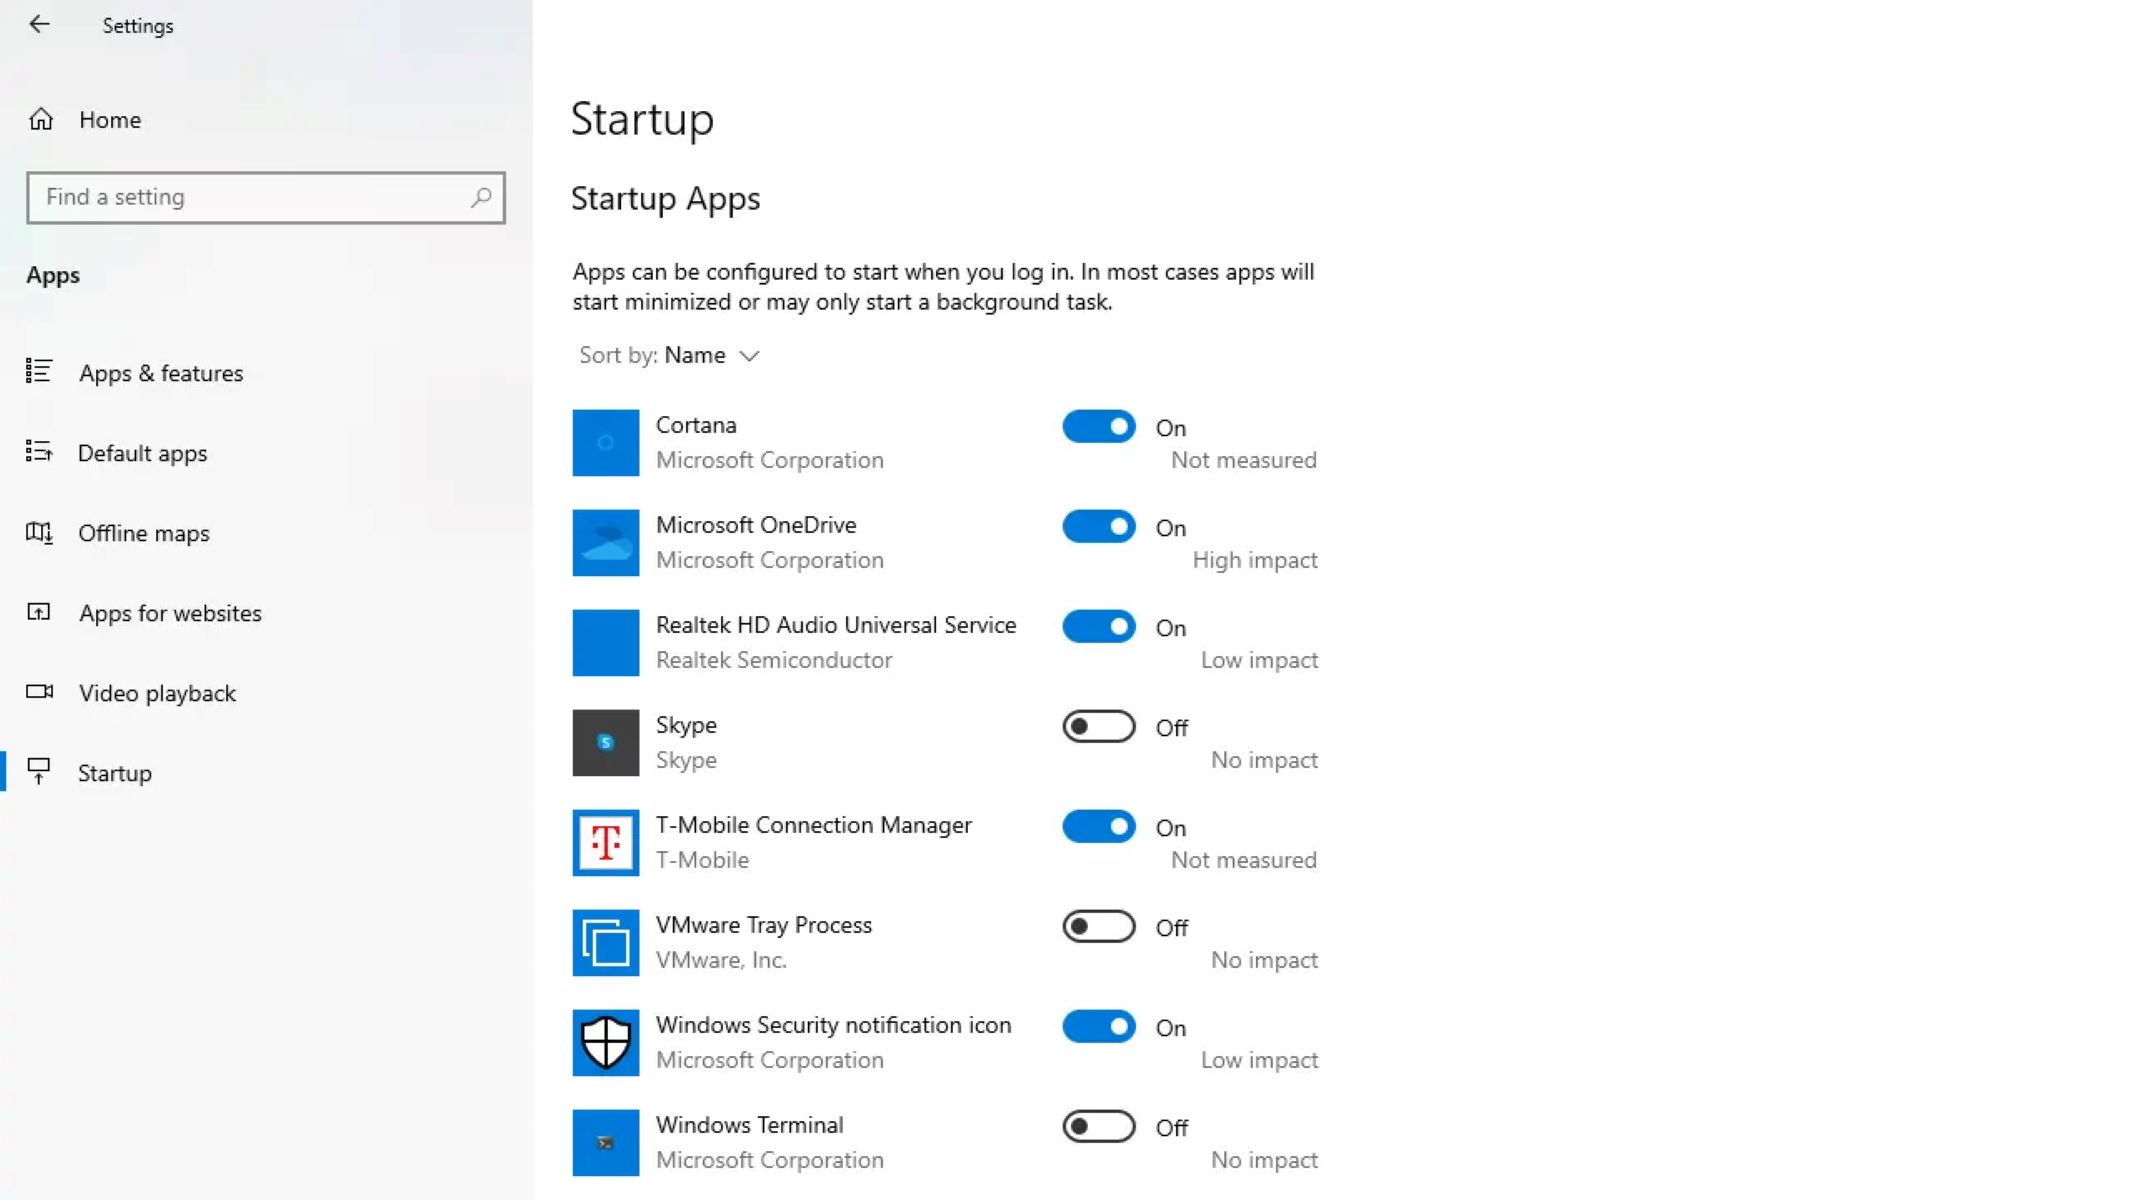
By managing the contents of the Startup folder, you can optimize the performance of your system. However, it’s important to note that having too many programs launching at startup can slow down your computer’s boot time and consume system resources unnecessarily. Therefore, it’s advisable to carefully choose the programs you add to the Startup folder, considering their importance and impact on system performance.
Furthermore, the Startup folder is user-specific, which means that each user account on your computer can have its own set of programs that launch at startup. This allows users to customize their own startup experience based on their individual needs and preferences.
Now that you have a clear understanding of what the Startup folder is and its significance, let’s explore how to find it in Windows 10 and manage its contents effectively.
Finding the Startup folder in Windows 10
Locating the Startup folder in Windows 10 might seem like a daunting task, especially for users who are not familiar with the file system. However, there are several methods that you can use to easily find the Startup folder. Let’s explore three different options below:
Option 1: Using the Run dialog
One of the simplest ways to access the Startup folder is by using the Run dialog. To open the Run dialog, press the Windows key + R on your keyboard. Once the dialog box appears, type ‘shell:startup’ (without quotation marks) and hit Enter. This will open the Startup folder directly.
Option 2: Navigating through File Explorer
Another way to find the Startup folder is by navigating through File Explorer. Open File Explorer by clicking on the folder icon in the taskbar or pressing the Windows key + E. In the address bar, paste the following path:
C:\Users\YourUsername\AppData\Roaming\Microsoft\Windows\Start Menu\Programs\StartupRemember to replace ‘YourUsername’ with your actual username. Once you enter the path and hit Enter, you will be directed to the Startup folder.
Option 3: Using the Windows Start menu
If you prefer a visually guided method, you can access the Startup folder through the Windows Start menu. Click on the Start button and scroll through the list of apps until you find the ‘Windows System’ folder. Expand this folder and click on ‘File Explorer.’ Once File Explorer opens, navigate to the following path:
This PC > Local Disk (C:) > Users > YourUsername > AppData > Roaming > Microsoft > Windows > Start Menu > Programs > StartupReplace ‘YourUsername’ with your actual username to access the Startup folder.
Nowadays, finding the Startup folder in Windows 10 is a quick and straightforward process. By using any of the methods outlined above, you can easily locate the Startup folder and proceed to manage its contents.
Option 1: Using the Run dialog
If you prefer a quick and straightforward method to access the Startup folder in Windows 10, using the Run dialog is the perfect option for you. Here’s how you can do it:
- Press the Windows key + R on your keyboard simultaneously to open the Run dialog.
- Once the Run dialog box appears, type ‘shell:startup’ (without quotation marks) and hit Enter or click on the OK button.
After executing these steps, the Startup folder will open directly, displaying all the programs and shortcuts that run at startup. You can now add, remove, or modify the contents of this folder according to your preferences.
The Run dialog method is a quick way to access the Startup folder, making it ideal for users who want to efficiently manage their startup programs. Whether you want to add a program to the startup list or remove unnecessary ones, this method simplifies the entire process.
Using the Run dialog, you can easily experiment with different configurations and customize your computer’s startup experience to suit your needs. This method eliminates the need for complex navigation through the file system, allowing you to access the Startup folder with just a few keyboard shortcuts.
Remember, managing the programs in the Startup folder can have a significant impact on your computer’s performance. So, choose wisely and only add the programs that you truly need to launch automatically at startup. This will ensure that your computer boots up quickly and efficiently without any unnecessary delays.
Now that you know how to access the Startup folder using the Run dialog, you can proceed to manage its contents effortlessly. Try this method out and take control of your startup programs, optimizing your Windows 10 experience.
Option 2: Navigating through File Explorer
If you prefer a more visual approach to accessing the Startup folder in Windows 10, you can easily find it by navigating through File Explorer. Follow these simple steps:
- Open File Explorer by clicking on the folder icon in the taskbar or by pressing the Windows key + E on your keyboard.
- In the address bar at the top, paste the following path:
C:\Users\YourUsername\AppData\Roaming\Microsoft\Windows\Start Menu\Programs\StartupBe sure to replace ‘YourUsername’ with your actual username. Once you have entered the path, hit Enter or click on the arrow button next to the address bar.
After executing these steps, File Explorer will navigate directly to the Startup folder, where you can view and manage the programs and shortcuts that run at startup.
Using File Explorer to access the Startup folder provides a visually guided experience, allowing you to explore the file system and find the folder easily. This method is ideal for users who are more comfortable with navigating through directories and prefer a visual representation of their files and folders.
Once you have accessed the Startup folder through File Explorer, you can add new programs or remove existing ones by simply copying, pasting, or deleting the corresponding shortcuts. Remember to be strategic in managing the contents of the Startup folder to optimize your computer’s performance and ensure a smooth boot-up process.
By using this method, you can take full control over your startup programs and customize your Windows 10 experience to fit your needs. Whether you want to streamline your workflow by adding essential applications to the Startup folder or reduce clutter by removing unnecessary ones, navigating through File Explorer makes the process hassle-free.
Now that you know how to access the Startup folder using File Explorer, go ahead and explore the multitude of possibilities to personalize your startup programs in Windows 10.
Option 3: Using the Windows Start menu
If you prefer a more user-friendly and visually guided approach to accessing the Startup folder in Windows 10, you can easily find it through the Windows Start menu. Follow these simple steps:
- Click on the Start button located in the bottom-left corner of your screen or press the Windows key on your keyboard to open the Start menu.
- Scroll through the list of apps until you find the ‘Windows System’ folder.
- Click on the ‘Windows System’ folder to expand it.
- Among the expanded folders, find and click on ‘File Explorer’.
Upon clicking on ‘File Explorer’, a new window will open, and you will be navigated to the ‘This PC’ section, displaying various drives on your computer.
- In the ‘This PC’ section, locate and click on the ‘Local Disk (C:)’ drive, which is typically the main drive on your system.
- Once you have selected the ‘Local Disk (C:)’ drive, navigate to the following path in the address bar:
This PC > Local Disk (C:) > Users > YourUsername > AppData > Roaming > Microsoft > Windows > Start Menu > Programs > StartupRemember to replace ‘YourUsername’ with your actual username.
After executing these steps, you will be directed to the Startup folder, which contains the programs and shortcuts that run automatically at startup.
Using the Windows Start menu method provides an intuitive and user-friendly approach to accessing the Startup folder. By leveraging the familiar interface of the Start menu, you can locate the Startup folder quickly and efficiently.
Once you have accessed the Startup folder, you can easily manage its contents by adding or removing programs and shortcuts. This method allows you to have full control over your startup programs, ensuring that your computer boots up with the applications you need most.
Now that you know how to access the Startup folder using the Windows Start menu, feel free to explore and customize your startup programs according to your preferences. Enhance your Windows 10 experience by adding essential programs to the Startup folder or removing unnecessary ones to streamline your boot-up process.
Managing Startup programs
Now that you have successfully located the Startup folder in Windows 10, it’s time to start managing the programs that launch automatically at startup. Managing these programs allows you to optimize your computer’s performance and tailor your startup experience to your needs. Here are some key aspects to consider when managing Startup programs:
Adding programs to the Startup folder
To add programs to the Startup folder, you can simply copy the program’s shortcut and paste it into the Startup folder. Here’s how:
- Open the location of the program or application you want to add to the Startup folder.
- Right-click on the program’s shortcut or executable file.
- Select ‘Copy’ from the context menu or press Ctrl+C on your keyboard.
- Locate the Startup folder using one of the methods mentioned earlier.
- Right-click inside the Startup folder and select ‘Paste’ from the context menu or press Ctrl+V on your keyboard.
The program’s shortcut will now be added to the Startup folder, ensuring that it launches automatically when you log into your computer.
Removing programs from the Startup folder
If you want to remove a program or shortcut from the Startup folder, follow these steps:
- Open the Startup folder using one of the methods mentioned earlier.
- Locate the program or shortcut you want to remove.
- Right-click on the program or shortcut and select ‘Delete’ from the context menu.
- Confirm the deletion by clicking ‘Yes’ or pressing Enter.
The program or shortcut will be removed from the Startup folder, preventing it from launching automatically at startup.
Optimizing your Startup folder
Managing the programs in your Startup folder allows you to optimize your computer’s performance and reduce system resource consumption. Here are a few tips to consider:
- Only add programs that you use frequently or that provide essential functionality at startup.
- Remove programs that are unnecessary or rarely used.
- Regularly review the contents of your Startup folder to ensure it stays streamlined.
- Consider disabling programs that have options to launch at startup within their own settings menus.
By carefully managing the programs in your Startup folder, you can minimize the startup time of your computer and improve its overall performance.
Take control of your startup experience by adding or removing programs from the Startup folder based on your preferences and needs. By doing so, you can tailor your Windows 10 experience to suit your specific requirements and enhance your efficiency when using your computer.
Adding programs to the Startup folder
Adding programs to the Startup folder in Windows 10 allows you to have your frequently used applications automatically launch when you log into your computer, saving you time and effort. Here’s how you can add programs to the Startup folder:
- Open the location of the program or application that you want to add to the Startup folder.
- Right-click on the program’s shortcut or executable file.
- Select “Copy” from the context menu, or use the keyboard shortcut Ctrl+C.
- Locate the Startup folder using one of the methods mentioned earlier in this article.
- Right-click inside the Startup folder and select “Paste” from the context menu, or use the keyboard shortcut Ctrl+V.
The program’s shortcut will now be added to the Startup folder, ensuring that it automatically launches every time you log into your computer.
It’s important to note that adding too many programs to the Startup folder may have an impact on your computer’s performance and slow down the startup process. Therefore, it’s recommended to only add applications that you frequently use or consider essential for your workflow.
If you want to remove a program from the Startup folder, simply locate the program’s shortcut within the Startup folder, right-click on it, and select “Delete” from the context menu. Confirm the deletion, and the program will no longer automatically launch at startup.
Adding programs to the Startup folder is a convenient way to personalize your Windows 10 experience and have your preferred applications ready for use as soon as you log in. It saves you time from manually launching each program and allows you to focus on your tasks without any interruptions.
Remember to regularly review and update the programs in your Startup folder to ensure that it remains optimized and only contains the ones that are necessary for your productivity. By managing the contents of the Startup folder effectively, you can streamline your computer’s startup experience and enhance your overall efficiency.
Removing programs from the Startup folder
Removing programs from the Startup folder in Windows 10 allows you to control the programs that automatically launch when you log into your computer. This can help improve your computer’s startup time and reduce unnecessary resource usage. To remove programs from the Startup folder, follow these simple steps:
- Open the Startup folder using one of the methods mentioned earlier in this article.
- Locate the program or shortcut that you want to remove.
- Right-click on the program or shortcut and select “Delete” from the context menu.
- Confirm the deletion by clicking “Yes” or pressing Enter.
By following these steps, you can remove the program or shortcut from the Startup folder, preventing it from launching automatically when you log into your computer.
Regularly reviewing and managing the programs in your Startup folder is important to keep your computer running smoothly. It allows you to eliminate unnecessary applications that may impact performance or cause delays during startup.
When deciding which programs to remove from the Startup folder, consider the ones that you do not frequently use or that are not essential for your day-to-day tasks. However, exercise caution and avoid removing programs that are required for system functionality or security.
Removing programs from the Startup folder can help declutter your system and provide a faster and more streamlined startup experience. By keeping the Startup folder optimized with only the necessary programs, you can ensure a more efficient and responsive computer performance.
Remember to periodically review the programs in your Startup folder and adjust them based on your changing needs and preferences. By regularly managing the contents of the Startup folder, you can maintain better control over your computer’s startup process and enhance your overall computing experience.
Conclusion
The Startup folder in Windows 10 provides a convenient way to manage the programs and shortcuts that automatically launch when you log into your computer. By understanding how to locate and access the Startup folder, as well as how to add or remove programs from it, you can personalize your startup experience and optimize your computer’s performance.
Whether you choose to use the Run dialog, navigate through File Explorer, or utilize the Windows Start menu, finding the Startup folder is a straightforward process. Once you have accessed the Startup folder, you can easily add or remove programs and shortcuts to customize your computer’s startup behavior.
However, it’s important to be mindful of the programs you add to the Startup folder. Too many startup programs can slow down your computer’s boot time and consume valuable system resources. Therefore, it’s recommended to only add programs that you frequently use or consider essential for your workflow.
Regularly reviewing and managing the contents of the Startup folder is crucial. This allows you to remove unnecessary programs that may impact performance, while ensuring that the important ones are launching automatically at startup.
By effectively managing the Startup folder, you can streamline your computer’s startup process, improve its performance, and have a more personalized computing experience.
Now that you have a solid understanding of how to find and manage the Startup folder in Windows 10, you can take control of your startup programs and optimize your computer’s performance. Experiment with different configurations, add important applications, and remove unnecessary ones to achieve a customized and efficient startup experience.
Remember, as your needs and preferences change over time, it’s valuable to regularly revisit and adjust the contents of the Startup folder. By doing so, you can ensure that your computer starts up smoothly, maximizing your productivity from the moment you log in.


