Introduction
When it comes to storing and accessing data on your computer, solid-state drives (SSDs) have become increasingly popular due to their superior performance and speed compared to traditional hard disk drives (HDDs). Whether you’re building a new computer or upgrading an existing one, understanding where the SSD goes on the motherboard is crucial for a successful installation.
In this guide, we will explore the different types of SSDs available, including SATA SSDs, M.2 SSDs, and PCIe SSDs, and discuss their respective placement on the motherboard. We will also dive into the various methods for mounting SSDs and provide step-by-step instructions on how to install each type.
Before we dive into the specifics, let’s first understand what an SSD is and why it has become a popular choice for storage in modern computers.
An SSD, or solid-state drive, is a storage device that uses flash memory to store data. Unlike traditional HDDs, which use spinning magnetic disks to read and write data, SSDs have no moving parts. This lack of moving parts results in faster data access times, lower power consumption, and improved durability.
SSDs have revolutionized the storage industry by offering significantly faster data transfer speeds, shorter boot times, and improved system responsiveness. They are an excellent choice for both casual computer users and professionals who require high-performance storage solutions for tasks such as gaming, video editing, and content creation.
Now that we have a basic understanding of what an SSD is and why it is popular, let’s continue by exploring the different types of SSDs available on the market.
What is an SSD?
An SSD, or solid-state drive, is a storage device that utilizes flash memory to store and retrieve data. Unlike traditional hard disk drives (HDDs) which use spinning platters and mechanical read/write heads, SSDs have no moving parts. Instead, they rely on integrated circuits to store data electronically.
One of the key advantages of SSDs is their speed. Unlike HDDs, which require time for the spinning platters to reach the correct position for data retrieval, SSDs can access data almost instantaneously. This results in significantly faster data transfer speeds, shorter boot times, and improved overall system responsiveness.
Another benefit of SSDs is their durability. Since they have no moving parts, they are less prone to mechanical failures that can occur in HDDs. This makes SSDs more reliable and less susceptible to physical shocks and vibrations. Additionally, SSDs are not affected by magnetic fields, unlike HDDs, which can experience data corruption if exposed to strong magnets.
In addition to their speed and durability, SSDs are also more power-efficient than HDDs. Since SSDs do not require power to spin disks or move read/write heads, they consume less energy during operation. This not only helps to extend battery life in laptops and portable devices but also reduces overall power consumption in desktop computers.
SSDs are available in various form factors to accommodate different types of devices. The most common form factors are 2.5-inch for desktop and laptop computers, M.2 for smaller, compact devices, and PCIe for high-performance applications.
With their superior performance, reliability, and power efficiency, SSDs have become the preferred storage solution for many users. Whether you’re a casual computer user, a gamer, or a professional who requires fast and reliable storage for demanding tasks, an SSD is an excellent choice to improve your overall computing experience.
Now that we have a clear understanding of what an SSD is and its advantages, let’s explore the different types of SSDs available on the market and where they are placed on the motherboard.
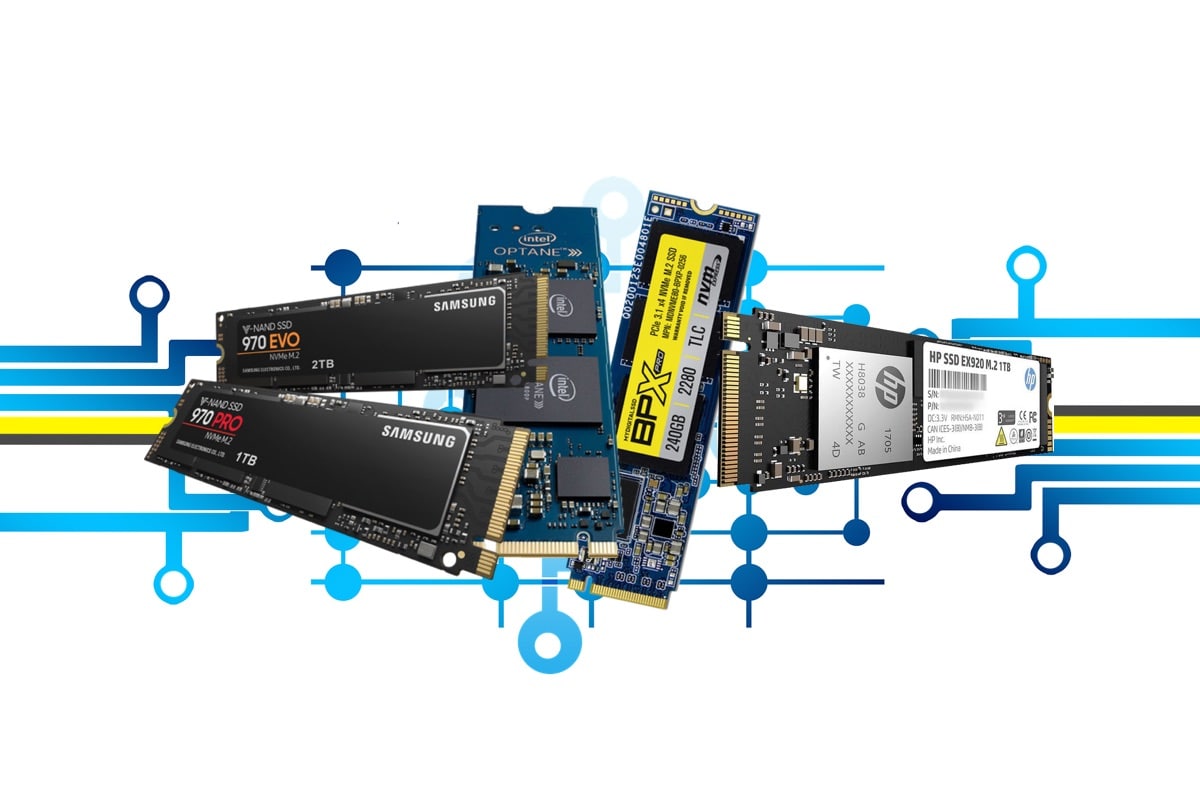
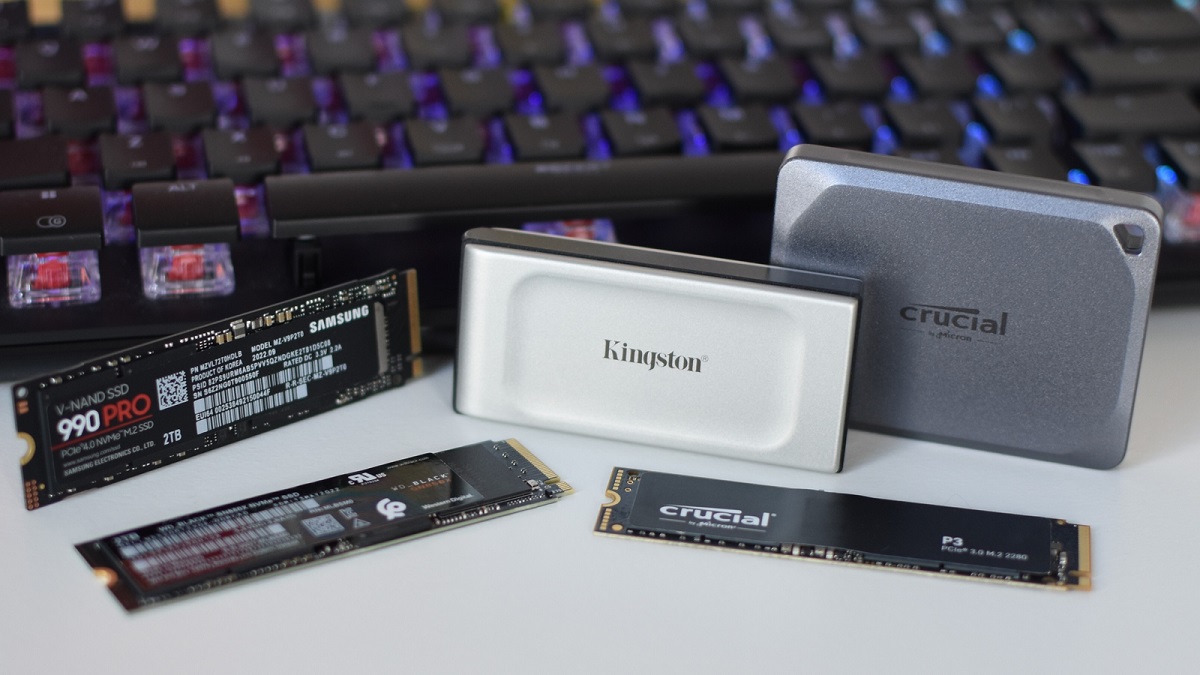
Types of SSDs
There are several types of SSDs available on the market, each with its own form factor and interface. Let’s take a closer look at the most common types:
1. SATA SSDs: SATA (Serial Advanced Technology Attachment) SSDs are the most common type of SSDs and are designed to be compatible with the SATA interface found on most motherboards. They come in the 2.5-inch form factor, similar in size to traditional HDDs, making them easy to install in desktop computers and laptops. SATA SSDs offer fast data transfer speeds and are an excellent choice for general computing tasks.
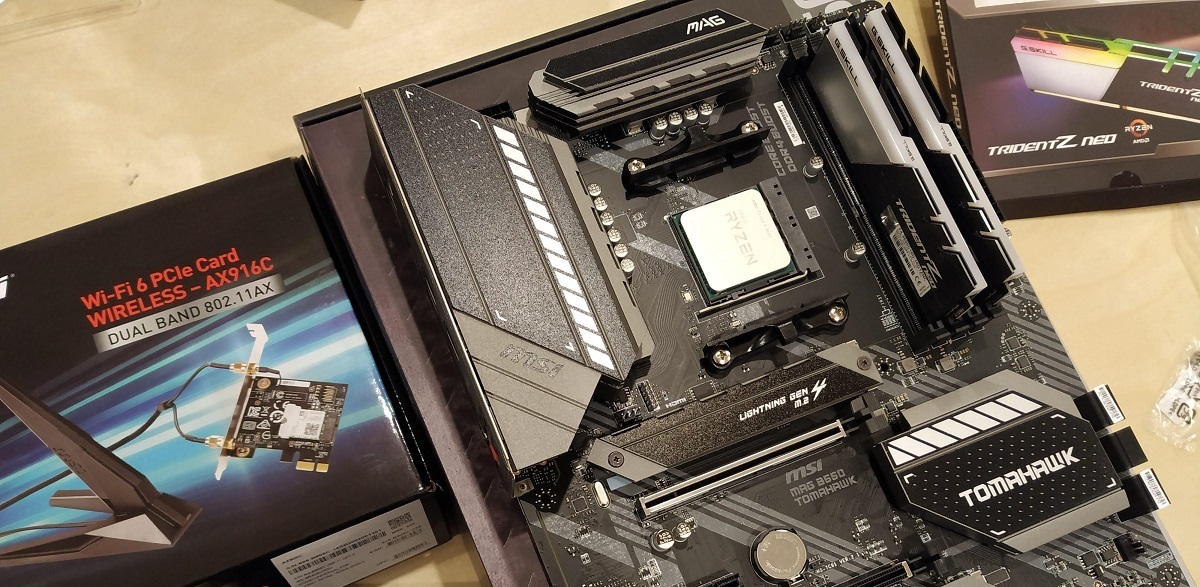
2. M.2 SSDs: M.2 SSDs are small, compact SSDs that connect directly to the motherboard via the M.2 slot. They come in a variety of lengths and widths and offer high-speed performance, making them ideal for ultrabooks, compact desktops, and other devices with limited space. M.2 SSDs can utilize either SATA or PCIe interface, so it’s important to check the specifications to ensure compatibility with your motherboard.
3. PCIe SSDs: PCIe (Peripheral Component Interconnect Express) SSDs are designed to connect directly to the PCIe slot on the motherboard. They offer the highest performance among all SSD types and are commonly used in high-end gaming PCs, workstations, and servers. PCIe SSDs utilize the PCIe 3.0 or 4.0 interface, providing blazing-fast data transfer speeds and extremely low latency.
It’s important to note that while SATA and M.2 SSDs are more commonly used, PCIe SSDs offer the highest performance but may come at a higher cost.
Now that we have covered the different types of SSDs, let’s continue by exploring where these SSDs are placed on the motherboard and how they are installed.
Where does the SSD go on the motherboard?
The placement of an SSD on the motherboard depends on the type of SSD you are using. Let’s take a look at the three common types of SSDs and where they are typically located on the motherboard:
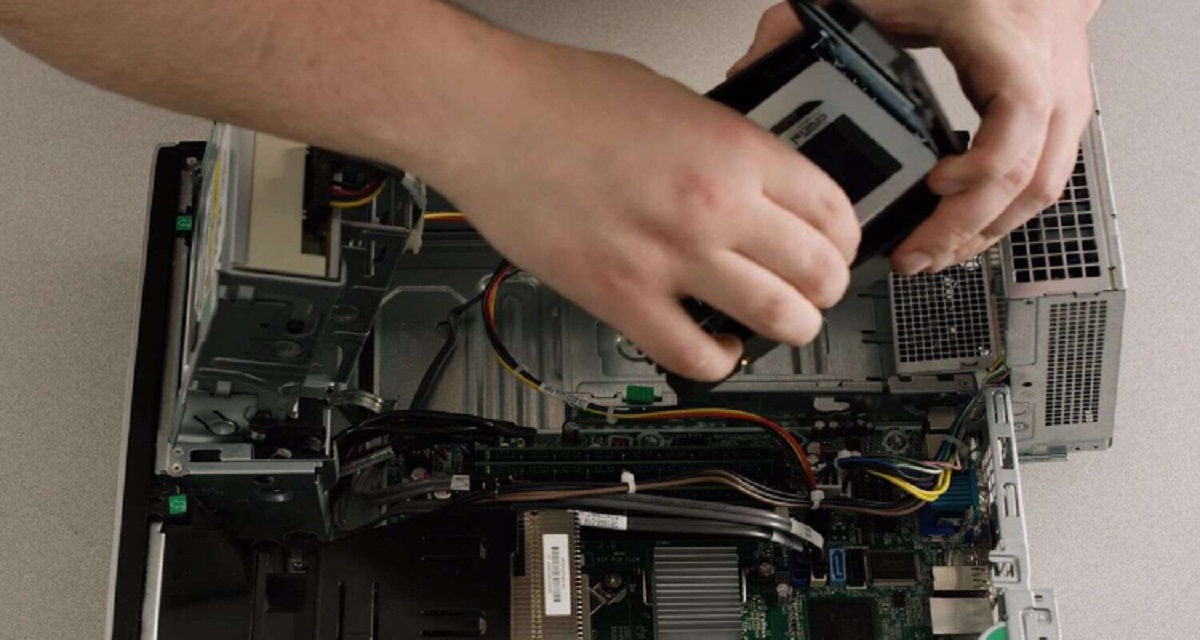
1. SATA SSDs: SATA SSDs usually connect to the motherboard using a SATA cable and are placed in the drive bays. Older motherboards may have several SATA ports, while newer ones may have M.2 slots dedicated for SATA SSDs. In the drive bays, SATA SSDs can be mounted using screws or tool-less mechanisms provided by the case manufacturer.
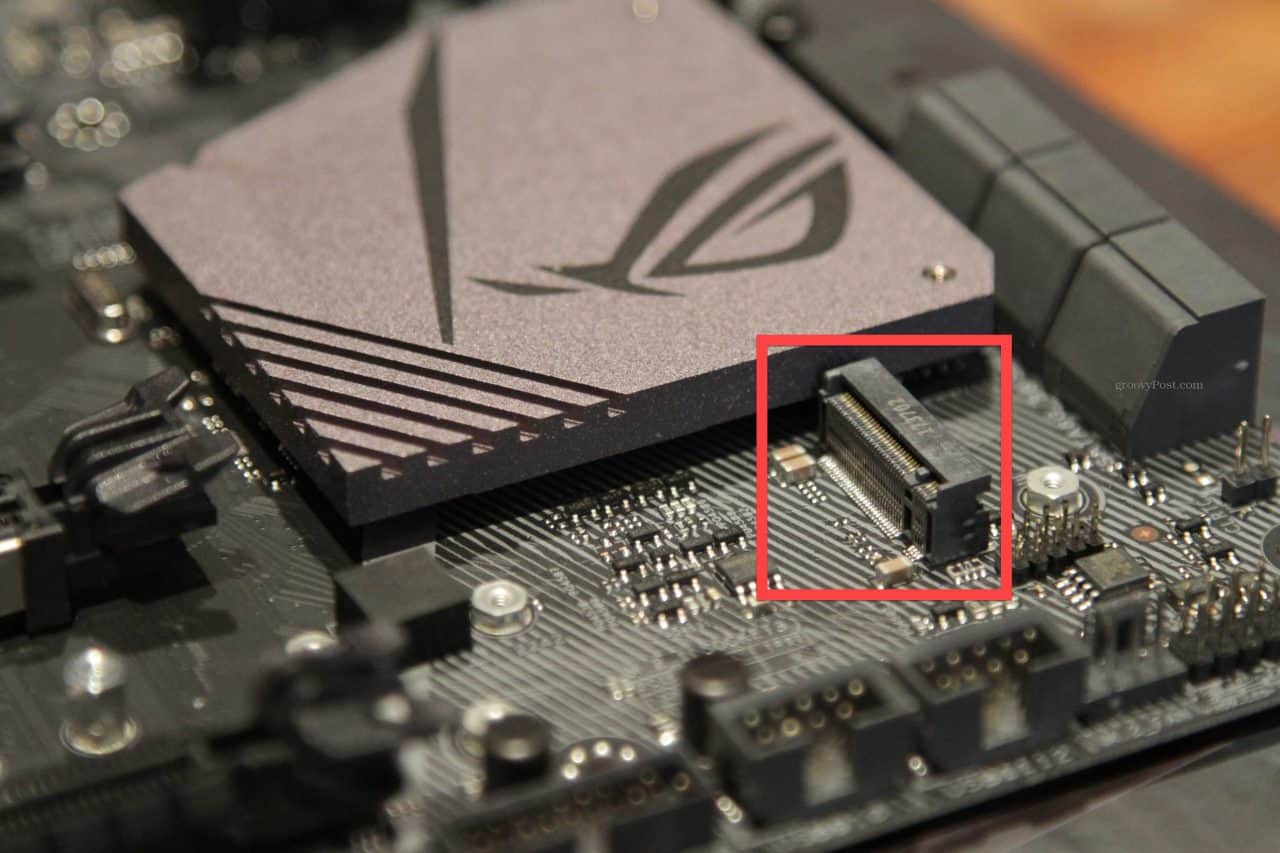
2. M.2 SSDs: M.2 SSDs have their specific slots on the motherboard called M.2 slots. These slots are usually located near the CPU, but the exact placement can vary depending on the motherboard model. M.2 slots can support both SATA and PCIe M.2 SSDs, so it’s essential to check the specifications of your motherboard to ensure compatibility with the type of M.2 SSD you have.
3. PCIe SSDs: PCIe SSDs are typically inserted into the PCIe slots on the motherboard. These slots are usually longer and have higher bandwidth capabilities compared to the standard PCIe slots used for expansion cards. Depending on the motherboard design, the PCIe slots may be located near the CPU or towards the bottom of the motherboard.
It’s important to consult your motherboard’s manual or specifications to identify the exact location of the SATA, M.2, and PCIe slots.
When installing an SSD, ensure that the motherboard and case support the specific type and form factor of the SSD you have. This will ensure proper connectivity and compatibility.
Now that we know where the SSDs are placed on the motherboard, let’s explore the different mounting methods for SSDs.
SATA SSDs
SATA SSDs are widely used and offer an affordable and reliable storage solution. To install a SATA SSD on your motherboard, you will need a SATA cable and an available SATA port on the motherboard. Here’s a step-by-step guide on installing a SATA SSD:
1. Start by identifying an empty drive bay in your computer case. Most cases have 2.5-inch or 3.5-inch drive bays. SATA SSDs come in a 2.5-inch form factor, so ensure you have an appropriate bay available.
2. Once you have identified a drive bay, secure the SSD in place. Depending on your case, you may need to use screws or a tool-less mechanism to secure the SSD in the bay.
3. Locate an available SATA port on your motherboard. SATA ports are usually labeled on the motherboard, and newer motherboards typically have multiple ports available.
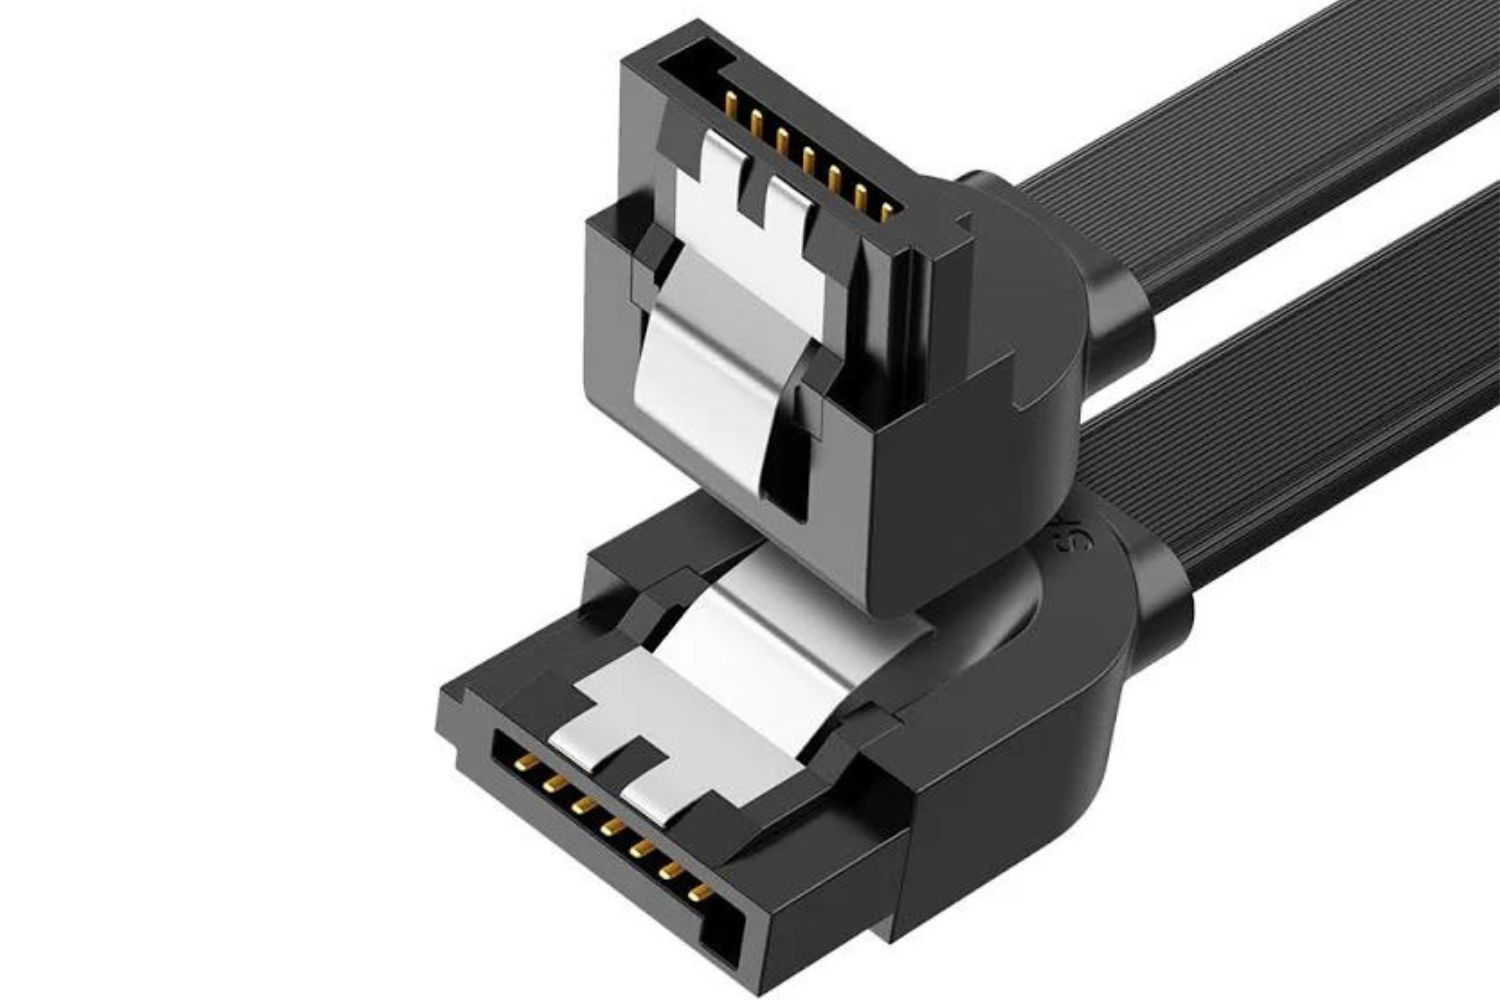
4. Connect one end of the SATA cable to the SSD and the other end to the SATA port on the motherboard. Ensure a secure connection is made, and the cable is firmly plugged in.
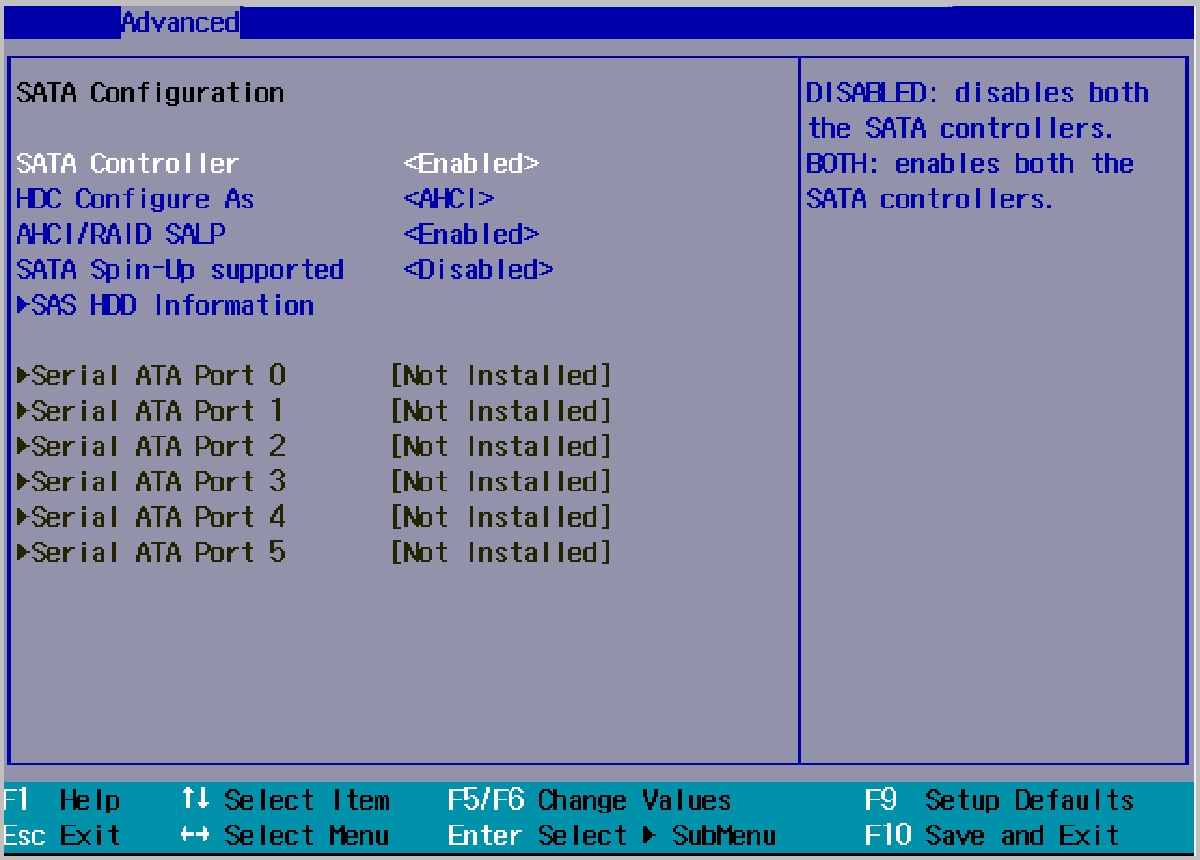
5. After connecting the SSD, power on your computer and enter the BIOS settings. Verify that the SSD is detected by the motherboard. If it is not detected, double-check the cable connections and BIOS settings.
6. Once the SSD is detected, you can proceed with installing an operating system or migrating data to the SSD. Follow the specific instructions for your operating system to complete the installation process.
It’s crucial to note that some motherboards may have specific connectors for SATA SSDs, often labeled as “SATA M.2.” In these cases, you may need an adapter or specific cable to connect the SATA SSD to the designated connector.
By following these steps, you can successfully install a SATA SSD on your motherboard and reap the benefits of faster data transfer speeds and improved storage performance.
Next, we will explore the installation process for M.2 SSDs, which is a different method compared to SATA SSDs.
M.2 SSDs
M.2 SSDs are a compact and high-performance storage solution that connect directly to the motherboard via the M.2 slot. Installing an M.2 SSD requires a compatible M.2 slot on the motherboard. Here’s a step-by-step guide on installing an M.2 SSD:
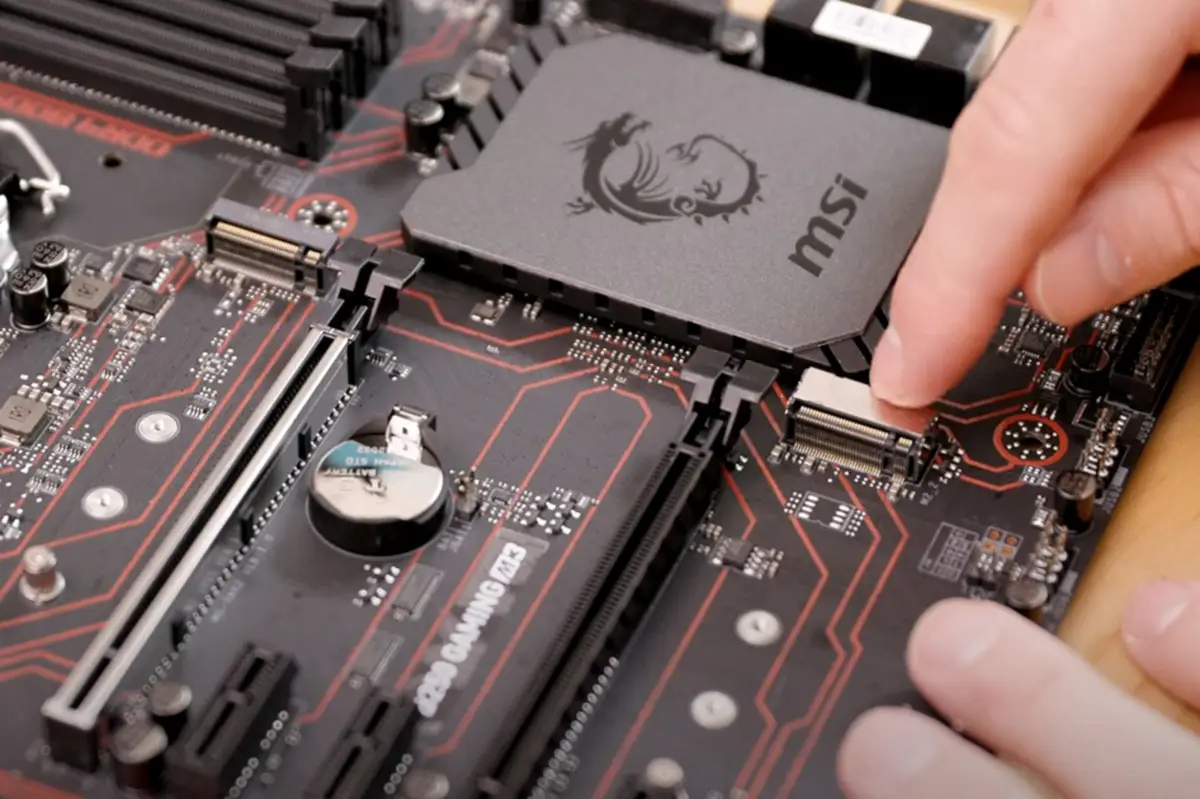
1. Start by locating the M.2 slot on your motherboard. The M.2 slot is typically located near the CPU, but the exact placement can vary depending on the motherboard model. Refer to your motherboard’s manual or specifications to identify the exact location.
2. Once you have located the M.2 slot, remove the screw or retention mechanism covering the slot, if present. This allows you to insert the M.2 SSD into the slot.
3. Carefully insert the M.2 SSD into the slot at a slight angle, aligning the notches or keying on the SSD with the slot on the motherboard. Gently press down on the SSD until it is seated firmly in the slot.
4. If your M.2 SSD requires a screw to secure it in place, use the provided screw to fasten the SSD to the motherboard. Do not overtighten the screw, as it may damage the SSD or the motherboard.
5. Once the M.2 SSD is installed, check the motherboard’s manual or specifications to determine if there are any specific BIOS settings or configurations required for proper recognition of the SSD.
6. After ensuring the M.2 SSD is recognized by the motherboard, you can proceed with installing an operating system or migrating data to the SSD. Follow the specific instructions for your operating system to complete the installation process.
It’s important to note that M.2 slots can support both SATA and PCIe M.2 SSDs. To ensure compatibility, check the specifications of your SSD and motherboard. SATA M.2 SSDs will operate at SATA speeds, while PCIe M.2 SSDs will deliver higher performance with faster data transfer rates.
By following these steps, you can successfully install an M.2 SSD on your motherboard and take advantage of its compact form factor and high-performance storage capabilities.
Next, we will explore the installation process for PCIe SSDs, which provides another level of storage performance.
PCIe SSDs
PCIe SSDs offer the highest level of storage performance and connect directly to the PCIe slot on the motherboard. The installation process for PCIe SSDs is slightly different compared to SATA and M.2 SSDs. Here’s a step-by-step guide on installing a PCIe SSD:
1. Start by identifying an available PCIe slot on your motherboard. PCIe slots are usually longer and have higher bandwidth capabilities compared to standard PCIe slots used for expansion cards. Refer to your motherboard’s manual or specifications to identify the PCIe slot that supports SSDs.
2. Remove any protective covers or brackets from the PCIe slot, if present. This will allow you to insert the PCIe SSD into the slot.
3. Carefully align the PCIe SSD with the PCIe slot and insert it firmly into the slot. Apply even pressure on both ends of the SSD, making sure it is seated securely in the slot. The PCIe SSD may require a bit of force to insert properly, so ensure that it is aligned correctly before applying pressure.
4. Once the SSD is inserted, secure it in place by fastening the screw or bracket that came with your motherboard. This helps prevent any accidental disconnections or movements of the SSD during operation.
5. After securing the SSD, check the motherboard’s manual or specifications for any BIOS settings that need to be configured for proper recognition of the PCIe SSD. Some motherboards may require enabling the PCIe slot in the BIOS settings.
6. Once the BIOS settings are properly configured, power on your computer and check if the PCIe SSD is detected by the motherboard. If it is not recognized, double-check the connections and BIOS settings.
7. After confirming the PCIe SSD is detected, you can proceed with installing an operating system or migrating data to the SSD. Follow the specific instructions for your operating system to complete the installation process.
PCIe SSDs offer incredible speed and performance, particularly in tasks that require high data transfer rates, such as gaming, content creation, and professional applications. They are a popular choice for gamers, professionals, and enthusiasts who demand top-tier storage performance.
By following these steps, you can successfully install a PCIe SSD on your motherboard and take advantage of its high-speed storage capabilities.
Next, we will explore the various mounting methods for SSDs, which are essential for securing them properly in your system.
Mounting Methods for SSDs
When it comes to mounting SSDs in your computer, there are several methods available depending on the type of SSD and the case you are using. Let’s explore the common mounting methods:
1. Screw Mounting: This is the most common method used for mounting 2.5-inch SATA SSDs. The SSD is secured in a 2.5-inch drive bay using screws. Most cases include specific mounting holes for 2.5-inch SSDs. Alternatively, some cases also offer tool-less mounting mechanisms, allowing you to insert the SSD into a tray or slot without the need for screws.
2. Bracket Mounting: Some cases include brackets or adapters that allow you to mount the SSD in a dedicated location within the case. These brackets provide a secure fit and help organize the cables and wires.
3. M.2 Standoff Mounting: When installing M.2 SSDs, especially longer ones, you may need to use a standoff mount. Standoff mounts are small screws or spacers that elevate the SSD above the motherboard to ensure it does not come into contact with other components. The standoff mounts are typically included with the motherboard or SSD.
4. M.2 Heat Sink: Some high-performance M.2 SSDs generate significant heat during operation. To maintain optimal performance and prevent throttling due to overheating, you can use a heat sink specifically designed for M.2 SSDs. These heat sinks help dissipate heat and provide better thermal management for the SSD.
Before mounting your SSD, it’s important to refer to the case and motherboard manuals to ensure compatibility with the specific mounting methods discussed above. Additionally, some cases offer cable management features such as SSD trays, routing clips, or Velcro straps that help organize the cables connected to the SSD, providing a clean and clutter-free build.
Proper mounting of SSDs is crucial to prevent any physical damage or disconnection during operation. Take the time to secure the SSD following the recommended mounting methods, ensuring a secure and stable fit.
Now that you are familiar with the various mounting methods, let’s move on to the installation processes for different types of SSDs.
Installation process for SATA SSDs
Installing a SATA SSD involves a straightforward process and requires a SATA data cable and an available SATA port on your motherboard. Here’s a step-by-step guide on how to install a SATA SSD:
1. Start by identifying an available 2.5-inch drive bay in your computer case. These drive bays are typically designed to fit 2.5-inch SSDs. Ensure that you have a compatible drive bay available for the SSD installation.
2. Once you have identified the drive bay, secure the SATA SSD in place. Many cases come with tool-less mechanisms that allow you to simply slide the SSD into the drive bay. If your case does not have these mechanisms, you can use screws to securely mount the SSD in place.
3. Next, locate an available SATA data port on your motherboard. These ports are usually labeled and can be found near the SATA power connectors. Connect one end of the SATA data cable to the SATA SSD and the other end to the SATA port on the motherboard. Ensure that the connection is secure.
4. Locate the SATA power connectors coming from your power supply unit (PSU). Connect one of these SATA power cables to the corresponding power connector on the SATA SSD. The SATA power connector should easily fit and securely attach to the SSD.
5. Once the SSD is securely connected to both the motherboard and the power supply, close the computer case and secure it using the case screws or latches.
6. Power on your computer and enter the BIOS settings. Verify that the SATA SSD is detected by the motherboard. If it is not detected, double-check the connections and ensure that the SSD is properly seated in the drive bay.
7. After confirming the detection of the SATA SSD, you can proceed with installing an operating system or migrating data to the SSD. Follow the specific instructions provided by the operating system or migration software to complete the installation process.
By following these steps, you can successfully install a SATA SSD in your computer, improving storage performance and benefiting from the advantages of solid-state technology.
Next, we will explore the installation process for M.2 SSDs, which offers a more compact and versatile storage solution.
Installation process for M.2 SSDs
Installing an M.2 SSD requires a different approach compared to SATA SSDs. M.2 SSDs are smaller and connect directly to the motherboard’s M.2 slot. Here’s a step-by-step guide on how to install an M.2 SSD:
1. Start by locating the M.2 slot on your motherboard. The M.2 slot is usually located near the CPU area, but the exact position can vary depending on the motherboard model. Refer to your motherboard’s manual or specifications to identify the specific M.2 slot for SSD installation.
2. Once you have located the M.2 slot, remove any screws or standoff mounts that may be covering or obstructing the slot. These screws or mounts are typically present to protect the M.2 slot during shipping and installation.
3. Carefully insert the M.2 SSD into the M.2 slot. Align the notches or keying on the SSD with the slot on the motherboard and gently press down on the SSD until it is fully seated. The SSD will be at a slight angle, but ensure it is securely placed in the slot.
4. If your M.2 SSD is longer or requires additional support, you might need to attach a standoff mount or bracket to secure the SSD in place. These mounts or brackets can usually be included with your motherboard or purchased separately.
5. Once the M.2 SSD is properly installed, use a small screw to secure it in place. Refer to your motherboard’s manual or specifications to determine the specific screw required for securing the M.2 SSD. Do not overtighten the screw.
6. With the M.2 SSD securely in place, you can now close the computer case and secure it using the case screws or latches.
7. Power on your computer and access the BIOS settings to ensure that the M.2 SSD is detected by the motherboard. If the SSD is not recognized, double-check the installation and connections to ensure everything is properly seated.
8. After confirming the detection of the M.2 SSD, you can proceed with installing an operating system or transferring data to the SSD. Follow the specific instructions provided by your operating system or data migration software to complete the installation process.
Following these steps will allow you to successfully install an M.2 SSD, taking advantage of its compact size and high-performance storage capabilities.
Next, let’s explore the installation process for PCIe SSDs, which provide even faster storage performance.
Installation process for PCIe SSDs
Installing a PCIe SSD requires a specific set of steps to properly connect and secure the SSD in the PCIe slot on the motherboard. Here’s a step-by-step guide on how to install a PCIe SSD:
1. Begin by identifying an available PCIe slot on your motherboard. PCIe slots are typically longer and have a higher bandwidth compared to standard PCIe slots used for expansion cards. Consult your motherboard’s manual or specifications to determine which PCIe slot is compatible with PCIe SSDs.
2. Remove any protective covers or brackets from the PCIe slot. These covers and brackets are often present to protect the PCIe slot during shipping or when not in use.
3. Carefully align the PCIe SSD with the PCIe slot on the motherboard. Ensure that the PCIe connector on the SSD lines up with the PCIe slot. Firmly insert the PCIe SSD into the slot. Gently push down on the SSD until it is fully seated in the slot. Note that the SSD may require a bit of force to insert properly.
4. Once the SSD is seated in the slot, secure it in place by using the screw or retention mechanism provided by your motherboard. Refer to the manual or specifications of your motherboard to identify the specific screw or mechanism required to secure the PCIe SSD.
5. With the PCIe SSD securely attached, close the computer case and fasten it using the case screws or latches.
6. Power on your computer and access the BIOS settings. Verify that the PCIe SSD is detected by the motherboard. If it is not recognized, double-check the installation, connections, and ensure that the SSD is properly seated in the PCIe slot.
7. After confirming the detection of the PCIe SSD, you can proceed with installing an operating system or transferring data to the SSD. Follow the specific instructions provided by your operating system or data migration software to complete the installation process.
Installing a PCIe SSD provides you with exceptional storage performance, making it an ideal choice for demanding applications and high-speed data transfers.
Following these steps will enable you to successfully install a PCIe SSD and harness its high-performance storage capabilities.
Next, we will explore some common troubleshooting tips to help resolve any issues you may encounter during the SSD installation process.
Troubleshooting SSD installation
While installing an SSD is typically a straightforward process, you may encounter some issues along the way. Here are some common troubleshooting tips to help resolve any problems that may arise during the SSD installation:
1. SSD not detected: If your SSD is not being detected by the motherboard, first, double-check all the connections. Ensure that the SATA or M.2 connection is secure and properly connected to the motherboard. If using a PCIe SSD, verify that the SSD is securely seated in the PCIe slot and that all necessary power connections are properly made. Additionally, check the BIOS settings to ensure that the SSD is enabled and set as a bootable device.
2. BIOS not recognizing SSD: If the SSD is not recognized in the BIOS, try updating your system’s BIOS to the latest version. Consult your motherboard manufacturer’s website for instructions on how to update the BIOS. Additionally, check for any specific settings or configurations related to SSD recognition in the BIOS and ensure they are properly configured.
3. SSD temperature issues: In some cases, high-performance SSDs may generate significant heat. If the SSD is running hot, consider installing a heatsink specifically designed for SSDs. This will help dissipate the heat and improve overall temperature management. Ensure that airflow within the case is adequate to prevent overheating of the SSD or other components.
4. Compatibility issues: Ensure that the SSD you have chosen is compatible with your motherboard and system. Check the specifications and requirements of both the SSD and the motherboard to ensure compatibility in terms of form factor, interface, and supported features. If compatibility issues persist, consider contacting the manufacturer or seeking support for further assistance.
5. Data migration issues: If you are migrating data from an existing drive to the newly installed SSD, ensure that you have properly cloned the data or transferred it correctly. Make sure to follow the instructions provided by the data migration software and verify the accuracy and integrity of the migrated data after the process is complete.
If you encounter any issues that cannot be resolved, it is recommended to consult the documentation provided with your SSD, motherboard, or seek support from the respective manufacturers. They can offer specific guidance based on the unique components and configurations of your system.
By troubleshooting and addressing any issues that arise during the installation process, you can ensure a successful and smooth SSD installation experience.
Next, let’s conclude our guide with a summary of the key points covered.
Conclusion
In conclusion, installing an SSD on your motherboard is a straightforward process once you understand the different types of SSDs and their respective placement. SATA SSDs are commonly installed in drive bays using screws or tool-less mechanisms, while M.2 SSDs connect directly to the motherboard’s M.2 slot. PCIe SSDs are inserted into PCIe slots on the motherboard for maximum performance.
When installing an SSD, it is important to follow the specific installation processes for each type and ensure compatibility with your motherboard and case. Securely mounting the SSD using screws, brackets, or standoffs is crucial for stability and reliable performance.
During the installation process, it is essential to check the BIOS settings to verify that the SSD is properly recognized. Updating the BIOS and configuring settings related to SSD recognition may be necessary in some cases.
If you encounter any issues, such as the SSD not being detected or compatibility problems, following troubleshooting steps such as checking connections, updating BIOS, or seeking support from manufacturers can help resolve the problems.
Overall, installing an SSD on your motherboard offers numerous benefits, including faster data transfer speeds, improved system responsiveness, and enhanced storage performance. Whether you choose a SATA, M.2, or PCIe SSD, properly installing and configuring it will significantly enhance your computing experience.
Now that you have a comprehensive understanding of SSD installation, you can confidently upgrade or build your system with the latest and most efficient storage solutions.