Importance of Nozzle to Plate Height
The nozzle to plate height, also known as the nozzle bed distance or first layer height, plays a crucial role in the 3D printing process. This measurement refers to the distance between the 3D printer’s nozzle and the print bed when the first layer is being deposited. While it may seem like a minute detail, the nozzle to plate height significantly impacts the overall print quality and success of a 3D print.
One of the main reasons why the nozzle to plate height is important is because it determines the adhesion of the printed object to the print bed. If the nozzle is too far from the plate, the filament may not adhere properly, leading to a weak and unstable print. On the other hand, if the nozzle is too close to the plate, the filament may get squished, causing the print to be too thin or even fail to extrude altogether.
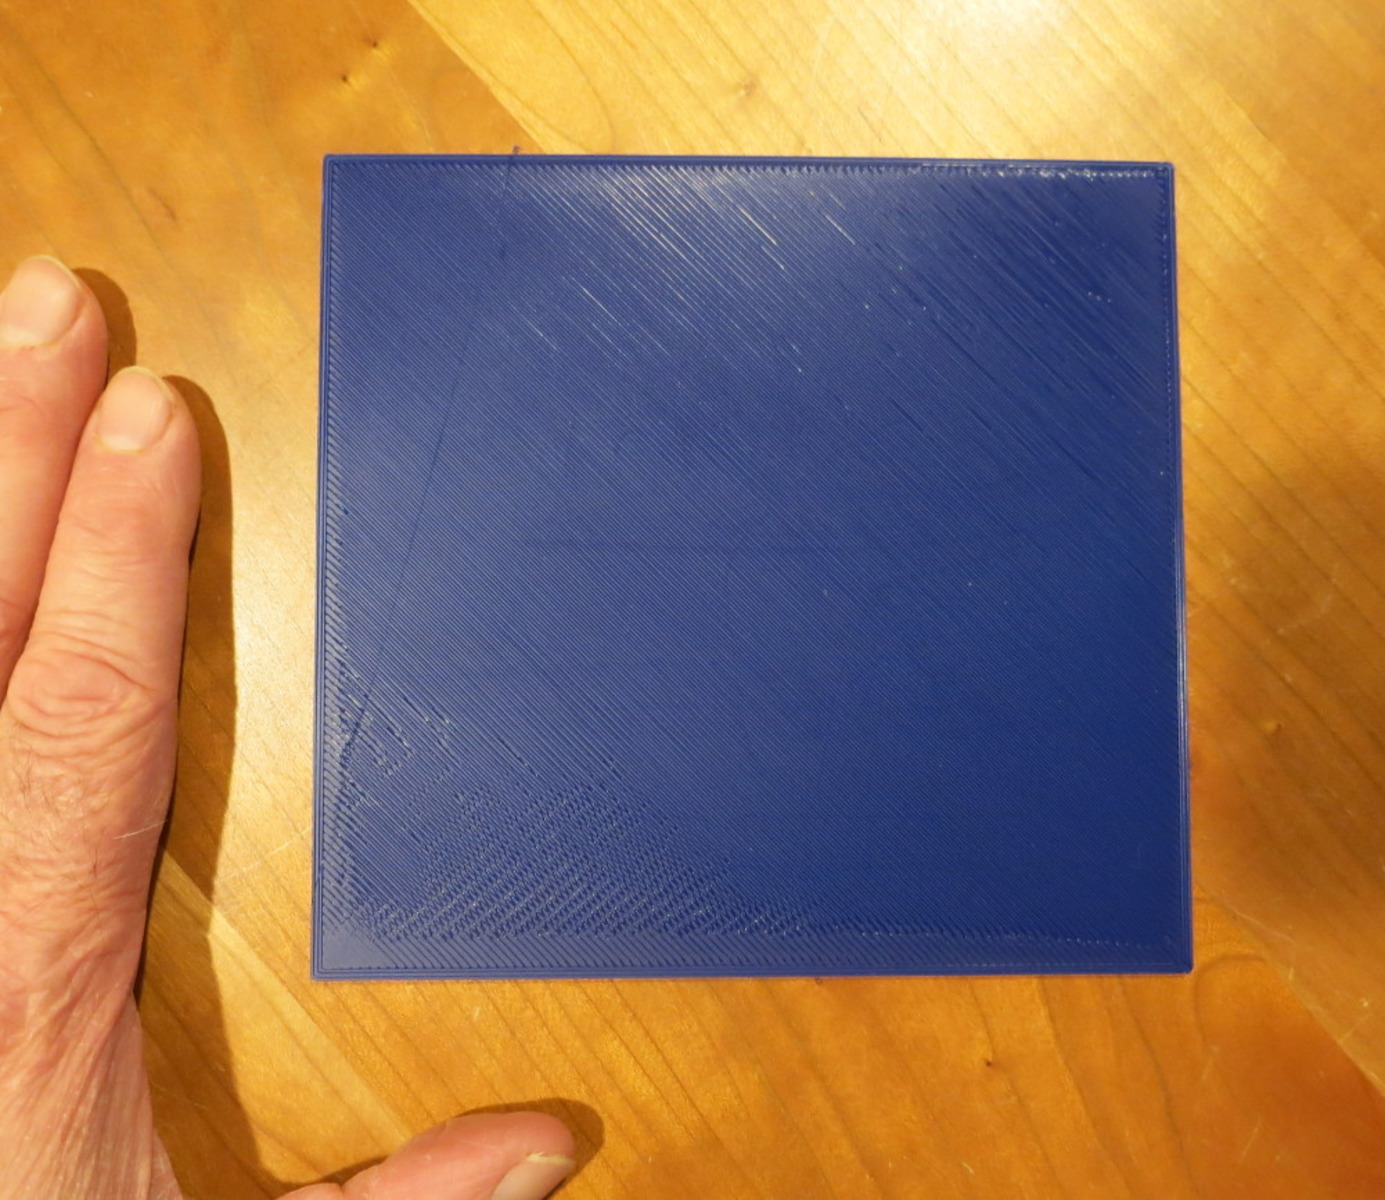
Another aspect affected by the nozzle to plate height is the surface finish of the printed object. A proper nozzle to plate height ensures that each layer of the print is deposited with precision, resulting in a smooth and uniform surface. If the height is not set correctly, there may be gaps between layers or excessive filament squishing, leading to a rough and uneven surface texture.
Furthermore, the nozzle to plate height affects the overall accuracy and dimensional accuracy of the printed object. When the height is properly set, each layer is deposited accurately, ensuring that the print matches the intended design specifications. However, if the height is off, the print may experience warping, distortion, or dimensional inaccuracies, compromising the final result.
It is important to note that the nozzle to plate height may vary depending on factors such as the type of filament being used, the print bed material, and the specific 3D printer model. Therefore, it is crucial to consider these factors when determining the appropriate nozzle to plate height for each print job.
Understanding the importance of the nozzle to plate height is essential for achieving high-quality 3D prints. Next, we will explore the factors to consider when determining the nozzle to plate height and different approaches to finding the ideal height for optimal print quality.
Factors to Consider when Determining Nozzle to Plate Height
When determining the nozzle to plate height for your 3D printer, there are several factors to take into consideration. These factors will help you find the optimal height for achieving the best print quality and adhesion. Let’s explore these factors in detail:
- Print Bed Material: Different print bed materials have varying characteristics, such as thermal conductivity and surface texture. These factors can affect the adhesion and the ideal nozzle to plate height. For instance, with a glass print bed, you may need a slightly higher nozzle to plate height compared to a textured build plate.
- Filament Type: The type of filament being used also influences the nozzle to plate height. Each filament has its own melting properties, flow rate, and adhesion characteristics. Experimenting with different heights is necessary to determine the optimal nozzle to plate distance for each specific filament.
- Layer Height: The layer height you choose for your print job will affect the optimal nozzle to plate height. Generally, if you are using a smaller layer height, a closer nozzle to plate distance may be required to ensure proper adhesion. However, with larger layer heights, you may need a slightly higher height to allow for proper filament flow and adhesion.
- Nozzle Diameter: The diameter of your 3D printer nozzle also plays a role in determining the nozzle to plate height. Different nozzle sizes require adjustments to the height to achieve optimal filament deposition and adhesion. Smaller nozzle diameters may necessitate a lower nozzle to plate height to ensure accuracy and precision.
- Leveling Calibration: Proper leveling calibration of the print bed is critical to achieving the correct nozzle to plate height. A well-leveled bed ensures that the distance remains consistent across the entire printing surface, resulting in uniform adhesion and print quality.
By taking these factors into account, you can fine-tune the nozzle to plate height for your specific printing requirements. However, it is important to note that finding the ideal height may involve some trial and error. Each printer and material combination may have different optimal settings, so experimentation and adjustment may be necessary.
In the next section, we will explore different approaches to determining the nozzle to plate height and strategies for achieving optimal print quality.
Different Approaches to Determining Nozzle to Plate Height
Setting the nozzle to plate height can be done through various approaches, each with its own advantages and considerations. The following are some common methods used to determine the optimal nozzle to plate height:
- Manual Adjustment: This approach involves manually adjusting the nozzle to plate height while observing the first layer as it is being printed. Start with a height that is slightly higher than the desired distance, then gradually lower the nozzle until the filament properly adheres to the print bed. This method requires close observation and fine-tuning but allows for precise control over the height.
- Paper Method: The paper method is a popular technique for determining the nozzle to plate height. It involves sliding a sheet of paper under the nozzle as it moves across the print bed. The ideal height is achieved when there is a slight amount of friction between the nozzle and the paper. This method is simple and effective, providing a reliable starting point for nozzle to plate height adjustment.
- Auto-Leveling Sensors: Many modern 3D printers come equipped with auto-leveling sensors. These sensors scan the print bed and adjust the nozzle to plate height automatically. This approach saves time and helps maintain consistent height across the entire print surface. However, it is important to ensure that the sensor is properly calibrated and functioning correctly.
- Software-Assisted Calibration: Some slicing software provides features that assist in determining the nozzle to plate height. This may include features like “First Layer Height Adjustment” or “Live Z Calibration.” These tools allow for adjusting the height during the print preparation process, eliminating the need for manual adjustment during printing.
- Dial Indicator: A dial indicator is a precision measurement tool that can be used to accurately measure the distance between the nozzle and the print bed. This method is more advanced and requires mounting the dial indicator to the printer carriage. It provides precise measurements but may require additional setup and calibration.
It’s important to note that the chosen approach may depend on the specific 3D printer model, available tools, and personal preference. Experimentation with different methods may be needed to find the most suitable approach for obtaining consistent and high-quality prints.
In the next section, we will discuss the best height to achieve optimal print quality and provide tips for achieving the perfect nozzle to plate height.
Best Height for Optimal Print Quality
When it comes to achieving optimal print quality, finding the best nozzle to plate height is crucial. While the exact height may vary depending on factors like printer model, filament type, and print bed material, there are some general guidelines to consider:
1. Fine-Tuning: Fine-tuning the nozzle to plate height is essential for achieving optimal print quality. The ideal height should allow for good filament adhesion without excessive squishing. Gradually adjust the height in small increments and observe the first few layers to find the sweet spot.
2. Leveling: Ensuring proper leveling of the print bed is essential. An uneven print bed can lead to inconsistent nozzle to plate height, resulting in varying print quality across different areas of the print. Regularly check and calibrate the print bed to maintain proper leveling.
3. First Layer Smoothing: When calibrating the nozzle to plate height, pay close attention to the appearance of the first layer. It should be smooth and evenly deposited. Adjust the height until the filament is properly adhering to the print bed without any gaps or excessive squishing.
4. Test Prints: Conducting test prints can help in determining the optimal nozzle to plate height. Use simple calibration prints or small objects with intricate details to evaluate the print quality. Make adjustments to the height and observe the results until the desired print quality is achieved.
5. Material-Specific Settings: Different filament materials may require slightly different nozzle to plate heights to achieve optimal print quality. Take note of any manufacturer recommendations or community guidelines related to nozzle to plate height for specific filament types.
6. Record and Document: Keep a record of successful nozzle to plate height settings for different filaments and print scenarios. This can serve as a reference for future prints and help streamline the calibration process.
Ultimately, finding the best nozzle to plate height for optimal print quality is an iterative process. It may require some experimentation and adjustments to find the perfect setting. Remember to consider the specific requirements of your printer, filament, and print bed to achieve the best results.
In the next section, we will discuss common pitfalls to avoid when setting the nozzle to plate height and provide tips for achieving the perfect height consistently.
Common Pitfalls to Avoid when Setting Nozzle to Plate Height
Setting the nozzle to plate height can be a challenging task, especially for beginners. To ensure successful 3D prints and avoid potential issues, it’s important to be aware of common pitfalls when adjusting the nozzle to plate height. Here are some pitfalls to avoid:
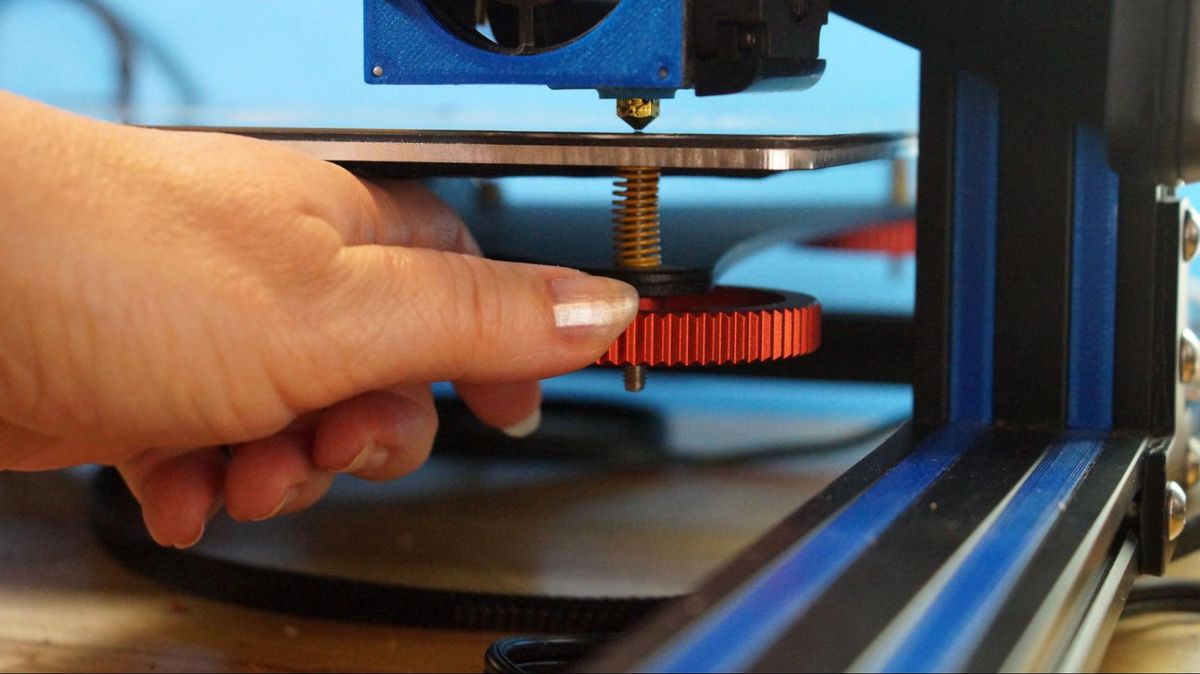
1. Incorrect Leveling: Improperly leveled print beds can lead to uneven nozzle to plate height and inconsistent print quality. Ensure that the print bed is properly leveled before adjusting the nozzle height. Use tools like leveling knobs or auto-leveling sensors to ensure a level surface.
2. Extreme Heights: Setting the nozzle too close or too far from the plate can cause problems. If the nozzle is too close, it can lead to filament squishing and poor print quality. Conversely, if the nozzle is too far, the filament may not adhere properly. Find a balance where there is proper adhesion without excessive filament squishing.
3. Neglecting Filament Type: Different filament types require different nozzle to plate heights. Neglecting to consider the characteristics of the filament can result in poor adhesion, warping, or clogging issues. Adjust the nozzle to plate height according to the specific requirements of the filament being used.
4. Skipping Calibration: Many 3D printers come with calibration features or processes, such as auto-leveling or software-assisted leveling. Skipping these calibration steps can lead to inaccuracies in nozzle to plate height and compromised print quality. Always perform calibration to ensure accurate measurements.
5. Overrelying on Generic Settings: Generic settings found online or provided by the printer manufacturer may serve as a starting point but may not be optimal for your specific setup. Each printer, filament, and print bed combination is unique. Avoid solely relying on generic settings and spend time fine-tuning the nozzle to plate height for your specific setup.
6. Inconsistent Monitoring: It’s important to monitor the initial layers of a print job when adjusting the nozzle to plate height. Inconsistent monitoring or not observing the print process can result in missed opportunities to make necessary adjustments. Stay vigilant and pay close attention during the initial layers.
By avoiding these common pitfalls, you can increase the chances of achieving the desired print quality and minimize troubleshooting efforts. In the next section, we will provide some practical tips for achieving the perfect nozzle to plate height consistently.
Tips for Achieving the Perfect Nozzle to Plate Height
Setting the perfect nozzle to plate height is essential for achieving high-quality 3D prints. To help you achieve consistent and precise nozzle to plate height adjustments, here are some tips to consider:
1. Start with a Calibration Print: Begin by printing a calibration object specifically designed to help determine the optimal nozzle to plate height. These prints often consist of multiple layers with varying shapes and features, allowing you to assess the print quality and make necessary adjustments.
2. Use Multiple Test Points: When fine-tuning the nozzle to plate height, it’s helpful to test multiple points across the build plate. This ensures that the height is consistent throughout the printing surface and minimizes the risk of experiencing print issues in specific areas.
3. Observe the First Layer: Pay close attention to the appearance of the first layer of the print. It should be evenly deposited and properly adhered to the print bed. Adjust the nozzle to plate height until you achieve a smooth and consistent first layer without any gaps or excessive squishing.
4. Consider Filament Specifics: Different filaments have unique characteristics, including their flow rates, adhesion properties, and optimal printing temperatures. Take these factors into account when determining the nozzle to plate height. Consult the manufacturer’s recommendations or community guidelines for specific filament types.
5. Document Your Settings: Keep a record of the nozzle to plate height settings that work best for different filaments, print bed materials, and print scenarios. Maintaining a documentation system allows for easy reference and saves time when setting up future prints.
6. Gradually Adjust the Height: When fine-tuning the nozzle to plate height, make small adjustments at a time. This allows for precise control and minimizes the risk of making drastic changes that could negatively impact print quality. Gradual adjustments help you achieve the optimal height more effectively.
7. Regularly Check Bed Leveling: Proper and consistent bed leveling is crucial for accurate nozzle to plate height. Regularly check and recalibrate the print bed to ensure it is level. Unleveled surfaces can lead to uneven heights and compromised print quality.
8. Take Advantage of Software Features: Utilize features provided by slicing software to assist in determining and adjusting the nozzle to plate height. Features like “First Layer Height Adjustment” or “Live Z Calibration” can significantly simplify the process and provide more precise control over the height settings.
9. Learn from Failed Prints: Failed prints can provide valuable insights into nozzle to plate height issues. Analyze failed prints to identify patterns and adjust the height accordingly. Learning from mistakes helps in refining the nozzle to plate height for future successful prints.
Implementing these tips will help you achieve the perfect nozzle to plate height consistently, resulting in improved print quality and overall 3D printing success. In the next section, we will discuss common troubleshooting strategies for nozzle to plate height-related issues.
Troubleshooting Nozzle to Plate Height Issues
While setting the nozzle to plate height is crucial for high-quality 3D printing, sometimes issues can arise that require troubleshooting. Here are some common nozzle to plate height-related issues and strategies to resolve them:
1. Poor Adhesion: If the print is not sticking to the print bed, the nozzle to plate height may be too high. Try decreasing the height slightly to allow for better filament adhesion. Additionally, ensure that the print bed is clean and free from any debris or residue that could affect adhesion.
2. Filament Squishing: If the filament is too squished and compressed after deposition, the nozzle to plate height may be too low. Increase the height slightly to provide more room for the filament to flow without excessive compression. Proper filament flow results in a smoother and more uniform print.
3. Gaps or Gaps Between Layers: If you notice gaps or uneven layers in the print, the nozzle to plate height might be too high or too low. Adjust the height in small increments until the layers are properly deposited without any gaps. Finding the right balance is key to achieving a consistent and gap-free print.
4. Warping or Curling: If the corners or edges of the print are lifting or curling, it could be a sign of incorrect nozzle to plate height. Ensure that the first layer is well-adhered to the print bed by adjusting the height. Additionally, consider using a heated bed or applying adhesive solutions like glue sticks or hairspray to improve adhesion and reduce warping.
5. Inconsistent Print Quality: Inconsistent print quality, such as variation in layer height or surface finish, often indicates an uneven nozzle to plate height. Recheck the print bed leveling and make necessary adjustments to ensure a consistent distance throughout the entire printing surface.
6. Excessive Filament Drag: If the extruder is visibly dragging or scraping against the print or if the layers have an uneven surface texture, it’s a sign that the nozzle to plate height is too low. Increase the height slightly to reduce filament dragging and achieve proper layer deposition.
7. Jamming or Clogging: A nozzle to plate height that’s too low can cause filament to get stuck or clog the extruder. Ensure that the height provides enough clearance for the filament to flow smoothly. If the issue persists, check for other factors like extruder temperature, filament quality, or extruder calibration.
8. Print Bed Damage: An incorrect nozzle to plate height can cause damage to the print bed, especially if the nozzle is scraping against the surface. Regularly inspect the print bed for any signs of damage or wear and make necessary adjustments to prevent further issues.
When troubleshooting nozzle to plate height issues, it’s important to make incremental adjustments and monitor the print quality after each change. Patience and meticulous observation will help identify the underlying issues and make the necessary adjustments for improved print outcomes.
In the next section, we will summarize the key points covered in this article regarding the nozzle to plate height.
Conclusion
Setting the nozzle to plate height correctly is a crucial step in achieving optimal print quality and successful 3D prints. By understanding the importance of this measurement and considering factors such as print bed material, filament type, and layer height, you can make informed decisions when adjusting the nozzle to plate height.
Using different approaches such as manual adjustment, the paper method, auto-leveling sensors, software-assisted calibration, or dial indicators can help determine the optimal nozzle to plate height for your specific printer setup. It may require some experimentation and fine-tuning to find the perfect setting, but the effort will be worth it for achieving consistent and high-quality prints.
Avoiding common pitfalls such as incorrect leveling, extreme height settings, neglecting filament specifics, overrelying on generic settings, inconsistent monitoring, and skipping calibration is essential. By following best practices and applying practical tips, including starting with calibration prints, using multiple test points, documenting your settings, and gradually adjusting the height, you can achieve the perfect nozzle to plate height consistently.
If you encounter any issues related to nozzle to plate height, troubleshooting strategies such as adjusting the height for better adhesion, reducing filament squishing, filling gaps, addressing warping, ensuring consistent print quality, reducing excessive filament drag, resolving jamming or clogging, and checking for print bed damage can help resolve the problem.
By paying attention to the details of nozzle to plate height and continuously improving your understanding and techniques, you can enhance your 3D printing experience and produce high-quality prints with precision and accuracy.
Remember, finding the optimal nozzle to plate height is an ongoing process that requires practice, patience, and a willingness to experiment. With persistence and attention to detail, you’ll be able to master this essential aspect of 3D printing and create impressive and successful prints.