Introduction
Welcome to the world of Android development! If you’re new to this exciting field, you may have heard the term “Android Activity” thrown around quite a bit. But what exactly is an Android Activity? In this article, we will dive into the fundamentals of Android Activities, explore their importance in the Android ecosystem, and understand how they function within an Android application.
An Android Activity can be thought of as a single, self-contained screen within an Android application. It serves as the building block of the user interface and encapsulates a specific set of functionalities and interactions. Activities are crucial in providing a seamless user experience and facilitating user interactions with the app.
Think of an Activity as a window through which users can view and interact with the content of your app. Each Activity has its own lifecycle, meaning it has different states and is responsible for carrying out specific tasks during its lifetime. Understanding the lifecycle of an Activity is key to efficiently managing resources and ensuring a smooth user experience.
Activities can be thought of as separate entities that work together to create the overall user experience in an Android app. They can communicate with each other, pass data between themselves, and be launched in different ways, such as from a button click or from another Activity. Understanding how activities interact with each other and managing the Activity stack is crucial for maintaining a coherent and intuitive user flow.
In this article, we will explore the anatomy of an Activity, dive into the lifecycle of an Activity, learn how to create and start Activities, and discover best practices for managing and interacting with Activities. By the end, you will have a solid understanding of how Activities work in Android and be able to create dynamic and user-friendly applications.
What is an Android Activity?
At its core, an Android Activity is a single screen or user interface component within an Android application. It is responsible for presenting and managing the visual elements, responding to user interactions, and coordinating with other components to provide a cohesive user experience.
Think of Activities as the building blocks of an Android app, where each Activity represents a specific task or functionality. For example, in a social media app, you may have separate Activities for the login page, news feed, profile view, and messaging interface.
An Activity is defined as a subclass of the `Activity` class in Android, which provides the basic structure and functionality required for an Activity to exist. Each Activity has its own layout file, which determines the visual arrangement of the user interface elements.
In addition to the visual aspect, Activities also handle user interactions and respond to events such as button clicks, menu selections, and touch gestures. For instance, when a user taps a button to submit a form, it triggers a callback in the corresponding Activity, allowing it to perform the necessary operations or navigate to another Activity.
Activities also play a vital role in managing the state and lifecycle of an Android app. They can be thought of as having various states, such as paused, resumed, or destroyed, based on user interactions or system events. Understanding the lifecycle of Activities is crucial for proper resource management, saving and restoring app data, and providing a seamless user experience.
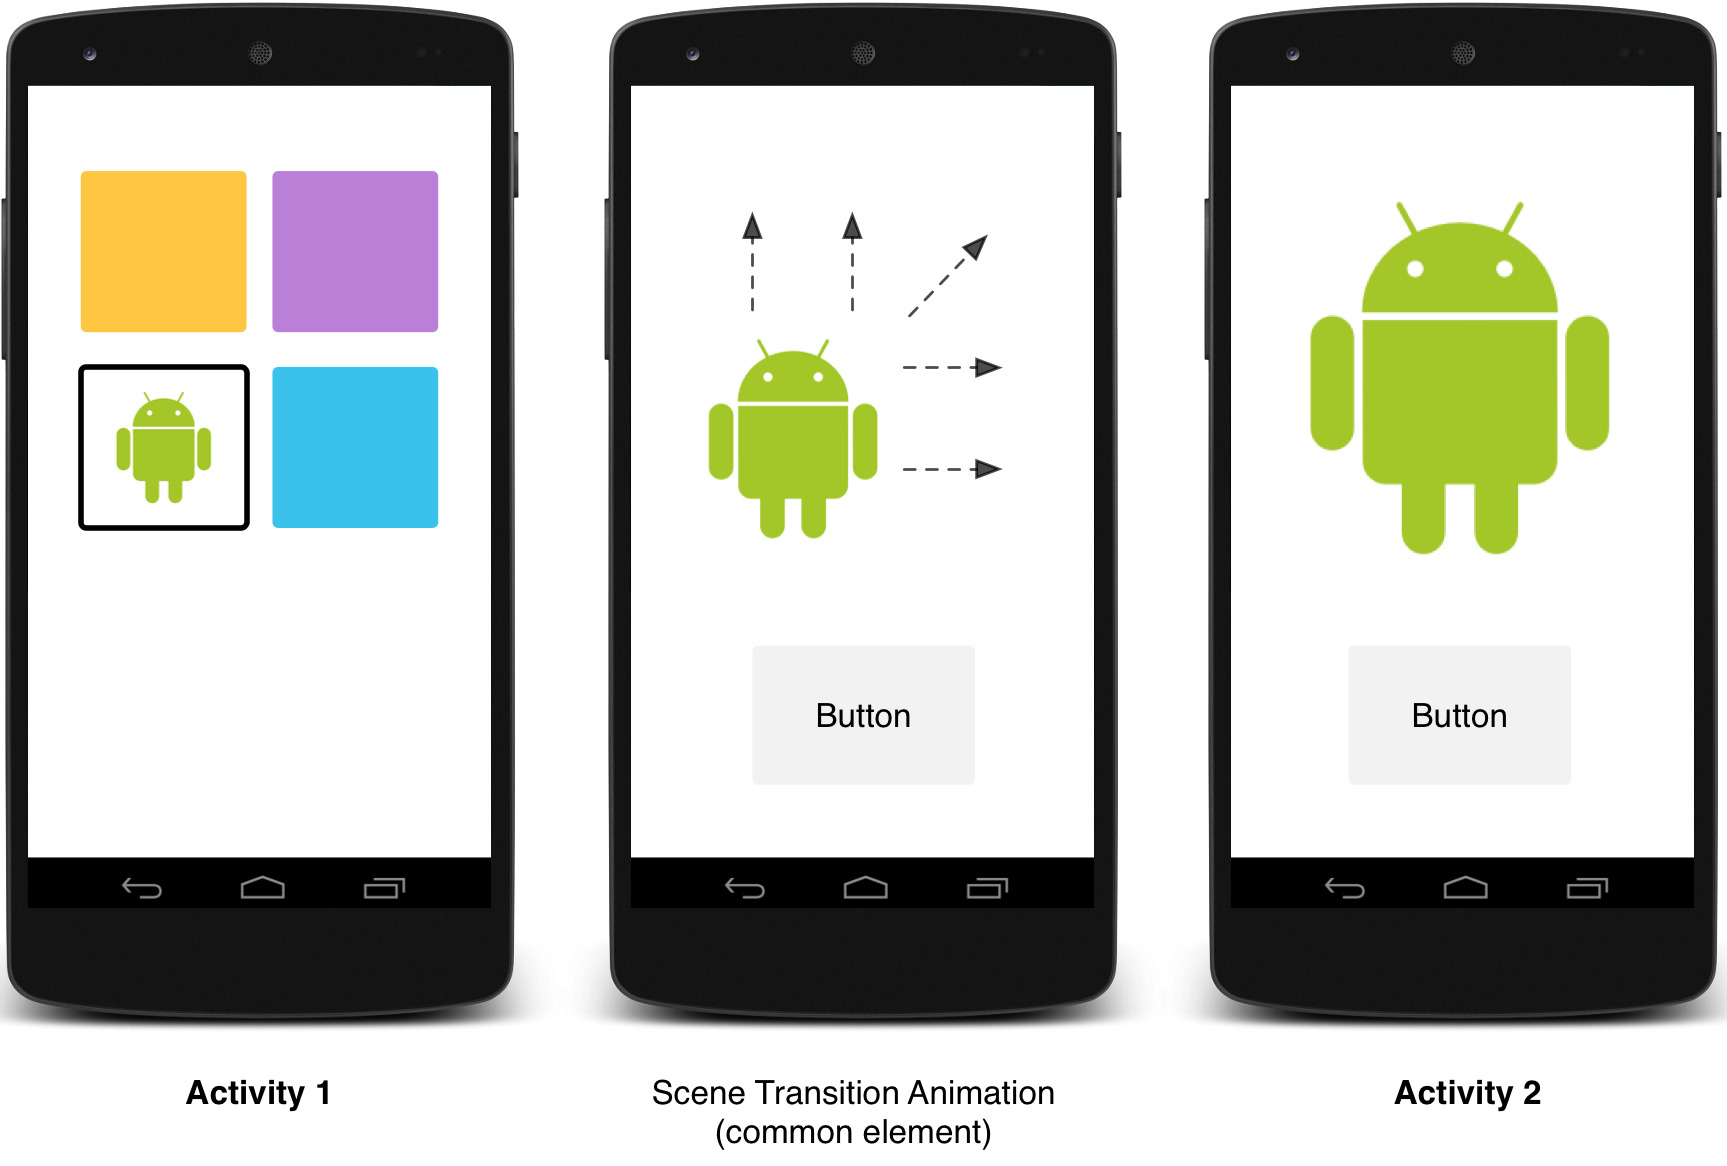
One of the key features of an Activity is its ability to be launched and used in different ways. Activities can be started within an app, either by user interactions or programmatically, and they can also be launched by other activities or even external applications. This flexibility allows for smooth navigation and integration between different parts of an app or between different apps.
Overall, an Android Activity is a key component of an Android application that provides the user interface, handles user interactions, and manages the lifecycle and state of the app. Understanding how Activities work and how they interact with other components is essential for building robust and engaging Android apps.
Anatomy of an Activity
To understand the inner workings of an Android Activity, let’s explore its key components and their roles in creating a functional user interface.
1. Layout: An Activity is associated with a layout file that defines the visual structure of the user interface. This file is typically written in XML and contains various widgets like buttons, text views, images, and more. The layout determines how the elements are arranged and styled on the screen.
2. Views: Views are the individual elements within an Activity’s layout, such as buttons, text fields, or images. Each View has a unique identifier that is used to reference and manipulate it programmatically. Views are responsible for displaying information, handling user interactions, and responding to events.
3. Intents: Intents are an essential part of Activities as they facilitate communication between different components within an app, as well as between different apps. An Intent can be used to start an Activity, pass data between Activities, or even launch an Activity in a different app. It acts as a message carrying information, representing a user’s intention or an app’s request.
4. Activity Lifecycle: An Activity has a well-defined lifecycle with various states. The lifecycle methods allow you to perform specific tasks when an Activity is created, started, resumed, paused, stopped, or destroyed. These methods provide hooks for managing resources, saving and restoring state, and maintaining the user experience even when the app’s state changes.
5. Event Handlers: Event handlers are methods in an Activity that respond to user interactions and system events. These methods are used to capture button clicks, touch events, menu selections, and more. By implementing event handlers, you can define the behavior of your app when a user performs certain actions.
6. Back Stack: Android maintains a stack of Activities, known as the back stack, to manage the navigation flow within an app. Each time a new Activity is started, it is added to the top of the stack, and when the user navigates back, the topmost Activity is popped off the stack. Managing the back stack is important for providing a smooth and intuitive user experience.
Understanding the various components of an Activity and their interactions is crucial for building functional and user-friendly Android applications. By mastering the anatomy of an Activity, you’ll have the knowledge to create engaging user interfaces, handle user interactions effectively, and provide a seamless navigation experience for your app users.
Lifecycle of an Activity
The lifecycle of an Android Activity refers to its different states and the sequence of events that occur as the Activity is created, started, paused, resumed, stopped, and destroyed. Understanding the Activity lifecycle is crucial for managing resources, saving and restoring data, and providing a seamless user experience.
1. onCreate(): This is the first method called when the Activity is created. It is typically used to initialize important components, such as setting up the layout, binding data, or initializing variables. This method is only called once during the lifetime of an Activity.
2. onStart(): This method is called when the Activity becomes visible to the user but is not yet interactable. It is used to perform any necessary setup before the Activity becomes active.
3. onResume(): This is called when the Activity is ready for the user to interact with. It is the most crucial state of an Activity, as it indicates that the Activity is in the foreground and actively running. Any interaction, such as capturing user input or starting animations, should be handled in this state.
4. onPause(): This is called when the Activity loses focus, either by another Activity taking precedence or by the user navigating to another app. This state is used to save any necessary data or perform cleanup operations before the Activity moves to the background.
5. onStop(): This method is called when the Activity is no longer visible to the user. It may happen when the Activity is completely hidden or when another Activity is being started. Any resources that are not needed in the background should be released in this state.
6. onDestroy(): This is the final method called before the Activity is destroyed. It is used to perform any necessary cleanup tasks, such as releasing resources or unregistering listeners. Once this method is called, the Activity is considered finished and will be removed from memory.
It’s important to note that an Activity can transition through different lifecycle states in response to various events, such as screen rotations, incoming phone calls, or system-level changes. By understanding the lifecycle callbacks and their order, you can manage these events effectively and maintain a consistent user experience throughout the lifetime of your app.
During the lifecycle of an Activity, the system may also call methods like onRestart(), onSaveInstanceState(), and onRestoreInstanceState() to handle specific scenarios, such as when an Activity is brought back to the foreground or when the system needs to save and restore the state of the Activity.
By properly handling the lifecycle of an Activity, you can optimize resource usage, provide a smooth multitasking experience, and ensure that your app behaves correctly in different scenarios. It’s essential to manage the lifecycle callbacks efficiently, handle configuration changes, and save and restore data to create robust and user-friendly Android applications.
Creating and Starting Activities
In Android, creating and starting Activities is a fundamental process that allows you to navigate between different screens or functionalities within your app. There are multiple ways to create and start Activities, depending on the desired behavior and context.
1. Declaring Activities in the Manifest: To use an Activity in your app, you need to declare it in the AndroidManifest.xml file. This tells the system that the Activity exists and can be launched. The declaration includes information such as the Activity’s name, its launcher icon, the intent filters, and any required permissions.
2. Explicit Intent: An explicit intent is used to start a specific Activity within your app. You define the target Activity class and create an intent object that explicitly specifies which Activity should be started. This is commonly used when navigating between Activities within the same app.
3. Implicit Intent: An implicit intent is used to start an Activity based on a certain action or category. For example, if you want to open a web page, you can create an intent with the action “ACTION_VIEW” and set the data URI to the desired web page. The system then searches for an appropriate Activity to handle the intent and launches it. Implicit intents are useful when you want to invoke functionality provided by other apps on the device.
4. startActivityForResult(): This method is used when you want to start an Activity and receive a result back from it. It is commonly used in scenarios where you need to collect user input or retrieve data from another screen. The started Activity can set a result and send it back to the calling Activity, allowing you to handle the result and make decisions based on it.
5. Launch Modes: Android provides different launch modes for Activities, which determine how instances of the Activity are created and behave. The four launch modes are standard, singleTop, singleTask, and singleInstance. Each mode has its own behavior in terms of creating new instances, placing Activities on the stack, and managing the flow of the app. Launch modes are useful in managing the navigation flow and handling back stack behavior.
6. Task and Back Stack Management: Android maintains a stack of Activities, known as the back stack, to manage the navigation flow within an app. When you start a new Activity, it is added to the top of the stack, and when the user navigates back, the topmost Activity is popped off the stack. You can manipulate the back stack using various flags and methods to control how Activities are handled and displayed.
Creating and starting Activities is a fundamental aspect of Android development, allowing you to create dynamic and interactive apps. By understanding the different methods and options available, you can navigate between screens, initiate actions, and seamlessly transition between different parts of your app.
Managing Activity Stack
When developing Android applications, managing the activity stack is essential to ensure a smooth and intuitive user experience. The activity stack is a system-managed stack that keeps track of activities as they are started and navigated between within an app. Proper management of the activity stack allows for seamless navigation, efficient memory usage, and control over how activities are displayed.
1. Launch Modes: Android provides different launch modes that define how activities are created and organized within the stack. The four launch modes are:
- Standard: Each time an activity is started, a new instance is created and added to the stack.
- SingleTop: If the topmost activity on the stack is of the same type as the one being started, instead of creating a new instance, the existing instance is reused.
- SingleTask: If an activity with the same task affinity already exists on the stack, the existing instance is brought to the front and all activities on top of it are cleared.
- SingleInstance: The same as singleTask, but the activity is launched in a separate, dedicated task.
2. Task Affinity and Task Stack: Each activity has a task affinity, which is a string that identifies to which task the activity belongs. By default, all activities in an app belong to the same task. However, you can assign different task affinities to activities, allowing for tasks with different behavior and back stack management.
3. Back Navigation: By default, when the user presses the back button, the topmost activity is removed from the stack, and the previous activity is brought to the foreground. You can override this behavior by implementing the onBackPressed() method and defining custom actions, such as prompting the user for confirmation before navigating back.
4. Stack Manipulation: Android provides various methods to manipulate the activity stack programmatically. You can use methods like finish() to remove the current activity from the stack, or startActivity() with appropriate flags to clear the stack or start a new instance of an activity.
5. Clearing Stack: Sometimes, you may want to clear the entire activity stack and start a fresh instance of a particular activity. This can be achieved by using the FLAG_ACTIVITY_CLEAR_TOP flag when starting an activity. This flag clears all activities on top of the target activity in the stack and brings the existing instance of the target activity to the foreground.
6. Handling Configuration Changes: When the device undergoes a configuration change, such as screen rotation or keyboard availability, the current activity may be destroyed and recreated. To handle this, you can use the onConfigurationChanged() method to save and restore important data and maintain the state of your activity.
By managing the activity stack effectively, you can control the flow and navigation within your app, provide a seamless user experience, and optimize resource usage. Understanding launch modes, task affinities, and stack manipulation techniques will empower you to create intuitive and user-friendly Android applications.
Handling Activity State Changes
Activity state changes are a common occurrence in Android applications, and properly handling these changes is vital to ensure a seamless and efficient user experience. State changes can occur due to various factors, such as device rotation, interruptions like phone calls or notifications, or the user navigating away from the app. By understanding how to handle these state changes, you can save and restore important data, maintain a consistent user interface, and provide a reliable app experience.
1. onSaveInstanceState(): When an activity is paused or destroyed, such as when the user navigates away or the system reclaims resources, the onSaveInstanceState() method is called. This method allows you to save any critical data that needs to be restored when the activity is recreated. You can use the Bundle parameter to store key-value pairs of data that is relevant to your activity’s state.
2. onRestoreInstanceState(): When an activity is recreated, such as after a configuration change, the onRestoreInstanceState() method is called. This method gives you the opportunity to restore any saved data from the Bundle parameter and bring your activity back to its previous state. It is important to note that onRestoreInstanceState() is only called when there is a saved state to restore.
3. Handling Configuration Changes: One of the most common state changes in Android is when the device undergoes a configuration change, such as a screen rotation. By default, the current activity is destroyed and recreated, which can lead to data loss or a jarring user experience. To handle configuration changes, you can override the onConfigurationChanged() method in your activity and specify how specific configuration changes should be handled, such as updating the layout or saving and restoring important data.
4. Retaining Fragments: If you are using fragments within your activity, you can also leverage their ability to retain state during configuration changes. By calling setRetainInstance(true) on a fragment, you can ensure that it is not destroyed and recreated during a configuration change. This allows you to retain important data and preserve the fragment’s state seamlessly.
5. Managing Long-Running Operations: During state changes, it is important to properly handle any long-running operations, such as network requests or file I/O. You should pause or cancel any ongoing operations in the onPause() method and restart or resume them in the onResume() method. This ensures that your app remains responsive and efficient even during state transitions.
By effectively handling activity state changes, you can provide a consistent and reliable user experience in your Android app. Saving and restoring critical data, properly managing configuration changes, and handling long-running operations help maintain the integrity of your app’s functionality and ensure a seamless transition between different device states.
Interacting with Activities
In Android development, interacting with activities is a fundamental aspect that allows for communication, data exchange, and navigation between different screens or components within an app. Properly understanding and implementing interaction between activities is crucial for creating dynamic and user-friendly Android applications. Here are some ways you can interact with activities:
1. Intents: Intents are a powerful mechanism for interacting with activities. They can be used to start activities, pass data between activities, and even launch activities in other apps. By creating and sending explicit or implicit intents, you can trigger specific actions or navigate to desired activities based on user interactions or application requirements.
2. startActivityForResult(): This method enables you to start an activity and receive a result back from it. This is especially useful when you need to collect user input or obtain data from another activity. After starting the activity using startActivityForResult(), a result can be set and sent back to the calling activity, allowing you to handle the result and take appropriate action based on the outcome.
3. Bundle and Extras: The Bundle object can be used to pass additional data between activities. You can add extras to an intent before starting another activity and retrieve those extras in the target activity. This allows for the seamless transfer of data, such as user preferences, user selections, or any other relevant information.
4. startActivityForResult() and setResult(): When using startActivityForResult(), the started activity can set a result using the setResult() method before being finished. The result can be an OK or Cancel status, or any custom status code or data. Upon receiving the result in the calling activity’s onActivityResult() method, you can handle the result accordingly.
5. Sharing Data: Activities can share data with other activities or external apps using content providers, broadcasts, or shared preferences. Content providers enable data sharing across multiple apps, broadcasts allow for sending and receiving messages within the app or even between apps, and shared preferences provide a way to store and access data that can be shared between activities or components.
6. Activity Callbacks: Android provides several activity callbacks that you can override to interact with the activity lifecycle, respond to specific events, or perform actions at various stages. Some commonly used callbacks include onCreate(), onResume(), onPause(), onDestroy(), and more. These callbacks allow you to handle functionality like data loading, UI updates, resource management, and initialization.
By effectively interacting with activities, you can enable seamless data exchange, provide smooth navigation, and create dynamic user experiences in your Android applications. Understanding the different techniques and methods available will empower you to build robust and interactive apps that cater to the needs of your users.
Launch Modes of Activities
In Android, launch modes define how activities are created, organized, and managed within the application. By understanding and utilizing different launch modes, you can control the behavior of activities and customize the navigation flow to provide a better user experience. Here are the four launch modes available:
1. Standard: This is the default launch mode for activities. Each time you start an activity, a new instance of that activity is created and added to the activity stack. This mode allows for multiple instances of the same activity to be present in the stack.
2. SingleTop: In this mode, if an instance of the activity already exists at the top of the activity stack, instead of creating a new instance, the existing instance is reused. This mode is useful when you want to prevent the creation of multiple instances of the same activity consecutively.
3. SingleTask: This launch mode ensures that only one instance of the activity exists in the activity stack. If another instance of the activity is launched while an existing instance is already present in the stack, the existing instance is brought to the front and all other activities on top of it are cleared. This mode is commonly used for main or home screens of applications.
4. SingleInstance: This launch mode is similar to singleTask, but the activity is launched in a separate, dedicated task. This means that the activity has its own task stack, independent of the main application stack, and no other activities can be launched in the same task. This mode is typically used for activities that should operate independently of the rest of the application, such as a dialer or camera activity.
Launch modes can be set by adding the `android:launchMode` attribute to the activity tag in the manifest file. It’s important to choose the appropriate launch mode based on the desired behavior and requirements of your application.
By utilizing launch modes effectively, you can fine-tune the navigation flow and optimize the user experience in your Android application. Understanding the different launch modes allows you to control how activities are created, organized, and managed in the activity stack, leading to more efficient resource usage and improved overall performance.
Best Practices for Activities
Activities are a vital component in Android development, and following best practices ensures the efficient and smooth functioning of your applications. Here are some recommended best practices for working with activities:
1. Keep Activities Focused: Each activity should have a clear and specific purpose. Avoid cluttering activities with unrelated functionality. Splitting functionalities into separate activities not only improves the organization and maintainability of your code but also provides a better user experience by presenting clear and focused screens.
2. Take Advantage of Fragments: Use fragments to modularize your UI and improve reusability. Fragments allow for flexible design and enable you to create dynamic and responsive user interfaces. They also help manage configuration changes and provide an efficient way to implement UI components that are shared across activities.
3. Optimize the Activity Lifecycle: Properly manage the activity lifecycle to ensure efficient resource utilization and a smooth user experience. Release unnecessary resources in the onStop() or onDestroy() methods, save and restore critical data during configuration changes, and handle interruptions gracefully by pausing and resuming operations in the onPause() and onResume() methods.
4. Use Intent Filters for External Actions: If you want your activity to respond to specific actions, such as opening a web link or handling file types, use intent filters. This allows other apps to directly launch your activity for the respective action, providing a seamless integration experience for users.
5. Handle Permissions Appropriately: Follow best practices for handling permissions within your activities. Request permissions only when necessary, explain why the permission is needed, and handle permission request results properly by implementing onRequestPermissionsResult(). Providing a clear and concise explanation of why a permission is required helps build user trust and confidence in your app.
6. Implement Responsive UI: Design your activities to be responsive and fluid. Avoid blocking the UI thread with long-running operations; instead, offload heavy tasks to background threads or utilize asynchronous mechanisms such as AsyncTask or Kotlin coroutines. This allows the UI to remain responsive and ensures a smooth user experience.
7. Test and Handle Edge Cases: Perform thorough testing of your activities to identify and handle edge cases. Consider scenarios such as low memory situations, unexpected interruptions, or incorrect inputs. Properly handling these edge cases ensures your app remains stable, reliable, and usable in all situations.
8. Maintain Consistent Design Patterns: Follow consistent design patterns and adhere to Android’s design guidelines to provide a familiar and cohesive experience to users. Utilize common UI components, navigation patterns, and actions to ensure users can easily navigate and interact with your app.
By following these best practices, you can create well-structured, efficient, and user-friendly activities in your Android applications. Strive for focused and modular activities, optimize the activity lifecycle, handle permissions appropriately, and maintain a responsive and consistent UI. Following these practices will help deliver high-quality apps that provide an exceptional user experience.
Conclusion
In this article, we have explored the fundamentals of Android activities and the various aspects involved in working with them. Activities serve as the building blocks of user interfaces in Android applications, and understanding their anatomy, lifecycle, and launch modes is crucial for creating robust and intuitive apps.
We discussed the core concepts of activities, including their purpose, layout, views, and intents. The activity lifecycle was examined in detail, covering methods such as onCreate(), onResume(), onPause(), and onDestroy(). By effectively managing these lifecycle callbacks, you can ensure proper resource usage, data persistence, and a smooth user experience.
We also delved into the different launch modes available for activities, such as standard, singleTop, singleTask, and singleInstance, and how they impact the behavior of activities within the application. Understanding launch modes enables you to customize navigation flows and control the organization of activities in the stack.
Interacting with activities was another important topic covered in this article. We explored how intents, extras, startActivityForResult(), and other mechanisms allow for seamless communication and data exchange between activities. By implementing these best practices, you can create interactive and dynamic user experiences.
Additionally, we discussed practical tips and best practices for working with activities, such as keeping activities focused and modular, utilizing fragments, optimizing the activity lifecycle, handling permissions properly, implementing responsive UI, and maintaining consistent design patterns.
By following these principles and understanding the nuances of activities in Android, you will be well-equipped to design and develop high-quality applications that provide a seamless user experience, efficient resource usage, and robust functionality.
So, go ahead and start applying these concepts, experiment with activity behaviors, and strive to create exceptional Android apps that deliver a delightful user experience.