Introduction
Welcome to our guide on how to water bath can using a Mueller 6 QT Electric Pressure Cooker. If you’re unfamiliar with water bath canning, it is a method of preserving food by sealing jars filled with fruits, vegetables, or other ingredients in a water bath at a specific temperature. This process helps to kill bacteria, molds, and yeasts that may be present in the food, ensuring its long-term storage.
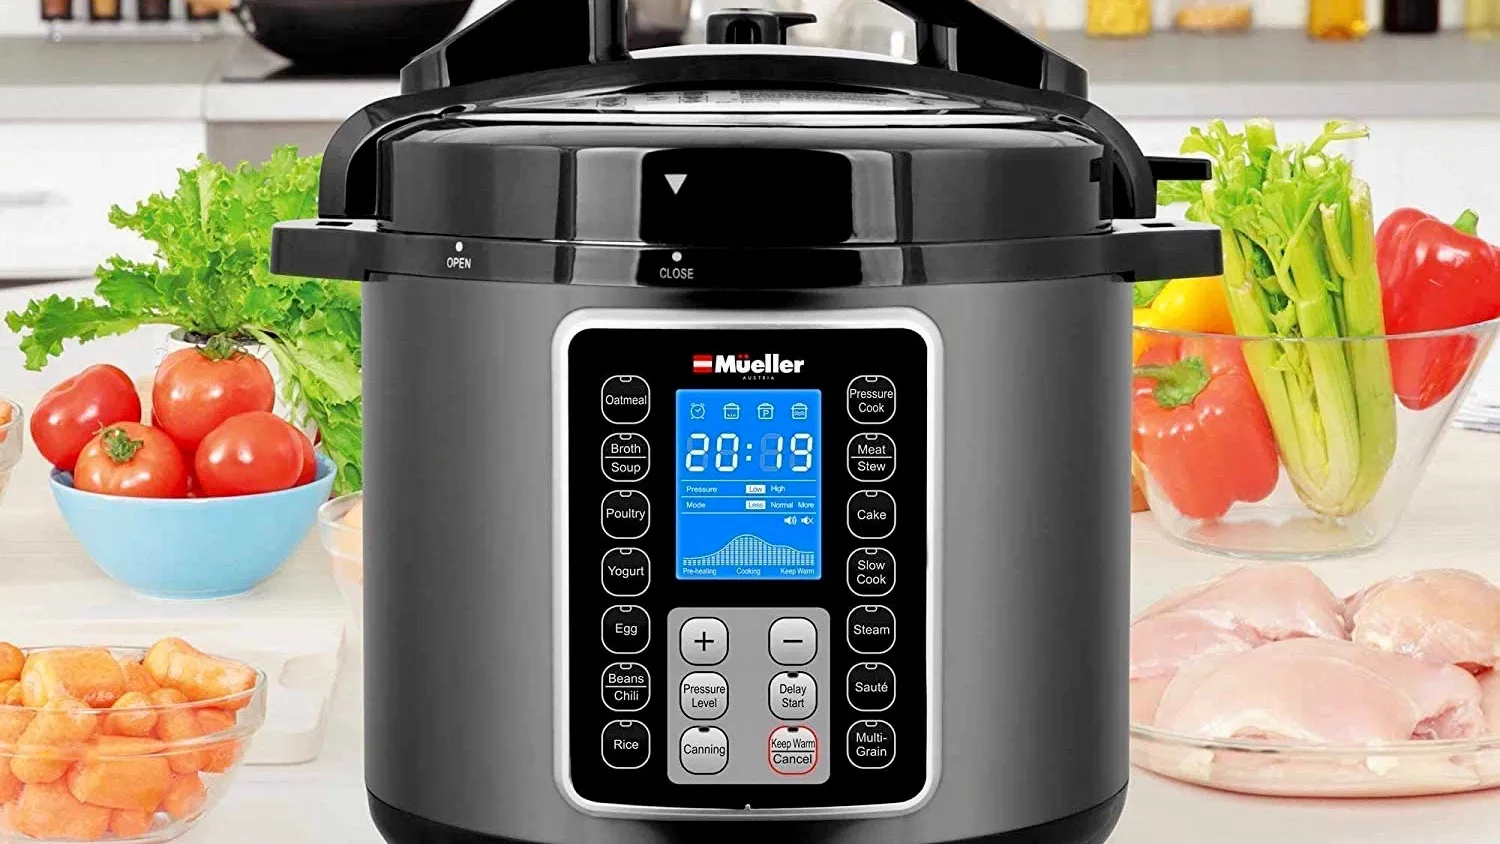
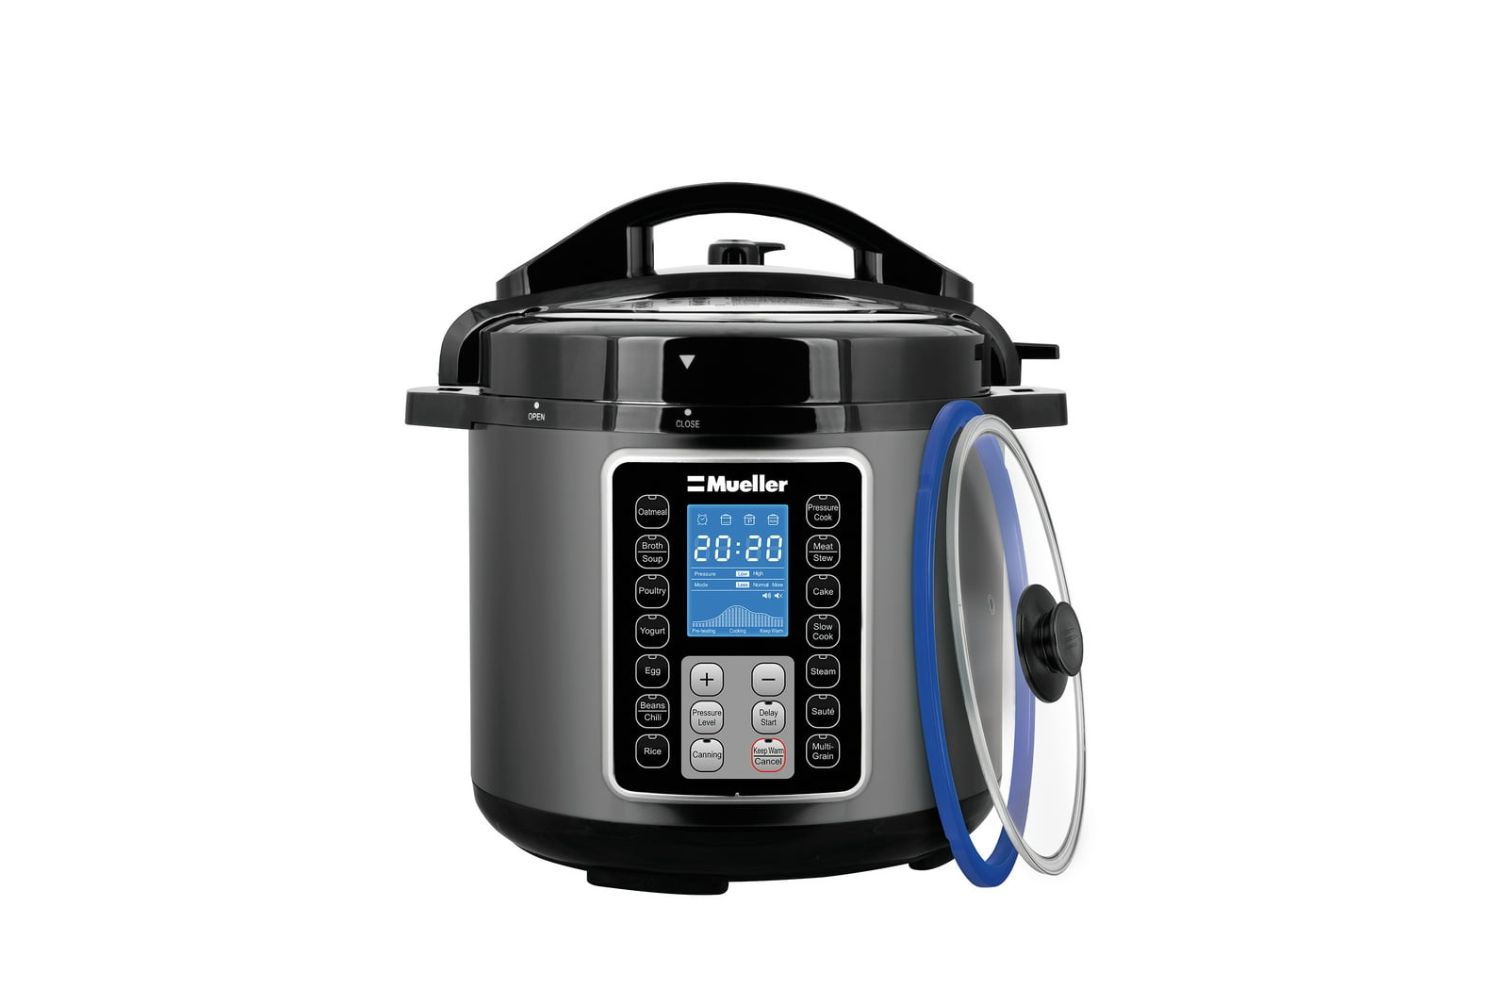
The Mueller 6 QT Electric Pressure Cooker is a versatile kitchen appliance that not only excels in pressure cooking but also offers a convenient water bath canning function. With this cooker, you can easily and safely can your favorite homemade jams, jellies, pickles, and more. It combines the benefits of a traditional water bath canner with the convenience of an electric pressure cooker.
In this guide, we will provide you with a step-by-step process of water bath canning using a Mueller 6 QT Electric Pressure Cooker. We will cover everything from preparing your pressure cooker for canning to processing and storing your canned goods. Whether you’re a seasoned canner or a beginner, you’ll find the instructions and tips in this guide helpful in achieving safe and delicious results.
So, let’s dive in and explore how easy and efficient it is to water bath can using a Mueller 6 QT Electric Pressure Cooker. Get ready to stock your pantry with homemade goodness that will last for months to come!
What is water bath canning?
Water bath canning is a popular method of food preservation that involves submerging jars filled with food in a pot of boiling water. By subjecting the jars to high temperatures, harmful bacteria, molds, and yeasts are destroyed, ensuring the safety and shelf life of the canned foods.
This method is suitable for preserving high-acid foods like fruits, jams, jellies, pickles, and salsas. The acidity in these foods creates an inhospitable environment for bacteria, which makes water bath canning an ideal choice.
To begin the water bath canning process, you’ll need a large pot or canner specifically designed for canning. The pot should be deep enough to allow for at least one inch of water to cover the tops of the jars. The use of a canning rack is recommended to keep the jars off the bottom of the pot and promote even heat distribution.
As the jars are heated in the boiling water, the food inside expands, and air bubbles are released. When the jars cool, a vacuum seal is formed, preventing any contamination from entering the jars and spoiling the food. This vacuum seal is crucial for maintaining the quality and safety of the canned goods.
Water bath canning is a time-tested method that has been used for generations to preserve seasonal produce and create delicious homemade preserves. It’s a great way to enjoy your favorite fruits and vegetables all year round, knowing that they are free from additives and preservatives.
Although water bath canning is relatively simple, it’s important to follow proper canning techniques and guidelines to ensure safe preservation. This includes using the appropriate canning equipment, following recommended processing times and temperatures, and properly sealing the jars.
Now that you have a better understanding of what water bath canning is, let’s explore why the Mueller 6 QT Electric Pressure Cooker is the perfect appliance for this method.
Why use a Mueller 6 QT Electric Pressure Cooker for water bath canning?
The Mueller 6 QT Electric Pressure Cooker is a versatile kitchen appliance that offers a number of advantages for water bath canning. Here are some reasons why it’s a great choice for your canning needs:
- Convenience: The Mueller 6 QT Electric Pressure Cooker combines the functions of a pressure cooker and a water bath canner in one appliance. This eliminates the need for separate equipment, saving you both space and money.
- Precise temperature control: The pressure cooker features precise temperature control, allowing you to maintain the water bath at the recommended canning temperature. This ensures that the food inside the jars is heated evenly and thoroughly for safe preservation.
- Efficiency: The electric pressure cooker quickly heats up and maintains the desired water bath temperature, reducing the time required for the canning process. This makes it a time-saving option, especially when compared to traditional stovetop canning methods.
- Safety features: The Mueller 6 QT Electric Pressure Cooker is equipped with safety features such as a locking lid, pressure release valve, and automatic shut-off. These features help prevent accidents and ensure a safe canning experience.
- Versatility: In addition to water bath canning, the Mueller 6 QT Electric Pressure Cooker can be used for various cooking methods, including pressure cooking, slow cooking, sautéing, and more. This makes it a versatile appliance that can be used for a wide range of recipes and culinary techniques.
- Consistent results: The Mueller 6 QT Electric Pressure Cooker provides consistent heat distribution, helping you achieve consistent results with your canned goods. This ensures that your preserves are properly sealed and have a longer shelf life.
With its convenience, precise temperature control, efficiency, safety features, versatility, and ability to deliver consistent results, the Mueller 6 QT Electric Pressure Cooker is an excellent choice for water bath canning. Whether you’re a seasoned canner or a beginner, this appliance will make the canning process easier and more enjoyable.
Now that you understand why the Mueller 6 QT Electric Pressure Cooker is a fantastic option for water bath canning, let’s move on to the step-by-step guide on how to use it for this preservation method.
Step-by-step guide to water bath canning in a Mueller 6 QT Electric Pressure Cooker
Follow these steps to successfully water bath can in your Mueller 6 QT Electric Pressure Cooker:
- Prepare your pressure cooker for canning: Ensure that your pressure cooker is clean and in good working condition. Check the sealing ring and pressure valve for any damage or wear. Follow the manufacturer’s instructions for assembling and preparing the cooker for canning.
- Select and prepare your canning jars and lids: Choose canning jars that are specifically designed for water bath canning. Inspect the jars for any cracks or chips, and wash them in hot, soapy water. Place the lids in a small saucepan of boiling water to soften the sealing compound.
- Prepare your fruits or vegetables for canning: Wash and prepare your fruits or vegetables as needed. Remove any pits, stems, or skins. Cut them into desired sizes or shapes, following the recipe instructions.
- Filling the jars and sealing them: Fill the clean, warm jars with the prepared fruits or vegetables, leaving the recommended headspace. Wipe the rims of the jars with a clean, damp cloth to remove any food particles. Place the softened lids on top of the jars and secure them with the screw bands, tightening them just until resistance is met.
- Placing the jars in the Mueller 6 QT Electric Pressure Cooker: Place the canning rack inside the pressure cooker and lower the filled jars onto the rack, ensuring they are evenly spaced and not touching each other or the sides of the cooker. Add hot water to the pressure cooker, covering the jars with at least one inch of water.
- Setting the water bath canning function on the pressure cooker: Close and lock the lid of the Mueller 6 QT Electric Pressure Cooker. Select the water bath canning function on the control panel, if available. If not, manually set the pressure cooker to maintain a steady temperature of 212°F (100°C) throughout the canning process.
- Processing and cooling the jars: Once the water in the pressure cooker reaches a rolling boil, set the timer for the recommended processing time based on the type of food and jar size. After the processing time is complete, turn off the heat and allow the pressure cooker to naturally release the pressure. Let the jars sit undisturbed in the cooker for an additional 5 minutes before carefully removing them using canning tongs.
- Storing and enjoying your canned goods: Place the hot jars on a clean towel or cooling rack, allowing them to cool completely. As the jars cool, you may hear the satisfying “pop” sound, indicating that the vacuum seal has formed. Once cooled, check the lids for proper sealing by pressing down on the center of each lid. If the lid doesn’t move, the jar is sealed correctly. Store the jars in a cool, dark place for optimal shelf life.
With this step-by-step guide, you are now equipped with the knowledge to confidently water bath can using your Mueller 6 QT Electric Pressure Cooker. Remember to always refer to trusted canning resources and follow recommended recipes and processing times for best results.
Now that you have successfully preserved your fruits or vegetables, you can enjoy the fruits of your labor throughout the year or share them with family and friends. Happy water bath canning!
Preparing your pressure cooker for water bath canning
Before you start water bath canning in your Mueller 6 QT Electric Pressure Cooker, it’s important to ensure that your pressure cooker is properly prepared. Follow these steps to get your pressure cooker ready for the canning process:
- Inspect your pressure cooker: Before using your pressure cooker, carefully inspect it for any signs of damage or wear. Check the sealing ring, pressure valve, and other components to ensure they are in good condition. If you notice any issues, such as cracks or wear, replace the necessary parts before proceeding.
- Wash and clean your pressure cooker: Thoroughly wash the pressure cooker’s pot, lid, and any removable parts with warm, soapy water. Rinse them thoroughly to remove any soap residue. Make sure all surfaces are clean and free from any debris or residue that could affect the canning process or the taste of the canned food.
- Assemble the pressure cooker: Follow the manufacturer’s instructions to correctly assemble your pressure cooker. This typically involves placing the sealing ring on the lid, ensuring it fits securely. Attach any necessary pressure release valves or other components according to the user manual.
- Check the pressure cooker’s gasket: The gasket, or sealing ring, is a crucial part of the pressure cooker that helps create a tight seal during the canning process. Check the gasket to ensure there are no cracks or tears. If needed, replace the gasket with a new one that is specifically designed for your pressure cooker model.
- Perform a water test: It’s recommended to perform a water test before using your pressure cooker for water bath canning. Fill the pressure cooker with a few inches of water and close the lid securely. Follow your pressure cooker’s instructions on how to bring it up to pressure and maintain it for a set period of time. This test helps ensure that your pressure cooker is functioning properly and that the sealing ring creates a tight seal.
- Familiarize yourself with the controls: Take the time to familiarize yourself with the controls and settings of your Mueller 6 QT Electric Pressure Cooker. This includes understanding how to set and adjust the temperature, pressure, and timer functions. Knowing how to operate your pressure cooker properly will help you achieve consistent and accurate results.
By properly preparing your pressure cooker for water bath canning, you are ensuring a safe and efficient canning process. Taking these steps will help you maintain the quality and integrity of your canned goods, giving you confidence in the preservation of your delicious homemade treats.
Now that your pressure cooker is ready, it’s time to move on to selecting and preparing your canning jars and lids.
Selecting and preparing your canning jars and lids
Choosing the right canning jars and preparing them properly is essential for successful water bath canning in your Mueller 6 QT Electric Pressure Cooker. Follow these steps to select and prepare your canning jars and lids:
- Select appropriate canning jars: Choose canning jars that are specifically designed for water bath canning. Opt for jars made of tempered glass that can withstand high temperatures.
- Inspect the jars: Before using the jars, thoroughly inspect them for any cracks, chips, or damages. Damaged jars can compromise the seal and safety of the canned food. Discard any jars that show signs of damage.
- Wash the jars: Wash the jars in hot, soapy water to remove any dust, dirt, or residue. Pay special attention to the rims and threads of the jars to ensure they are clean and free from food particles that could interfere with the sealing process.
- Prepare the lids: Place the lids in a small saucepan filled with boiling water. Let them simmer for a few minutes to soften the sealing compound. This step helps to ensure a proper seal when the lids are placed on the filled jars.
- Prepare the screw bands: In most cases, the screw bands can be reused as long as they are free from rust or damage. Wash the screw bands with hot, soapy water and inspect them for any signs of wear. Replace any bands that are corroded or bent to ensure a secure fit.
- Keep the jars warm: To minimize the risk of thermal shock, keep the freshly washed jars warm until you are ready to fill them. You can place them in a warm oven or in a pot of hot water, ensuring that they are not in direct contact with a hot surface.
Properly selecting and preparing your canning jars and lids is crucial for maintaining the quality and safety of your canned goods. Taking the time to ensure they are in good condition and free from contaminants will help you achieve successful water bath canning results.
Now that your jars and lids are prepared, it’s time to move on to preparing your fruits or vegetables for canning.
Preparing your fruits or vegetables for canning
Properly preparing your fruits or vegetables before canning is essential to ensure the best quality and safety of the final product. Follow these steps to prepare your fruits or vegetables for water bath canning in your Mueller 6 QT Electric Pressure Cooker:
- Wash your fruits or vegetables: Thoroughly wash your produce under cool running water. Gently scrub or brush away any dirt or debris. Remove any stems, leaves, or cores as needed.
- Peel or trim, if necessary: Depending on the type of produce you’re canning, you may need to peel or trim it before proceeding. For example, peel and pit stone fruits like peaches or plums, or remove the outer leaves and stems from vegetables like cucumbers.
- Prevent browning: To prevent fruits or vegetables from browning, you can treat them with a solution of ascorbic acid or lemon juice. This helps preserve the natural color and texture of the produce. Follow the recommended instructions for the specific fruits or vegetables you’re canning.
- Prepare for packing: Depending on the size and shape of the produce, you may need to cut or slice it into appropriate sizes for packing into the jars. Follow the recipe instructions or personal preference for the desired cut.
- Pack the produce into the jars: Fill the warm, prepared jars with the prepared fruits or vegetables, leaving the recommended headspace as specified in the recipe. Pack them tightly but without crushing the produce.
- Remove air bubbles: After packing the jars, use a non-metallic utensil such as a plastic spatula or bubble remover tool to remove any air bubbles trapped within the jars. Gently slide the utensil along the sides of the jar to release the bubbles.
- Wipe the jar rims: Before placing the lids on the jars, wipe the rims clean with a clean, damp cloth to ensure a proper seal. Any food residue or liquid on the rim may prevent the jars from sealing correctly.
By diligently following these steps, you’re ensuring that your fruits or vegetables are properly prepared, clean, and ready for the water bath canning process. This attention to detail will help preserve the flavors, textures, and nutritional value of your canned goods.
Now that your fruits or vegetables are prepared, it’s time to fill the jars and seal them for the canning process.
Filling the jars and sealing them
Once you have prepared your fruits or vegetables for canning, it’s time to fill the jars and seal them properly. Follow these steps to ensure a successful water bath canning process in your Mueller 6 QT Electric Pressure Cooker:
- Fill the jars: Using a ladle or a canning funnel, carefully fill the prepared jars with the fruits or vegetables, leaving the recommended headspace as specified in the recipe. Headspace is the space between the top of the food and the rim of the jar, allowing for proper expansion during processing.
- Remove air bubbles: After filling the jars, use a non-metallic utensil, such as a plastic spatula or a bubble remover tool, to remove any trapped air bubbles. Gently run the utensil along the sides of the jar to release any air pockets. This step helps ensure proper sealing and prevents spoilage.
- Wipe the jar rims: Before placing the lids on the jars, wipe the rims clean with a clean, damp cloth or paper towel. Any food particles or liquid on the rim can interfere with the sealing process, leading to potential issues with the canned goods.
- Apply the lids: Using tongs or clean hands, carefully remove the softened lids from the saucepan of hot water. Place a lid on top of each jar, ensuring that the sealing compound side is facing down. Press the lid firmly onto the rim of the jar, centering it properly.
- Secure with screw bands: Once the lids are in place, secure them tightly with the screw bands. Use your fingertips to tighten the bands just until you meet resistance; do not over-tighten, as air needs to escape during the water bath canning process.
- Double-check everything: Before placing the jars in the Mueller 6 QT Electric Pressure Cooker, double-check that all the lids are securely in place and the screw bands are tightened correctly. Ensure that the jars are clean and free from any spills or debris.
By filling the jars properly and ensuring a tight seal, you are taking essential steps to preserve the quality and safety of your canned goods. This careful attention to detail ensures that your efforts are rewarded with delicious, long-lasting products.
Now that the jars are filled and properly sealed, it’s time to move on to the next step in the water bath canning process – placing the jars in the Mueller 6 QT Electric Pressure Cooker.
Placing the jars in the Mueller 6 QT Electric Pressure Cooker
Once your jars are filled and sealed, the next step in the water bath canning process is to place them in the Mueller 6 QT Electric Pressure Cooker. Follow these steps to ensure proper placement of the jars:
- Prepare the canning rack: Before placing the jars in the pressure cooker, set up the canning rack provided with the Mueller 6 QT Electric Pressure Cooker. The canning rack helps elevate the jars and promotes even heat distribution during processing.
- Place the canning rack in the pressure cooker: Insert the canning rack into the pressure cooker, ensuring it is level and stable. The rack should be positioned in a way that allows water to circulate freely around each jar.
- Lower the jars onto the rack: Carefully lower the filled and sealed jars onto the canning rack, spacing them evenly and ensuring they are not touching each other or the sides of the pressure cooker. It’s important to maintain proper spacing between the jars to allow hot water to circulate around them.
- Add water to the pressure cooker: Add hot water to the pressure cooker, filling it to a level that covers the tops of the jars with at least one inch of water. The water level should not exceed the maximum fill line indicated in the pressure cooker and should provide enough coverage for the entire processing time.
- Check for any trapped air bubbles: Before closing the lid of the pressure cooker, check for any remaining air bubbles inside the jars. Gently tap the sides of the jars or use a non-metallic utensil to release any air that may have been trapped during the jar placement process.
- Securely lock the lid: Securely lock the lid of the Mueller 6 QT Electric Pressure Cooker in place, following the manufacturer’s instructions. Ensuring a tight and secure seal is vital for maintaining the pressure and temperature required during the water bath canning process.
By properly placing the filled and sealed jars in the Mueller 6 QT Electric Pressure Cooker, you are setting the stage for successful water bath canning. The careful positioning of the jars allows for proper heat distribution and helps ensure the preservation of your delicious homemade goods.
Now that the jars are properly placed in the pressure cooker, it’s time to move on to the next important step – setting the water bath canning function on the Mueller 6 QT Electric Pressure Cooker.
Setting the water bath canning function on the pressure cooker
Setting the water bath canning function on your Mueller 6 QT Electric Pressure Cooker is a crucial step to ensure precise temperature control during the canning process. Follow these steps to properly set the water bath canning function:
- Refer to the user manual: Consult the user manual provided with your Mueller 6 QT Electric Pressure Cooker for specific instructions on how to set the water bath canning function. The manual will have detailed information on the control panel and settings for canning.
- Preheat the pressure cooker: Before setting the water bath canning function, preheat the pressure cooker by turning it on and selecting the appropriate mode for canning. This may be labeled as “Water Bath Canning” or something similar, depending on the model.
- Select the desired temperature: Once the water bath canning mode is activated, select the desired temperature for the water bath. In most cases, it should be set to maintain a temperature of 212°F (100°C) throughout the canning process. Refer to your recipe or trusted canning resources for specific temperature requirements.
- Set the timer: Determine the recommended processing time for the food you are canning and set the timer accordingly. This will vary depending on the type of food and the jar size. Refer to trusted canning resources or recipes for accurate processing times.
- Monitor the pressure cooker: Once the water bath canning function is set, monitor the pressure cooker to ensure it reaches and maintains the desired temperature. The pressure cooker will automatically regulate the temperature, but it’s important to keep an eye on it throughout the canning process.
- Observe the pressure release: After the processing time is complete, allow the pressure cooker to naturally release the pressure. Avoid opening the pressure cooker until the pressure valve has dropped completely to indicate that the pressure has been released.
Properly setting the water bath canning function on your Mueller 6 QT Electric Pressure Cooker is essential for maintaining the correct temperature for safe food preservation. By carefully following the instructions and monitoring the cooker, you are ensuring optimal canning results.
Now that you have set the water bath canning function, the next step is to process and cool the jars to complete the canning process.
Processing and cooling the jars
After the set processing time in the Mueller 6 QT Electric Pressure Cooker is complete, it’s time to move on to the next crucial steps in the water bath canning process – processing and cooling the jars. Follow these steps to ensure your jars are properly processed and cooled:
- Wait for natural pressure release: Once the processing time is complete, resist the urge to open the pressure cooker. Allow the pressure cooker to naturally release the pressure. This means letting it sit undisturbed until the pressure valve drops completely. This can take some time, so be patient and do not rush the process.
- Carefully remove the jars from the pressure cooker: Once the pressure has been fully released, carefully remove the jars from the pressure cooker using canning tongs or oven mitts. Place the hot jars on a clean kitchen towel or cooling rack, making sure to handle them with care to prevent any accidents or burns.
- Leave the jars undisturbed: Allow the jars to cool completely, undisturbed, for several hours or overnight. As the jars cool, you may hear a popping sound, indicating that the vacuum seal is forming. This is a good sign that the canning process is successful.
- Check for proper sealing: After the jars have cooled completely, check the lids for a proper seal. Press down on the center of each lid to ensure it is concave and does not move. If any lids pop back and forth, they are not properly sealed, and the contents should be consumed or reprocessed immediately.
- Label and store the jars: Once you have confirmed that the jars are properly sealed, it’s time to label them. Use a permanent marker to write the contents and the date of canning on each jar lid. Properly store the jars in a cool, dark place away from direct sunlight and extreme temperature fluctuations.
Processing and cooling the jars correctly ensures the safety and longevity of your canned goods. By allowing the jars to cool undisturbed, checking for proper sealing, and storing them properly, you can enjoy the fruits of your labor for months to come.
Now that your jars are processed and cooled, it’s time to move on to the final step – storing and enjoying your canned goods!
Storing and enjoying your canned goods
Now that you have successfully completed the water bath canning process in your Mueller 6 QT Electric Pressure Cooker, it’s time to store and enjoy your homemade canned goods. Follow these guidelines to ensure the best quality and safety:
- Check the seals: Before storing the jars, double-check that all lids are properly sealed. Press down on the center of each lid to ensure it is concave and does not move. Any unsealed jars should be refrigerated and consumed within a few days.
- Label your jars: It’s important to label each jar with the contents and the date of canning. Use a permanent marker to write this information on the lid. This labeling helps you keep track of the age and type of canned goods, ensuring that you use the oldest ones first.
- Store in a cool, dark place: Proper storage is key to maintaining the quality and longevity of your canned goods. Store the jars in a cool, dark place away from direct sunlight and extreme temperature fluctuations. A pantry or basement storage area is ideal.
- Use within a reasonable timeframe: Although properly canned goods can last for up to one year or more, it’s best to consume them within a reasonable timeframe to enjoy the best flavor and texture. Plan your meals accordingly to rotate your canned goods and use the oldest ones first.
- Inspect before consuming: Before consuming any canned goods, inspect them for any signs of spoilage. Check for any bulging lids, mold growth, or unusual odors. If you notice any of these signs, discard the jar immediately.
- Enjoy your creations: Now, it’s time to reap the rewards of your water bath canning efforts. Incorporate your preserved fruits, vegetables, jams, jellies, and pickles into your favorite recipes, or simply enjoy them on their own. The taste of homemade, freshly preserved foods is a true delight.
Remember, proper storage and regular inspection are essential for maintaining the safety and quality of your canned goods. By following these guidelines, you can confidently enjoy your homemade creations throughout the year.
Water bath canning in your Mueller 6 QT Electric Pressure Cooker allows you to preserve the flavors of the season and enjoy the taste of your favorite fruits and vegetables long after they are gone from the garden or store. Now, go ahead and savor the satisfaction of your hard work!
Conclusion
Congratulations! You have successfully learned how to water bath can in your Mueller 6 QT Electric Pressure Cooker. By following the step-by-step guide and tips provided in this article, you are well-equipped to preserve your favorite fruits, vegetables, jams, jellies, and pickles for long-term storage and enjoyment.
The Mueller 6 QT Electric Pressure Cooker offers the convenience, temperature control, and safety features necessary for water bath canning. Its versatility and precise heat distribution make it an excellent choice for preserving your homemade goods.
Remember to always follow proper canning techniques and guidelines to ensure the safety and quality of your canned goods. This includes selecting high-quality jars, properly preparing your fruits or vegetables, filling and sealing the jars correctly, and processing them at the appropriate temperature and time.
Proper storage is essential for maintaining the longevity and taste of your canned goods. Ensure that your jars are sealed properly, label them with the contents and date, and store them in a cool, dark place. Regularly inspect your canned goods before consuming to check for any signs of spoilage.
Water bath canning allows you to stock your pantry with wholesome, flavorful foods that can be enjoyed throughout the year. Whether you’re savoring the taste of ripe summer peaches in the middle of winter or delighting in your homemade pickles on a sandwich, the rewards of your efforts will be remarkable.
So go ahead, embrace the art of water bath canning, and let your Mueller 6 QT Electric Pressure Cooker help you preserve the bounties of the season. With patience, attention to detail, and a dash of creativity, you can create a pantry filled with delicious canned goods that will bring joy to you and your loved ones.