Introduction
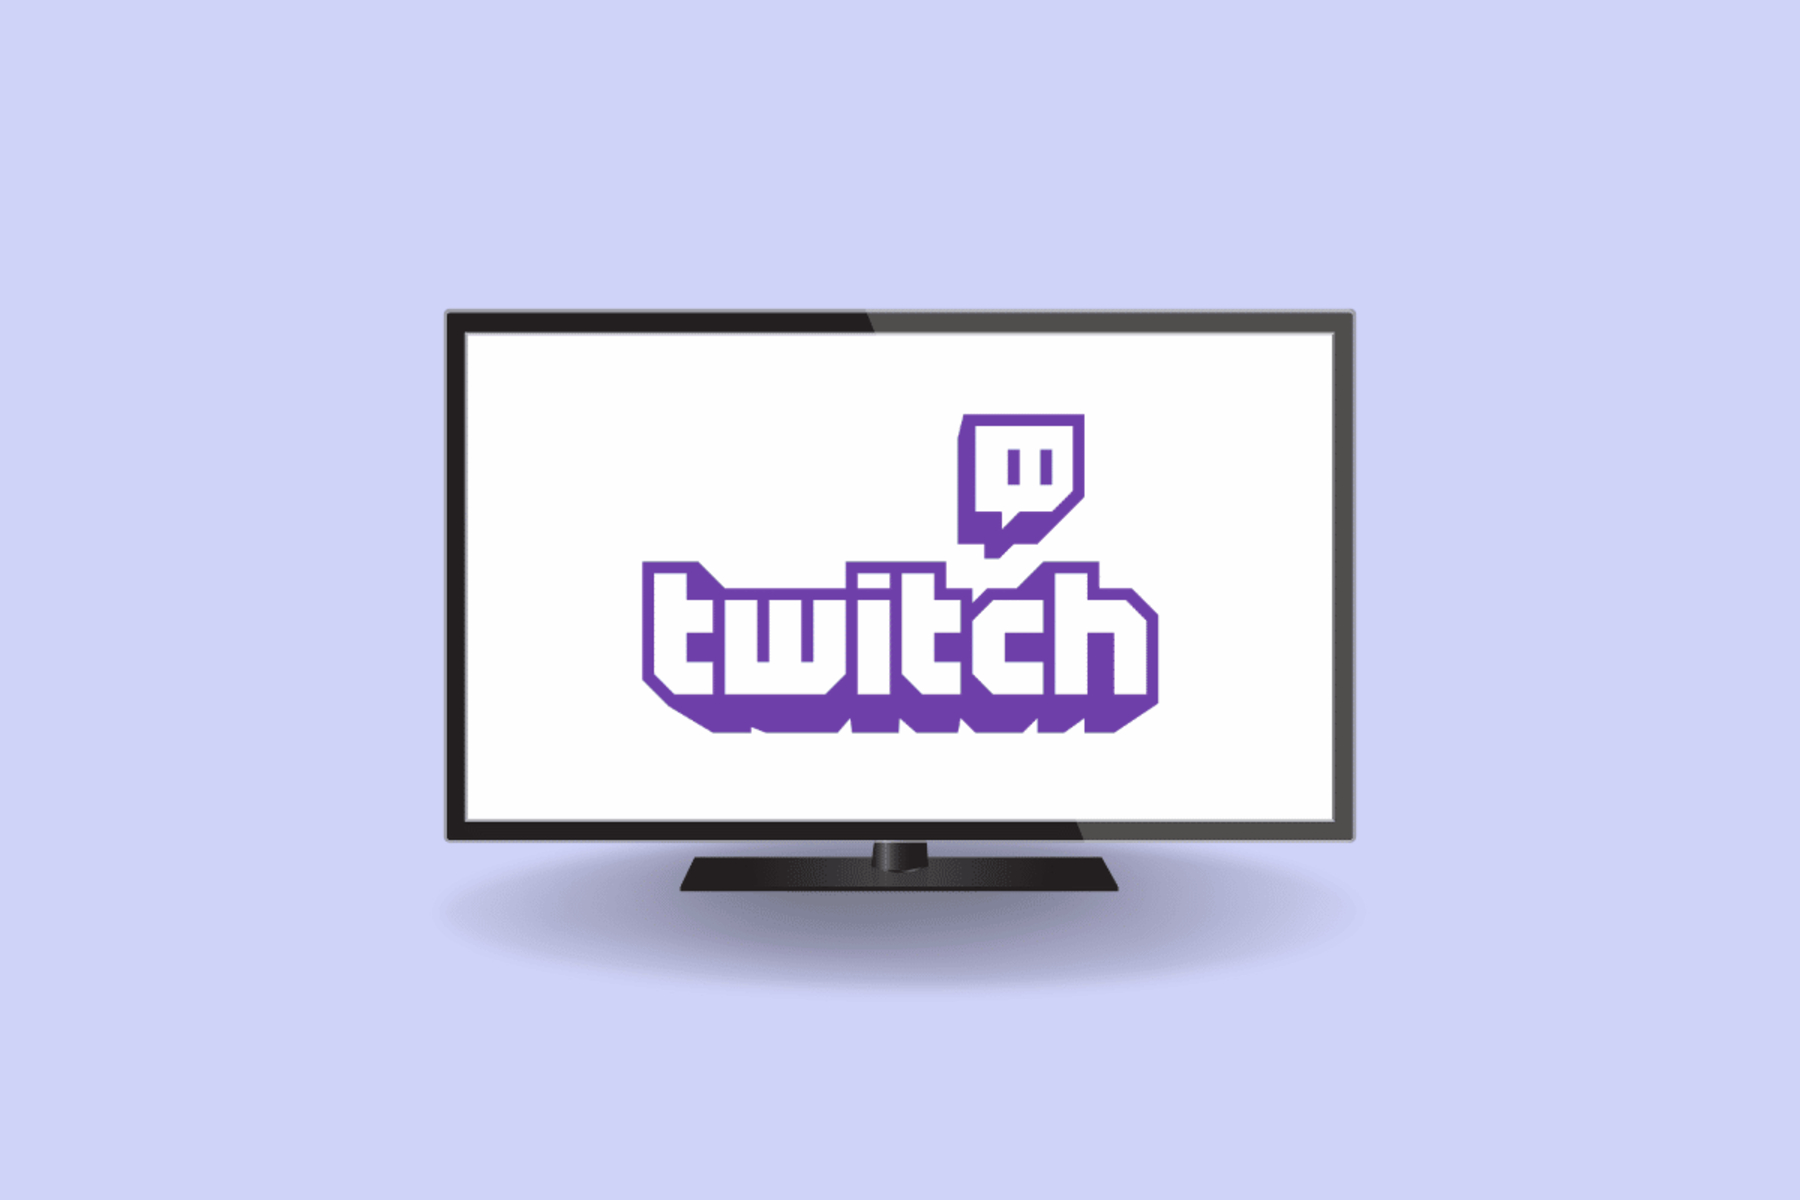
Welcome to the world of Twitch, the leading live-streaming platform for gamers and content creators! With Twitch, you can watch your favorite gamers in action, discover new gaming content, and join an active community of like-minded individuals. While Twitch is most commonly associated with being watched on a computer or mobile device, you can also enjoy Twitch on your Roku streaming device. In this guide, we’ll show you how to watch Twitch on Roku so that you can bring the excitement of live gaming directly to your TV screen.
Roku is a popular streaming platform that offers access to a wide range of streaming services and channels. By adding the Twitch channel to your Roku, you can easily access all the live gaming content and features that Twitch has to offer without the need for a computer or mobile device.
Whether you’re a die-hard fan of a specific Twitch streamer or a casual gaming enthusiast looking to explore new content, watching Twitch on Roku opens up a whole new world of gaming entertainment in the comfort of your living room. So let’s dive in and get you set up to watch Twitch on your Roku device!
Step 1: Setting Up Roku
Before you can start watching Twitch on your Roku, you’ll need to set up your Roku streaming device. If you haven’t done so already, follow these simple steps:
- Connect your Roku device to your TV using an HDMI cable.
- Plug the power cord into the Roku device and connect it to an electrical outlet.
- Turn on your TV and select the appropriate HDMI input channel that corresponds to the Roku device.
- Follow the on-screen setup instructions to connect your Roku device to your Wi-Fi network. Make sure you have your Wi-Fi password handy.
- Once connected to Wi-Fi, your Roku device will prompt you to download and install any available software updates. It’s best to let this process complete to ensure you have the latest features and bug fixes.
- After the software updates have been installed, your Roku device will provide you with a unique activation code. Keep this code handy as you’ll need it to link your Roku device to your Roku account.
- Visit Roku’s official website (www.roku.com/link) on your computer or mobile device and enter the activation code when prompted.
- Sign in to your existing Roku account or create a new one if you don’t already have one.
- Once you’ve successfully linked your Roku device to your Roku account, your Roku device will automatically update its channel lineup. This may take a few moments, so be patient.
- With your Roku device set up and ready to go, it’s time to find and add the Twitch channel to your Roku. Let’s move on to the next step!
The setup process may vary slightly depending on the specific Roku model you have, but these general steps should help you get your Roku up and running quickly. Once you’ve completed the setup, you’re one step closer to enjoying Twitch on your Roku device. Let’s move on to the next step to find out how to add the Twitch channel to your Roku.
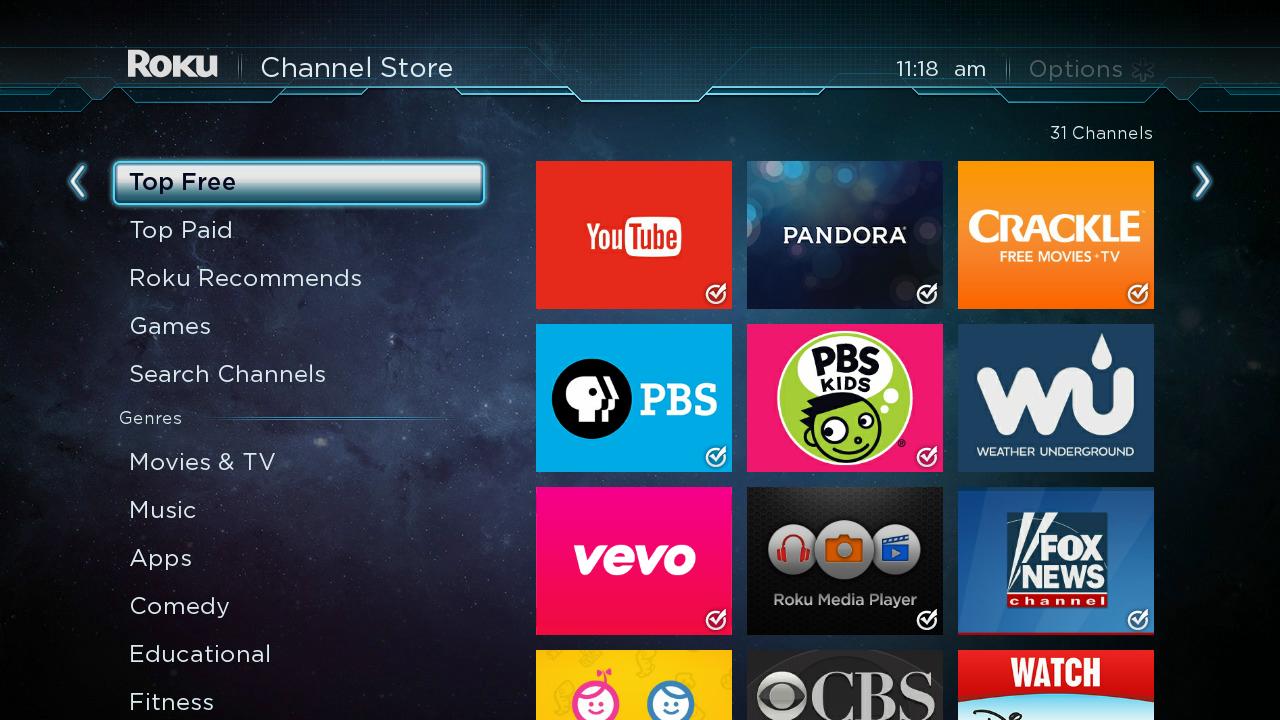
Step 2: Finding the Twitch Channel
After setting up your Roku device, the next step is to find and add the Twitch channel to your Roku channel lineup. Here’s how:
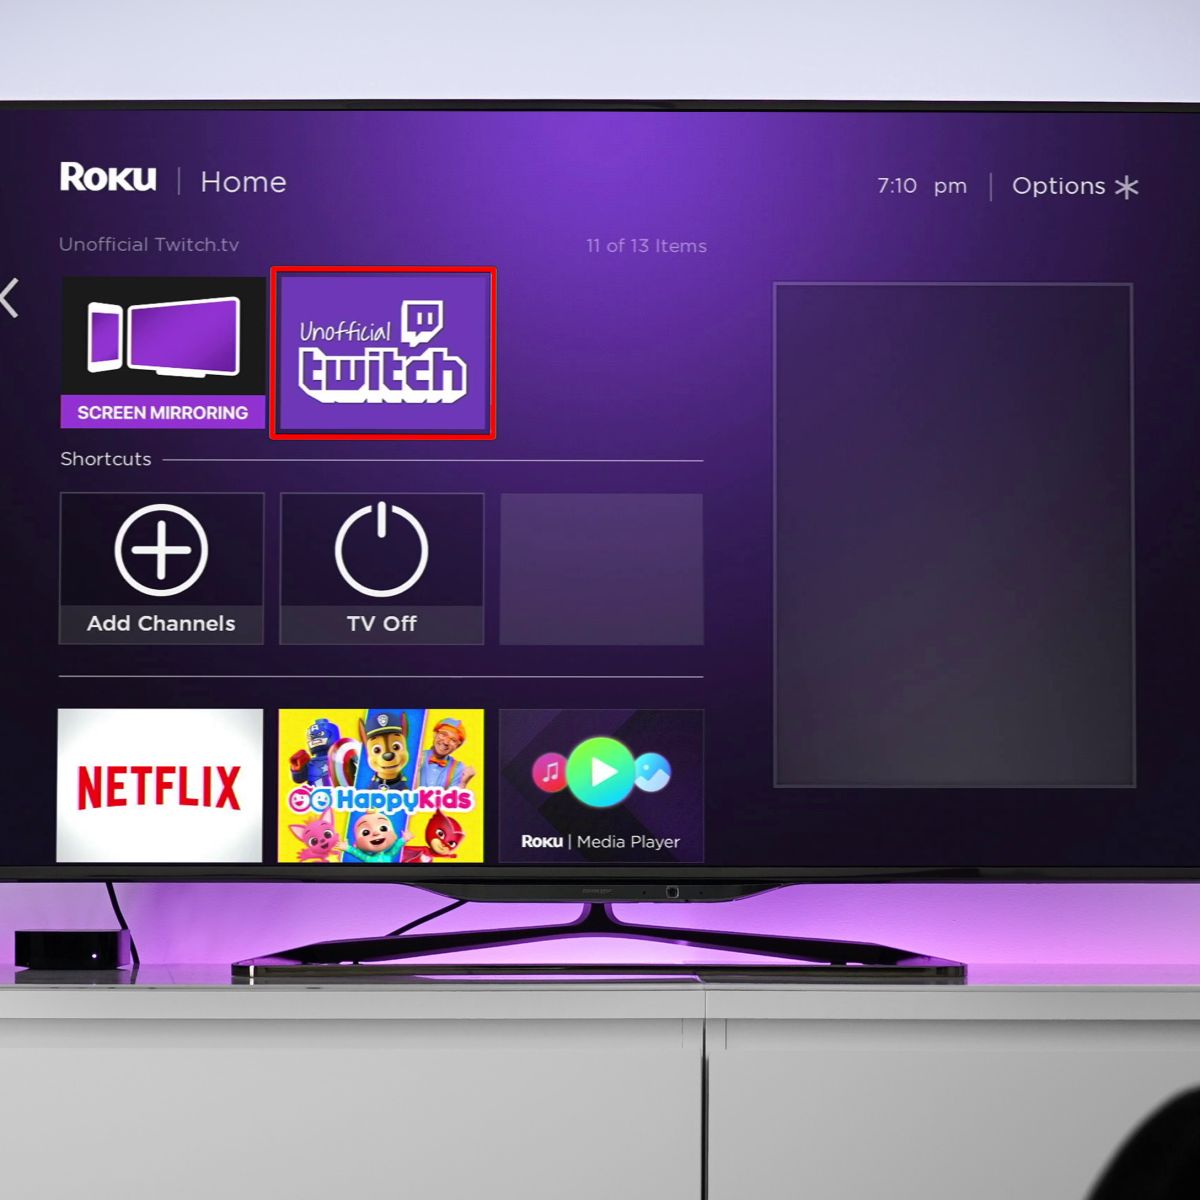
- Using your Roku remote, navigate to the home screen by pressing the home button.
- Scroll down and select “Streaming Channels” to open the Channel Store.
- In the Channel Store, you can browse through various categories or use the search function to find specific channels. Look for the “Search Channels” option and select it.
- Using the on-screen keyboard, type in “Twitch” and select the Twitch channel from the search results.
- On the Twitch channel page, you’ll find more information about the channel as well as user ratings and reviews. Take a moment to familiarize yourself with the details.
- To add the Twitch channel to your Roku, select the “Add Channel” button. This will initiate the installation process.
- Once the installation is complete, you will see a confirmation message notifying you that the Twitch channel has been successfully added to your Roku.
Now that you’ve successfully added the Twitch channel to your Roku, you’re ready to move on to the next step and sign in to your Twitch account on Roku. Let’s find out how to do that!
Step 3: Adding the Twitch Channel
With the Twitch channel successfully found, it’s time to add it to your Roku channel lineup. Follow these steps to add the Twitch channel:
- Once you have selected the Twitch channel in the Channel Store, navigate to the “Add Channel” button on the Twitch channel page.
- Press the OK button on your Roku remote to add the Twitch channel to your Roku.
- The Twitch channel will begin to install and will appear in your Roku channel lineup.
Adding the Twitch channel to your Roku is a simple and straightforward process. Once the installation is complete, you’ll find the Twitch channel alongside your other channels on the Roku home screen.
Now that you have successfully added the Twitch channel to your Roku, you can proceed to the next step and sign in to your Twitch account on Roku. By signing in, you can access additional features and personalize your Twitch experience. Let’s move on to the next step!
Step 4: Signing in to Twitch
Now that you have the Twitch channel added to your Roku, you can sign in to your Twitch account to access all the features and personalized content. Follow these steps to sign in to Twitch on your Roku:
- Open the Twitch channel on your Roku by navigating to the Twitch icon in your Roku channel lineup.
- On the Twitch channel home screen, you will see a prompt to sign in. Use the arrow keys on your Roku remote to highlight the “Sign In” option and press the OK button to select it.
- A unique six-digit code will appear on your Roku screen. Take note of this code as you will need it to complete the sign-in process.
- Using a computer or mobile device, open a web browser and visit www.twitch.tv/activate.
- Enter the six-digit code displayed on your Roku into the provided field on the Twitch activation page and click “Activate”.
- Next, sign in to your Twitch account using your username or email and password.
- Once signed in, you will receive a notification on your Roku screen indicating that you are now logged in to your Twitch account.
By signing in to Twitch on your Roku, you gain access to your personalized Twitch experience, including your followed channels, saved content, and viewing preferences. You can now enjoy all the features of Twitch right on your Roku device.
In the next step, we will explore how to navigate the Twitch app on Roku and start watching live streams. Let’s continue!
Step 5: Navigating the Twitch App on Roku
Now that you’re signed in to your Twitch account on Roku, let’s explore how to navigate the Twitch app and find the content you want to watch. Follow these steps to navigate the Twitch app on Roku:
- Launch the Twitch channel on your Roku by selecting the Twitch icon from your Roku channel lineup. The Twitch app will open, and you will be taken to the Twitch home screen.
- At the top of the Twitch home screen, you will find several categories, including “Browse,” “Following,” “Discover,” and more. Use the arrow keys on your Roku remote to navigate through these categories.
- To browse through different games or categories, select the “Browse” option. Here, you will find a list of popular games and categories that you can explore.
- If you want to see the streams from channels you follow, select the “Following” option. This will display live streams from the channels you are following on Twitch.
- To discover new channels or explore trending content, select the “Discover” option. This will show you a curated list of popular and recommended streams.
- As you navigate through the Twitch app, use the arrow keys on your Roku remote to browse through the streams and categories. Press the OK button to select a stream and start watching.
By navigating through the Twitch app on Roku, you can easily find the live streams and gaming content that interests you. Whether you want to watch your favorite streamers, discover new games, or explore different categories, the Twitch app on Roku provides a user-friendly interface for seamless navigation.
In the next step, we will cover how to watch live streams on Twitch using your Roku. Let’s continue the journey!
Step 6: Watching Live Streams
Now that you’ve navigated to the stream you want to watch, it’s time to sit back, relax, and enjoy the live gaming action on Twitch. Here’s how you can watch live streams on Twitch using your Roku:
- Using the arrow keys on your Roku remote, navigate to the stream you want to watch and highlight it.
- Press the OK button on your Roku remote to open the stream.
- The live stream will begin playing on your TV screen. You can adjust the volume, pause, and resume the stream using the buttons on your Roku remote.
- While watching a live stream, you can interact with the streamer and other viewers using the chat feature. To access the chat, press the asterisk (*) button on your Roku remote.
- To exit the live stream, press the back or home button on your Roku remote.
Watching live streams on Twitch using your Roku allows you to immerse yourself in the world of gaming and connect with your favorite streamers in real-time. Whether you’re into eSports, let’s plays, or speedruns, Twitch on Roku provides a seamless streaming experience right on your TV screen.
In the next step, we’ll explore how you can interact with streamers and other viewers through the chat feature on Twitch. Let’s continue!
Step 7: Interacting with Streamers and Chat
One of the great features of Twitch is the ability to interact with not only the streamers but also other viewers through the chat feature. Here’s how you can engage with streamers and participate in the chat on Twitch using your Roku:
- While watching a live stream on Twitch, press the asterisk (*) button on your Roku remote to activate the chat feature.
- A chat window will appear on the right side of the screen, displaying messages from other viewers.
- Use the arrow keys on your Roku remote to navigate the chat and select the text input field.
- Once you’ve selected the text input field, use the on-screen keyboard to type your message.
- Press the OK button on your Roku remote to send your message to the chat.
- You can now participate in the chat and engage with the streamer and other viewers by asking questions, sharing your thoughts, or simply cheering on the streamer.
- Keep in mind that Twitch has community guidelines and rules for chat behavior. Be respectful and follow the guidelines to ensure a positive and enjoyable experience for everyone.
Interacting with streamers and other viewers through the chat feature on Twitch adds a social aspect to the streaming experience. It allows you to join a passionate community, connect with like-minded individuals, and share your love for gaming.
In the next step, we’ll discuss how you can customize your Twitch experience on Roku. Let’s continue!
Step 8: Customizing Twitch on Roku
Twitch offers several customization options on Roku, allowing you to tailor your streaming experience to your preferences. Here’s how you can customize Twitch on Roku:
- On the Twitch channel home screen, use the arrow keys on your Roku remote to navigate to the menu icon, typically located in the top-left corner of the screen.
- Select the menu icon to open the Twitch menu, which provides various options for customizing your Twitch experience.
- Within the Twitch menu, you can access your followed channels, saved content, settings, and more. Use the arrow keys to navigate through the options.
- To manage your followed channels, select the “Following” option. Here, you can unfollow channels and organize your followed channels list.
- To view your saved content, select the “Saved” option. This will display your saved videos and clips for easy access.
- To customize your Twitch settings, select the “Settings” option. Here, you can adjust video quality, chat settings, notifications, and other preferences.
- Explore the Twitch menu to discover additional customization options that suit your streaming needs and preferences.
Customizing Twitch on Roku allows you to personalize your Twitch experience, making it easier to access your favorite channels, manage your stored content, and fine-tune settings to enhance your viewing pleasure.
In the final step, we’ll provide some troubleshooting tips to help you overcome common issues while using Twitch on Roku. Let’s get to it!
Step 9: Troubleshooting Tips
While using Twitch on Roku, you may encounter some common issues or challenges. Here are a few troubleshooting tips to help resolve any problems you might face:
- If you experience buffering or poor video quality, ensure that your Roku device and internet connection are working properly. Restart your Roku device and router, and check your internet speed.
- If the Twitch channel is not loading or crashes frequently, try removing and re-adding the Twitch channel from your Roku channel lineup. Go to the Roku home screen, navigate to the Twitch channel, press the * button on your Roku remote, and select “Remove channel”. Then, follow the steps to add the Twitch channel back.
- If you’re having trouble signing in to your Twitch account, double-check your login credentials and ensure that you have entered the activation code correctly on the Twitch activation page.
- If the chat feature is not working or you’re unable to type in the chat, make sure that your Roku remote is functioning properly. Replace the batteries or try using a different Roku remote if available.
- If you’re experiencing specific issues with a particular stream or channel, it might be an issue on the streamer’s end. Try watching a different stream or reach out to the streamer for assistance.
- If all else fails, you can visit the official Twitch support website or contact their support team for further assistance. They can provide more tailored solutions to specific issues.
By following these troubleshooting tips, you can overcome common issues and enjoy a smooth and seamless experience while using Twitch on Roku.
With that, you have completed all the steps to watch Twitch on your Roku device. Now you can immerse yourself in the world of live gaming, discover new streamers, and interact with a vibrant community of fellow gamers.
Enjoy your Twitch viewing experience on Roku and have a blast exploring new games, watching thrilling live streams, and connecting with your favorite streamers!
Conclusion
Congratulations! You’ve successfully learned how to watch Twitch on your Roku streaming device. By following the steps outlined in this guide, you can now bring the world of live gaming and interactive content directly to your TV screen.
Roku provides a convenient platform to access the Twitch channel and stream your favorite games, interact with streamers, and join a passionate community of gamers. With the ability to customize your Twitch experience, you can personalize your viewing preferences and make the most out of your streaming sessions.
Remember to keep your Roku device updated, check your internet connection, and troubleshoot any issues that might arise to ensure a smooth streaming experience. And don’t forget to follow Twitch’s community guidelines and be respectful when participating in the chat and interacting with streamers and fellow viewers.
Now that you have the knowledge and tools to watch Twitch on your Roku, it’s time to dive in, explore new game genres, discover talented streamers, and immerse yourself in the captivating world of live gaming entertainment. Grab your remote, sit back, and enjoy the exciting live streams on Twitch, right from the comfort of your own living room.
Happy streaming!