Introduction
If you’re a music producer or a sound designer, the UVI Workstation is a powerful tool that can take your music creations to the next level. Whether you’re a beginner or an experienced professional, this virtual instrument offers a wide range of sounds and features that can bring your music to life.
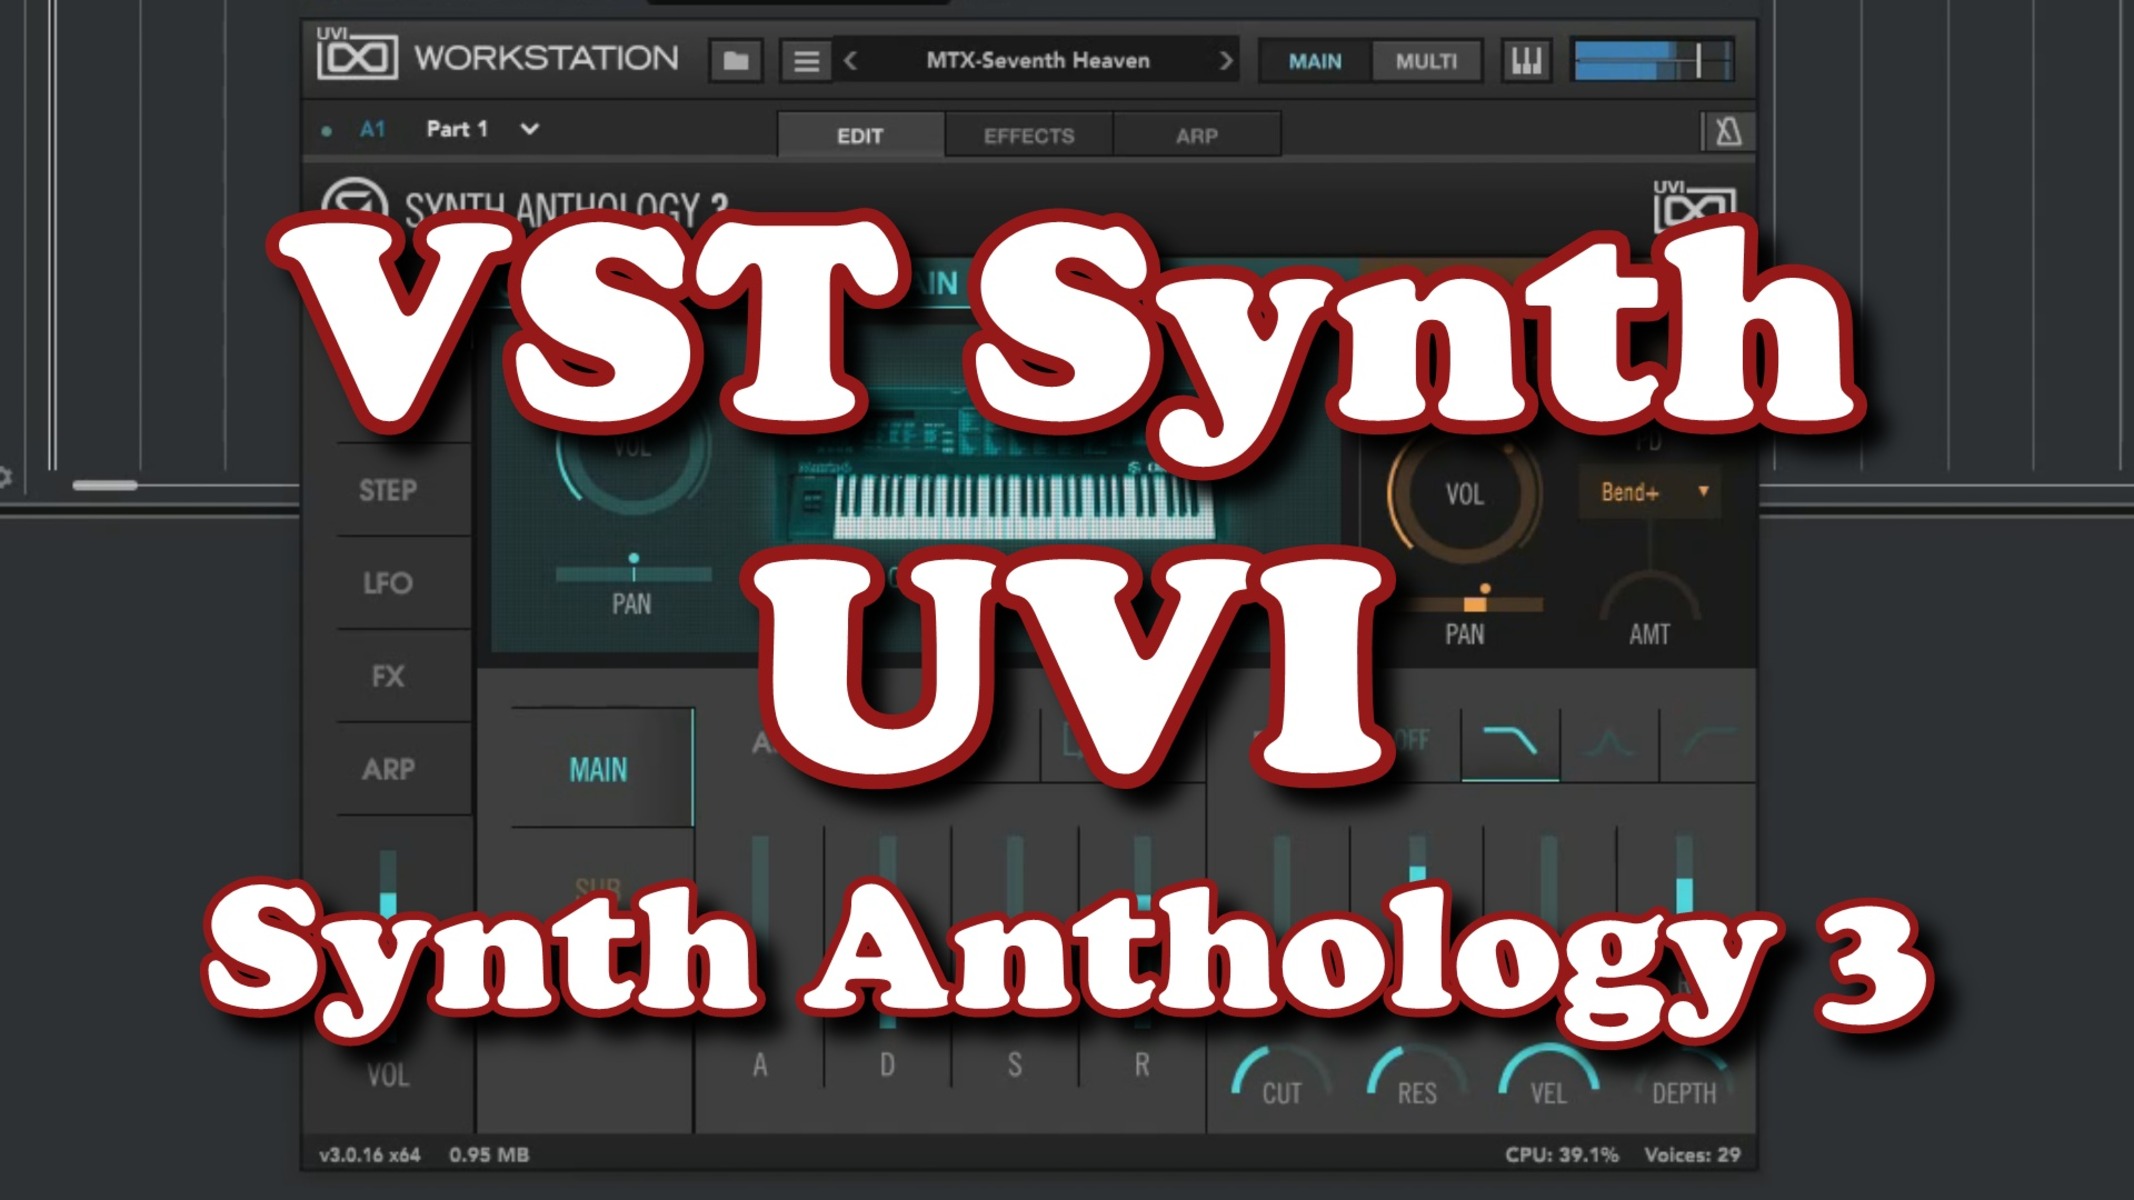
UVI Workstation is a sampler and software synthesizer that was developed by UVI, a renowned company known for their high-quality virtual instruments. It is available as a standalone application and also as a VST plugin, which means you can use it directly in your favorite digital audio workstation (DAW).
In this article, we will guide you through the process of installing UVI Workstation as a VST and explore its various features and functionalities. We’ll cover topics such as setting up UVI Workstation in your DAW, loading soundbanks, navigating the interface, using effects and filters, creating and editing instruments, applying modulation and expression, and saving and managing presets.
With UVI Workstation, you have access to a vast library of sounds, including acoustic and electronic instruments, synthesizers, drum kits, and more. The intuitive interface allows you to easily browse and load sounds, tweak parameters, and shape your own unique sonic creations.
Whether you’re looking for realistic orchestral sounds, futuristic synth textures, or classic vintage instruments, UVI Workstation delivers a versatile and professional sound palette. It is widely used by composers, producers, and sound designers in various genres, from film scoring and electronic music to pop and rock.
In the following sections, we will provide step-by-step instructions and tips on how to make the most out of UVI Workstation. So, let’s dive in and unlock the full potential of this incredible virtual instrument.
What is UVI Workstation?
UVI Workstation is a versatile software sampler and synthesizer developed by UVI. It offers a wide range of features and a vast library of high-quality sounds, making it a go-to tool for music producers, composers, and sound designers.
At its core, UVI Workstation is designed to provide users with an extensive collection of sampled instruments, synthesizers, and effects. It combines advanced sound engine technology with an intuitive interface, allowing users to create expressive and realistic musical performances.
One of the standout features of UVI Workstation is its powerful sound engine, which offers dynamic sampling and playback capabilities. This means that each individual note is sampled multiple times at different velocity levels, resulting in incredibly detailed and expressive sound reproduction.
In addition to its sample-based instruments, UVI Workstation also includes a comprehensive range of virtual synthesizers. From classic analog emulations to cutting-edge digital creations, these synthesizers offer a wide array of sonic possibilities.
UVI Workstation’s interface is designed to be user-friendly and intuitive, making it easy for both beginners and professionals to navigate. The interface allows users to browse the vast library of sounds easily, organize and categorize presets, and customize settings to suit their needs.
One of the key advantages of using UVI Workstation is its compatibility with other popular plugins and DAWs. As a VST plugin, UVI Workstation can be integrated seamlessly into your preferred digital audio workstation, allowing you to access its features directly within your workflow.
Moreover, UVI Workstation supports various industry-standard formats, including AU, AAX, and RTAS, ensuring compatibility with a wide range of software and hardware setups. This flexibility makes UVI Workstation a versatile tool that can fit into any music production environment.
Whether you’re looking for realistic instrument sounds to enhance your compositions, creating unique and experimental electronic textures, or layering and manipulating samples to create entirely new sounds, UVI Workstation offers the tools and flexibility necessary to bring your musical ideas to life.
In the next sections, we will explore the installation process of UVI Workstation as a VST and guide you through its various features and functionalities. So, let’s jump right in and discover the endless possibilities of UVI Workstation!
Installing UVI Workstation as a VST
Installing UVI Workstation as a VST is a straightforward process that allows you to integrate this powerful virtual instrument into your digital audio workstation (DAW). Follow the steps below to install UVI Workstation as a VST on your computer:
1. Download the UVI Workstation installer: Visit the official UVI website and navigate to the download section. Locate the UVI Workstation installer and download it to your computer.
2. Run the installer: Once the download is complete, run the UVI Workstation installer. Follow the on-screen instructions to proceed with the installation process.
3. Choose the VST installation option: During the installation process, you will be prompted to select the installation options. Choose the option to install UVI Workstation as a VST plugin.
4. Select the destination folder: Choose the desired folder location on your computer where you want to install UVI Workstation. It is recommended to select the default folder location unless you have a specific preference.
5. Complete the installation: Click on the “Install” button to start the installation process. Wait for the installation to complete, and then click on the “Finish” button to exit the installer.
6. Open your DAW: Launch your DAW software (e.g., Ableton Live, Logic Pro, FL Studio) on your computer. If you had your DAW open during the installation, close and restart it to ensure that the newly installed plugins are recognized.
7. Scan for plugins: Once your DAW is open, go to the plugin manager or settings section. Look for an option to scan for new plugins or to add a new plugin directory. Click on this option to scan for UVI Workstation.
8. Locate UVI Workstation: After the scan is complete, UVI Workstation should appear in the list of available plugins. Depending on your DAW, it may be listed under the Instruments or Effects category.
9. Set up the plugin: Drag and drop UVI Workstation onto a new track or instrument rack in your DAW. Configure the MIDI input/output settings as needed.
10. Test it out: Load a soundbank or preset in UVI Workstation and start experimenting with the different sounds and features. Explore the interface, tweak parameters, and unleash your creativity.
Congratulations! You have successfully installed UVI Workstation as a VST plugin in your DAW. You can now start exploring the vast library of sounds and unleash your creativity in your music production projects.
Setting Up UVI Workstation in Your DAW
Once you have installed UVI Workstation as a VST plugin in your digital audio workstation (DAW), it’s time to set it up and ensure that it works seamlessly within your workflow. Follow the steps below to properly configure UVI Workstation in your DAW:
1. Create a new track or instrument rack: Open your DAW and create a new track or instrument rack where you want to use UVI Workstation. This can be done by going to the “File” menu or using the keyboard shortcut specific to your DAW.
2. Add UVI Workstation to the track: In your DAW’s plugin browser or instrument rack, locate UVI Workstation and drag it onto the newly created track or instrument rack. This will instantiate UVI Workstation as a plugin in your project.
3. Configure MIDI input and output: In your DAW’s track settings or plugin interface, ensure that the MIDI input and output settings are correctly configured. This will allow you to control UVI Workstation using MIDI data from your MIDI controller or sequencer.
4. Assign MIDI channels: If you’re using multiple instances of UVI Workstation or working with multi-timbral setups, assign different MIDI channels to each instance. This way, you can control different instruments and sounds within UVI Workstation independently.
5. Set audio outputs: In your DAW’s track settings or plugin interface, assign audio outputs for UVI Workstation. This will determine where the audio from UVI Workstation will be routed within your DAW’s mixer and audio routing system.
6. Configure sample rate and buffer size: Ensure that the sample rate and buffer size settings in your DAW match the settings in UVI Workstation. Consistency between these settings is crucial for achieving optimal performance and avoiding any synchronization issues.
7. Enable MIDI and audio recording: If you plan on recording MIDI data or audio directly from UVI Workstation into your DAW, make sure that the appropriate MIDI and audio recording options are enabled in your DAW’s preferences or settings.
8. Set up automation: UVI Workstation offers a wide range of parameters that can be automated in your DAW. Familiarize yourself with the automation capabilities of your DAW and set up automation lanes to control parameters in UVI Workstation over time.
9. Save and organize presets: As you explore UVI Workstation and create your own custom sounds and instrument setups, be sure to save and organize your presets. This will allow for easy access and retrieval of your favorite sounds in future projects.
10. Test and optimize performance: Before diving into your music production, it’s recommended to test UVI Workstation’s performance within your project. Adjust the buffer size and optimize your computer’s settings to ensure smooth playback and minimal latency.
With UVI Workstation properly set up in your DAW, you’re now ready to unleash its powerful features and dive into the world of creative sound design and music production. Experiment with different soundbanks, explore the interface, and let your imagination run wild with the endless possibilities offered by UVI Workstation.
Loading a Soundbank in UVI Workstation
One of the key features of UVI Workstation is its extensive library of soundbanks, which contain a wide variety of sampled instruments, synthesizers, and effects. Loading a soundbank in UVI Workstation is a simple process that allows you to access and explore the vast collection of sounds. Follow the steps below to load a soundbank in UVI Workstation:
1. Open UVI Workstation: Launch UVI Workstation either as a standalone software or as a plugin within your digital audio workstation (DAW).
2. Access the browser: Locate the browser section within the UVI Workstation interface. This is usually located on the left side of the plugin interface and contains various tabs and categories.
3. Select a soundbank: Click on the “Soundbanks” or “Libraries” tab in the browser to access the list of available soundbanks. Browse through the different categories and subcategories to find the soundbank you want to load.
4. Load the soundbank: Once you have found the desired soundbank, click on it to reveal its contents. This may include different instrument presets, multisamples, drum kits, and more. Select the specific sound or instrument you want to load by clicking on it.
5. Adjust settings and parameters: After loading the soundbank, you may have the option to adjust various settings and parameters. This can include modifying the ADSR envelope, applying effects, tweaking filter settings, and more. Explore the available options to customize the sound to your preference.
6. Explore different layers and articulations: Some soundbanks in UVI Workstation offer multiple layers and articulations for a more expressive and dynamic performance. Experiment with different keyswitches, velocity layers, and articulation mappings to add depth and realism to your playing.
7. Play the loaded sound: Once you have loaded the soundbank and customized the settings, play the sound using your MIDI controller or the virtual keyboard within UVI Workstation. Explore the different tonal characteristics, dynamics, and expressive capabilities of the loaded sound.
8. Save and manage presets: If you create a custom sound or tweak the loaded soundbank to your liking, you can save it as a preset for future use. UVI Workstation provides options to save and manage presets, allowing you to easily access your favorite sounds in future projects.
9. Combine multiple soundbanks: UVI Workstation allows you to load multiple soundbanks simultaneously, creating complex instrument setups and layered sounds. Experiment with combining different soundbanks to create unique and innovative sonic textures.
10. Explore additional soundbanks: UVI Workstation offers a vast library of soundbanks, so don’t be afraid to explore and try out different ones. Many soundbanks cover a wide range of genres and styles, providing endless possibilities for your music productions.
By following these steps, you can easily load a soundbank in UVI Workstation and start exploring the rich collection of sounds and instruments it has to offer. Take your music production to new heights by unleashing the creative potential of UVI Workstation’s extensive soundbank library.
Navigating the UVI Workstation Interface
The UVI Workstation interface is designed to be user-friendly and intuitive, allowing you to easily navigate and access its various features and functionality. Familiarizing yourself with the interface will help you make the most out of this powerful virtual instrument. Here’s a guide on navigating the UVI Workstation interface:
1. Main Menu Bar: The topmost section of the interface contains the main menu bar, where you can access different menus and functions. This includes options to load and save presets, manage soundbanks, adjust preferences, and more.
2. Browser: Located on the left side of the interface, the browser allows you to browse through the available soundbanks and categories. It provides a convenient way to explore and load sounds into UVI Workstation.
3. Instrument Editor: The instrument editor is where you can view and customize the parameters and settings of the currently loaded instrument or soundbank. This section allows you to adjust various aspects such as envelopes, filters, effects, modulation sources, and more.
4. Keyboard and Trigger Pads: UVI Workstation features a virtual keyboard and trigger pads, which allow you to play and trigger sounds using your mouse or MIDI controller. The keyboard can be used to play melodies, while the trigger pads can be used for percussion or triggering different samples.
5. Mixer: The mixer section allows you to control the levels, panning, and effects of individual layers and instruments within UVI Workstation. You can adjust the volume, apply EQ, add insert or send effects, and customize the overall mix of your sounds.
6. MIDI Modulation and Expression Matrix: UVI Workstation includes a MIDI modulation and expression matrix, which enables you to create dynamic and expressive performances. This matrix allows you to map MIDI controllers, such as modulation wheel or aftertouch, to control various parameters of the loaded sound.
7. Effects and Filters: UVI Workstation provides a variety of effects and filters that can shape and enhance your sounds. This section allows you to apply effects such as reverb, delay, chorus, and more. Additionally, you can apply filters to sculpt the frequency content of your sounds.
8. Preset Browser: UVI Workstation offers a preset browser that lets you easily access and manage your saved presets. This section allows you to search, categorize, and organize your presets for quick and efficient workflow.
9. Performance Controls: UVI Workstation includes performance controls such as pitch bend, modulation wheel, and assignable controllers. These controls enable you to add expression and nuance to your performances and create dynamic sound variations.
10. Help and Documentation: UVI Workstation provides comprehensive documentation and help resources to assist you in understanding and using its features effectively. The help menu or dedicated documentation section offers information on various aspects of UVI Workstation’s functionality and usage.
By familiarizing yourself with the UVI Workstation interface, you can navigate and access its features with ease. Take some time to explore and experiment with the different sections, parameters, and controls to unlock the full potential of this versatile virtual instrument.
Basic Controls and Features in UVI Workstation
UVI Workstation offers a wide range of basic controls and features that allow you to shape and customize your sounds. Understanding these controls will help you navigate the interface and make the most out of this powerful virtual instrument. Let’s explore some of the primary controls and features in UVI Workstation:
1. Volume and Pan: UVI Workstation provides controls to adjust the volume and pan of individual layers or instruments. The volume control allows you to adjust the overall level, while the pan control enables you to position the sound in the stereo field.
2. Keyboard and Trigger Pads: The virtual keyboard and trigger pads in UVI Workstation allow you to play and trigger sounds using your mouse or MIDI controller. The keyboard is ideal for playing melodies, while the trigger pads are useful for percussion or triggering different samples.
3. Preset Browser: UVI Workstation includes a preset browser that allows you to easily access and manage your saved presets. You can search, categorize, and organize your presets for quick and efficient workflow.
4. MIDI Learn: With UVI Workstation’s MIDI Learn feature, you can easily assign MIDI controllers to control various parameters. This allows you to tweak and modulate parameters in real-time using your MIDI controller.
5. Envelopes: UVI Workstation provides envelope controls that allow you to shape the amplitude and timbre of your sounds. You can adjust parameters such as attack, decay, sustain, and release to control how the sound evolves over time.
6. Filters: UVI Workstation offers a range of filter types, including low-pass, high-pass, band-pass, and more. Filters allow you to shape the frequency content of your sounds, enhancing or reducing specific frequencies to achieve the desired tonal character.
7. Effects: UVI Workstation includes a variety of effects that can be applied to your sounds. These effects include reverb, delay, chorus, distortion, and more. You can adjust the parameters of each effect to add depth, space, and character to your sound.
8. Modulation Matrix: UVI Workstation features a modulation matrix that allows you to assign various sources, such as LFOs and envelopes, to modulate different parameters. This enables you to create dynamic and evolving sounds by introducing modulation to parameters like pitch, filter cutoff, and more.
9. Keyswitches and Articulations: Some soundbanks in UVI Workstation support keyswitches and articulations, which allow you to switch between different playing techniques or sounds. These can include different playing styles, articulations like staccato or legato, or even switching between different instruments within a multi-sampled soundbank.
10. Polyphony and Voices: UVI Workstation provides settings to adjust the polyphony or number of voices available. This determines the maximum number of notes that can be played simultaneously. Adjusting the polyphony can help optimize performance and avoid note cutoffs.
By familiarizing yourself with the basic controls and features in UVI Workstation, you can effectively navigate and shape your sounds to suit your creative vision. Take the time to explore and experiment with these controls, and unlock the full potential of this versatile virtual instrument.
Creating and Editing Instruments in UVI Workstation
UVI Workstation not only provides a vast library of preloaded instruments and soundbanks but also allows you to create and customize your own instruments. This gives you the flexibility to shape your unique sonic creations. Here’s a guide on how to create and edit instruments in UVI Workstation:
1. Starting with a Empty Instrument: To create a new instrument, start by loading an empty instrument in UVI Workstation. This can be done by selecting the “New Instrument” option or by clearing any loaded soundbanks.
2. Layering Sounds: UVI Workstation allows you to layer sounds to create rich and complex instruments. You can drag and drop multiple sound sources or samples into different layers within the instrument editor. Adjust the volume, panning, and other parameters for each layer to fine-tune the mix.
3. Mapping Keyzones: Keyzones define which keys trigger specific notes or sounds in your instrument. Use the keyzone editor to map different samples or sound sources to specific key ranges. This allows for playing different timbres or articulations across the keyboard.
4. Customizing Parameters: UVI Workstation offers a wide range of parameters that can be customized within each layer. Explore the instrument editor to adjust settings such as ADSR envelopes, filters, LFOs, and effects. This enables you to shape the sound and create unique sonic textures.
5. Modulation and Expression: UVI Workstation provides a modulation matrix that allows you to assign various modulation sources, such as envelopes or LFOs, to control different parameters. Experiment with modulation to add movement and expressiveness to your instrument.
6. Effects Processing: Enhance your instrument by adding effects processing to the entire instrument or individual layers. UVI Workstation offers a range of effects, including reverb, delay, chorus, and more. Adjust the parameters to shape the sound as desired.
7. Saving and Managing Instruments: Once you have created your instrument, save it as a preset for future use. UVI Workstation allows you to save and manage presets, making it easy to access your custom instruments in other projects.
8. Editing Existing Instruments: UVI Workstation also allows you to edit existing instruments or presets. Load a preset from the soundbank, make changes to the parameters, and save it as a new preset or overwrite the existing one.
9. Macro Controls: UVI Workstation provides macro controls that allow you to assign multiple parameters to a single control, making it easier to manipulate and perform in real-time. Assign frequently used parameters to macro controls for quick and intuitive sound shaping.
10. Experiment and Explore: Creating and editing instruments in UVI Workstation is a creative process. Don’t be afraid to experiment and explore different combinations of sound sources, parameters, and effects. Continuously tweak and refine your instrument until it matches your vision.
By utilizing the instrument creation and editing features in UVI Workstation, you can design instruments that reflect your unique sound and style. Whether you’re creating from scratch or customizing existing presets, the possibilities for sonic exploration and innovation are endless.
Using UVI Workstation’s Effects and Filters
UVI Workstation comes equipped with a versatile array of effects and filters that allow you to shape, enhance, and manipulate your sounds to achieve the desired sonic characteristics. Understanding how to utilize these effects and filters will help you add depth and creativity to your music. Here’s a guide on how to use UVI Workstation’s effects and filters:
1. Effects Section: UVI Workstation features a dedicated effects section where you can add and tweak various effects to enhance your sounds. Click on the effects tab in the instrument editor to access the available effects.
2. Effects Routing: UVI Workstation allows you to route effects in different ways, such as inserting them directly on the instrument or applying them to the overall output. Experiment with different routing options to achieve the desired sonic result.
3. Reverb: Reverb adds a sense of space and depth to your sounds, simulating the natural reflections of a room. UVI Workstation provides different types of reverb, giving you the ability to create anything from small rooms to vast, spacious environments.
4. Delay: Delay produces echoes and repeats of your sound, adding rhythmic movement and ambience. UVI Workstation offers various delay settings, including feedback, time, and modulation controls for precise control over the effect.
5. Chorus and Flanger: Chorus and flanger effects create modulation by duplicating and slightly detuning the original sound. This adds richness, movement, and width to your sound. UVI Workstation’s chorus and flanger options allow you to adjust the modulation rate, depth, and feedback parameters.
6. Distortion: UVI Workstation’s distortion effects introduce harmonic distortion, adding warmth, grit, and character to your sounds. Adjust parameters such as drive, tone, and level to shape the intensity and coloration of the distortion effect.
7. EQ and Filters: UVI Workstation provides EQ and filter options to shape the frequency content of your sounds. Adjust the EQ parameters to boost or cut specific frequencies, while the filter parameters allow you to shape the tonal characteristics by controlling cutoff, resonance, and filter type.
8. Modulation Effects: UVI Workstation offers modulation effects like tremolo, vibrato, and auto-panning. These effects add rhythmic motion and modulation to your sounds, creating dynamic and evolving textures.
9. Dynamics Processing: UVI Workstation includes dynamics processing such as compressors and limiters. These tools help you control the dynamic range of your sounds, allowing you to enhance the sustain, control peaks, and accentuate specific elements.
10. Effects Automation: UVI Workstation allows you to automate the parameters of the effects and filters. This means you can create dynamic changes in the effects over time, adding movement and expression to your sound.
Experiment with different combinations of effects and filters in UVI Workstation to achieve the desired tonal characteristics and sonic textures. Use them subtly to enhance your sounds or creatively to transform them entirely. The flexibility and versatility of UVI Workstation’s effects and filters provide endless possibilities for sound design and musical expression.
Applying Modulation and Expression in UVI Workstation
Modulation and expression are crucial elements in bringing life and movement to your music. UVI Workstation provides various tools and features that allow you to apply modulation and expression, adding depth and nuance to your sounds. Here’s a guide on how to apply modulation and expression in UVI Workstation:
1. Modulation Matrix: UVI Workstation’s modulation matrix enables you to assign modulation sources to control various parameters. Click on the modulation matrix section to access and configure the modulation routing.
2. Modulation Sources: UVI Workstation offers a range of modulation sources that can be assigned to different parameters. These sources include LFOs, envelopes, MIDI controllers, and more. Experiment with different modulation sources to create movement and variation in your sounds.
3. Mapping Modulation: Within the modulation matrix, you can assign modulation sources to specific parameters by selecting the modulation source, destination, and the amount of modulation. This allows you to control parameters like filter cutoff, resonance, pitch, and more using various modulation sources.
4. Envelope Modulation: UVI Workstation’s envelopes can be used as a modulation source, allowing you to shape the dynamics of your sounds over time. Assign envelopes to parameters like volume, filter cutoff, or any other parameter that you want to modulate based on the envelope shape.
5. LFO Modulation: Low-Frequency Oscillators (LFOs) in UVI Workstation generate cyclic modulation waveforms. These can be assigned to parameters such as filter cutoff, pitch, or amplitude to create rhythmic modulation effects. Experiment with different LFO shapes, rates, and amounts to achieve desired modulation effects.
6. Key and Velocity Tracking: UVI Workstation allows you to use key and velocity tracking to modulate parameters. Key tracking adjusts parameters based on the pitch of the played notes, while velocity tracking modulates parameters based on the intensity of the played notes. Use these tracking features to add expressive variations to your sounds.
7. MIDI Learn: Assigning MIDI controllers to modulate parameters in UVI Workstation is easy with the MIDI Learn feature. Right-click on a parameter, select MIDI Learn, and move the desired controller on your MIDI controller. This allows you to perform real-time modulation using hardware or software controllers.
8. Expression Controls: UVI Workstation provides expression controls such as modulation wheel, aftertouch, and pedal inputs. These controls allow you to add real-time variations to parameters while performing or recording, adding expressive nuances to your music.
9. Automation: In addition to real-time modulation, UVI Workstation allows you to automate modulation and expression parameters in your DAW. This enables you to create dynamic changes over time, adding movement and evolving textures to your sounds.
10. Experiment and Explore: Modulation and expression are powerful tools for sound design and musical expression. Don’t be afraid to experiment with different modulation sources, destinations, and amounts. Combine multiple modulation sources and explore unique combinations to create intricate and evolving soundscapes.
By applying modulation and expression in UVI Workstation, you can bring your sounds to life and add a sense of movement, variation, and expression to your music. Experiment with different modulation sources, destinations, and amounts to unleash your creativity and create captivating sonic experiences.
Saving and Managing Presets in UVI Workstation
UVI Workstation offers powerful preset management features that allow you to save, organize, and recall your favorite sounds and instrument setups. Properly saving and managing presets in UVI Workstation not only ensures easy access to your custom creations but also streamlines your workflow. Here’s a guide on how to save and manage presets in UVI Workstation:
1. Saving Presets: Once you have dialed in and customized a sound or instrument setup in UVI Workstation, you can save it as a preset for future use. Click on the preset menu or button in the instrument editor and choose “Save Preset.” Give your preset a descriptive name and choose a location to save it on your computer.
2. Organizing Presets: UVI Workstation allows you to create folders and subfolders to organize your presets. Use this feature to categorize your presets based on genres, moods, or any other classification that suits your workflow. This makes it easier to locate and access presets when needed.
3. Deleting Presets: If you no longer need a preset or want to declutter your library, you can delete presets in UVI Workstation. Select the preset you want to remove and either right-click and choose “Delete” or navigate to the preset menu and select “Delete.” Confirm the deletion when prompted.
4. Renaming Presets: UVI Workstation provides the option to rename presets. If you want to change the name of a preset to something more meaningful or descriptive, select the preset and either right-click and choose “Rename” or access the preset menu and select “Rename.”
5. Importing and Exporting Presets: UVI Workstation allows you to import and export presets, making it easy to share your custom creations with others or transfer them between different systems. Use the import and export options in the preset menu to import presets from external sources or export them for sharing.
6. Factory Presets: UVI Workstation comes with a collection of factory presets that span various instruments and styles. These presets serve as a great starting point for your own creations. Explore and experiment with the factory presets to discover new sounds and inspire your music-making process.
7. User Libraries: UVI Workstation allows you to create user libraries to store your own presets separate from the factory presets. This ensures that your custom presets are easily accessible and separate from the default presets provided by UVI Workstation.
8. Backup and Restore: It’s important to regularly backup your presets to safeguard your hard work and ensure that they are not lost due to system failures or accidental deletions. Create a backup of your presets on external storage devices or cloud services to prevent data loss.
9. Preset Browser: UVI Workstation’s preset browser provides a convenient way to search, filter, and browse through your preset library. Use the search bar or category filters to quickly locate presets based on specific criteria and easily preview and audition presets before loading them.
10. User Favorites: UVI Workstation offers the ability to mark presets as favorites, allowing you to quickly access your most frequently used sounds. Mark presets as favorites by selecting the preset and either right-clicking and choosing “Add to Favorites” or accessing the preset menu and selecting “Add to Favorites.”
By saving and managing your presets in UVI Workstation, you can efficiently organize your custom creations and easily recall them when needed. Take advantage of the preset management features to streamline your workflow, save time, and stay focused on your music-making process.
Conclusion
UVI Workstation is a powerful virtual instrument that offers a wide range of sounds, features, and creative possibilities for music producers, composers, and sound designers. With its intuitive interface, extensive library of soundbanks, and customizable parameters, UVI Workstation provides a versatile toolset for unleashing your musical ideas.
Throughout this guide, we have explored various aspects of using UVI Workstation, starting with the installation process as a VST plugin, setting up within your DAW, loading soundbanks, navigating the interface, utilizing basic controls, creating and editing instruments, applying effects and filters, and incorporating modulation and expression.
By following these instructions, exploring the features, and experimenting with different parameters, you can unlock the full potential of UVI Workstation and create unique, professional-quality sounds for your music productions.
Remember to save and manage your presets to streamline your workflow and easily recall your favorite custom sounds. Take advantage of the extensive soundbank library and explore the different categories and genres to find inspiration and new sonic possibilities.
UVI Workstation’s modulation and expression capabilities allow you to add depth, movement, and expression to your music. Experiment with assigning modulation sources to various parameters, map expression controls to add nuance, and automate modulation to introduce dynamic changes over time.
Whether you’re a beginner or an experienced producer, UVI Workstation empowers you to create distinct sounds, from realistic instrument emulations to innovative electronic textures. The endless possibilities offered by UVI Workstation make it a valuable tool for any music production environment.
So, take the time to dive deeper into UVI Workstation, explore its features, and let your creativity soar. With the right approach and an open mind, you can harness the power of UVI Workstation to bring your musical vision to life.
Start creating expressive melodies, captivating soundscapes, and engaging compositions with UVI Workstation, and let your musical journey unfold with limitless sonic potential.


