Introduction
Welcome to the world of Android tablets, where convenience and portability meet technology. Android tablets have become a popular choice for many users, thanks to their versatility and user-friendly interface. One of the great features of Android tablets is the ability to expand their storage capacity using a flash drive.
Flash drives, also known as thumb drives or USB sticks, have been a lifesaver for many who need to transfer and store data on the go. They are small, portable, and offer ample storage space for photos, videos, documents, and more. The best part is that you can easily connect a flash drive to your Android tablet and access your files anytime, anywhere.
In this article, we will explore how to use a flash drive on an Android tablet. We will guide you through the process of connecting a flash drive to your tablet, accessing and transferring files, and managing your data efficiently. Whether you want to free up space on your tablet or need to transfer files between devices, a flash drive can be an invaluable tool.
Before we dive into the details, let’s take a closer look at what a flash drive is and the benefits it offers when used with an Android tablet.
What Is a Flash Drive?
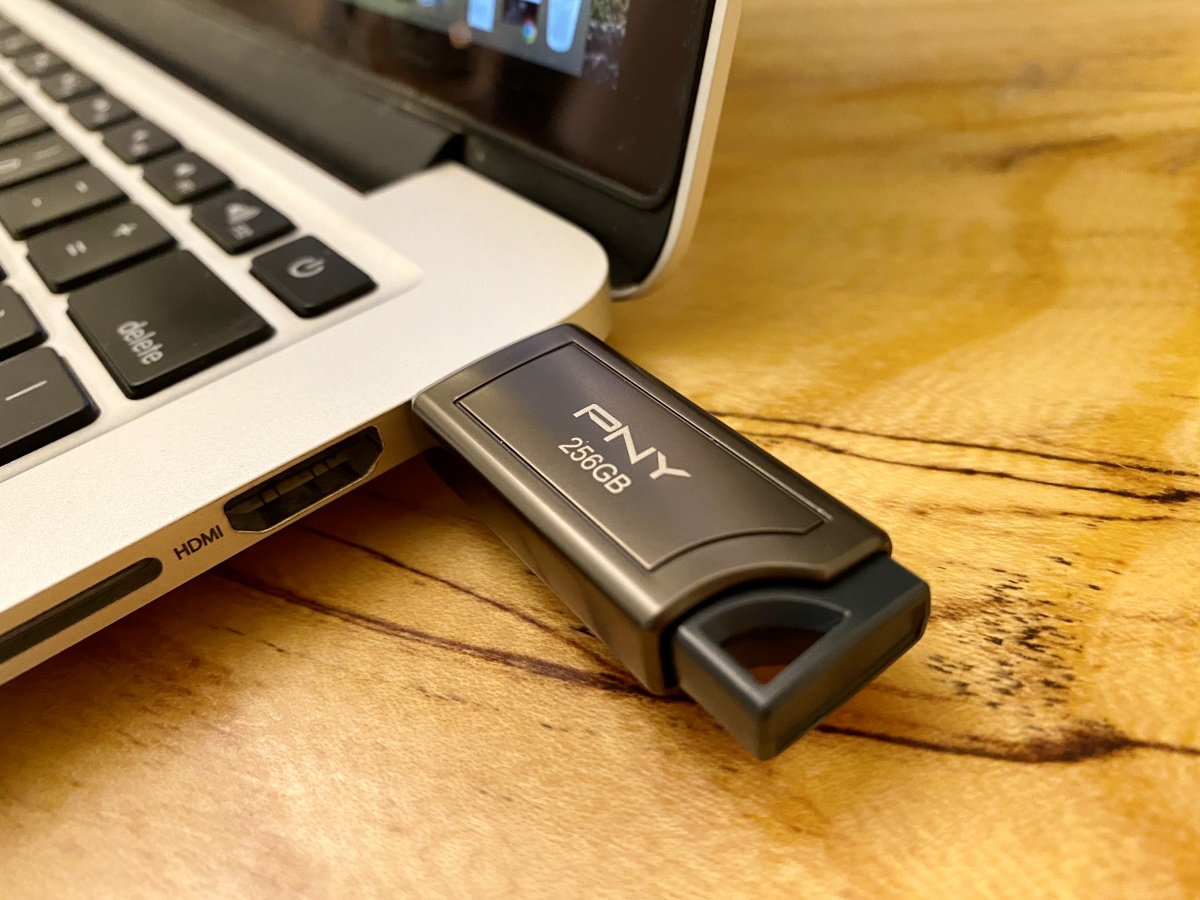
A flash drive, also referred to as a USB drive, thumb drive, or pen drive, is a portable storage device that allows you to store and transfer data. It is a small, lightweight device that connects to your computer or mobile device using a USB interface.
Flash drives have revolutionized the way we store and transport data. Unlike traditional storage mediums like floppy disks or CDs, flash drives use solid-state memory chips to store data electronically. This makes them more durable, faster, and capable of storing larger amounts of data.
Flash drives typically come in various storage capacities, ranging from a few gigabytes to several terabytes. Their compact design makes them highly portable, allowing you to carry important files, documents, photos, and videos with ease.
With a flash drive, you can access and transfer data between different devices without the need for an internet connection. You can easily plug it into any USB port on a computer, laptop, or Android tablet, making it a convenient tool for data storage and transfer.
In addition to their portable nature, flash drives are compatible with a wide range of devices. They work with both Windows and macOS computers, as well as Android devices. This versatility makes them an ideal choice for cross-platform file sharing.
Moreover, modern flash drives offer high-speed data transfer rates, ensuring quick and efficient file transfers. This is particularly useful when working with large files or when you need to transfer files in a time-sensitive situation.
Overall, flash drives provide a reliable and convenient way to store and transfer data. Now that we understand what a flash drive is and its capabilities, let’s explore the benefits of using a flash drive on an Android tablet.
Benefits of Using a Flash Drive on an Android Tablet
Using a flash drive with your Android tablet brings a host of benefits that can enhance your tablet experience. Here are some advantages of utilizing a flash drive:
- Expanded storage capacity: Android tablets often come with limited internal storage. By connecting a flash drive, you can instantly expand your tablet’s storage capacity. This allows you to store more files, such as photos, videos, music, and documents, without worrying about running out of space.
- Easy file transfer: With a flash drive, you can easily transfer files between your tablet and other devices. Whether you want to transfer photos from your tablet to a computer or share documents with a colleague, a flash drive eliminates the need for cumbersome cables or an internet connection.
- Portability and convenience: Flash drives are compact and lightweight, making them highly portable. You can carry your important files with you wherever you go and access them on your Android tablet. Whether you’re traveling, working remotely, or attending a meeting, having your files on a flash drive ensures you always have them within reach.
- Backup and data security: Using a flash drive as a backup solution offers an extra layer of protection for your important files. You can regularly back up your tablet’s data to a flash drive, safeguarding it against accidental loss or device failure. Additionally, you can keep sensitive files on a separate flash drive, providing a level of privacy and security.
- Compatibility with various file formats: Flash drives are compatible with a wide range of file formats, making them ideal for storing diverse types of content. Whether you need to save photos in JPEG format, videos in MP4, or documents in PDF, a flash drive can accommodate different file types without any compatibility issues.
The benefits of using a flash drive on your Android tablet go beyond just storage expansion. They offer convenience, security, and flexibility, allowing you to make the most out of your tablet. Now that we understand the advantages, let’s explore how to connect a flash drive to an Android tablet.
Compatibility and Requirements
Before connecting a flash drive to your Android tablet, it’s important to ensure compatibility and meet the necessary requirements. Here are a few key points to consider:
- USB OTG Support: Most Android tablets come with USB On-The-Go (OTG) support, which allows the device to function as a host and connect to external devices like flash drives. To check if your tablet has OTG support, you can search for your device model on the manufacturer’s website or refer to the tablet’s user manual.
- Android OS Version: The Android operating system version on your tablet can also affect compatibility with flash drives. Generally, most Android tablets running on Android 4.0 (Ice Cream Sandwich) or later versions should support flash drive connectivity. However, it’s always a good idea to verify the specific requirements for your device.
- File System Format: Flash drives usually come formatted with the FAT32 file system, which is compatible with both Windows and Android. However, if you plan to use large files (over 4GB) on your flash drive, you might consider reformatting it to the exFAT or NTFS file system for better compatibility and support for larger file sizes.
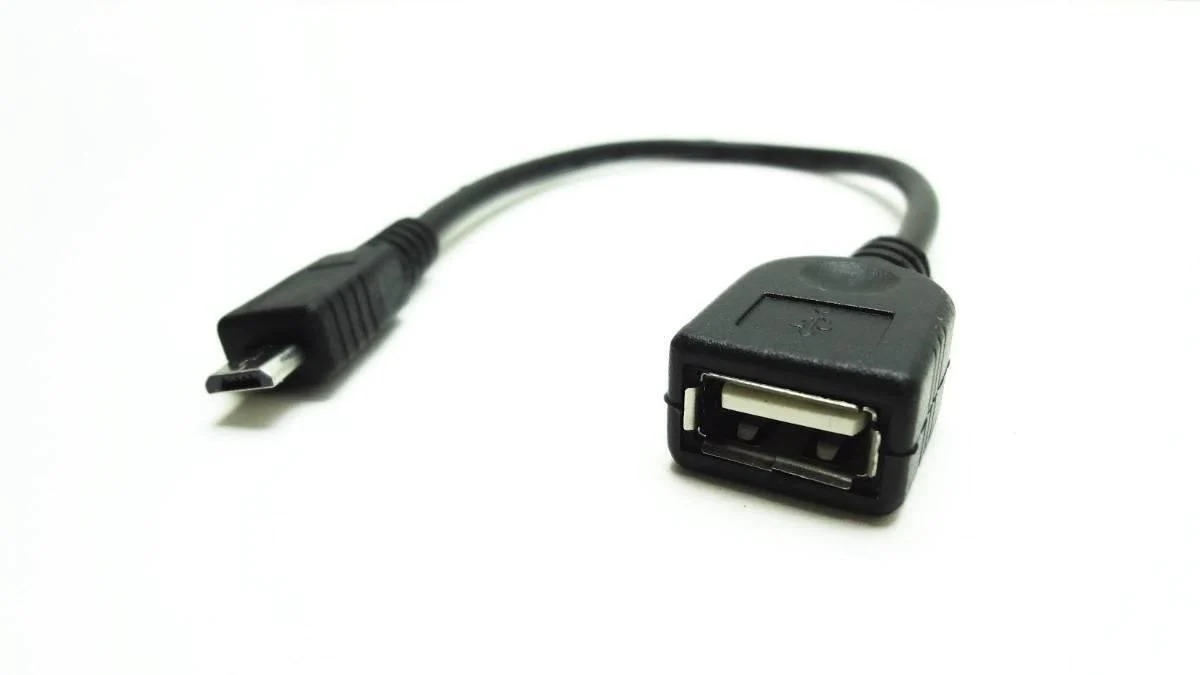
- OTG Cable or USB-C Flash Drive: To connect a flash drive to your Android tablet, you will typically need an OTG cable or a USB-C flash drive. An OTG cable, also known as an OTG adapter, allows you to connect a standard USB-A flash drive to the micro-USB or USB-C port on your tablet. Alternatively, if your tablet has a USB-C port, you can directly connect a USB-C flash drive without the need for an adapter.
- Third-Party File Manager: While some Android tablets come with built-in file managers that support USB storage, it’s recommended to install a reliable third-party file manager app from the Google Play Store. These file managers offer more flexibility and advanced features for managing files on your external storage devices.
By ensuring compatibility and meeting the requirements mentioned above, you can ensure a seamless connection and optimal performance when using a flash drive with your Android tablet. Next, we will explore the different methods of connecting a flash drive to your tablet.
Connecting a Flash Drive to an Android Tablet
Connecting a flash drive to your Android tablet can be done using various methods, depending on the available ports on your device. Here are two common ways to connect a flash drive:
- Using an OTG Cable: If your tablet has a micro-USB port, you will need an OTG cable or adapter to connect a standard USB flash drive. Here’s how to do it:
- Connect one end of the OTG cable to the micro-USB port on your tablet.
- Connect the other end of the OTG cable to the USB-A end of your flash drive.
- Your tablet should detect the flash drive automatically, and you will see a notification indicating its connection.
- Using a USB-C Flash Drive: If your tablet has a USB-C port, you can directly connect a USB-C flash drive without the need for an adapter. Here’s how to connect it:
- Insert the USB-C end of your flash drive into the USB-C port on your tablet.
- Your tablet should recognize the flash drive instantly, and a notification will appear to confirm the connection.
Once you’ve successfully connected your flash drive to your Android tablet, you can start accessing and managing your files. However, keep in mind that some tablets might require you to enable USB storage mode or grant permission to access the external storage. If prompted, simply follow the on-screen instructions to proceed.
It’s important to note that not all Android tablets support flash drive connectivity. If you’re unsure about your tablet’s compatibility, refer to the manufacturer’s documentation or contact their customer support for guidance.
Now that you know how to connect a flash drive to your Android tablet, let’s move on to the next section and explore how to access your files on the flash drive.
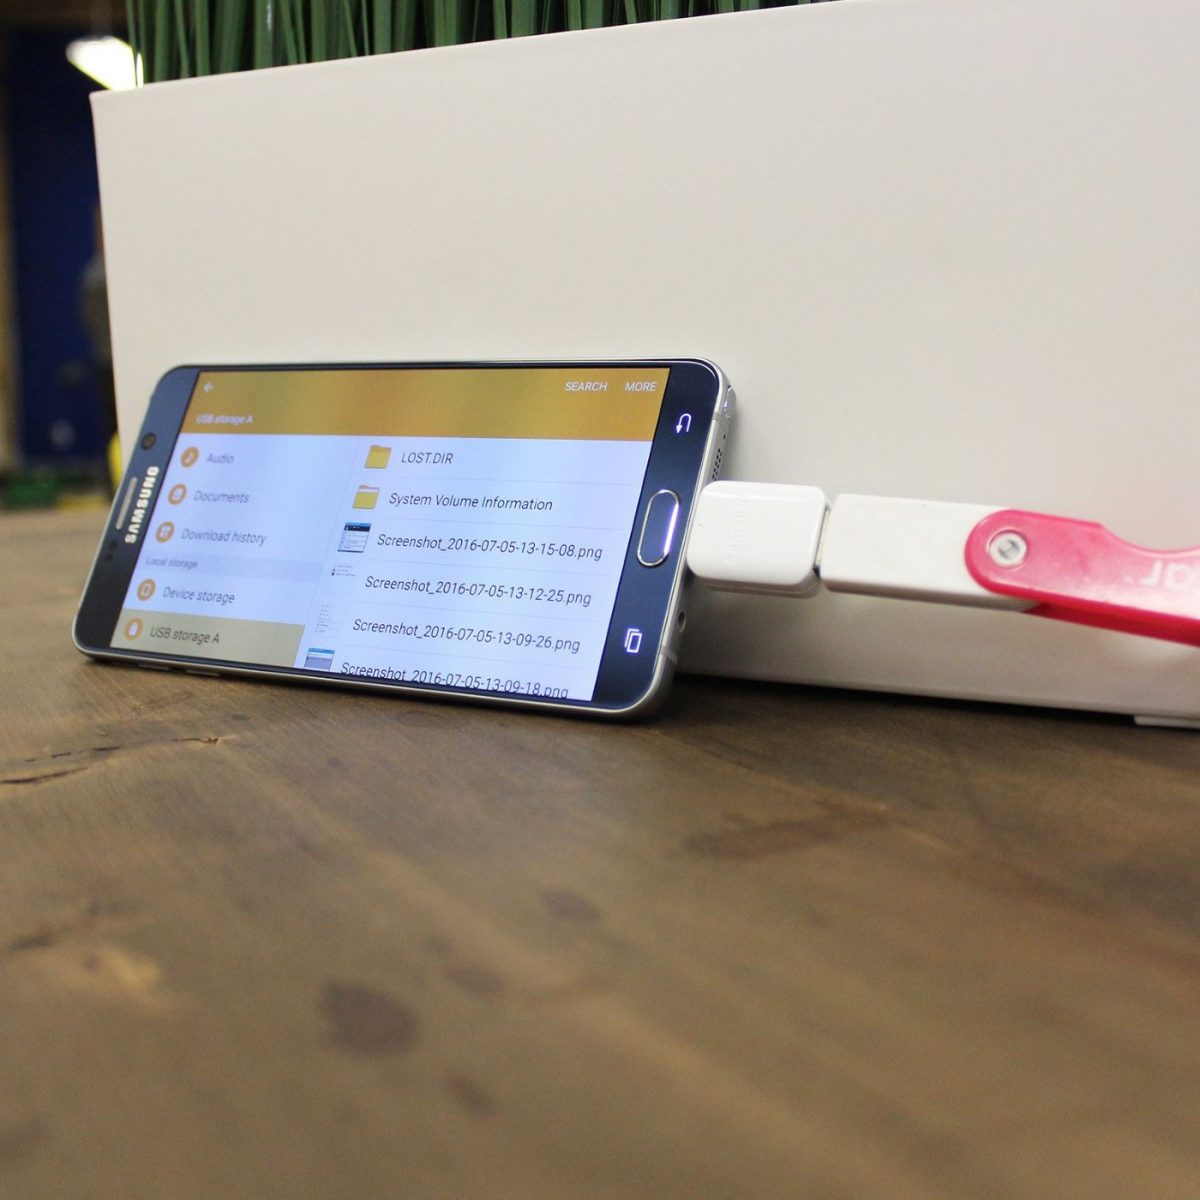
Using an OTG Cable
If your Android tablet has a micro-USB port, you can connect a standard USB flash drive using an OTG (On-The-Go) cable or adapter. This method allows you to easily access and manage files on your flash drive directly from your tablet. Here’s how to use an OTG cable:
- Start by ensuring that your tablet is powered on and unlocked.
- Connect one end of the OTG cable to the micro-USB port on your tablet. The other end of the cable should have a USB-A port.
- Connect your flash drive to the USB-A port on the OTG cable.
- Once connected, your tablet should recognize the flash drive and display a notification indicating its connection.
- To access the files on the flash drive, open the file manager app on your tablet. If you don’t have a file manager app installed, you can download one from the Google Play Store.
- In the file manager app, navigate to the “Flash Drive” or “USB Storage” location. This location may vary depending on the file manager app you’re using.
- Tap on the flash drive icon to open it. You will now see the files and folders stored on your flash drive.
- To open a file, simply tap on it, and it will open in the associated app on your tablet.
- If you want to transfer files to or from the flash drive, you can do so by selecting the desired files or folders and using the file manager’s built-in copy, cut, or paste functions.
Remember to safely eject the flash drive from your tablet when you’re done using it. This helps prevent data corruption and ensures that all files are properly saved. To eject the flash drive, go to the notification panel on your tablet, find the flash drive notification, and tap on “Eject” or “Disconnect”. Once ejected, you can safely remove the flash drive from the OTG cable.
Using an OTG cable is a simple and effective way to connect a flash drive to your Android tablet. It allows you to access files, transfer data, and expand your tablet’s storage capacity on the go. However, if your tablet has a USB-C port, you can directly connect a USB-C flash drive without the need for an adapter. Let’s explore this method in the next section.
Using a USB-C Flash Drive
If your Android tablet has a USB-C port, you can easily connect a USB-C flash drive without the need for an OTG cable or adapter. USB-C flash drives provide a convenient and direct connection, allowing you to access and manage files on your tablet with ease. Here’s how to use a USB-C flash drive:
- Begin by making sure that your tablet is powered on and unlocked.
- Take your USB-C flash drive and insert the USB-C end directly into the USB-C port on your tablet.
- Your tablet should automatically recognize the flash drive and display a notification confirming its connection.
- To access the files on the flash drive, open a file manager app on your tablet. If you don’t have a file manager app installed, you can download one from the Google Play Store.
- In the file manager app, navigate to the “Flash Drive” or “USB Storage” location. This may vary depending on the file manager app you’re using.
- Tap on the flash drive icon to open it. You will now be able to see the files and folders stored on your USB-C flash drive.
- To open a file, simply tap on it, and it will open in the associated app on your tablet.
- If you wish to transfer files to or from the flash drive, you can do so by selecting the desired files or folders and using the built-in copy, cut, or paste functions of the file manager.
Once you have completed working with the USB-C flash drive, it’s important to eject it safely from your tablet before removing it. This ensures that all data is properly saved and prevents any potential data corruption. To eject the flash drive, simply go to the notification panel on your tablet, locate the flash drive notification, and tap on “Eject” or “Disconnect”. Once ejected, you can safely remove the USB-C flash drive from your tablet.
Using a USB-C flash drive provides a hassle-free way to expand storage, transfer files, and access data on your Android tablet. The direct connection ensures fast and efficient access, making it a convenient solution for those with USB-C compatible devices.
Now that you’re familiar with connecting and using a flash drive on your Android tablet, let’s move on to the next section and explore how to access and manage files on the flash drive.
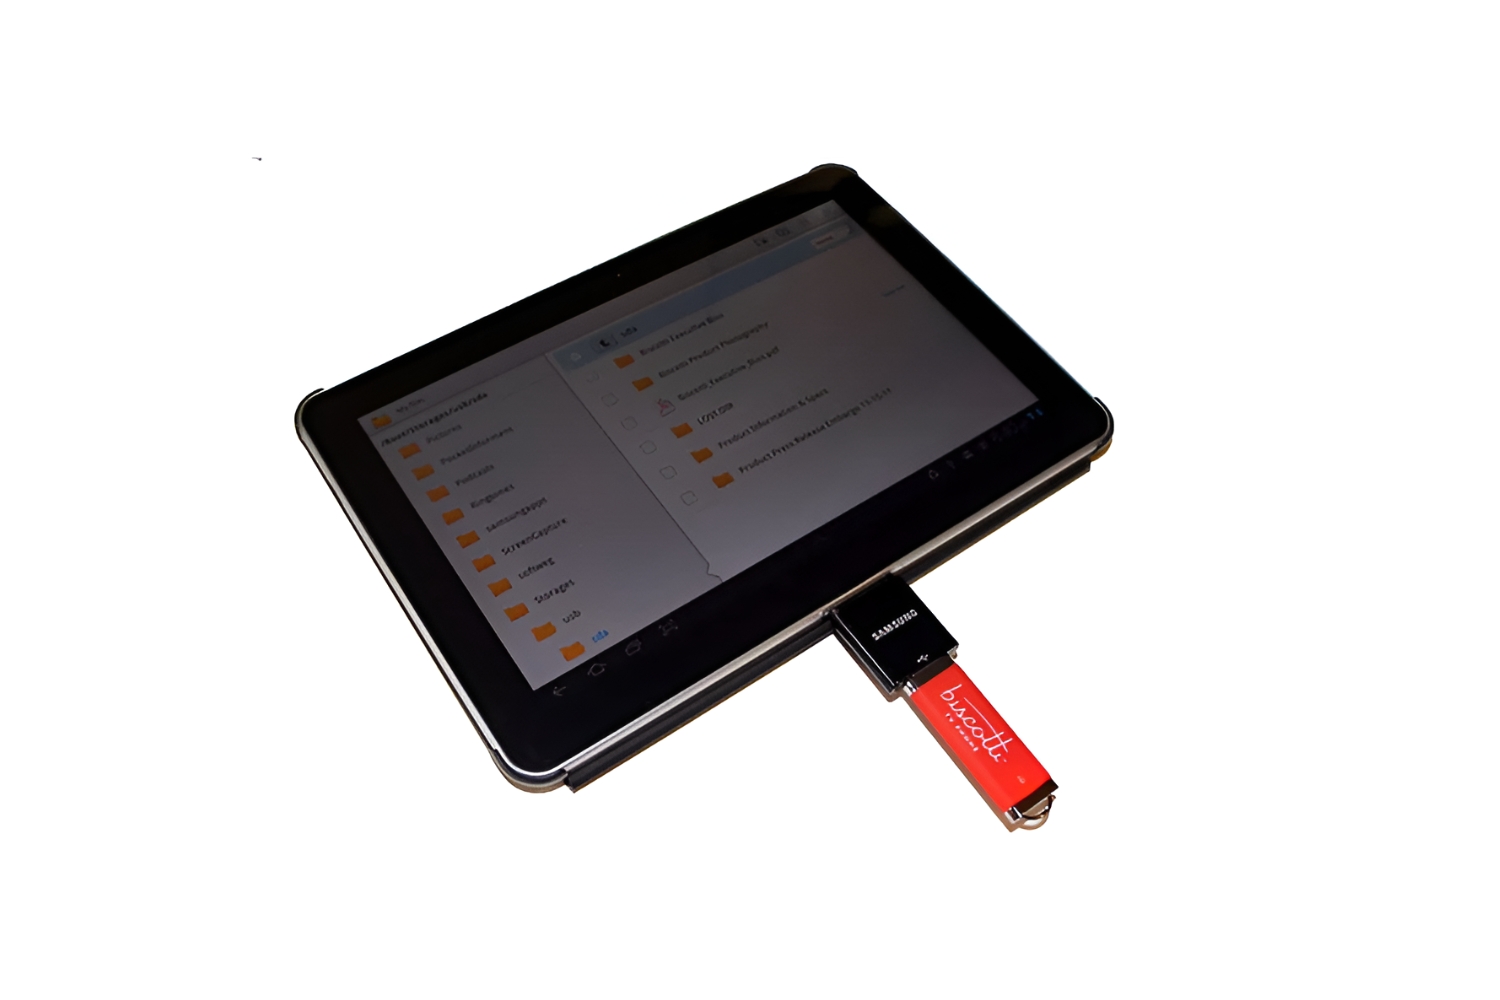
Accessing Files on a Flash Drive
Once you have connected a flash drive to your Android tablet, accessing the files stored on it is a straightforward process. By following a few simple steps, you can navigate through the folders and access the desired files. Here’s how to access files on a flash drive:
- Ensure that the flash drive is connected to your Android tablet using either an OTG cable or a direct USB-C connection. The tablet should recognize the flash drive and display a notification confirming its connection.
- Open the file manager app on your tablet. If you don’t have a file manager app installed, you can find various options on the Google Play Store.
- In the file manager app, you should see a list of available storage locations. Look for the name of your flash drive, which might be displayed as “Flash Drive,” “USB Storage,” or the manufacturer’s name.
- Tap on the name of the flash drive to open it. You will be taken to the root directory of the flash drive.
- Browse through the folders and subfolders to locate the file you wish to access. You can tap on folders to navigate further into the directory structure.
- When you find the desired file, tap on it to open it. If you have the appropriate app installed on your tablet that can handle the file type, the file will open in that app.
Whether you are looking for photos, videos, documents, or any other type of file, you can easily locate and access them on the flash drive using the file manager on your Android tablet.
In addition to accessing individual files, you can also utilize various search and sorting functionalities offered by your file manager app to find files quickly. Different file managers might offer different features, so make sure to explore the options available in your chosen app.
Now that you know how to access files on a flash drive, let’s move on to the next section, where we will cover how to transfer files to and from the flash drive.
Transferring Files to and from the Flash Drive
Transferring files to and from a flash drive is a convenient way to manage your data and free up space on your Android tablet. Whether you want to backup important files or share them with others, the process is simple and straightforward. Here’s how to transfer files to and from a flash drive:
- Ensure that the flash drive is connected to your Android tablet using either an OTG cable or a direct USB-C connection.
- Open the file manager app on your tablet and navigate to the location of the file you want to transfer. This could be a file stored on your tablet’s internal storage or another location within the file manager.
- Long-press on the file or select multiple files by checking the checkbox next to each file.
- Once the files are selected, look for the copy or move option within your file manager app. The option might be represented by icons or available in the app’s menu.
- Choose the flash drive as the destination location for the files. In most file manager apps, the flash drive will be identified by its name, such as “Flash Drive” or “USB Storage.”
- Tap on the copy or move button to initiate the file transfer. The files will be transferred to the flash drive, and you will see a progress indicator.
- Once the transfer is complete, you can navigate to the flash drive’s location within the file manager to confirm that the files are there.
To transfer files from the flash drive back to your Android tablet, follow a similar process. Open the file manager app, navigate to the flash drive’s location, select the files you want to transfer, and choose the destination location within your tablet’s internal storage.
It’s worth noting that the file transfer speed might vary depending on the size of the files and the speed of the flash drive. Larger files may take longer to transfer. Additionally, some file manager apps might offer features like batch select, search functionality, and drag-and-drop to make the transfer process even more convenient.
By transferring files to and from the flash drive, you can efficiently manage your data and ensure that your important files are backed up and easily accessible whenever you need them. Now that we have covered file transfers, let’s move on to the next section, where we will explore how to manage files on the flash drive.
Managing Files on the Flash Drive
Managing files on a flash drive connected to your Android tablet allows you to organize, rename, delete, or create new folders to better structure your data. By efficiently managing your files, you can easily locate and access the information you need. Here’s how to manage files on the flash drive:
- Start by ensuring that the flash drive is connected to your Android tablet using either an OTG cable or a direct USB-C connection.
- Open the file manager app on your tablet and navigate to the location of the flash drive.
- Within the file manager, you can perform various file management actions on the flash drive, including the following:
- Create a New Folder: To create a new folder, navigate to the flash drive’s location, tap on the option to create a new folder, and give it a suitable name.
- Rename Files or Folders: To rename a file or folder, select it and look for the option to rename within the file manager app. Provide a new name and confirm the change.
- Copy or Move Files: To make duplicate copies or move files within the flash drive, select the desired files and choose the copy or move option. Then, navigate to the destination folder and paste the files.
- Delete Files or Folders: To remove files or folders from the flash drive, select them and look for the delete option. Confirm the deletion when prompted.
- Utilize additional file management features offered by your chosen file manager app. This might include functions like file search, sorting options, file sharing, or compressing files for easier storage and sharing.
By effectively managing your files on the flash drive, you can keep your data organized and easily accessible. This simplifies the process of finding what you need and ensures that your files are stored in a manner that meets your specific requirements.
It’s important to remember that any modifications made to files or folders on the flash drive will directly impact the data stored on it. Therefore, exercise caution when renaming, deleting, or moving files to avoid accidental data loss.
Now that you know how to manage files on the flash drive, let’s move on to the next section, where we will discuss the proper method of ejecting the flash drive from your Android tablet.
Ejecting the Flash Drive Safely
After using a flash drive on your Android tablet, it’s crucial to eject it safely to ensure that your data is properly saved and prevent any potential data corruption. Ejecting the flash drive safeguards against data loss and ensures that all files are safely transferred and ready for future use. Here’s how to safely eject a flash drive from your Android tablet:
- Ensure that all file transfer operations involving the flash drive have been completed. Make sure to close any apps or files that are currently accessing the flash drive.
- Swipe down from the top of your tablet’s screen to open the notification panel.
- Look for the notification related to the flash drive connection. It might be labeled as “USB storage,” “Flash drive,” or with the manufacturer’s name.
- Tap on the flash drive notification to expand it.
- Within the expanded notification, you should see an option to “Eject” or “Disconnect” the flash drive. Tap on this option.
- Your tablet will perform necessary operations to safely eject the flash drive. Once ejected, a notification or message will confirm that it is safe to remove the flash drive from the OTG cable or USB-C port.
- Gently remove the flash drive from the tablet, taking care not to apply excessive force or damage the device or flash drive.
Ejecting the flash drive ensures that any pending write operations are completed, and the file system is properly closed. This helps in preventing data loss or corruption that can occur if the flash drive is removed abruptly while still in use.
To maintain the integrity of your files and the flash drive itself, it’s important to always eject the flash drive safely before physically disconnecting it from your Android tablet. Following this practice will help ensure that your data remains safe and accessible for future use.
Now that you know how to safely eject a flash drive from your Android tablet, let’s move on to the next section, where we will provide some additional tips on using a flash drive with an Android tablet.
Tips for Using a Flash Drive on an Android Tablet
Using a flash drive on your Android tablet can greatly enhance your storage options and improve your overall experience. To make the most out of your flash drive, here are some helpful tips:
- Choose a reliable flash drive: When purchasing a flash drive, opt for a reputable brand known for its quality and reliability. This ensures that your data is stored securely and the flash drive will last through many uses.
- Keep your flash drive clean: Regularly clean the contacts of your flash drive to maintain optimal performance. Use a lint-free cloth or cotton swab lightly dampened with isopropyl alcohol to gently wipe the contacts.
- Organize your files: Create a logical folder structure on your flash drive to keep your files organized and easy to locate. Consider categorizing files by type, project, or any other relevant classification.
- Backup important files: Use the flash drive as a backup solution for your critical files. Regularly copy important documents, photos, and other irreplaceable data from your tablet to the flash drive to ensure you have a secure backup in case of any data loss events.
- Scan for viruses: Before accessing files from an unfamiliar or borrowed flash drive, it’s advisable to scan it for viruses with a reliable antivirus app installed on your tablet. This helps prevent any potential malware infections.
- Encrypt sensitive files: If you store sensitive or confidential files on your flash drive, consider encrypting them for added security. Numerous file encryption apps are available on the Google Play Store to protect your sensitive data from unauthorized access.
- Regularly update your tablet’s software: Keeping your Android tablet’s operating system and file manager app up to date ensures that you have the latest security patches, bug fixes, and compatibility enhancements, providing a smooth and secure flash drive experience.
- Safely remove the flash drive: Always follow the proper procedure to eject the flash drive from your tablet before physically disconnecting it. This helps avoid data corruption and ensures that files are properly saved.
- Test your flash drive: Periodically test your flash drive by transferring files to and from it to ensure it is functioning properly. If you encounter any issues or errors, consider replacing the flash drive to prevent data loss.
By following these tips, you can optimize your experience of using a flash drive on your Android tablet. Whether you utilize it for additional storage, file transfers, or backups, a flash drive can significantly enhance your productivity and convenience.
Now that you have gained insights into using a flash drive on an Android tablet and learned some valuable tips, you are ready to make the most out of this versatile storage solution.
Conclusion
Using a flash drive on your Android tablet opens up a world of possibilities for expanding storage, transferring files, and managing your data with ease. Whether you connect a standard USB flash drive with an OTG cable or use a USB-C flash drive, the process is simple and convenient.
In this article, we explored the benefits of using a flash drive on an Android tablet, including the ability to expand storage capacity, easily transfer files, and enjoy portability and convenience. We discussed the compatibility requirements and methods for connecting a flash drive, whether it’s using an OTG cable or directly using a USB-C port.
We learned how to access files on the flash drive and transfer files to and from the flash drive using a file manager app on your tablet. Additionally, we discussed the importance of managing files on the flash drive, including creating folders, renaming files, and deleting unnecessary data.
Furthermore, we covered the essential practice of safely ejecting the flash drive from your Android tablet to prevent data corruption and ensure proper file saving. Lastly, we provided useful tips on using a flash drive effectively, such as choosing a reliable flash drive, organizing files, backing up data, and keeping your flash drive clean.
By following the guidelines and tips outlined in this article, you can make the most of your flash drive and enhance your Android tablet experience. Incorporating a flash drive into your regular workflow provides you with flexibility, convenience, and the peace of mind of having your important files accessible wherever you go.
So, grab your flash drive, connect it to your Android tablet, and enjoy the benefits of expanded storage and seamless file transfer. Happy flash drive usage with your Android tablet!