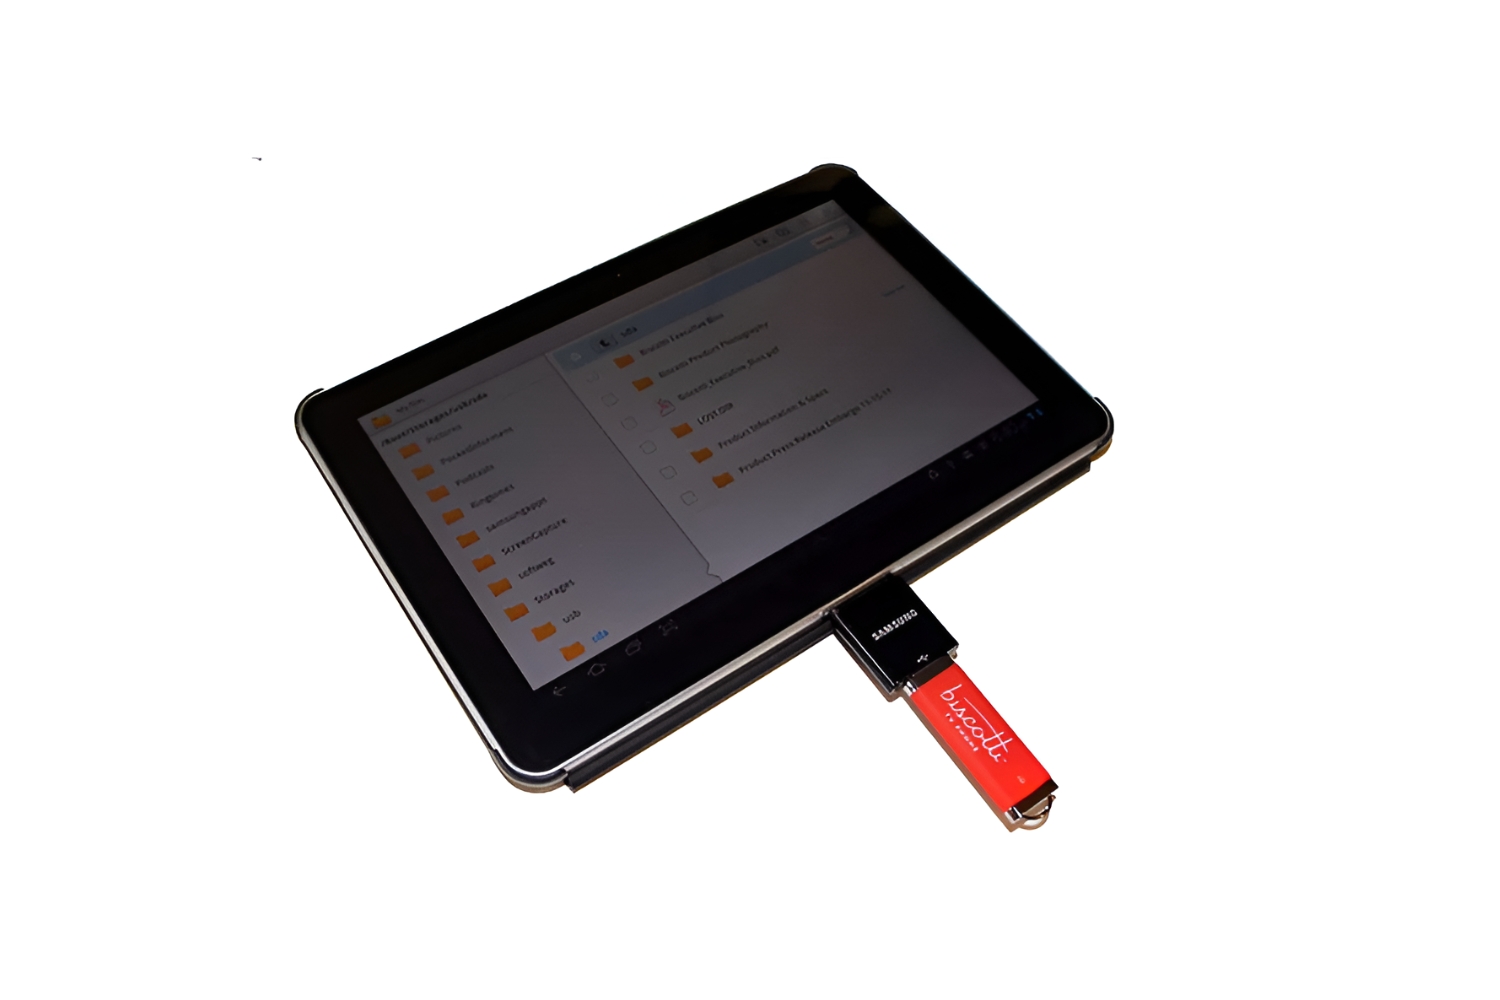
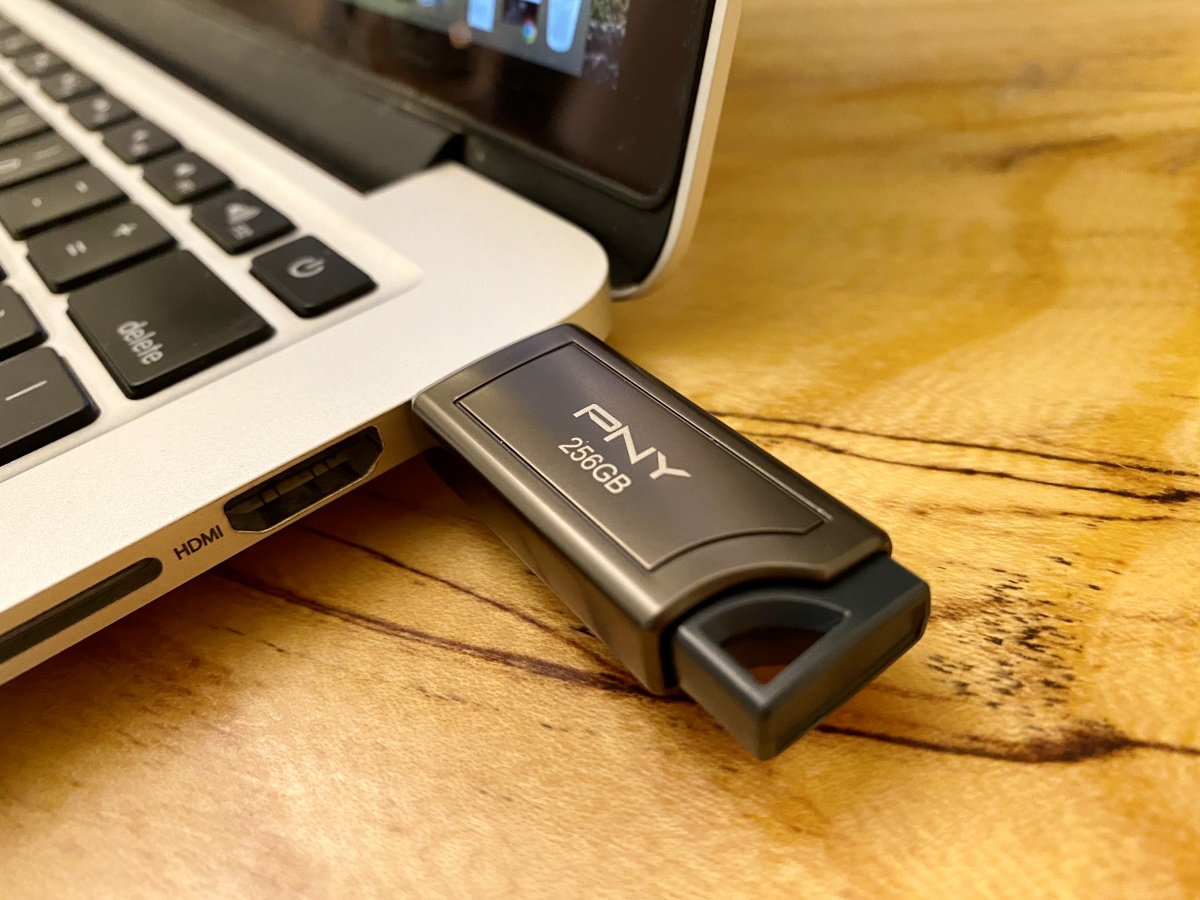
Connecting the USB flash drive to your Android tablet
Using a USB flash drive on your Android tablet can be incredibly convenient for transferring files and expanding your storage capacity. However, before you can begin, it’s essential to connect the USB flash drive to your device. Here’s how you can do it:
1. Check if your Android tablet is compatible with USB OTG:
Before connecting a USB flash drive, ensure that your Android tablet supports USB On-The-Go (OTG) functionality. Not all devices have this feature, so it’s crucial to verify compatibility. Look for your device’s user manual or search online to confirm if it supports USB OTG.
2. Enable USB OTG support on your Android tablet:
If your tablet supports USB OTG, you might need to enable the feature in your device’s settings. Go to the Settings app, locate the USB OTG or Storage section, and toggle on the USB OTG support option.
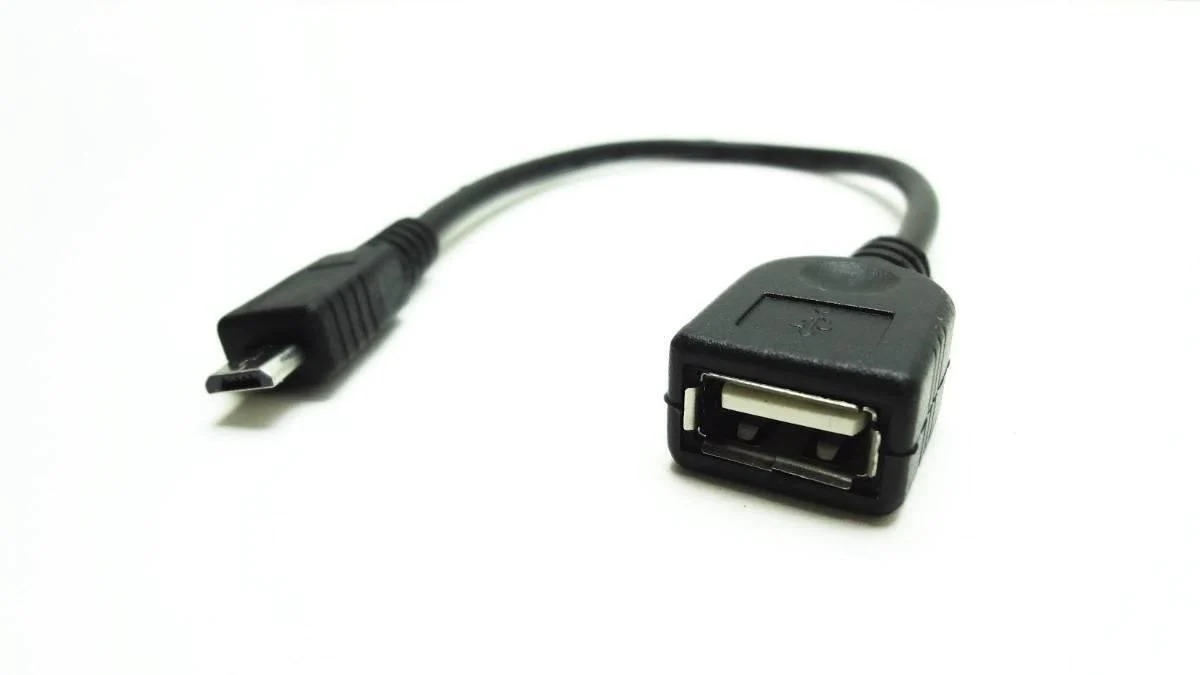
3. Identify the USB On-The-Go (OTG) cable and adapter essentials:
To connect the USB flash drive to your Android tablet, you’ll need an OTG cable or adapter. An OTG cable has a standard USB Type-A port on one end and a micro USB or USB Type-C connector on the other end. Alternatively, you can use an adapter that converts a USB Type-A port into a micro USB or USB Type-C port.
4. Insert the USB flash drive into the OTG cable:
Connect one end of the OTG cable into your Android tablet’s USB port. Then, plug the USB flash drive into the USB Type-A port on the OTG cable or adapter. Ensure that both connections are secure and properly aligned.
5. Grant permission to access the USB flash drive on your tablet:
When you connect the USB flash drive to your Android tablet, a notification may appear on your screen, asking for permission to access the device. Tap on the notification and grant permission to proceed.
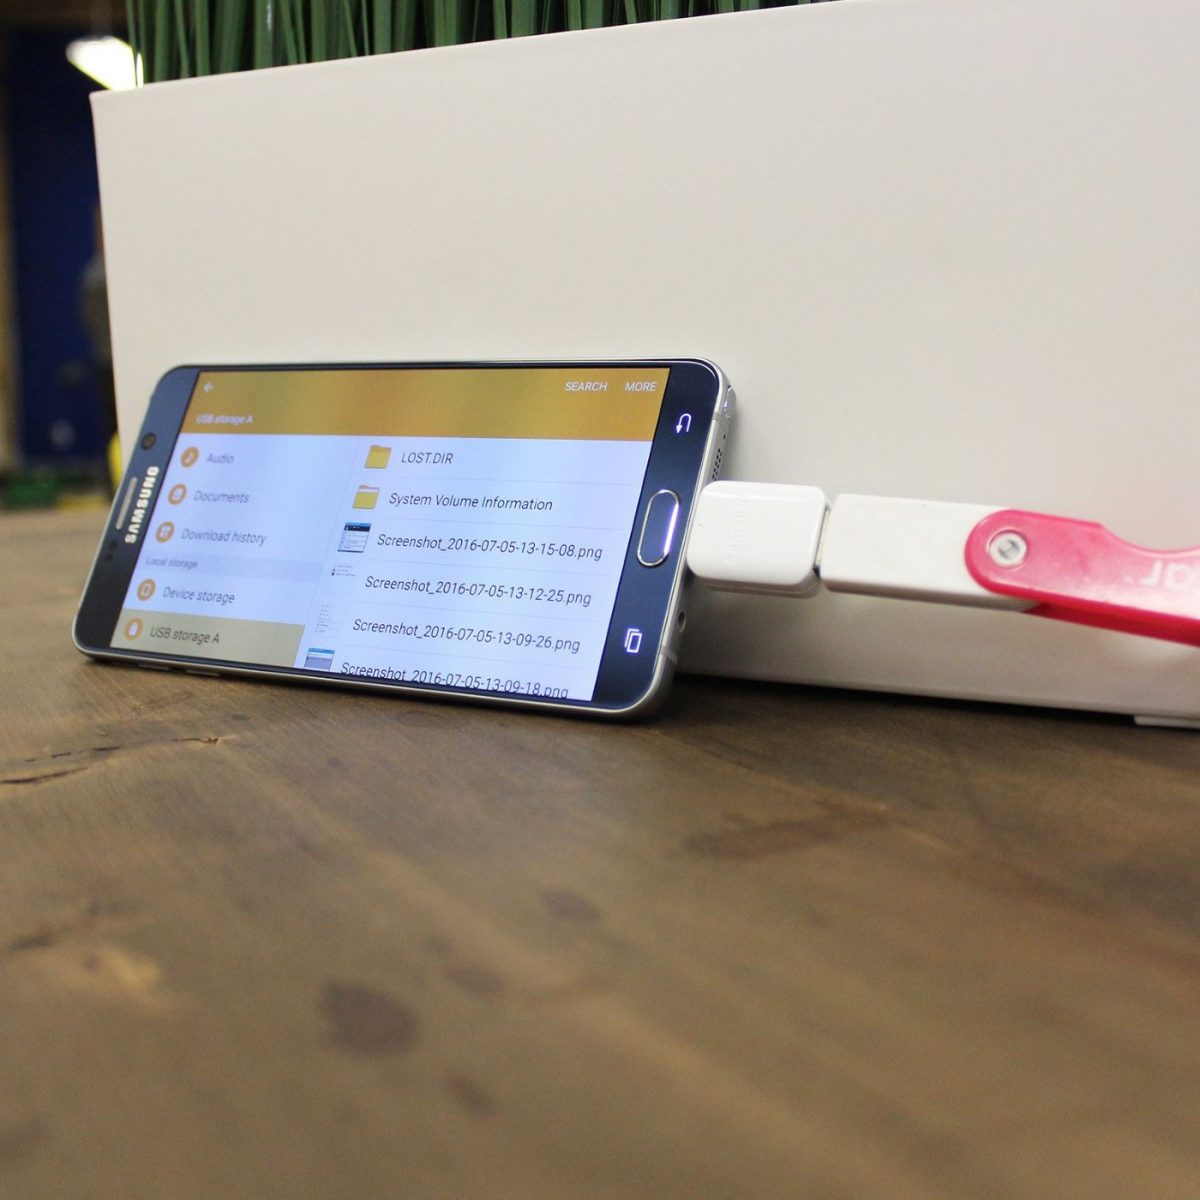
6. Access content on the USB flash drive using a file manager app:
Once connected, you can explore the contents of your USB flash drive by opening a file manager app on your Android tablet. Most devices come with a pre-installed file manager, but you can also download a third-party one from the Google Play Store for more advanced features.
7. Transfer files between your tablet and the USB flash drive:
To transfer files between your Android tablet and the USB flash drive, simply select the files or folders you want to move or copy. Then, use the file manager app’s options to paste or move them to the desired location on your tablet’s internal storage or SD card.
8. Safely remove the USB flash drive from your Android tablet:
Before physically disconnecting the USB flash drive from your Android tablet, ensure that all file transfers are complete. Properly eject the flash drive by using the “Eject” or “Unmount” option in your file manager app. This step helps prevent data corruption and ensures the safe removal of the USB flash drive.
By following these steps, you can easily connect a USB flash drive to your Android tablet and take advantage of the additional storage and file transfer capabilities it offers. Enjoy the convenience and versatility of using a USB flash drive on your device!
Checking if your Android tablet is compatible with USB OTG
Before you can connect a USB flash drive to your Android tablet, it’s important to determine whether your device supports USB On-The-Go (OTG) functionality. USB OTG enables your Android tablet to act as a host and connect to external devices like USB flash drives. Here’s how you can check if your tablet is compatible:
1. Check the user manual:
The first step is to refer to your Android tablet’s user manual. Look for information regarding USB OTG support. The manual should specify whether your device has this capability or not. If you no longer have the manual, you can usually find it online on the manufacturer’s website.
2. Search online:
If you can’t find the information in the user manual, perform a quick internet search. Look for your specific tablet model and search for “USB OTG compatibility.” You may come across forums or discussions where other users have already determined if the tablet supports USB OTG.
3. Use apps:
Several apps available on the Google Play Store can help you determine if your Android tablet supports USB OTG. One such app is “USB OTG Checker.” Simply install the app on your device and run it. The app will analyze your tablet’s hardware and firmware to determine if it has USB OTG support.
4. Contact the manufacturer:
If you’re still unsure about your tablet’s USB OTG compatibility, reach out to the manufacturer’s customer support. They can provide you with accurate information and clarify any doubts or queries you may have about your tablet’s compatibility with USB OTG.
It’s important to note that not all Android tablets support USB OTG. This functionality is more commonly found in newer and higher-end devices. If your tablet does not support USB OTG, there are still alternative methods to transfer files, such as using cloud storage services or wireless file transfer apps.
By confirming the USB OTG compatibility of your Android tablet before attempting to connect a USB flash drive, you can ensure a seamless experience and avoid any compatibility issues. Once you’ve confirmed that your tablet supports USB OTG, you can proceed with connecting your USB flash drive and enjoying the added functionality it provides.
Enabling USB OTG support on your Android tablet
In order to connect a USB flash drive to your Android tablet, you may need to enable USB On-The-Go (OTG) support. USB OTG allows your tablet to function as a host and recognize external devices like USB flash drives. To ensure a seamless connection, here’s how you can enable USB OTG support on your Android tablet:
1. Navigate to the Settings app:
Start by accessing the Settings app on your Android tablet. You can usually find it in the app drawer or by swiping down from the top of the screen and tapping the gear icon.
2. Locate the USB OTG or Storage settings:
Once in the Settings app, scroll through the options and find the USB OTG or Storage section. The location of this setting may vary depending on your device’s manufacturer and Android version. If you’re having trouble finding it, try using the search function within the settings app and search for “USB OTG” or “Storage.”
3. Toggle on USB OTG support:
Once you’ve located the USB OTG or Storage section, you should see an option to enable USB OTG support. Toggle on this option to activate USB OTG functionality on your tablet.
4. Confirm the USB OTG support:
After enabling USB OTG support, your tablet should now be able to recognize and connect to external USB devices, such as a USB flash drive. You can verify that USB OTG is successfully enabled by connecting a USB flash drive using an OTG cable or adapter. If your tablet prompts you to grant permission or displays the contents of the USB flash drive, then USB OTG is functioning correctly.
It’s worth noting that not all tablets have the option to enable USB OTG support in their settings. Some devices have USB OTG support enabled by default, while others may lack this functionality altogether. If you cannot find the USB OTG settings in your tablet’s Settings app, it’s possible that your device does not support USB OTG.
By following these steps to enable USB OTG support on your Android tablet, you can ensure that your device recognizes and interacts with external USB devices like USB flash drives. Once USB OTG support is enabled, you can proceed to connect and access files on your USB flash drive using a file manager app or other compatible applications.
Identifying the USB on-the-go (OTG) cable and adapter essentials
Before connecting a USB flash drive to your Android tablet, you’ll need to identify the necessary essentials – the USB on-the-go (OTG) cable and adapter. These components are crucial for establishing a connection between your tablet and the USB flash drive. Here are the essentials you need to look for:
1. OTG cable or adapter:
An OTG cable or adapter is the main component that allows you to connect a USB flash drive to your Android tablet. This cable has a standard USB Type-A port on one end and a micro USB or USB Type-C connector on the other end. The USB Type-A port is where you plug in the USB flash drive, while the micro USB or USB Type-C connector connects to your Android tablet’s charging/data port.
2. Compatibility:
Ensure that the OTG cable or adapter you choose is compatible with your specific tablet model. Different tablets may have different charging/data port configurations, so confirm that the cable or adapter aligns with your tablet’s port. Many OTG cables and adapters are versatile and support both micro USB and USB Type-C connections, making them suitable for a wide range of Android tablets.
3. Length and flexibility:
Consider the length and flexibility of the OTG cable or adapter. Opt for a length that allows for comfortable use, whether you’re using the tablet while the USB flash drive is connected or if you need to position the drive in a specific way. A flexible cable or adapter prevents strain on the connectors and provides easier maneuverability.
4. Quality and durability:
Choose a high-quality OTG cable or adapter to ensure a reliable and durable connection between your tablet and the USB flash drive. Look for cables and adapters made from sturdy materials and with solid connectors. Avoid cheap or flimsy options that may lead to unreliable data transfer or connection issues.
5. Additional features:
Some OTG cables or adapters come with extra features such as built-in USB hubs, card readers, or HDMI ports. These additional features can enhance the versatility of your Android tablet by allowing you to connect multiple devices simultaneously or transfer data from different storage mediums.
By identifying the essential components for connecting a USB flash drive to your Android tablet, you can ensure a smooth and hassle-free experience. The right OTG cable or adapter will provide a reliable connection and enable you to make use of the additional storage and file transfer capabilities offered by a USB flash drive on your tablet.
Inserting the USB flash drive into the OTG cable
Once you have the necessary essentials, such as the USB on-the-go (OTG) cable or adapter, it’s time to connect the USB flash drive to your Android tablet. Follow these steps to insert the USB flash drive into the OTG cable:
1. Ensure both devices are powered off:
Before connecting the USB flash drive, make sure both your Android tablet and the flash drive are powered off. This precaution is essential to prevent any potential damage to the devices or loss of data during the connection process.
2. Identify the USB Type-A port on the OTG cable or adapter:
Examine the OTG cable or adapter and locate the USB Type-A port. This is the larger end of the cable where you will insert the USB flash drive. Inserting the flash drive into this port will establish a connection between the two devices.
3. Align the USB flash drive with the USB Type-A port:
Take your USB flash drive and ensure that the connector end matches the port on the OTG cable or adapter. Align the USB flash drive connector with the USB Type-A port, and make sure they fit together properly. The connection should be secure and snug, without force. Avoid inserting the flash drive at an angle or with excessive pressure.
4. Insert the USB flash drive into the USB Type-A port:
Gently insert the USB flash drive into the USB Type-A port on the OTG cable or adapter. Ensure that the connection is fully inserted and secure. When properly connected, the USB flash drive should be firm and not easily dislodged.
5. Confirm the connection:
Check if the connection between the USB flash drive and the OTG cable or adapter is established by ensuring that the flash drive is securely attached without any wobbling. A proper connection ensures reliable data transfer and access to the files on the USB flash drive.
It’s important to note that some OTG cables or adapters may have additional ports or connectors. These extra features provide additional functionality, such as USB hub capabilities or card reader slots. If your OTG cable or adapter has such features, ensure that you’re connecting the USB flash drive to the appropriate USB Type-A port.
By correctly inserting the USB flash drive into the OTG cable or adapter, you establish a connection between the two devices and prepare your Android tablet for accessing the files stored on the flash drive. With a secure and stable connection, you can now move on to the next steps of accessing and transferring files between your tablet and the USB flash drive.
Granting permission to access the USB flash drive on your tablet
When you connect a USB flash drive to your Android tablet using an OTG cable or adapter, you may need to grant permission for your device to access the files on the flash drive. Follow these steps to grant permission to access the USB flash drive:
1. Connect the OTG cable or adapter:
Ensure that the USB flash drive is securely connected to your Android tablet through the OTG cable or adapter. Double-check that the connection is stable and properly aligned.
2. Check for a notification:
Once the USB flash drive is connected, your Android tablet may display a notification indicating that a USB device has been connected. Pull down the notification shade by swiping down from the top of the screen to view the notification.
3. Tap on the notification:
Tap on the notification related to the connected USB device. This action opens a dialog box or prompt that asks for your permission to access files on the USB flash drive.
4. Grant permission:
In the dialog box or prompt, you will typically see an option or button to grant permission. Tap on this option to grant your Android tablet permission to access the USB flash drive’s contents.
5. Select the desired action:
Once you’ve granted permission, your Android tablet will recognize the USB flash drive as an external storage device. At this point, you can choose various actions depending on your device and the installed apps. For example, you can choose to open the files using a file manager app, view media files using a media player, or import files into other applications.
Note: The permission prompt may differ slightly depending on the make and model of your Android tablet, as well as the version of the operating system. The above steps provide a general guideline, but the exact process may vary.
Granting permission to access the USB flash drive on your Android tablet is crucial to ensure that your device recognizes and interacts with the files on the flash drive. By following these steps, you can authorize your tablet to access the flash drive’s contents and proceed with accessing or transferring files between the two devices.
Accessing content on the USB flash drive using a file manager app
Once you have connected a USB flash drive to your Android tablet and granted permission to access it, you can utilize a file manager app to explore and manage the files stored on the flash drive. Follow these steps to access content on the USB flash drive using a file manager app:
1. Open the file manager app:
Start by opening the file manager app on your Android tablet. You can typically find the file manager app in the app drawer or on the home screen. If you don’t have a file manager app installed, you can download one from the Google Play Store.
2. Locate the USB flash drive:
Within the file manager app, navigate to the storage or external devices section. Look for a section that represents the USB flash drive. It may be labeled as “USB,” “OTG,” or have the name of the flash drive itself.
3. Tap on the USB flash drive:
Tap on the section or icon representing the USB flash drive in the file manager app interface. This action will open the contents of the flash drive, allowing you to view the files and folders stored on it.
4. Explore the contents:
Once inside the flash drive’s section, you can navigate through the folders, subfolders, and files it contains. Use the file manager app’s interface to browse, open, or manage the files on the USB flash drive.
5. View and interact with files:
The file manager app provides various options to interact with the files on the USB flash drive. You can view documents, photos, videos, or play music files directly from the app. Additionally, the app allows you to copy, move, rename, or delete files and folders on the flash drive, enabling you to manage the content as desired.
6. Use built-in search and sorting features:
Most file manager apps offer search and sorting features that can help you quickly find specific files or organize content based on criteria such as name, date, or file type. Take advantage of these features to streamline your file management tasks on the USB flash drive.
By accessing the content on the USB flash drive using a file manager app, you can easily navigate through the files and folders and perform various actions, such as viewing, copying, moving, or deleting files. With the convenience and functionality of a file manager app, you can efficiently manage the content stored on the USB flash drive using your Android tablet.
Transferring files between your tablet and the USB flash drive
One of the primary advantages of using a USB flash drive on your Android tablet is the ability to easily transfer files between the two devices. Whether you want to back up important documents, share media files, or free up storage space, here’s how you can transfer files between your tablet and the USB flash drive:
1. Open the file manager app:
Start by opening the file manager app on your Android tablet. Navigate to the section representing the USB flash drive, as described in the previous section.
2. Select the files or folders to transfer:
Within the USB flash drive section of the file manager app, select the files or folders you want to transfer. You can usually do this by long-pressing on the file or folder and selecting the appropriate option, such as “Copy” or “Move.”
3. Choose the destination:
Next, navigate to the location on your tablet’s internal storage or SD card where you want to transfer the files. This can be a specific folder or the root directory of the storage. Again, use the file manager app to navigate to the desired destination.
4. Paste the files or folders:
Once you’re in the desired location on your tablet, paste the files or folders you previously selected from the USB flash drive. Use the file manager app’s options to paste the files, usually by selecting the “Paste” or “Move here” option.
5. Monitor the transfer progress:
During the file transfer process, the file manager app will display the progress of each file being transferred. Monitor the transfer progress to ensure that all files are copied or moved successfully without any interruptions.
6. Verify successful transfer:
Once the transfer process is complete, navigate to the destination location on your tablet and confirm that the files are transferred successfully. Open the files or folders to ensure that they are functioning as intended.
Note: The specific steps may vary slightly depending on the file manager app you are using. However, most file manager apps follow a similar process for transferring files between devices.
By following these steps, you can easily transfer files between your Android tablet and the USB flash drive using a file manager app. This allows you to conveniently manage and organize your files, share data between devices, and free up storage space on your tablet or flash drive.
Safely removing the USB flash drive from your Android tablet
When you have finished using the USB flash drive on your Android tablet, it’s important to safely remove it to prevent data corruption or loss. Follow these steps to safely remove the USB flash drive from your Android tablet:
1. Ensure all file transfers are complete:
Before disconnecting the USB flash drive, make sure that any ongoing file transfers or operations involving the flash drive are complete. This ensures that all data is properly saved, minimizing the risk of file corruption or data loss.
2. Save any open files or applications:
If you have any files or applications open from or stored on the USB flash drive, ensure that you save or close them before removing the flash drive. This step prevents any potential conflicts or errors that may occur when removing an active file or application.
3. Open the file manager app:
If you have a file manager app open that is currently accessing the USB flash drive, navigate back to the main interface of the app or close it entirely. This ensures that no processes or operations are actively using the flash drive.
4. Locate the “Eject” or “Unmount” option:
Within the file manager app or the Android system settings, locate the option to “Eject” or “Unmount” the USB flash drive. This option may be found by tapping and holding on the flash drive section in the file manager app or by going to the storage settings in the Android system settings.
5. Tap on the “Eject” or “Unmount” option:
Tap on the “Eject” or “Unmount” option to safely disconnect the USB flash drive from your Android tablet. This action prepares the system for the removal of the flash drive by ensuring that all ongoing read or write processes are completed and the file system is properly unmounted.
6. Physically remove the USB flash drive:
Once you have ejected or unmounted the USB flash drive, gently pull it out from the USB Type-A port on the OTG cable or adapter. Ensure that you remove the flash drive straight and evenly without any abrupt or forceful movements. This prevents any potential damage to the flash drive’s connector or the tablet’s USB port.
By following these steps to safely remove the USB flash drive from your Android tablet, you minimize the risk of data loss or file corruption. Properly disconnecting the flash drive ensures that all data is saved correctly and that the file system is intact, allowing for a seamless and error-free experience when using the flash drive in the future.