Introduction
3D printing has revolutionized various industries, from manufacturing to healthcare. The ability to transform digital designs into physical objects quickly and easily has opened up a world of possibilities. In the virtual reality game Take On Mars, 3D printing is not just a buzzword, but a crucial tool for survival and exploration on the red planet.
In this article, we will explore the intricacies of using a 3D printer in Take On Mars. We will guide you through the process of gathering resources, building a 3D printer, and understanding its interface. Moreover, we will delve into the exciting world of selecting and uploading designs, adjusting settings, and troubleshooting common issues that may arise during the 3D printing process.
Whether you are a seasoned explorer or a rookie astronaut on your first mission to Mars, this article will equip you with the knowledge and skills needed to utilize the power of 3D printing. Get ready to unleash your creativity and embark on a journey of innovation and discovery.
So, grab your spacesuit, fasten your helmet, and let’s dive into the fascinating world of 3D printing in Take On Mars.
Overview of 3D Printing in Take On Mars
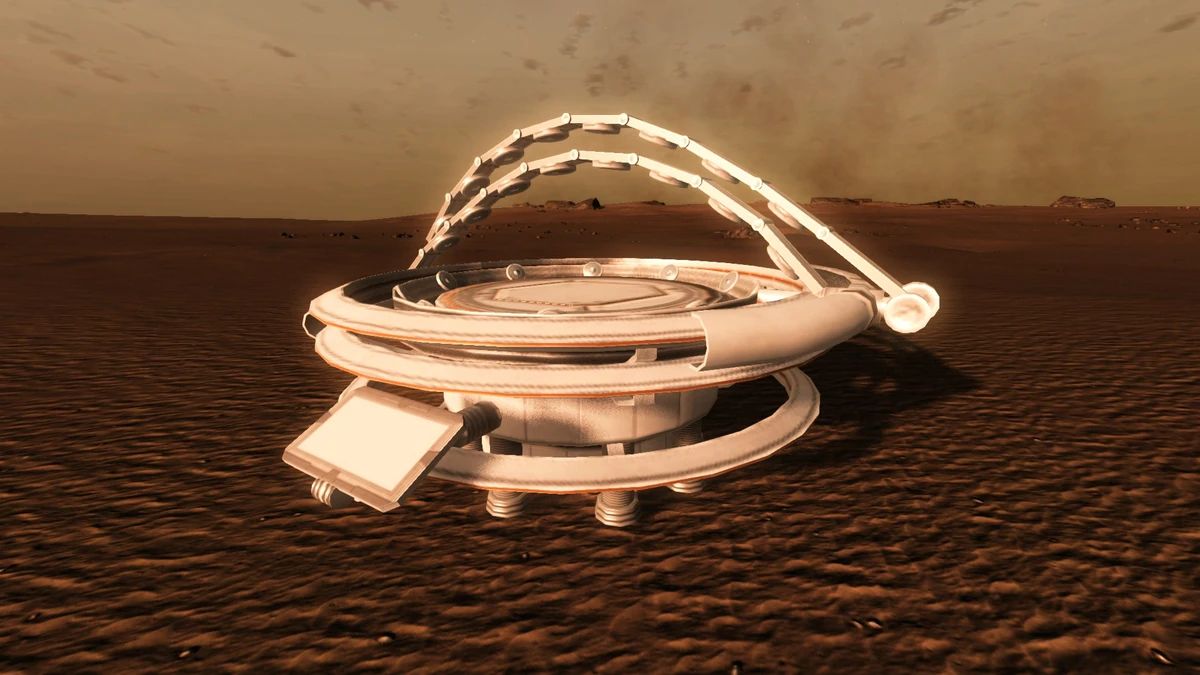
Take On Mars is an immersive virtual reality game that allows players to experience the challenges of space exploration. One of the most important tools at your disposal is the 3D printer, which enables you to create essential objects and structures using available resources.
In Take On Mars, the 3D printer works by using a process called additive manufacturing. This means that objects are built layer by layer, using a filament material that is heated and deposited in precise patterns. The result is a solid, three-dimensional object that can be used for a variety of purposes, from crafting tools and equipment to constructing habitats.
The game provides various resources that can be collected and used for 3D printing, such as rocks, soil, and minerals. These resources can be found on the surface of Mars or extracted from underground deposits. It’s essential to explore and gather these resources to ensure a steady supply of materials for your 3D printing endeavors.
As you progress in the game, you’ll have access to more advanced 3D printers with additional features and capabilities. These upgrades allow you to create more complex and sophisticated designs, empowering you to tackle more challenging missions and tasks.
The possibilities of 3D printing in Take On Mars are vast. You can print tools and equipment to increase your chances of survival, build structures for shelter and storage, and even create vehicles to explore the Martian landscape. The ability to manufacture objects on-demand using available resources can greatly enhance your efficiency and self-sufficiency in this challenging environment.
However, it’s important to note that 3D printing in Take On Mars is not without its challenges. Limited resources, power constraints, and the need to manage your time effectively are all factors that you must consider when utilizing the 3D printer. Strategic planning and resource management are crucial skills that will play an integral role in your success as an astronaut on Mars.
Now that we have explored the basics of 3D printing in Take On Mars, let’s move on to the next step: gathering the resources needed for your 3D printing projects.
Gathering Resources for 3D Printing
In order to utilize the 3D printer effectively in Take On Mars, you need to gather the necessary resources to fuel your printing projects. These resources are crucial for manufacturing objects and structures on the harsh Martian landscape.
Exploration is key to finding the resources needed for 3D printing. As you traverse the Martian terrain, keep an eye out for rocks, soil, and minerals that can be used as raw materials. These resources can be found on the surface or extracted from underground deposits.
To gather resources, you’ll need to equip yourself with the appropriate tools, such as a rock hammer for breaking down rocks and a soil sampler for extracting soil samples. These tools can be crafted using the 3D printer itself. So, make sure you allocate some of your printing resources to create these essential tools.
Once you have the necessary tools, explore the various regions of Mars to collect different types of resources. Each region may have different geological compositions, offering a variety of materials for 3D printing.
As you gather resources, it’s essential to keep an inventory of what you have collected. This will help you keep track of your available materials and plan your printing projects accordingly. Managing your resources efficiently is crucial to ensure a steady supply and avoid running out of essential materials when you need them the most.
Keep in mind that not all resources are suitable for 3D printing. Some materials may require additional processing or refinement before they can be used. So, prioritize the collection of resources that are ready to be used directly in your 3D printer.
As you progress in the game and unlock more advanced 3D printers, you may also gain access to new types of materials. These advanced materials may offer enhanced properties and capabilities, allowing you to create even more durable and versatile objects.
Gathering resources for 3D printing is an ongoing process in Take On Mars. Regularly explore the Martian landscape, exploit new regions, and collect a diverse range of resources to expand your capabilities and increase your chances of survival.
Now that you understand the importance of gathering resources, let’s move on to the next step: building a 3D printer to bring your designs to life.
Building a 3D Printer
In Take On Mars, building a 3D printer is a crucial step towards harnessing the power of additive manufacturing on the red planet. Constructing your own 3D printer allows you to customize its features and functionalities, ensuring it meets your specific needs.
To build a 3D printer, you will need to gather the necessary components and assemble them according to the provided instructions. These components can be crafted using the resources you have collected, ensuring a self-sufficient approach to manufacturing.
The first step in building a 3D printer is to access the blueprint or design for the printer. This can be obtained through research and exploration or by unlocking it as you progress in the game. Once you have the blueprint, you can use the 3D printer to produce the required parts.
Each component of the printer has its own set of resource requirements, so make sure you have enough materials to craft each part. Utilize your resource management skills to allocate the right amount of materials for each component, ensuring a smooth construction process.
Once you have crafted all the necessary components, it’s time to assemble them. Follow the provided instructions carefully, making sure each part is fitted correctly. Take your time and pay attention to detail to ensure a sturdy and functional 3D printer.
As you build the printer, you may also have the opportunity to make modifications or upgrades. These enhancements can enhance the performance and capabilities of your printer, allowing you to create more intricate and complex designs.
Building a 3D printer in Take On Mars is not just a one-time task. As you progress in the game and unlock new technologies, you may have the opportunity to build advanced versions of the printer. These upgraded printers offer improved speed, precision, and material compatibility, expanding your possibilities for 3D printing.
Remember that building a 3D printer requires careful planning and resource management. Make sure you have enough materials in stock to complete the construction process. Don’t forget to allocate some resources for future repairs and maintenance of the printer.
Now that you have successfully built your 3D printer, it’s time to dive into its user interface and understand how to navigate and utilize its features. Let’s move on to the next section to explore the intricacies of the 3D printer interface in Take On Mars.
Understanding the 3D Printer Interface
Once you have built your 3D printer in Take On Mars, it’s time to familiarize yourself with its user interface. The interface plays a vital role in controlling the printer and executing your 3D printing projects.
The 3D printer interface in Take On Mars is designed to be intuitive and user-friendly. It provides you with various options and settings to customize your printing experience and ensure the successful execution of your designs.
When you access the 3D printer interface, you’ll be greeted with a menu that displays different functions and options. These include actions such as uploading designs, adjusting printer settings, managing print queues, and monitoring the progress of ongoing prints.
To upload a design to the printer, you will need to have the design file ready. This file can be obtained from various sources, such as your own creations or downloaded designs from the in-game community. Once you have the design file, you can navigate to the upload function in the interface and select the file to be added to the print queue.
Once the design is uploaded, you can adjust various settings to ensure a successful print. These settings may include parameters such as print speed, layer height, infill density, and support structures. Understanding these settings and how they impact the final print is essential for achieving the desired results.
Managing the print queue is another important aspect of the 3D printer interface. You can arrange the order of prints, cancel or pause ongoing prints, and monitor the progress of each print in the queue. This allows you to prioritize certain prints over others and maintain an organized workflow.
As the printer executes a print job, you’ll be able to monitor its progress through the interface. This includes information such as the percentage of completion, estimated time remaining, and any errors or warnings that may occur during the printing process. Monitoring the progress allows you to intervene if any issues arise and ensure a smooth printing experience.
It’s important to take the time to explore and familiarize yourself with the different functions and options available in the 3D printer interface. Experiment with different settings, navigate through the menus, and practice uploading and managing print jobs to become proficient in utilizing the printer to its full potential.
Now that you understand the basics of the 3D printer interface, it’s time to move on to the next step in the 3D printing process: selecting a design for your printing project. Let’s explore this aspect further in the upcoming section.
Selecting a 3D Printing Project
Choosing the right design for your 3D printing project in Take On Mars is a crucial step that determines the outcome and purpose of your prints. With a vast array of possibilities, from creating tools and equipment to constructing structures, selecting the right project can greatly enhance your abilities as an astronaut on Mars.
When selecting a 3D printing project, consider your current needs and objectives. Are you in need of a specific tool or equipment to aid in your exploration? Or perhaps you’re focused on building a sustainable habitat to ensure your long-term survival?
Take into account the available resources and materials at your disposal. Some designs may require specific types of materials or a certain quantity of resources. Ensure that you have the necessary materials in stock to complete the print successfully.
Consider the complexity and time required for each project. Some prints may be relatively simple and quick, while others may be more intricate and time-consuming. Assess your limitations and ensure that the chosen project aligns with your available resources, time, and skill level.
Additionally, explore the in-game community for designs created by other players. The community may offer a wide range of designs that can serve as inspiration or fulfill your specific needs. Downloading and utilizing community designs can save you time and effort in the design process.
Remember, 3D printing projects in Take On Mars extend beyond just functional items. You can also explore the realms of art and creativity, crafting unique and decorative objects to showcase your imagination and personal style.
When selecting a design, take into account the feasibility and practicality of the print. Ensure that the chosen design is compatible with your specific 3D printer and its capabilities. Some designs may require advanced features or materials that your current printer may not support.
Once you have selected your desired 3D printing project, you can proceed to upload the design to the printer and prepare it for printing. This involves adjusting settings, such as print scale and orientation, to achieve the desired result.
By selecting the right 3D printing project, you can maximize the effectiveness and impact of your prints in Take On Mars. Whether it’s survival tools, functional equipment, or creative artistic pieces, each project contributes to your growth and success as an astronaut.
Now that you understand the importance of selecting the right 3D printing project, let’s move forward and explore the process of uploading your design to the printer.
Uploading Your Design to the 3D Printer
Once you have chosen the perfect design for your 3D printing project in Take On Mars, the next step is to upload it to the 3D printer. Uploading your design is a straightforward process that allows you to bring your creations to life.
Before uploading the design, ensure that you have the design file ready. This file could be in various formats, such as .STL or .OBJ. You can either create your own design using 3D modeling software or download a design from the in-game community.
Access the 3D printer interface and navigate to the upload function. This will open a file explorer where you can locate and select the design file. Once you have selected the file, confirm the upload, and the design will be added to the print queue.
When uploading your design, take note of the scale and orientation of the object. Adjust these settings as needed to ensure the desired size and position of the printed object. Additionally, consider any supports or rafts that may be required depending on the complexity of the design.
During the upload process, the 3D printer will analyze the design file and calculate the estimated time and resources required for printing. It’s important to review these estimates to ensure they align with your available resources and the time you have allocated for the print.
Once the design is uploaded and the settings are adjusted, you can manage the design within the print queue. This allows you to prioritize certain prints, cancel or pause ongoing prints, and monitor the progress of each print job.
Remember to keep an eye on the printer’s status through the interface as it executes the print job. This will allow you to intervene if any issues arise and ensure a successful and accurate print.
Uploading your design to the 3D printer is an exciting moment as you bring your creations to life. The printer transforms the digital design into a physical object, allowing you to see your vision materialize in front of your eyes.
Now that you have successfully uploaded your design to the 3D printer, it’s time to explore the various settings and adjustments you can make to ensure a successful print. Let’s move on to the next section to understand the intricacies of adjusting settings for a successful print.
Adjusting Settings for a Successful Print
When it comes to 3D printing in Take On Mars, adjusting the right settings is crucial to ensure a successful print. The settings you choose can greatly impact the quality, strength, and accuracy of the final printed object.
Before initiating a print, take the time to review and adjust the various settings available in the 3D printer interface. These settings include parameters such as print speed, layer height, infill density, support structures, and cooling settings.
Print speed determines how fast the printer moves during the printing process. Higher speeds can result in quicker prints, but may sacrifice print quality. Slower speeds provide more precision but may increase print time. Consider balancing speed and quality based on your requirements and available resources.
Layer height determines the thickness of each layer that the printer deposits. Smaller layer heights result in higher resolution and finer details but increase print time. On the other hand, larger layer heights reduce print time but may sacrifice smoothness and detail. Adjust the layer height based on the complexity of your design and the desired level of quality.
Infill density refers to the internal structure of the printed object. Higher densities result in stronger prints but consume more material and may increase print time. Lower densities use less material but may compromise the strength of the object. Consider the intended purpose of your print and adjust the infill density accordingly.
Support structures are temporary structures that provide stability during the printing process. They are needed for designs with overhangs or complex geometries. Ensure that you enable support structures for designs that require them to prevent deformations and improve print accuracy.
Cooling settings control the cooling fan speed during the printing process. Adequate cooling helps prevent warping and improves the overall print quality. Adjust the cooling settings based on the material being used and the specific requirements of your print.
Experimentation and iteration are key when adjusting settings for 3D printing. Start with default settings and gradually make adjustments as needed. Take note of the results and iterate, making incremental changes until you achieve the desired outcome.
Additionally, keep in mind the limitations and capabilities of your specific 3D printer. Not all printers are created equal and may have varying settings and functionalities. Familiarize yourself with your printer’s specifications and recommended settings to optimize your prints.
By adjusting the right settings, you can achieve high-quality prints that meet your desired standards. Take the time to understand the impact of each setting and make informed decisions based on your specific project requirements.
Now that you are familiar with the settings, it’s time to initiate the 3D printing process and watch as your design takes shape. Let’s proceed to the next section to explore how to initiate the 3D printing process in Take On Mars.
Initiating the 3D Printing Process
After adjusting the settings for your 3D printing project in Take On Mars, it’s time to initiate the printing process and watch your design come to life. Initiating a print is an exciting moment as the 3D printer begins to transform your digital creation into a physical object.
To initiate the 3D printing process, ensure that the printer is properly prepared and ready for operation. This includes checking that the filament is loaded correctly, the print bed is properly leveled, and any necessary preheating has been done to ensure optimal print conditions.
Once the printer is ready, navigate to the print queue in the 3D printer interface, where your uploaded design awaits execution. Select the desired print job and confirm your selection to begin the print process.
During the printing process, the printer will carefully deposit layers of the filament material based on your design and the adjusted settings. The printer’s extruder heats the filament, melting it, and deposits it layer by layer to build the object from the bottom up.
While the printer is at work, monitor the print progress through the interface. This will allow you to keep an eye on the percentage of completion, estimated time remaining, and any warnings or errors that may occur during the print. This real-time feedback empowers you to address any issues promptly and ensure a successful print.
It is essential to exercise patience during the printing process, as it can take some time depending on the complexity and size of your design. Use this time to explore other activities in the game or plan your next mission on Mars.
Once the printing process is complete, carefully remove the printed object from the print bed. Take note of any post-processing steps that may be required, such as removing support structures or sanding rough surfaces, to achieve the desired finish and functionality.
Remember that the success of a print is not solely determined by the printer but also factors such as design quality, material selection, and adjusted settings. Continuously refine your techniques and experiment with different approaches to achieve the best results.
Now that you have initiated the 3D printing process, it’s time to explore common issues that may arise during printing and learn how to troubleshoot them. Let’s move on to the next section to understand how to address common 3D printing issues in Take On Mars.
Troubleshooting Common 3D Printing Issues
While 3D printing in Take On Mars can be a rewarding and efficient process, there may be times when you encounter common issues that can affect the quality and success of your prints. Understanding and troubleshooting these issues is essential to ensure smooth and consistent printing.
One common issue is adhesion problems, where the printed object does not properly adhere to the print bed. This can result in a distorted or failed print. To address this, ensure that the print bed is clean and leveled correctly. Adjusting the print bed temperature and using adhesive aids, such as tape or glue, can also improve adhesion.
Another issue is poor layer adhesion, where the printed layers do not bond properly. This can cause weak and fragile prints. To mitigate this issue, ensure that your print temperature and cooling settings are suitable for the filament material being used. Increasing the extruder temperature or adjusting cooling can help improve layer adhesion.
Warping is a persistent issue that occurs when the corners of the print curl or lift from the print bed. This is more common with larger prints or certain materials. To combat warping, consider using a heated print bed, applying a suitable adhesive surface, and adjusting the print bed temperature to promote better adhesion.
Stringing or oozing refers to thin strands of filament that appear between different parts of the print. This can happen when the nozzle drips or moves across empty space during a print. To minimize stringing, adjust the retraction settings in your 3D printer interface. Increasing retraction distance and speed can help reduce stringing and achieve cleaner prints.
Inconsistent extrusion is another issue that can result in uneven or patchy print layers. Ensure that the filament is fed smoothly and consistently into the extruder. Check for any obstructions or clogs in the nozzle and clean it if necessary. Properly calibrate your printer’s extruder to ensure accurate filament feeding.
Layer shifting occurs when the layers of the print are misaligned, leading to skewed or distorted prints. This can be caused by mechanical issues or incorrect belt tension. Check that all belts and pulleys are properly tightened and aligned. Lubricate any necessary parts to reduce friction and ensure smooth movement.
If you experience any of these issues, it is important to assess the root cause and make appropriate adjustments. Take note of the specific settings, materials, and environmental conditions at the time of the issue to aid in troubleshooting.
Remember that troubleshooting is an iterative process, and patience is key. Make incremental adjustments to settings, investigate potential mechanical issues, and consult resources such as online forums or community guides for further guidance.
By understanding and effectively troubleshooting common 3D printing issues, you can overcome challenges and achieve high-quality prints in Take On Mars. Now, armed with this knowledge, let’s explore tips and tricks to optimize your 3D printing workflow and enhance efficiency.
Tips and Tricks for Efficient 3D Printing
Efficient 3D printing in Take On Mars not only saves time and resources but also enhances your overall productivity as an astronaut. Here are some tips and tricks to optimize your 3D printing workflow and maximize efficiency:
1. Plan Ahead: Take the time to plan your printing projects in advance. Consider the desired outcomes, required resources, and print settings. This will help you avoid last-minute errors and ensure a smooth printing process.
2. Optimize Print Orientation: Experiment with different orientations for your design to minimize support material and improve print quality. Adjusting the orientation can also impact the strength and stability of the printed object.
3. Use High-Quality Filament: Invest in high-quality filament materials that offer good adhesion, strength, and dimensional accuracy. Quality filament can result in better prints and reduce the likelihood of printing issues.
4. Maintain Proper Calibration: Regularly calibrate your 3D printer to ensure accurate and reliable prints. Check and adjust the print bed level, nozzle alignment, and extruder calibration as needed.
5. Experiment with Support Structures: When designing or selecting models, test different support structure configurations to minimize excessive support material usage. This can significantly reduce print time and material waste.
6. Optimize Infill Density: Fine-tune the infill density based on the requirements of your print. For non-structural parts, lower infill densities can save material and print time while still providing sufficient strength and stability.
7. Monitor Print Progress: Keep an eye on the print progress through the printer interface. Regularly check for any errors or warnings and address them promptly to prevent print failures.
8. Practice Iteration and Refinement: Use each print as an opportunity to learn and improve. Keep notes of your settings and adjustments, and iterate on them over time to achieve the best results for future prints.
9. Utilize Multi-Print Functionality: Take advantage of the ability to queue multiple prints and plan efficient print sessions. Batch printing similar objects can minimize setup time and increase overall productivity.
10. Learn from the Community: Engage with the in-game community and online forums to learn from others’ experiences and gather valuable insights. Share your own discoveries and collaborate with other players to unlock new techniques.
By implementing these tips and tricks, you can optimize your 3D printing workflow in Take On Mars, increasing efficiency, and achieving higher-quality prints. Now equipped with these strategies, let’s explore more advanced 3D printing techniques and customization options in the next section.
Advanced Techniques for Custom Designs
In Take On Mars, custom designs allow you to push the boundaries of 3D printing and create unique objects tailored to your specific needs. As you become more experienced with 3D printing, here are some advanced techniques you can explore to enhance your designs:
1. Customization and Personalization: Customize existing designs or create your own from scratch to reflect your personal style and requirements. Add logos, engravings, or intricate details to make your prints truly one-of-a-kind.
2. Parametric Modeling: Utilize parametric design software to create models with adjustable parameters. This allows you to easily modify dimensions, angles, or other features without recreating the entire design. It offers a great deal of flexibility and saves time in the design iteration process.
3. Multi-material Printing: Take advantage of advanced 3D printers that support multi-material printing. This allows you to combine different filaments or materials in a single print, opening up possibilities for creating objects with varying properties and textures.
4. Mesh Editing and Repair: Use software tools to manipulate and repair mesh files before printing. This includes tasks such as smoothing surfaces, removing imperfections, or fixing intersecting geometry. Properly preparing the mesh can drastically improve the print quality.
5. Experimental Filaments: Venture beyond traditional filaments and explore exotic materials. From wood-infused filaments to conductive materials, experimenting with different filaments can unlock new design opportunities and functional applications.
6. Integration of Electronic Components: Combine your 3D prints with electronic components to create functional objects such as sensors, lights, or mechanical parts. Design enclosures and fittings to seamlessly integrate electronic elements into your prints.
7. Texturing and Surface Finishing: Explore techniques to enhance the surface finish of your prints. This can include post-processing methods like sanding, polishing, or applying coatings or paints to achieve a desired texture or aesthetic appeal.
8. Designing for Assembly: Optimize designs for easy assembly and disassembly. Incorporate features such as interlocking mechanisms, snap-fit connections, or screw bosses to simplify construction and allow for easier maintenance or modification.
9. Scaling and Resizing: Experiment with scaling and resizing designs to create variations of your prints. Enlarge or shrink objects to fit specific requirements or explore the possibilities of miniaturization.
10. Complex Geometries: Challenge yourself with designing complex geometries that maximize the potential of 3D printing. Explore lattice structures, Voronoi patterns, or generative design techniques to create intricate and lightweight objects.
By delving into these advanced techniques, you can take your 3D printing skills to the next level and create highly customized and innovative prints in Take On Mars. Don’t be afraid to experiment and push the boundaries of what is possible with your 3D printer.
Now equipped with these advanced techniques, you have the tools to unleash your creativity and tackle even the most complex 3D printing projects in the game.
Conclusion
3D printing in Take On Mars offers a unique and immersive experience that allows you to harness the power of additive manufacturing on the red planet. By gathering resources, building a 3D printer, and mastering the intricacies of its interface, you can bring your digital designs to life in the form of physical objects.
Throughout this article, we’ve explored the various aspects of 3D printing in Take On Mars, from gathering resources and building a printer to selecting designs, adjusting settings, and troubleshooting common issues. We’ve also delved into advanced techniques for custom designs, empowering you to unleash your creativity and push the boundaries of what is possible with 3D printing.
Remember, efficient and successful 3D printing requires careful planning, resource management, and an understanding of the technicalities involved. By utilizing the tips and tricks provided, you can optimize your workflow, enhance print quality, and maximize your productivity as an astronaut on Mars.
Whether you’re creating tools for survival, constructing habitats, or exploring artistic endeavors, the possibilities of 3D printing in Take On Mars are limited only by your imagination. Embrace the challenge, continue to learn and refine your techniques, and share your discoveries with the in-game community and beyond.
Now, armed with this knowledge, it’s time for you to embark on your journey of exploration and innovation. Step into the world of Take On Mars, harness the power of 3D printing, and unlock the endless possibilities that await you on the red planet.