Introduction
Upgrading the RAM in an Android phone can greatly enhance its performance, allowing for smoother multitasking, faster app launches, and improved overall responsiveness. While many people assume that upgrading RAM is only possible in computers, it is indeed possible to upgrade the RAM in some Android devices as well. However, it is important to note that not all Android phones support RAM upgrades, as the RAM is often soldered onto the motherboard.
Before attempting to upgrade the RAM in your Android phone, there are a few important things to consider. First and foremost, you need to ensure that your device is compatible with RAM upgrades. Checking the specifications of your phone and consulting the manufacturer’s documentation can help you determine if your device supports RAM upgrades.
Another crucial factor to consider is that upgrading the RAM in an Android phone can be a complex task and may void your device’s warranty. It requires technical expertise and knowledge of the phone’s hardware components. If you are not confident in your abilities, it is recommended to seek professional help or consult with the manufacturer.
In this guide, we will walk you through the process of upgrading the RAM in your Android phone, assuming that your device supports RAM upgrades. We will provide step-by-step instructions to help you navigate the process smoothly.
Before proceeding with the RAM upgrade, it is essential to back up your data to prevent any potential loss. Additionally, ensure that you have the necessary tools and equipment to disassemble and reassemble your phone. This includes a small screwdriver set, an anti-static mat (optional but recommended), and a clean and well-lit workspace.
Now that we have covered the necessary precautions and preparations, let’s dive into the detailed steps for upgrading the RAM in your Android phone.
Things to Consider Before Upgrading RAM
Before you embark on the process of upgrading the RAM in your Android phone, there are several important factors to consider. These considerations will help ensure a successful and smooth upgrade process, as well as prevent any potential issues or damage to your device.
1. Compatibility: The first step is to check if your Android phone supports RAM upgrades. Not all devices are designed to allow for RAM expansion. Check the specifications of your phone, consult the manufacturer’s documentation, or search online forums and communities dedicated to your specific device model to determine if RAM upgrades are possible.
2. Warranty: It’s crucial to be aware that upgrading the RAM in your Android phone may void the warranty. If your device is still under warranty, consider contacting the manufacturer or authorized service center to inquire about RAM upgrades and potential implications on your warranty coverage.
3. Technical Expertise: Upgrading RAM in an Android phone requires technical knowledge and expertise. It involves disassembling your device and working with delicate hardware components. If you are not comfortable or confident in your abilities, it is recommended to seek professional assistance or have the upgrade performed by an experienced technician.
4. Research and Preparation: Before starting the upgrade, conduct thorough research on your specific phone model. Look for guides, tutorials, videos, or user experiences from reliable sources to get a better understanding of the process. Make sure to gather all the necessary tools, such as a small screwdriver set, an anti-static mat (optional but recommended), and a clean workspace, to facilitate a smooth upgrade process.
5. Data Backup: Before performing any hardware modifications, it is essential to back up all your important data. Upgrading the RAM involves disassembling and potentially resetting your device, which could result in data loss. Take the time to back up your photos, videos, documents, and any other valuable data to prevent irrevocable loss.
6. Budget Considerations: RAM upgrades may come at a cost. Research the compatible RAM modules for your device and consider your budget before making any purchases. Remember to factor in the cost of the RAM module itself and any additional tools or services you may require to complete the upgrade.
By carefully considering these factors and preparing adequately, you can ensure a successful RAM upgrade in your Android phone. Now that we have covered the essential considerations, let’s move on to the step-by-step process of upgrading the RAM in your device.
Step 1: Check the Compatibility
Before you begin the process of upgrading the RAM in your Android phone, it is crucial to check if your device is compatible with RAM upgrades. Not all Android phones support this feature, as the RAM is often soldered onto the motherboard and not easily replaceable. Follow the steps below to determine if your device can be upgraded:
1. Check your phone’s specifications: Start by checking your phone’s specifications. You can usually find this information in the user manual or by visiting the manufacturer’s website. Look for details about the RAM capacity and whether it can be upgraded. If there is no mention of RAM upgrades or if the RAM capacity is listed as “non-expandable,” it is likely that your device does not support RAM upgrades.
2. Consult online resources: If you are unable to find conclusive information in your phone’s official documentation, a quick search online can provide valuable insights. Look for forums, community discussions, or articles specific to your phone model. Often, more experienced users or tech enthusiasts may have already explored the possibility of RAM upgrades and shared their experiences online.
3. Contact the manufacturer: If you are still unsure about your phone’s compatibility after conducting initial research, reaching out to the manufacturer directly is a good idea. Contact their customer support or visit their official website to inquire about RAM upgrades for your specific device. They will be able to provide accurate information and guide you accordingly.
4. Seek professional advice: If you prefer to have expert advice, consider consulting with a professional technician or a knowledgeable phone repair service. They will have the expertise and experience to assess your device’s compatibility and provide you with accurate information.
It is important to note that even if your phone supports RAM upgrades, there may be certain limitations. Some devices have a maximum RAM capacity that cannot be exceeded, or they may require specific RAM modules. Make sure to check these details during your research to ensure that you choose compatible RAM for your device.
Once you have determined that your phone is compatible with RAM upgrades, you can proceed to the next steps, which involve purchasing the compatible RAM module and preparing for the upgrade process. Follow along as we guide you through each step to successfully upgrade the RAM in your Android phone.
Step 2: Purchase the Compatible RAM
After confirming that your Android phone supports RAM upgrades, the next step is to purchase the compatible RAM module. It is crucial to choose the right RAM module that is compatible with your device to ensure optimal performance and compatibility. Follow these steps to purchase the compatible RAM:
1. Identify the RAM requirements: Check your phone’s specifications or consult the manufacturer’s documentation to determine the RAM requirements for your specific device. Note down the recommended RAM capacity and other specifications such as the speed (in MHz) and type (DDR3, DDR4, etc.).
2. Research compatible RAM modules: Once you have the RAM requirements, conduct a thorough research to find the appropriate RAM module for your device. Look for reputable brands and models that offer compatibility with your phone model. It is recommended to visit official manufacturer websites, reliable online retailers, or specialized tech forums for information on compatible RAM options.
3. Consider the RAM capacity: Determine how much RAM you want to upgrade. Depending on your phone’s capabilities, you may have different options for RAM capacity. Consider your specific needs and usage patterns while choosing the appropriate capacity. Keep in mind that some Android phones have a maximum RAM capacity limit that cannot be exceeded.
4. Check the RAM speed: Pay attention to the speed of the RAM module. Match it with the recommended speed mentioned in your phone’s specifications. Using a RAM module with a higher speed than recommended may not provide any performance benefits and could potentially cause compatibility issues.
5. Verify the RAM type: Ensure that the RAM module you choose is of the correct type (DDR3, DDR4, etc.) as specified by your phone’s requirements. Using an incompatible RAM type may result in the module not being recognized by your device.
6. Trust reputable sources: Purchase the RAM module from reputable sources to ensure that you receive a genuine product. Avoid buying from unknown sellers or websites that offer heavily discounted prices, as counterfeit or low-quality RAM modules could lead to compatibility or performance issues.
7. Double-check compatibility: Before finalizing your purchase, double-check the compatibility of the RAM module with your specific device model. Verify that the RAM module is explicitly listed as compatible with your phone model to ensure a seamless upgrade process.
Upon purchasing the compatible RAM module, make sure to handle it with care, following proper electrostatic discharge (ESD) precautions, and keeping it in an anti-static packaging until you are ready to install it. With the compatible RAM module in hand, you are now ready to proceed to the next steps and upgrade the RAM in your Android phone.
Step 3: Back Up Your Data
Prior to performing any hardware modifications, such as upgrading the RAM in your Android phone, it is crucial to back up all of your important data. This step ensures that your valuable files, photos, videos, contacts, and other vital information are safely stored, preventing potential data loss during the upgrade process. Follow these steps to back up your data:
1. Choose a backup method: Determine the most suitable method for backing up your data. You can opt for cloud-based services like Google Drive, Dropbox, or OneDrive, which offer storage and synchronization of files across devices. Alternatively, you can use a computer to manually transfer and store your data.
2. Sync and backup contacts and calendars: If you have important contacts and calendars on your phone, sync them with your Google account or export them to a supported format for safekeeping. This ensures that you can easily restore them on your device later.
3. Backup photos and videos: Use cloud storage services or connect your phone to a computer and transfer your photos and videos to a designated folder on your PC or an external hard drive. Alternatively, you can use dedicated photo backup apps available in your app store.
4. Transfer files and documents: If you have any important files or documents saved on your phone, connect it to your computer and manually transfer them to a safe location. You can create a specific folder on your desktop or use cloud storage services to store these files.
5. Backup app data: Some apps allow you to backup and restore data, including settings, preferences, and in-app content. Check if any of your important apps offer this feature and enable the data backup option. Alternatively, take screenshots or note down any necessary information from your apps that you may need to reinstall or reconfigure later.
6. Verify the backup: Once you have completed the backup process, take a moment to verify that all your important data has been successfully backed up. Double-check that your contacts, photos, videos, files, and other essential information are securely stored and easily accessible.
Remember, backing up your data is a precautionary step to prevent potential loss during the RAM upgrade process. It is recommended to keep your backup files in a secure location, either through cloud storage or offline storage, until the upgrade is completed successfully.
Now that you have backed up your crucial data, you are ready to proceed with the next steps involved in upgrading the RAM in your Android phone.
Step 4: Power Off Your Android Phone
Before you begin the process of upgrading the RAM in your Android phone, it is essential to power off the device completely. This step ensures your safety and prevents any potential damage to the phone’s components during the RAM installation process. Follow these instructions to power off your Android phone:
1. Save any work and exit applications: Make sure to save any ongoing work and exit all applications on your phone. This step ensures that your data is properly saved and prevents any potential data loss.
2. Press and hold the power button: Locate the power button on your Android phone. Press and hold this button until the power options menu appears on your screen.
3. Select the “Power off” option: In the power options menu, you will see various choices such as “Power off,” “Restart,” or “Airplane mode.” Tap on the “Power off” option to shut down your phone.
4. Confirm the power off process: Some devices may require you to confirm the power off process by selecting “OK” or “Confirm” on a pop-up window. If prompted, follow the on-screen instructions to proceed with the power off.
5. Wait for the phone to turn off: Once you have initiated the power off process, wait for your phone to fully shut down. You may see a spinning icon or a blank screen indicating that the device is powering off. This process may take a few seconds.
6. Verify the phone is turned off: To double-check that your Android phone is completely powered off, press the power button again briefly. If the device does not turn on or show any signs of activity, it indicates that the phone is successfully powered off.
By properly powering off your Android phone, you ensure that the device is in a safe state for the RAM upgrade process. This step helps prevent accidental power surges or damage to the phone’s internal components during the installation process.
With your Android phone powered off and safely prepared, you are now ready to move on to the next steps involved in upgrading the RAM in your device.
Step 5: Locate the RAM Slot
Once your Android phone is powered off, the next step in upgrading the RAM is to locate the RAM slot. The RAM slot is where the RAM module is installed in your device. Follow these instructions to find the RAM slot in your Android phone:
1. Refer to your phone’s documentation: Consult the user manual or any documentation provided by the manufacturer for your specific phone model. Look for information about the location of the RAM slot. The user manual may also include diagrams or illustrations that can help you identify the RAM slot easily.
2. Research online resources: If you can’t find the necessary information in the phone’s documentation, search online for technical guides, tutorials, or videos specific to your phone model. Online forums and community websites dedicated to your phone’s brand or model can provide valuable insights and visual references.
3. Observe the internal structure of the phone: Carefully remove the phone’s back cover or any panels that provide access to the internals of your device. Use a small screwdriver or a plastic prying tool, if necessary. Once you have access to the internal components, observe the layout and look for any marked areas or distinguishing features that may indicate the location of the RAM slot.
4. Look for labeled components: The RAM slot is typically labeled or marked in some way to indicate its location. It may be referred to as “RAM,” “Memory,” or have a symbol that represents memory modules. Inspect the internal components, and if you see any labels or markings related to memory, chances are you have found the RAM slot.
5. Examine the motherboard: If you are comfortable with handling internal components of your phone, you can remove additional layers or shields to expose the motherboard. Look for a rectangular or square-shaped slot with notches at the bottom. This is where the RAM module will be inserted.
It is important to note that the location of the RAM slot can vary depending on the phone model. Some devices may have the slot easily accessible by removing the back cover, while others may require further disassembly. Take your time and be patient during this process to avoid any damage to the device.
With the RAM slot located, you are one step closer to upgrading the RAM in your Android phone. In the next steps, we will guide you through removing the old RAM module and installing the new one to improve your device’s performance.
Step 6: Remove the Old RAM Module
With the RAM slot located, it’s time to remove the old RAM module from your Android phone. Removing the old RAM module allows you to replace it with the new one and upgrade the device’s memory capacity. Follow these steps to safely remove the old RAM module:
1. ESD precautions: Before you begin, take necessary precautions for electrostatic discharge (ESD). Wear an anti-static wrist strap, or at the very least, touch a grounded metal object to discharge any static electricity from your body. This helps protect the internal components of your phone from potential damage.
2. Access the RAM slot: Depending on your phone model, you may need to remove additional covers or panels to gain direct access to the RAM slot. Use a small screwdriver or a plastic prying tool to carefully remove any necessary components, following proper disassembly instructions specific to your device.
3. Identify the old RAM module: Once you have access to the RAM slot, locate the existing RAM module. It will be a small rectangular or square-shaped object, similar to the new RAM module you purchased, and will be inserted into the RAM slot at an angle.
4. Release the securing mechanism: Most RAM modules are held in place by a securing mechanism. It could be small metal tabs, plastic clips, or brackets that you need to release to remove the old RAM module. Gently push or pull the tabs or clips away from the RAM module to release it.
5. Remove the old RAM module: Once the securing mechanism is released, carefully pull the old RAM module out of the RAM slot. Hold it by the edges and avoid touching the gold contacts or any sensitive components. Make sure to keep the old RAM module in a safe place or dispose of it appropriately.
6. Handle the module with care: If you plan to keep the old RAM module for any reason, store it in an anti-static bag or wrap it in an anti-static cloth to protect it from static electricity and physical damage.
By following these steps, you have successfully removed the old RAM module from your Android phone. Now, let’s move on to the next step, where we will guide you through the process of installing the new RAM module into your device.
Step 7: Install the New RAM Module
Now that you have successfully removed the old RAM module from your Android phone, it’s time to install the new RAM module. The new RAM module will provide you with improved memory capacity and enhance the overall performance of your device. Follow these steps to install the new RAM module:
1. Handle the new RAM module with care: Before proceeding, ensure that you are taking necessary precautions to prevent any damage to the new RAM module. Handle the module by its edges, avoiding contact with the gold contacts or any sensitive components. If required, use an anti-static wrist strap to discharge any static electricity.
2. Align the new RAM module: Orient the new RAM module correctly by aligning the notch on the module with the tab or notch in the RAM slot. Ensure that the module is inserted in the correct direction, as incorrect alignment may prevent proper installation or cause damage to the RAM module or the slot.
3. Insert the new RAM module at an angle: Insert the new RAM module into the RAM slot at an angle, typically around 30 to 45 degrees. Gently press the module down, ensuring that it is seated properly and the gold contacts on the module align with the contacts in the RAM slot. Firmly push the module down until it is fully seated in the slot and the securing mechanism engages.
4. Secure the new RAM module: Once the new RAM module is inserted, secure it in place by engaging the securing mechanism. This could involve pushing the metal tabs or plastic clips back into position, or sliding a bracket over the RAM module to hold it securely. Make sure that the module is locked in place and does not move or wiggle when gently pressed.
5. Double-check the installation: Take a moment to double-check the installation of the new RAM module. Ensure that it is fully seated in the RAM slot, properly aligned, and securely held in place by the securing mechanism. Check that the gold contacts are not visibly dirty or damaged.
6. Close any access panels: If you had to remove any covers or panels to access the RAM slot, carefully close them and ensure they are securely fastened. Pay attention to any clips or screws that need to be tightened to hold the panels in place.
By following these steps, you have successfully installed the new RAM module into your Android phone. In the next step, we will guide you through putting everything back together and preparing to power on your device.
Step 8: Put Everything Back Together
Now that you have installed the new RAM module in your Android phone, it’s time to put everything back together and prepare for powering on your device. Follow these steps to ensure a proper reassembly:
1. Reattach any removed panels or covers: If you had to remove any panels or covers to access the RAM slot, carefully reattach them in their original positions. Align the tabs or clips and apply gentle pressure to secure them into place. Make sure all screws, if any, are tightened appropriately.
2. Verify the alignment of internal components: After reattaching the panels, check for any internal components that may have shifted during the disassembly process. Ensure they are properly aligned and secured. Avoid forcing anything into place, as this could lead to damage. Double-check that all connectors, cables, and ribbons are intact and correctly positioned.
3. Close and secure the phone’s back cover: If applicable, reattach the back cover of your phone. Align it with the edges and corners of the device and press it firmly until you hear a satisfying click or feel it securely fasten. Ensure that there are no gaps or areas where the cover is not flush with the rest of the device.
4. Test the phone’s overall structural integrity: After reassembling the device, gently press on different areas of the phone to ensure that everything is securely in place. Pay attention to any unusual noises, creaking, or loose parts. If you notice any abnormalities, double-check the specific area to ensure proper positioning or fastening.
5. Wipe off any fingerprints or smudges: Before proceeding to the final step, wipe off any fingerprints, smudges, or debris from the phone’s exterior using a microfiber cloth or a soft, lint-free cloth. This helps maintain a clean and aesthetically pleasing appearance.
By following these simple steps, you have successfully put everything back together after installing the new RAM module in your Android phone. Now, you are ready to move on to the final step, where we will guide you through powering on your device and testing the new RAM module.
Step 9: Power On Your Android Phone
After reassembling your Android phone, it’s time to power it on and ensure that everything is functioning correctly with the new RAM module. Follow these steps to safely power on your device:
1. Locate the power button: Identify the power button on your phone. It is typically located on the side or top of the device. Take note of its position for easier access.
2. Press and hold the power button: Press and hold the power button until you see the device’s logo or an indication that it is booting up. Keep the button pressed until the screen lights up, and the phone powers on.
3. Wait for the phone to start up: Allow your phone a few moments to boot up. Depending on your device, this process may take a short while. You may see the manufacturer’s logo or an animation during this time.
4. Enter your passcode or unlock pattern (if applicable): If you have a passcode, PIN, or pattern set up to unlock your phone, enter it after the device finishes booting up. This step is necessary to access the home screen.
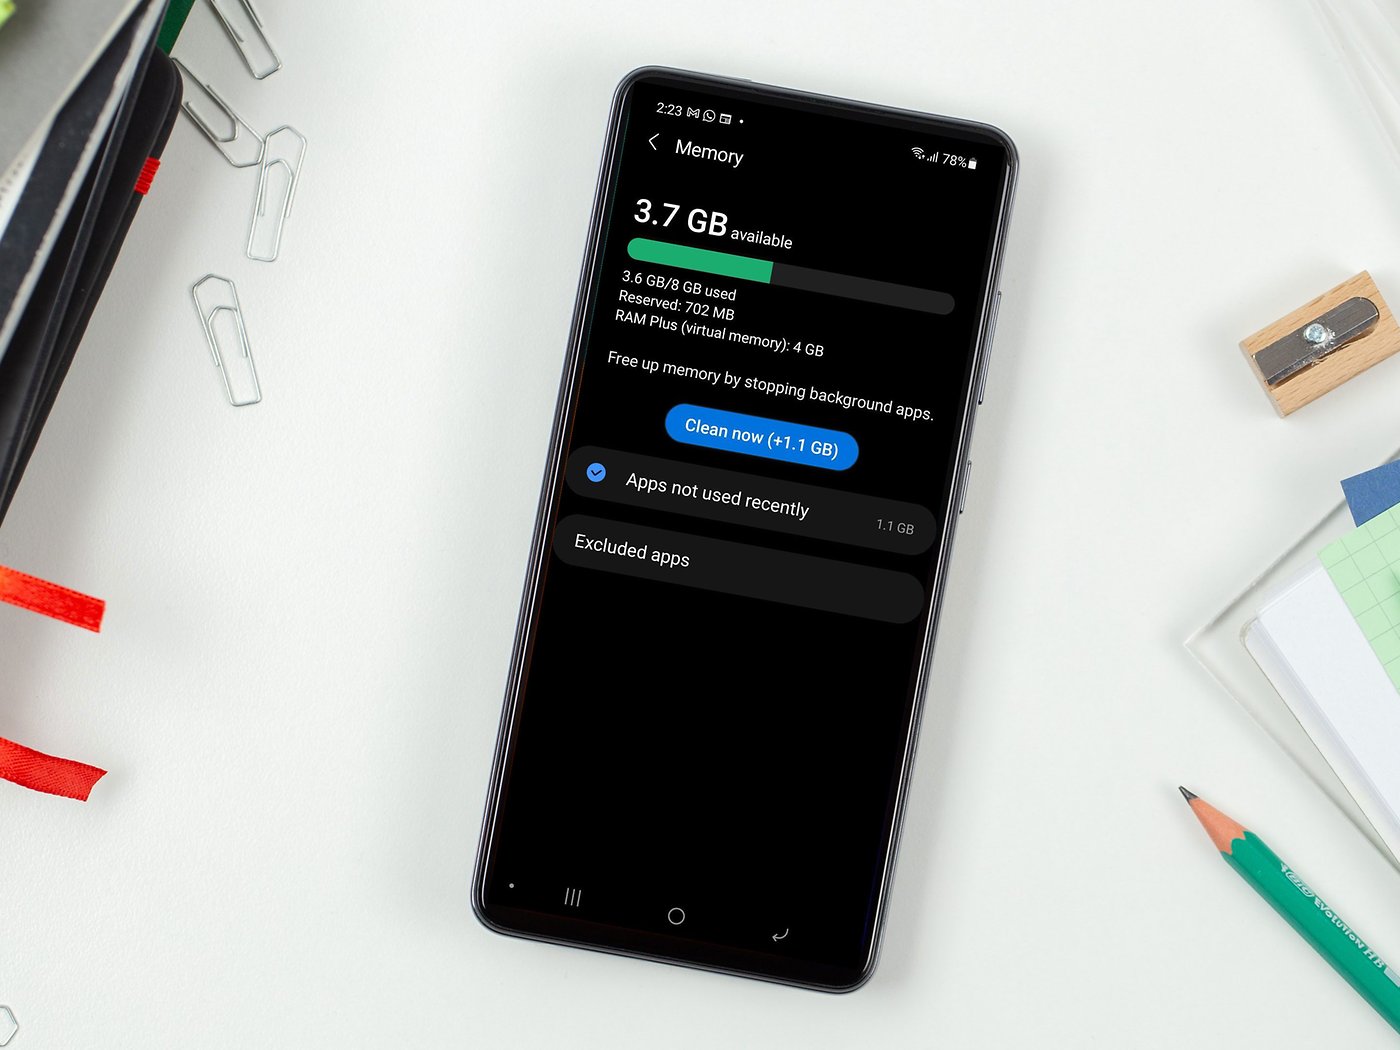
5. Verify that the phone recognizes the new RAM module: Once you have successfully unlocked your device, navigate to the phone’s settings and locate the information regarding the RAM. Check if the phone recognizes the new RAM module and correctly displays the updated RAM capacity.
6. Monitor the phone’s performance: As you use your phone, pay attention to its overall performance. Monitor how apps open and close, multitasking capabilities, and any noticeable improvements in responsiveness. Remember that although a RAM upgrade can enhance performance, it may not yield drastic changes in all aspects of the device’s functionality.
7. Test various apps and functionalities: Test out different applications and features on your phone to ensure that everything is functioning correctly with the new RAM module. Open and close multiple apps, switch between them, and perform tasks that previously caused slowdowns or lag to see if there is any improvement.
If you encounter any issues or notice abnormalities with your phone’s functionality or performance, it is advisable to consult with a professional technician or the manufacturer for further assistance.
With your Android phone successfully powered on and verified, you have completed the upgrade process. Enjoy the improved performance and responsiveness that the new RAM module brings to your device.
Step 10: Test the New RAM Module
After installing the new RAM module in your Android phone, it’s crucial to test its functionality and ensure that it is working properly. This final step allows you to confirm that the RAM upgrade has been successful and assess any performance improvements. Follow these steps to effectively test the new RAM module:
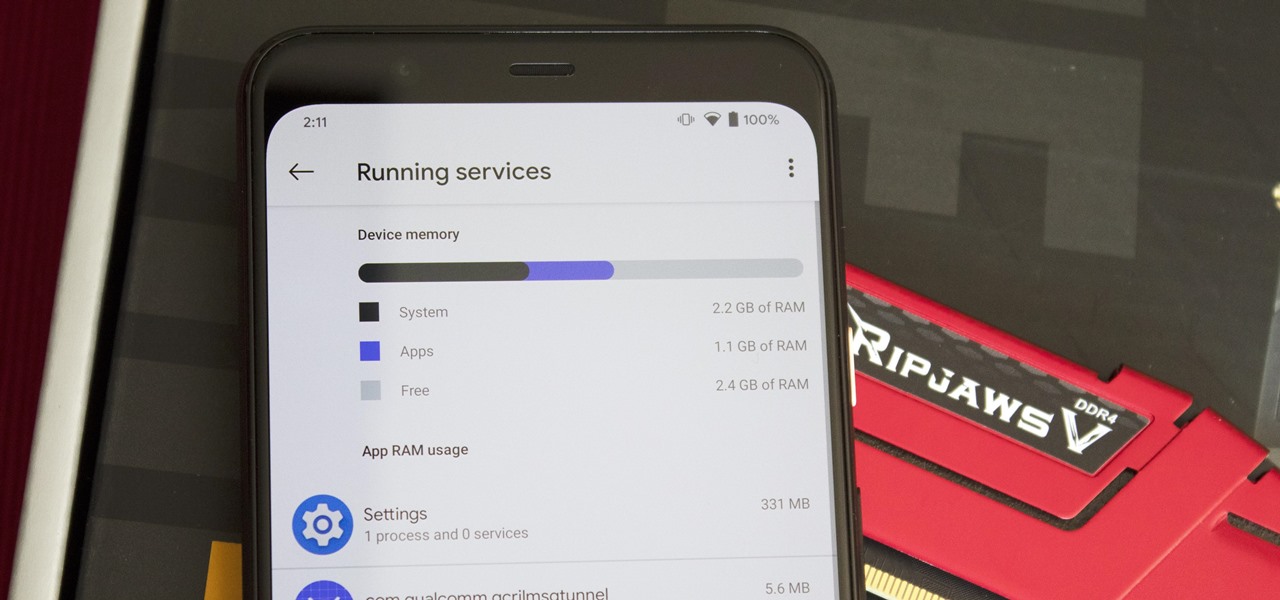
1. Monitor system resource usage: Check the system resource usage on your phone while performing various tasks. Use the phone’s built-in task manager or a third-party monitoring app to monitor the RAM usage. Compare it to the previous usage with the old RAM module to see if there is any noticeable difference.
2. Multitasking test: Open multiple applications simultaneously and switch between them. Pay attention to the speed at which the apps open, close, and switch. Note any improvements in multitasking capabilities and if the phone can handle running multiple resource-intensive apps simultaneously without significant delays or slowdowns.
3. App loading times: Open commonly used apps on your phone and compare the loading times to see if there are any noticeable improvements. Apps that previously took longer to open should now load faster with the increased RAM capacity.
4. Gaming performance: If you use your device for gaming purposes, test out some resource-intensive games. Monitor the game’s performance, including frame rates, smoothness, and overall responsiveness. Compare the gaming experience to how it was with the old RAM module to assess any improvements.
5. General phone responsiveness: Pay attention to the overall responsiveness of your phone. Notice if it feels snappier, smoother, and more fluid when navigating through menus, scrolling through webpages, or interacting with the user interface. If you previously experienced lag or delays, the new RAM module should help alleviate these issues.
6. Battery performance: Although RAM upgrades mainly focus on improving performance, keep an eye on your phone’s battery performance. Observe any changes in battery drain or standby time after the RAM upgrade. It is normal to see slight variations, but ensure that there are no significant negative impacts on battery life.
7. Stability and reliability: After using your device with the new RAM module for a period of time, observe its stability and reliability. Check for any unexpected crashes, freezes, or unusual behavior. A stable and reliable performance is essential for a satisfying user experience.
If you encounter any issues or notice unexpected behavior during the testing phase, it is advisable to consult with a professional technician or reach out to the manufacturer’s support for troubleshooting assistance.
By diligently testing the new RAM module, you can determine whether the upgrade has been successful and enjoy the enhanced performance and responsiveness it brings to your Android phone.
Conclusion
Upgrading the RAM in your Android phone can significantly improve its performance by allowing for smoother multitasking, faster app launches, and overall improved responsiveness. While not all Android devices support RAM upgrades, for those that do, following the right steps is essential to ensure a successful upgrade process.
In this guide, we have walked you through the step-by-step process of upgrading the RAM in your Android phone. We began by emphasizing the need to check compatibility and consider important factors such as warranty, technical expertise, and data backup. We then guided you through each step, from locating the RAM slot and removing the old RAM module to installing the new RAM module and testing its functionality.
Throughout the process, it is crucial to handle the RAM modules with care, follow electrostatic discharge precautions, and ensure proper alignment and installation. Additionally, testing the new RAM module allows you to assess its performance improvements in terms of multitasking, app loading times, gaming experience, device responsiveness, and stability.
Remember, if you encounter any issues or unexpected behavior during the RAM upgrade process or after installing the new module, it is advisable to seek professional assistance or contact the manufacturer’s support for guidance and troubleshooting.
By upgrading the RAM in your Android phone, you can optimize its performance and enjoy a smoother and more efficient user experience. Take the time to research, prepare, and follow the steps outlined in this guide to ensure a successful RAM upgrade and unlock the full potential of your Android device.