Introduction
ASUS gaming laptops are known for their powerful performance and functionality, providing gamers with a seamless and immersive gaming experience. One essential component of these gaming laptops is the touchpad, which allows users to navigate and interact with the device.
However, sometimes the touchpad on an ASUS gaming laptop may be turned off or not functioning properly, causing frustration and hindering productivity. In this guide, we will walk you through the steps to turn on the touchpad on your ASUS gaming laptop, ensuring that you can fully utilize this important feature.
Whether you accidentally turned off the touchpad, encountered a software issue, or are experiencing other complications, we have got you covered. We will provide you with different methods to enable the touchpad, including checking if it is enabled, using the settings menu, keyboard shortcuts, updating or reinstalling touchpad drivers, and troubleshooting common touchpad issues.
By the end of this guide, you will have a complete understanding of how to effectively turn on the touchpad on your ASUS gaming laptop, allowing you to resume your gaming sessions or work tasks without any disruptions. So let’s dive in and explore the various methods to solve this problem.
Step 1: Checking if the touchpad is enabled
The first step in resolving touchpad issues on your ASUS gaming laptop is to check if the touchpad is enabled. Sometimes, the touchpad may have been accidentally disabled, causing it to become unresponsive. Follow these simple steps to verify the status of the touchpad:
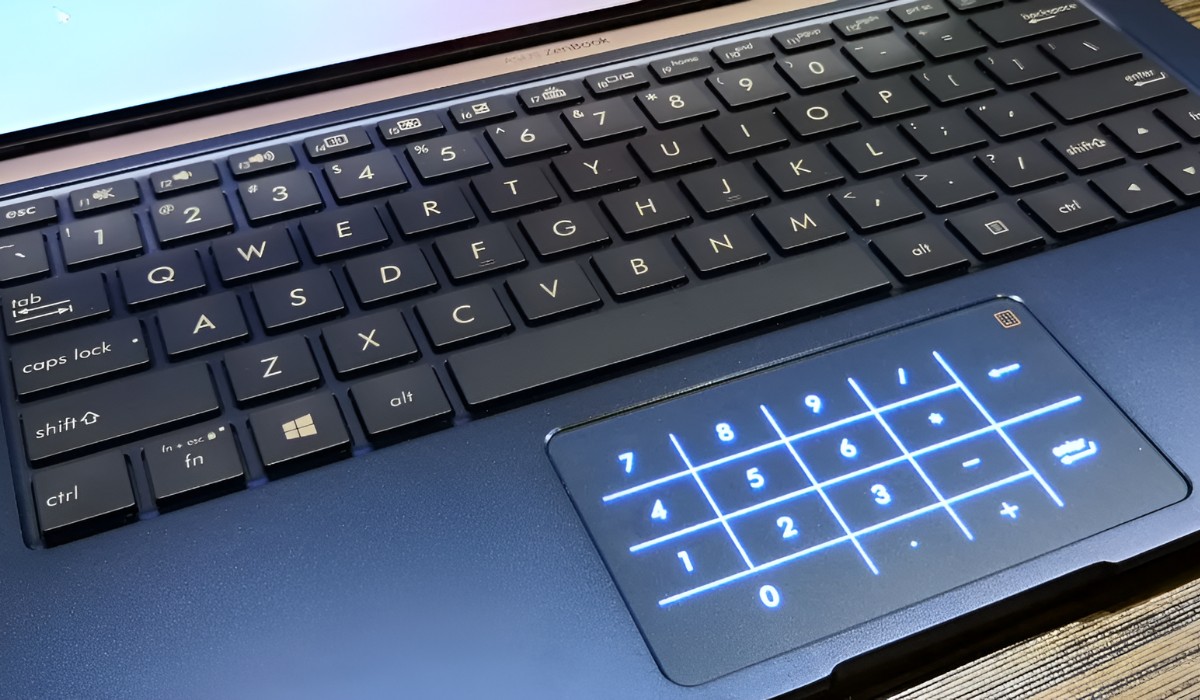
- Begin by locating the touchpad on your ASUS gaming laptop. It is usually located below the keyboard and above the palm rest.
- Look for a small LED indicator near the touchpad. This LED light is often used to indicate the status of the touchpad.
- If the LED light is on, it indicates that the touchpad is enabled. You can proceed to the next step. However, if the LED light is off, it means that the touchpad is disabled.
- Next, try pressing the Fn key, usually located at the bottom left corner of the keyboard, along with the function key that has the touchpad icon. This combination varies depending on the ASUS laptop model but is typically F9, F5, or F7. By pressing these keys simultaneously, you can toggle the touchpad on or off.
- Check the touchpad functionality after pressing the key combination. If the touchpad starts working, it means that it was initially disabled, and you have successfully enabled it.
- If this method doesn’t work, proceed to the next step to enable the touchpad through the settings menu.
By following these steps, you can easily check if the touchpad on your ASUS gaming laptop is enabled. This simple troubleshooting method will help you determine whether the touchpad issues are due to a disabled touchpad or if there are other underlying causes. Let’s move on to the next step and explore how to enable the touchpad using the settings menu.
Step 2: Enabling the touchpad through the settings
If checking the physical status of the touchpad and using keyboard shortcuts did not resolve the issue, you can try enabling the touchpad through the settings menu on your ASUS gaming laptop. Follow these steps:
- Start by accessing the settings menu. You can do this by clicking on the Windows Start button and selecting the “Settings” option.
- In the Settings menu, click on “Devices.”
- From the left-hand side menu, select “Touchpad.”
- On the Touchpad settings page, you will find a toggle switch to enable or disable the touchpad. Make sure the toggle switch is set to the “On” position.
- Additionally, you might see some additional touchpad settings that you can customize according to your preferences. Feel free to explore these settings and adjust them as needed.
- Once you have enabled the touchpad, close the Settings menu and check if the touchpad is working properly.
If the touchpad is still not functioning correctly, proceed to the next step, where we will discuss how to enable the touchpad using keyboard shortcuts.
Enabling the touchpad through the settings menu allows you to have more control over its functionality. By customizing the touchpad settings, you can optimize it to suit your specific needs and preferences. Let’s move on to the next step and explore the option of enabling the touchpad using keyboard shortcuts.
Step 3: Enabling the touchpad using keyboard shortcuts
If the previous methods did not enable the touchpad on your ASUS gaming laptop, you can try using keyboard shortcuts to activate it. Follow these steps:
- Press the Fn key, usually located at the bottom left corner of the keyboard, along with the function key that has the touchpad icon. The keyboard shortcut varies depending on the ASUS laptop model. It is typically F9, F5, or F7.
- Simultaneously pressing the Fn key and the corresponding function key will toggle the touchpad on or off.
- Check the touchpad functionality after using the keyboard shortcut. If the touchpad starts working again, it means that it was initially disabled, and you have successfully enabled it.
If this method did not enable the touchpad or if the touchpad is still not functioning properly, proceed to the next step, where we will discuss updating or reinstalling the touchpad drivers.
Enabling the touchpad using keyboard shortcuts provides a quick and convenient way to toggle its functionality. By knowing the correct combination of keys, you can easily enable or disable the touchpad whenever needed. Let’s move on to the next step and explore the option of updating or reinstalling the touchpad drivers.
Step 4: Updating or reinstalling touchpad drivers
If the previous methods didn’t solve the touchpad issues on your ASUS gaming laptop, it’s possible that the touchpad drivers are outdated or corrupted. Updating or reinstalling the touchpad drivers can often resolve these problems. Follow these steps to update or reinstall the touchpad drivers:
- Start by accessing the Device Manager. You can do this by right-clicking on the Windows Start button and selecting “Device Manager” from the menu.
- In the Device Manager window, locate the “Mice and other pointing devices” category and expand it by clicking on the arrow next to it.
- Right-click on the touchpad driver and select the “Update driver” option. Alternatively, you can choose the “Uninstall device” option to remove the driver.
- If you selected “Update driver,” follow the on-screen instructions to search for and install the latest driver updates for your touchpad.
- If you chose “Uninstall device,” confirm the action and wait for the touchpad driver to be uninstalled.
- Once the driver is uninstalled, restart your ASUS gaming laptop.
- After restarting, Windows will automatically detect and reinstall the touchpad driver. If necessary, you can also manually install the touchpad driver using the manufacturer’s website or the ASUS support page.
- Check the touchpad functionality after the driver update or reinstallation. Hopefully, the touchpad will now be working properly.
If updating or reinstalling the touchpad drivers did not resolve the issue, proceed to the next step, where we will discuss troubleshooting common touchpad issues.
Updating or reinstalling the touchpad drivers ensures that you have the latest software to support the functionality of the touchpad. Keeping the drivers up to date can help resolve compatibility issues and improve overall performance. Let’s move on to the next step and explore troubleshooting common touchpad issues.
Step 5: Troubleshooting common touchpad issues
If the touchpad on your ASUS gaming laptop is still not functioning properly after following the previous steps, it may be necessary to troubleshoot common touchpad issues. Here are a few troubleshooting suggestions:
- Check for physical damage: Inspect the touchpad for any physical damage such as cracks or loose connections. If you notice any damage, it may require professional repair.
- Clean the touchpad: Dust, dirt, and debris can accumulate on the touchpad surface and interfere with its functionality. Use a soft cloth or a compressed air canister to gently clean the touchpad. Be careful not to apply too much pressure.
- Disable palm rejection: Sometimes, the touchpad may misinterpret palm contact as unintentional touch. Access the touchpad settings and disable the palm rejection feature to see if it resolves the issue.
- Perform a system restart: A simple system restart can sometimes resolve temporary software glitches that may be affecting the touchpad. Save your work and restart your ASUS gaming laptop to see if it fixes the problem.
- Run a malware scan: Malware or viruses can interfere with the normal functioning of your touchpad. Use a reliable antivirus program to scan your laptop for any malicious software and remove it if detected.
- Create a new user account: Sometimes, touchpad issues can be specific to a user account. Create a new user account and test the touchpad functionality in the new account. If the touchpad works fine, it indicates that the problem lies within your previous user account.
- Seek professional assistance: If you have tried all the troubleshooting steps and the touchpad still doesn’t work, it may be necessary to seek the help of a professional technician. They can diagnose the problem more accurately and provide a solution.
By following these troubleshooting steps, you can effectively address common touchpad issues on your ASUS gaming laptop. Remember to exercise caution when performing any physical cleaning or software modifications. If the issue persists or if you are unsure about any steps, it is best to seek professional assistance.
Conclusion
The touchpad is a crucial component of the ASUS gaming laptop, allowing users to navigate and interact with the device efficiently. In this guide, we discussed various methods to enable the touchpad on your ASUS gaming laptop.
We started by checking if the touchpad is enabled physically, followed by enabling it through the settings menu. We then explored the option of using keyboard shortcuts to activate the touchpad. If these methods didn’t work, we discussed updating or reinstalling the touchpad drivers to resolve any software-related issues.
If the touchpad issues persist, we provided troubleshooting suggestions such as checking for physical damage, cleaning the touchpad, disabling palm rejection, performing a system restart, running a malware scan, and creating a new user account to isolate the problem.
Remember, it is essential to exercise caution when performing any physical cleaning or software modifications. If you are unsure about any steps or if the issue persists, it is recommended to seek professional assistance from a technician.
We hope that this guide has helped you in enabling the touchpad on your ASUS gaming laptop. By following the steps outlined, you can overcome touchpad issues and continue enjoying a seamless gaming experience or improve your everyday productivity.
Now that you have the knowledge to troubleshoot touchpad issues, you can confidently tackle any future problems that may arise. Happy gaming and smooth navigation!