Introduction
Welcome to our guide on how to track mileage in QuickBooks Online. Properly tracking and managing mileage expenses is essential for businesses of all sizes. Whether you’re a freelancer, small business owner, or a team member who frequently travels for work, accurately recording your mileage can help you save money on taxes and streamline your expense tracking process.
QuickBooks Online, a popular accounting software, offers a built-in mileage tracking feature that allows you to easily record and categorize your business-related travel. In this article, we will walk you through the steps of setting up the mileage tracking feature in QuickBooks Online, adding and categorizing mileage expenses, setting up mileage rates, entering and tracking mileage trips, generating mileage reports, and exploring third-party apps for mileage tracking.
By the end of this guide, you will have a comprehensive understanding of how to efficiently manage and track your mileage using QuickBooks Online. So, let’s get started and make mileage tracking a breeze!
Why is tracking mileage important?
Tracking mileage is an essential practice for businesses and individuals who incur travel expenses as part of their work. Here are several reasons why accurately tracking mileage is important:
- Tax deductions: Keeping a record of your business-related mileage can lead to significant tax deductions. The Internal Revenue Service (IRS) allows you to claim a standard mileage rate for each business mile driven, which can help reduce your taxable income. By tracking your mileage, you can maximize your deductions and potentially save a substantial amount of money during tax season.
- Expense reimbursement: If you’re an employee who frequently travels for work, tracking mileage is crucial for ensuring accurate reimbursement. Many companies provide reimbursement for mileage expenses, and by keeping a record of your business-related travel, you can ensure that you’re properly compensated for the miles you’ve driven on behalf of your employer.
- Business financial management: Tracking mileage allows businesses to accurately calculate and allocate travel-related expenses. By understanding the costs associated with business travel, you can budget effectively and make informed decisions about future travel plans.
- Compliance with auditing and legal requirements: In some industries, such as healthcare and transportation, accurate mileage tracking is necessary to comply with auditing and legal requirements. Having detailed records of mileage can help demonstrate compliance with regulations and policies.
- Improved productivity and efficiency: By tracking mileage, you can analyze and optimize your travel patterns. This information can help you identify more efficient routes, plan trips more effectively, and ultimately save time and money.
Overall, tracking mileage is not only important for financial purposes but also for improving business operations and complying with legal requirements. It allows individuals and businesses to better manage their expenses, maximize tax benefits, and make informed decisions about travel-related activities.
Setting up the mileage tracking feature in QuickBooks Online
To start tracking mileage in QuickBooks Online, you’ll need to set up the mileage tracking feature. Follow these steps to get started:
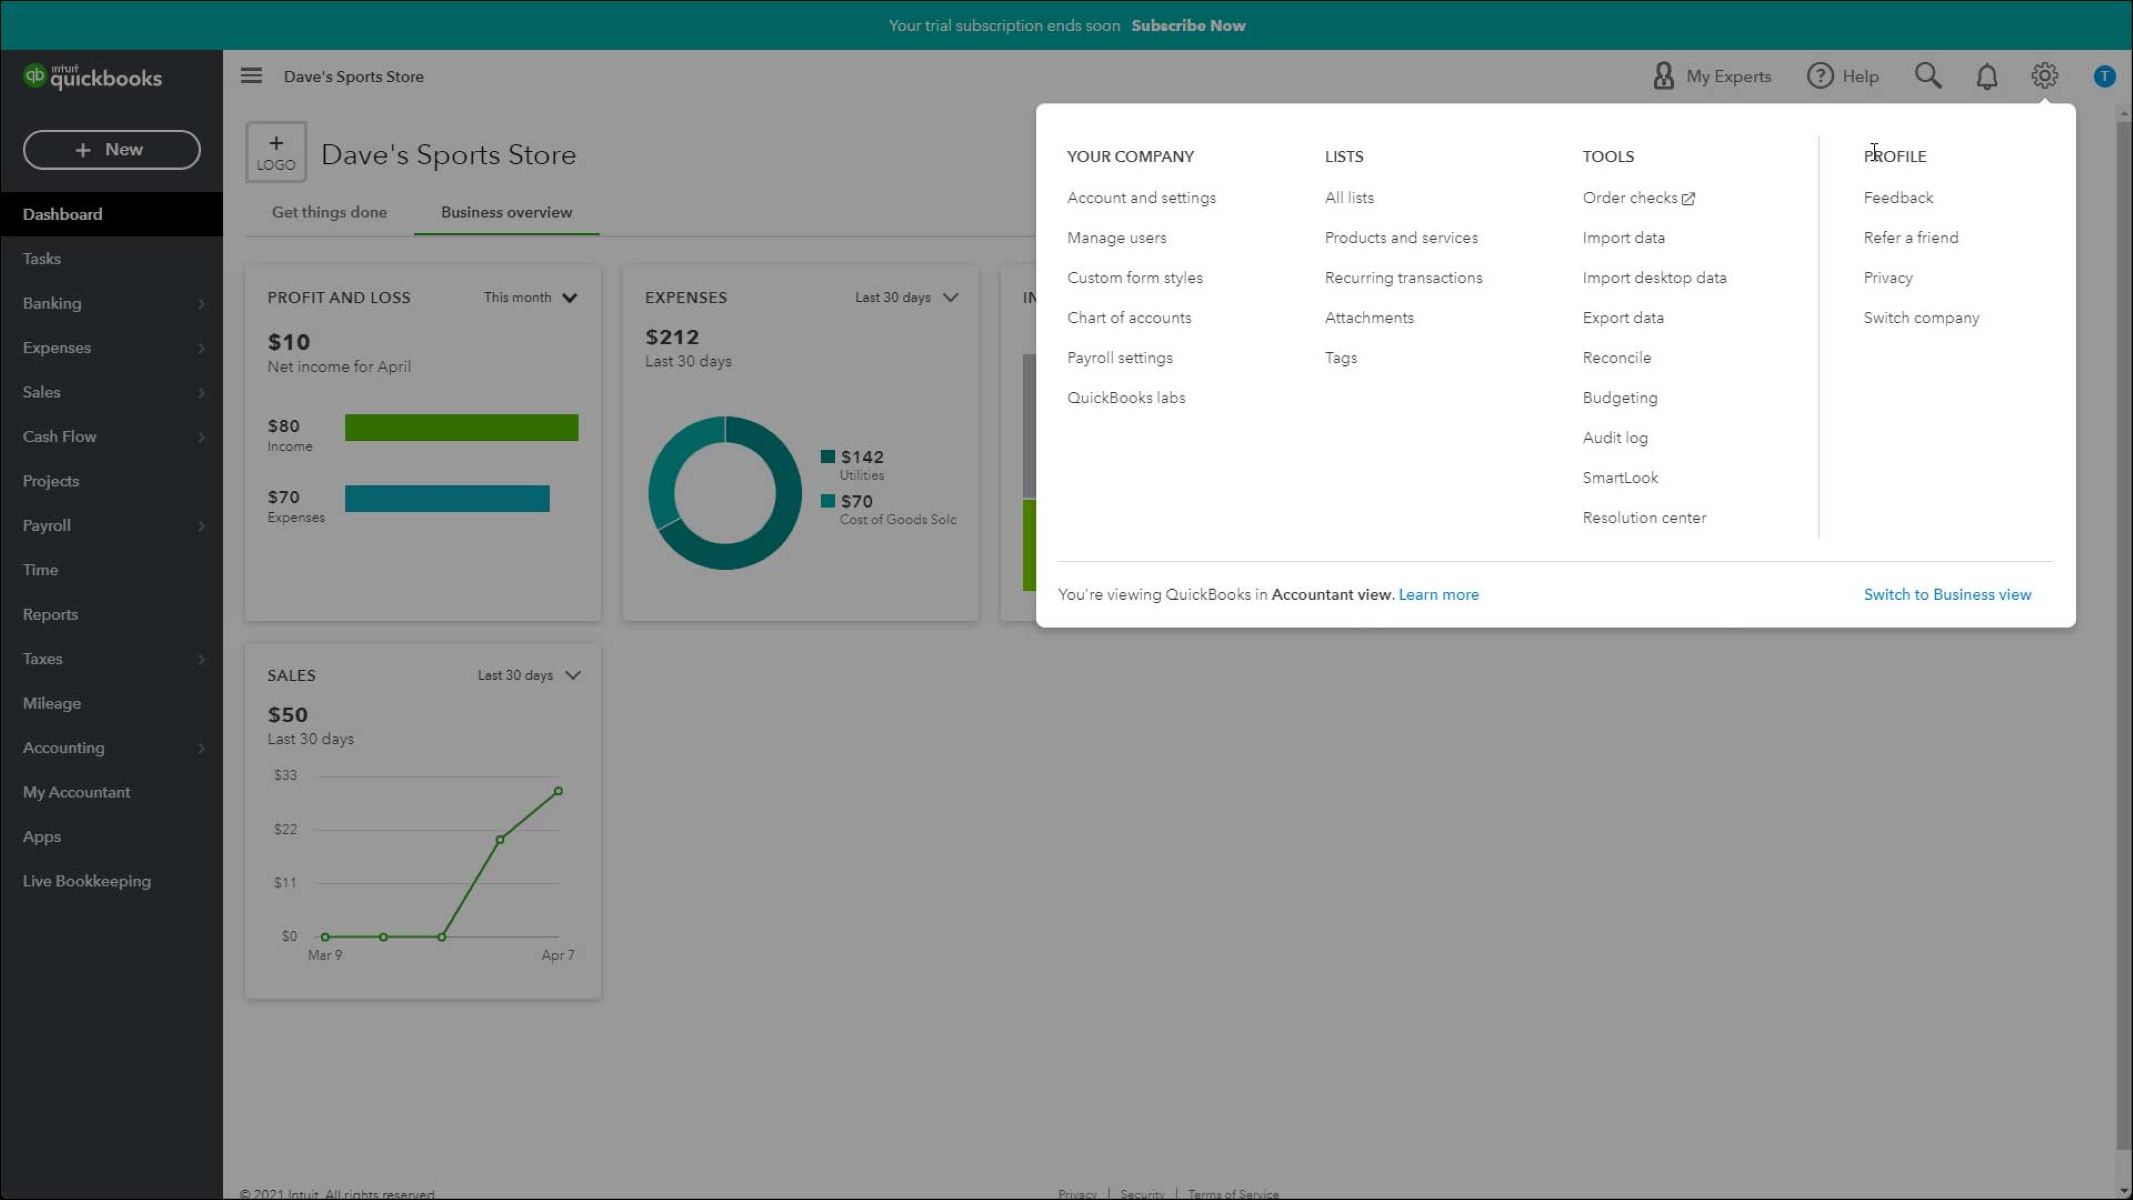
- Enable the mileage tracking feature: Log in to your QuickBooks Online account and navigate to the Gear Icon in the top right corner. From the drop-down menu, select “Account and Settings.” In the sidebar, click on “Expenses” and then select “Mileage.” Enable the mileage tracking feature by toggling the switch to “On.”
- Set your mileage preferences: After enabling the mileage tracking feature, you can customize your preferences. Specify whether you want to track mileage by car or by other means of transportation. You can also choose to automatically apply mileage rates to recorded trips.
- Define mileage rates: Next, you’ll need to define the mileage rates you’ll be using. QuickBooks Online allows you to set different mileage rates for different purposes, such as reimbursing employees or billing clients. Specify the rates according to your needs.
- Save your settings: Once you’ve configured your mileage preferences and rates, click on “Save” to store your settings and activate the mileage tracking feature.
With these simple steps, you’ll have successfully set up the mileage tracking feature in QuickBooks Online. Now you can begin adding and categorizing mileage expenses to keep track of your business-related travel accurately.
Note that the steps and options mentioned here might vary slightly depending on the version of QuickBooks Online you are using. Make sure to refer to the official QuickBooks Online documentation or contact their support if you encounter any difficulties during the setup process.
Adding and categorizing mileage expenses in QuickBooks Online
Once you’ve set up the mileage tracking feature in QuickBooks Online, you can start adding and categorizing your mileage expenses. Follow these steps to ensure accurate recording and categorization of your business-related travel:
- Create a new mileage expense: To add a new mileage expense, go to the “Expenses” tab in QuickBooks Online. Click on “New Expense” and select “Mileage” as the expense type.
- Enter the trip details: Provide the necessary information for the mileage expense. This typically includes the date of the trip, the starting and ending locations, the purpose of the trip, and any additional notes relevant to the mileage expenses. Make sure to accurately enter all relevant details for each trip.
- Assign a customer or project (optional): If the mileage expense is related to a specific customer or project, you can assign it by selecting the appropriate option. This helps with tracking expenses and allocating costs to the correct areas of your business.
- Categorize the mileage expense: QuickBooks Online allows you to assign a specific category to your mileage expense. Choose the appropriate category, such as “Travel,” “Transportation,” or a specific expense category that aligns with your business’s needs.
- Save the mileage expense: Once you’ve entered all the necessary details and chosen the correct category, click on “Save” to record the mileage expense in QuickBooks Online.
By following these steps, you can ensure that your mileage expenses are accurately recorded and categorized in QuickBooks Online. This will help you keep track of your travel-related costs and facilitate expense tracking, tax deductions, and financial reporting.
Remember to regularly add and categorize your mileage expenses to maintain up-to-date records of your business-related travel. This will enable you to generate accurate mileage reports and gain valuable insights into your travel expenses.
Setting up mileage rates in QuickBooks Online
When tracking mileage in QuickBooks Online, it’s important to set up appropriate mileage rates that reflect the reimbursement or billing rates you use for your business. Here’s how you can set up mileage rates in QuickBooks Online:
- Navigate to the Gear Icon: Log in to your QuickBooks Online account and click on the Gear Icon in the top-right corner to access the settings menu.
- Select “Account and Settings”: From the drop-down menu, choose “Account and Settings” to access the settings for your account.
- Go to “Expenses”: In the sidebar of the Account and Settings page, click on “Expenses.”
- Open the “Mileage” tab: On the Expenses page, click on the “Mileage” tab to access the mileage settings.
- Add a new mileage rate: Under the Mileage Rates section, click on “Add Rate” to create a new mileage rate.
- Enter the details: In the New Mileage Rate window, fill in the necessary information. This includes specifying the effective date, description, and rate (per mile) for the mileage rate you’re setting up. You can add additional rates by clicking on “Add Another Rate” if you have different rates for different purposes.
- Save the mileage rate: Once you’ve entered the required details, click on “Save” to save the new mileage rate in QuickBooks Online.
By following these steps, you can easily set up mileage rates that align with your business’s reimbursement or billing practices. Adding different rates allows you to accommodate varying rates for different purposes, such as employee reimbursement or client billing.
Remember to review and update your mileage rates as needed. If your reimbursement or billing rates change, you can modify the existing mileage rates or add new rates accordingly. This ensures that your mileage expenses are accurately calculated and reflected in your financial records.
Setting up mileage rates in QuickBooks Online takes just a few simple steps and allows you to streamline your expense tracking process. With accurate rates in place, you can easily calculate mileage expenses and generate reports to assess the cost of your business-related travel.
Entering and tracking mileage trips in QuickBooks Online
Once you have set up mileage rates and configured the mileage tracking feature in QuickBooks Online, you can begin entering and tracking your mileage trips. Follow these steps to accurately record and monitor your business-related travel:
- Navigate to the Mileage tab: Log in to your QuickBooks Online account and go to the left-hand navigation menu. Click on “Mileage” to access the mileage tracking section.
- Add a new mileage trip: Click on “Add trip” or the “+” button to create a new mileage trip entry.
- Fill in the trip details: Enter the necessary information for the trip, such as the date, starting location, ending location, and purpose of the trip. You can also add any additional notes or details that are relevant to the trip.
- Select a vehicle (optional): If you have multiple vehicles or vehicles associated with specific employees, you can choose the appropriate vehicle for the trip. This helps in maintaining accurate records and attributing mileage to the correct vehicle or individual.
- Save the mileage trip: Once you have entered all the relevant details, click on “Save” to record the mileage trip in QuickBooks Online.
- Repeat for additional trips: If you have more mileage trips to enter, continue adding new trips using the same process.
By diligently entering and tracking your mileage trips in QuickBooks Online, you can keep an organized and comprehensive record of your business-related travel. This makes it easier to calculate expenses, monitor mileage for tax purposes, and create accurate reports for financial and reimbursement purposes.
Remember to regularly update your mileage trips as you incur new travel-related expenses. This ensures that your records are up-to-date and reflective of your business activities.
QuickBooks Online simplifies the process of entering and tracking mileage trips, allowing you to effectively manage your travel expenses and streamline your overall expense tracking system.
Generating mileage reports in QuickBooks Online
QuickBooks Online provides powerful reporting capabilities for tracking and analyzing your mileage expenses. Generating mileage reports allows you to gain insights into your business-related travel and make informed financial decisions. Here’s how you can generate mileage reports in QuickBooks Online:
- Navigate to the Reports section: Log in to your QuickBooks Online account and go to the left-hand navigation menu. Click on “Reports” to access the reporting section.
- Select “Mileage” to view available reports: Within the Reports section, select “Mileage” to view the range of mileage reports available.
- Choose a mileage report: From the list of mileage reports, select the specific report that aligns with your reporting goals. Common options include “Mileage by Vehicle Summary,” “Mileage by Customer Summary,” and “Mileage by Employee Summary.”
- Customize the report (optional): QuickBooks Online allows you to customize the report based on your preferences. You can adjust the date range, choose specific vehicles, customers, or employees, and modify other settings to refine the report output.
- Review and export the report: Once you have customized the report to your liking, review the contents and ensure it includes the desired information. You can then choose to export the report to a PDF or Excel file for further analysis, sharing, or printing.
Generating mileage reports in QuickBooks Online provides you with valuable information about your business-related travel expenses. These reports help you understand the costs associated with your mileage, identify trends in travel expenses, and fulfill reporting requirements for tax purposes or client billing.
Make it a regular practice to generate mileage reports on a periodic basis, such as monthly or quarterly, to stay informed about your travel-related expenses. This enables you to make data-driven decisions, track your financial performance, and ensure accurate record-keeping.
With QuickBooks Online’s comprehensive reporting features, you can easily generate mileage reports that provide you with the insights needed to effectively manage your mileage expenses.
Using third-party apps for mileage tracking in QuickBooks Online
While QuickBooks Online offers a built-in mileage tracking feature, you may also consider utilizing third-party apps that integrate with QuickBooks to enhance and streamline your mileage tracking process. These apps offer additional features and capabilities that can further simplify your mileage management. Here’s how you can leverage third-party apps for mileage tracking in QuickBooks Online:
- Research and choose a third-party mileage tracking app: Conduct research to identify the mileage tracking apps that integrate seamlessly with QuickBooks Online. Look for apps that have positive user reviews, robust features, and reliable integration capabilities.
- Review the app’s mileage tracking features: Evaluate the features offered by the app. Look for features such as automatic mileage tracking, GPS tracking, trip categorization, and easy expense entry. Consider which features align with your specific mileage tracking needs.
- Check for QuickBooks integration: Ensure that the app offers seamless integration with QuickBooks Online. This allows for easy import or synchronization of mileage data between the app and QuickBooks, eliminating the need for manual data entry.
- Install and set up the app: Download and install the chosen app on your mobile device or computer. Follow the instructions provided by the app to set it up and connect it to your QuickBooks Online account.
- Track and record mileage using the app: Utilize the app to track your mileage. Most apps offer features like automatic mileage detection, trip categorization, and expense tracking. Enter the necessary details for each trip, and ensure that the app accurately captures and records your mileage data.
- Sync mileage data with QuickBooks: Once you have recorded your mileage trips in the app, ensure that the data is synchronized with your QuickBooks Online account. This allows for easy transfer of mileage expenses and ensures that your QuickBooks records are up to date.
By incorporating a third-party mileage tracking app into your workflow, you can simplify and automate the process of recording and managing mileage expenses. These apps provide enhanced features and functionality to streamline your mileage tracking, saving you time and effort.
Before choosing a third-party app, consider your specific needs, budget, and preferences. Explore the options available and select an app that best fits your requirements for accurate mileage tracking and seamless integration with QuickBooks Online.
Remember to periodically review and update the app to ensure compatibility with the latest version of QuickBooks Online and to take advantage of any new features or improvements that may enhance your mileage tracking process.
Conclusion
Properly tracking and managing mileage expenses is essential for businesses and individuals alike. QuickBooks Online provides a convenient built-in mileage tracking feature that allows you to accurately record and categorize your business-related travel. With the information provided in this guide, you can effectively set up and utilize the mileage tracking feature in QuickBooks Online.
We discussed the importance of tracking mileage for tax deductions, expense reimbursement, financial management, compliance, and productivity. By keeping detailed records, you can maximize tax benefits, ensure accurate reimbursement, make informed business decisions, and optimize your travel efficiency.
In addition, we covered the steps to set up the mileage tracking feature, add and categorize mileage expenses, configure mileage rates, enter and track mileage trips, generate mileage reports, and explore third-party apps for enhanced mileage tracking.
Remember to consistently update your mileage records, review reports periodically, and utilize the appropriate resources to streamline your mileage tracking process. By accurately tracking and managing your mileage expenses, you can gain valuable insights, save money, and maintain organized records for your business operations.
Whether you’re a freelancer, small business owner, or part of a larger organization, leveraging QuickBooks Online’s mileage tracking feature can greatly simplify your expense tracking process and help you make informed financial decisions based on accurate mileage data.
Start tracking your mileage in QuickBooks Online today and experience the benefits of efficient mileage management!


