Introduction
Face ID is a popular security feature that allows iPhone users to unlock their device and authenticate various actions using facial recognition technology. While Face ID offers convenience and enhanced security, there may be situations where you need to temporarily disable it. Whether you want to lend your phone to a friend, wear a face mask that interferes with Face ID, or simply prefer to use a different unlock method, knowing how to disable Face ID can be helpful.
In this article, we will guide you through the steps on how to take off Face ID on your iPhone. Whether you have an iPhone X, XR, XS, 11, or the latest models, the process remains relatively the same. By following these steps, you can easily toggle off Face ID and opt for an alternative unlocking method.
Before proceeding, it’s important to note that disabling Face ID temporarily will not delete your facial data, and you can enable it again whenever you want. However, it’s always a good idea to keep your device secure and re-enable Face ID after you’re finished with the temporary disablement.
Now, let’s dive into the steps to take off Face ID on your iPhone.
Step 1: Access Settings
The first step to disabling Face ID is to access the settings on your iPhone. To do this, locate the “Settings” app on your home screen. It is represented by a gray icon with gears and can usually be found on the first page of your home screen or in a folder labeled “Utilities.”
Tap on the “Settings” app icon to open it. Once the app is launched, you will see various options and menus to customize different aspects of your iPhone.
If you have trouble finding the “Settings” app, you can also use the device’s search function. Swipe down on your home screen or swipe right from the main screen to access the search bar. Type “Settings” in the search bar, and the app should appear as one of the top results. Tap on it to open the settings.
Once you’ve successfully opened the “Settings” app, you’re ready to move on to the next step in disabling Face ID on your iPhone.
Step 2: Select Face ID & Passcode
After accessing the settings on your iPhone, the next step is to navigate to the “Face ID & Passcode” section. This is where you can manage and configure the settings related to your facial recognition and passcode authentication.
Scroll down the list of options in the settings until you find “Face ID & Passcode.” It is usually located in the second or third group of settings, depending on your device’s iOS version. Tap on “Face ID & Passcode” to proceed.
If your device has a passcode set up, you will be prompted to enter it at this stage to access the Face ID & Passcode settings. Enter your passcode using the keypad that appears on the screen.
Once you’ve entered the correct passcode, you will be granted access to the Face ID & Passcode settings menu. Here, you can manage various settings related to Face ID, including disabling it temporarily.
Now that you have successfully accessed the Face ID & Passcode settings, let’s move on to the next step of disabling Face ID on your iPhone.
Step 3: Enter Passcode
Once you have accessed the “Face ID & Passcode” settings, you are now ready to enter your passcode to make changes to your Face ID settings.
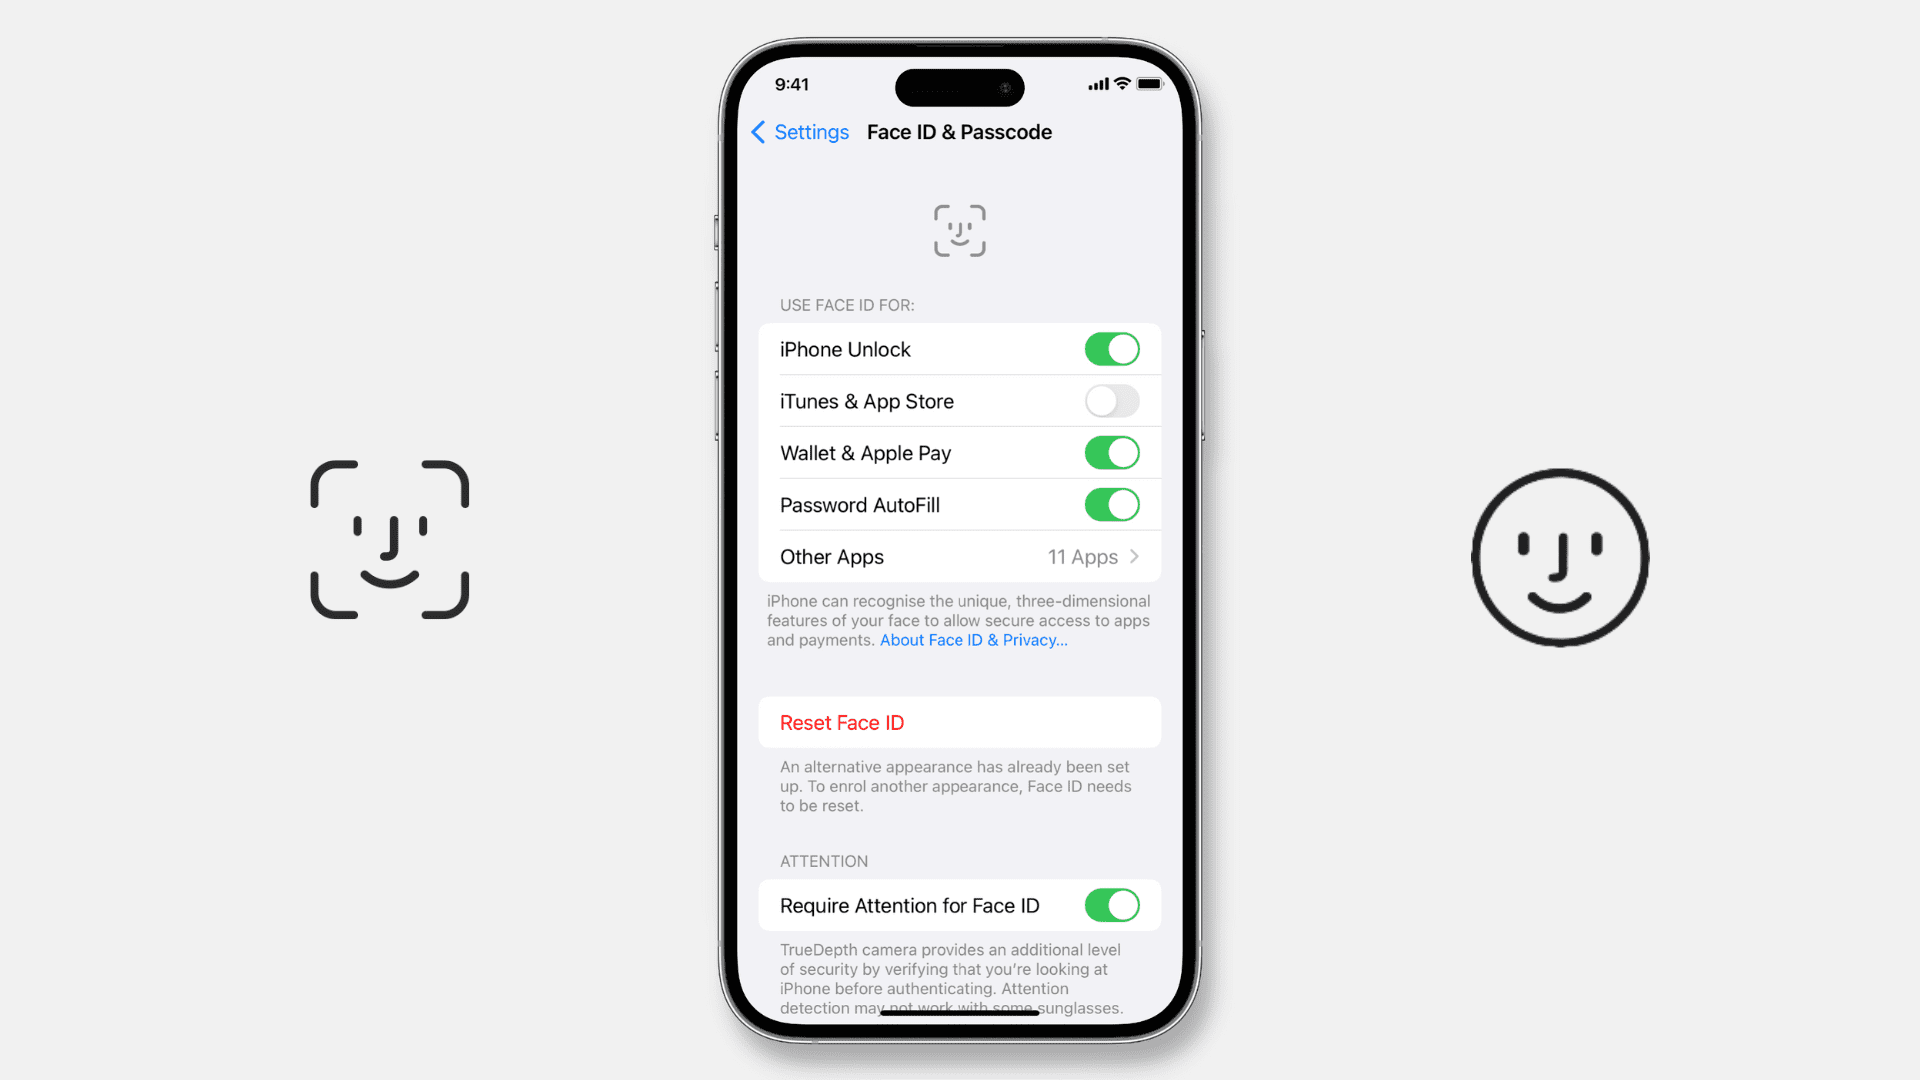
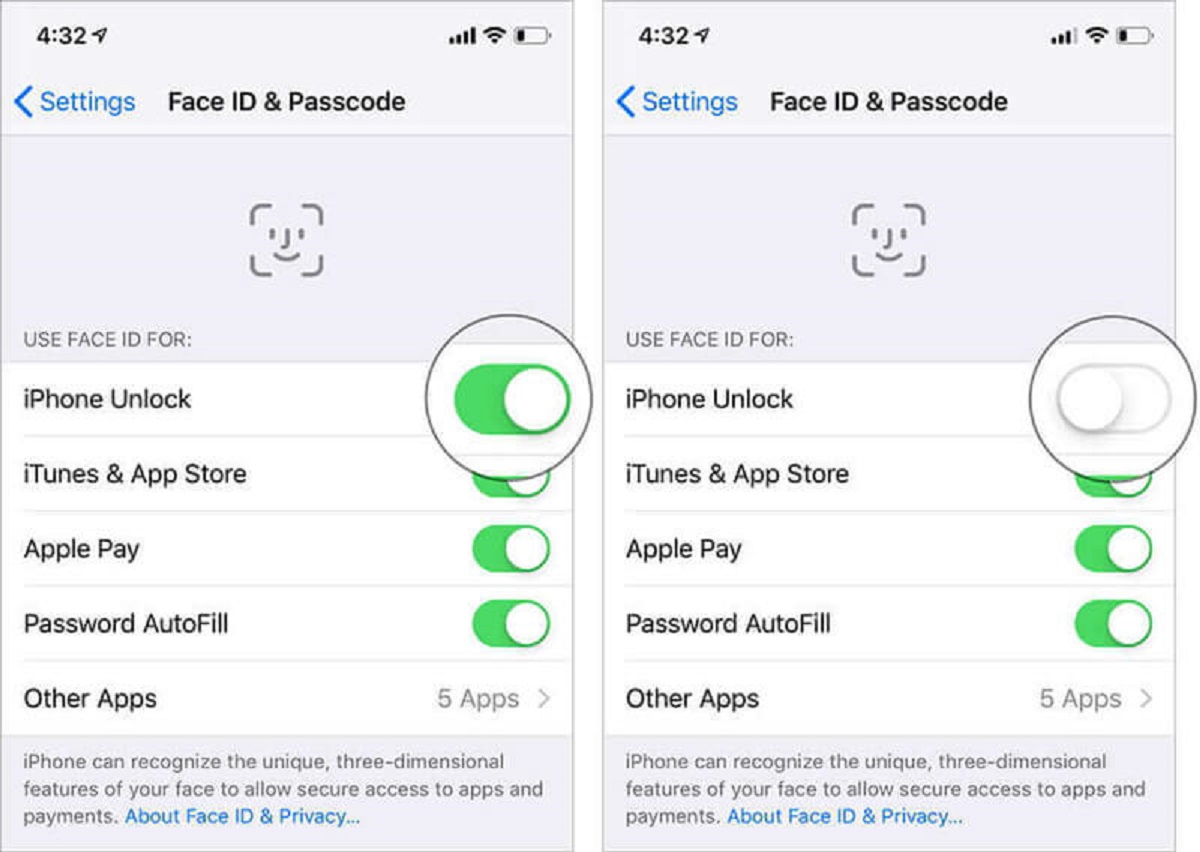
In the Face ID & Passcode settings menu, you will see a section labeled “Face ID.” This section provides options to manage facial recognition for various tasks such as unlocking your iPhone, making purchases, and more.
Tap on the option that corresponds to the specific feature you want to disable Face ID for. For example, if you want to disable Face ID for unlocking your iPhone, tap on the “iPhone Unlock” option.
After tapping on the desired option, you will be prompted to enter your passcode. This is a security measure to ensure that only authorized users can make changes to Face ID settings. Enter your passcode using the on-screen keypad.
Make sure to enter the correct passcode as multiple incorrect attempts may result in temporary restrictions.
Once you have successfully entered your passcode, you will be directed to the settings page specific to the feature you selected. From here, you can proceed to the next step to disable Face ID.
Now that you have entered your passcode, let’s move on to the final step of disabling Face ID on your iPhone.
Step 4: Disable Face ID
Once you have entered your passcode and accessed the specific settings page, it’s time to disable Face ID on your iPhone.
Look for the toggle switch labeled “Enable Face ID” or a similar option that allows you to turn off Face ID for the selected feature. This switch is typically located at the top of the settings page, and it is set to “on” by default.
To disable Face ID, simply tap on the toggle switch to turn it off. Once disabled, the switch will no longer be in the “on” position and will appear grayed out or switched off.
After disabling Face ID, you will no longer be able to use facial recognition for the feature you selected. Instead, you may be prompted to enter a passcode or use an alternative unlocking method, such as Touch ID or a custom password.
It’s important to note that disabling Face ID for one feature does not disable it for other features. If you want to disable Face ID for multiple purposes, you will need to repeat the process for each individual feature within the Face ID & Passcode settings menu.
While Face ID is a convenient and secure method of authentication, there are situations where temporarily disabling it can be beneficial. By following these steps, you now know how to disable Face ID on your iPhone for specific features.
Keep in mind that disabling Face ID is a temporary measure, and you can easily re-enable it whenever you desire. Whether you want to lend your phone to a friend, wear a face mask that affects Face ID accuracy, or simply prefer an alternative unlocking method, disabling Face ID gives you the flexibility to choose.
Congratulations! You have successfully disabled Face ID on your iPhone. Enjoy using your device with the alternative unlocking method of your choice.
Conclusion
Disabling Face ID on your iPhone can be useful in certain situations where you prefer to use an alternative unlocking method or temporarily lend your phone to someone. Thankfully, the process of disabling Face ID is straightforward and can be done in a few simple steps.
In this article, we walked you through the process of disabling Face ID on your iPhone. We started by accessing the settings app and navigating to the Face ID & Passcode section. We then entered our passcode to make changes to the Face ID settings, and finally disabled Face ID for specific features by toggling off the corresponding options.
Remember that disabling Face ID for one feature does not disable it for others. If you want to disable Face ID for multiple purposes, you will need to repeat the process for each feature within the Face ID & Passcode settings menu.
It is important to note that disabling Face ID temporarily does not delete your facial data, and you can re-enable it whenever you want. However, it is always recommended to keep your device secure and re-enable Face ID after you no longer need to disable it.
Now you have the knowledge and confidence to take off Face ID on your iPhone. Whether it’s for privacy reasons, convenience, or personal preference, being able to switch to an alternative unlocking method gives you more flexibility and control over your device.
So go ahead and disable Face ID when you need to, and enjoy using your iPhone in the way that suits you best!