Introduction
Keeping track of tasks and events can be a daunting challenge, especially when using different platforms for various purposes. Thankfully, technology offers seamless solutions to make our lives easier. One such solution is syncing Todoist with Google Calendar. This powerful integration allows you to effortlessly manage and visualize your tasks and events in one place.
In this article, we will guide you through the process of syncing Todoist with Google Calendar. We will cover step-by-step instructions on how to connect the two platforms, import tasks from Todoist to Google Calendar, sync tasks from Google Calendar to Todoist, and manage synced tasks between the two. Additionally, we will address common troubleshooting issues that may arise during the syncing process.
By integrating Todoist with Google Calendar, you can streamline your productivity, improve time management, and ensure that you never miss a deadline or appointment. Whether you are a busy professional juggling multiple projects or a student managing coursework and extracurricular activities, syncing Todoist with Google Calendar will help you stay organized and on top of your commitments.
Before we dive into the steps, it is important to note that this integration requires a Google account and a Todoist account. If you don’t already have accounts for both platforms, make sure to sign up before proceeding.
Now, let’s get started on the journey of syncing Todoist with Google Calendar to optimize your task management and productivity.
Step 1: Connecting Todoist to Google Calendar
Before you can begin syncing tasks between Todoist and Google Calendar, you need to establish a connection between the two platforms. Here’s how you can do that:
- Open Todoist on your preferred device or navigate to the Todoist website.
- Click on the settings icon located in the top-right corner of the screen.
- In the settings menu, select “Integrations”.
- Scroll down to find “Google Calendar” and click on the “Connect” button next to it.
- A new window will open, prompting you to sign in to your Google account. Enter your credentials and click “Allow” to grant permissions to Todoist.
- Once you have successfully connected Todoist to Google Calendar, you will see a confirmation message.
That’s it! You have now established a connection between Todoist and Google Calendar. This connection will enable seamless synchronization between the two platforms, ensuring that your tasks and events are always up to date.
It’s worth noting that this one-time connection process may vary slightly depending on the device you are using or updates to the Todoist interface. However, the general steps outlined above should guide you through the process. If you encounter any difficulties during the connection process, make sure to consult Todoist’s help documentation or contact their support for further assistance.
Now that you have successfully connected Todoist to Google Calendar, let’s move on to the next step: importing tasks from Todoist to Google Calendar.
Step 2: Importing tasks from Todoist to Google Calendar
Once you have connected Todoist to Google Calendar, the next step is to import your tasks from Todoist into your Google Calendar. This will allow you to see your Todoist tasks alongside your other events and appointments. Follow these steps to import tasks:
- Open Google Calendar on your device or navigate to the Google Calendar website.
- On the left sidebar, locate the “Other Calendars” section.
- Click on the “+” sign next to “Other Calendars” and select “From URL” from the dropdown menu.
- In the Todoist settings menu, go to the “Integrations” section and look for “Google Calendar”. Click on the “COPY” button next to the URL.
- Return to Google Calendar and paste the copied URL into the “URL of calendar” field.
- Click the “Add Calendar” button to import the tasks from Todoist into your Google Calendar.
- Once the import is complete, you will see your Todoist tasks appear as events in Google Calendar.
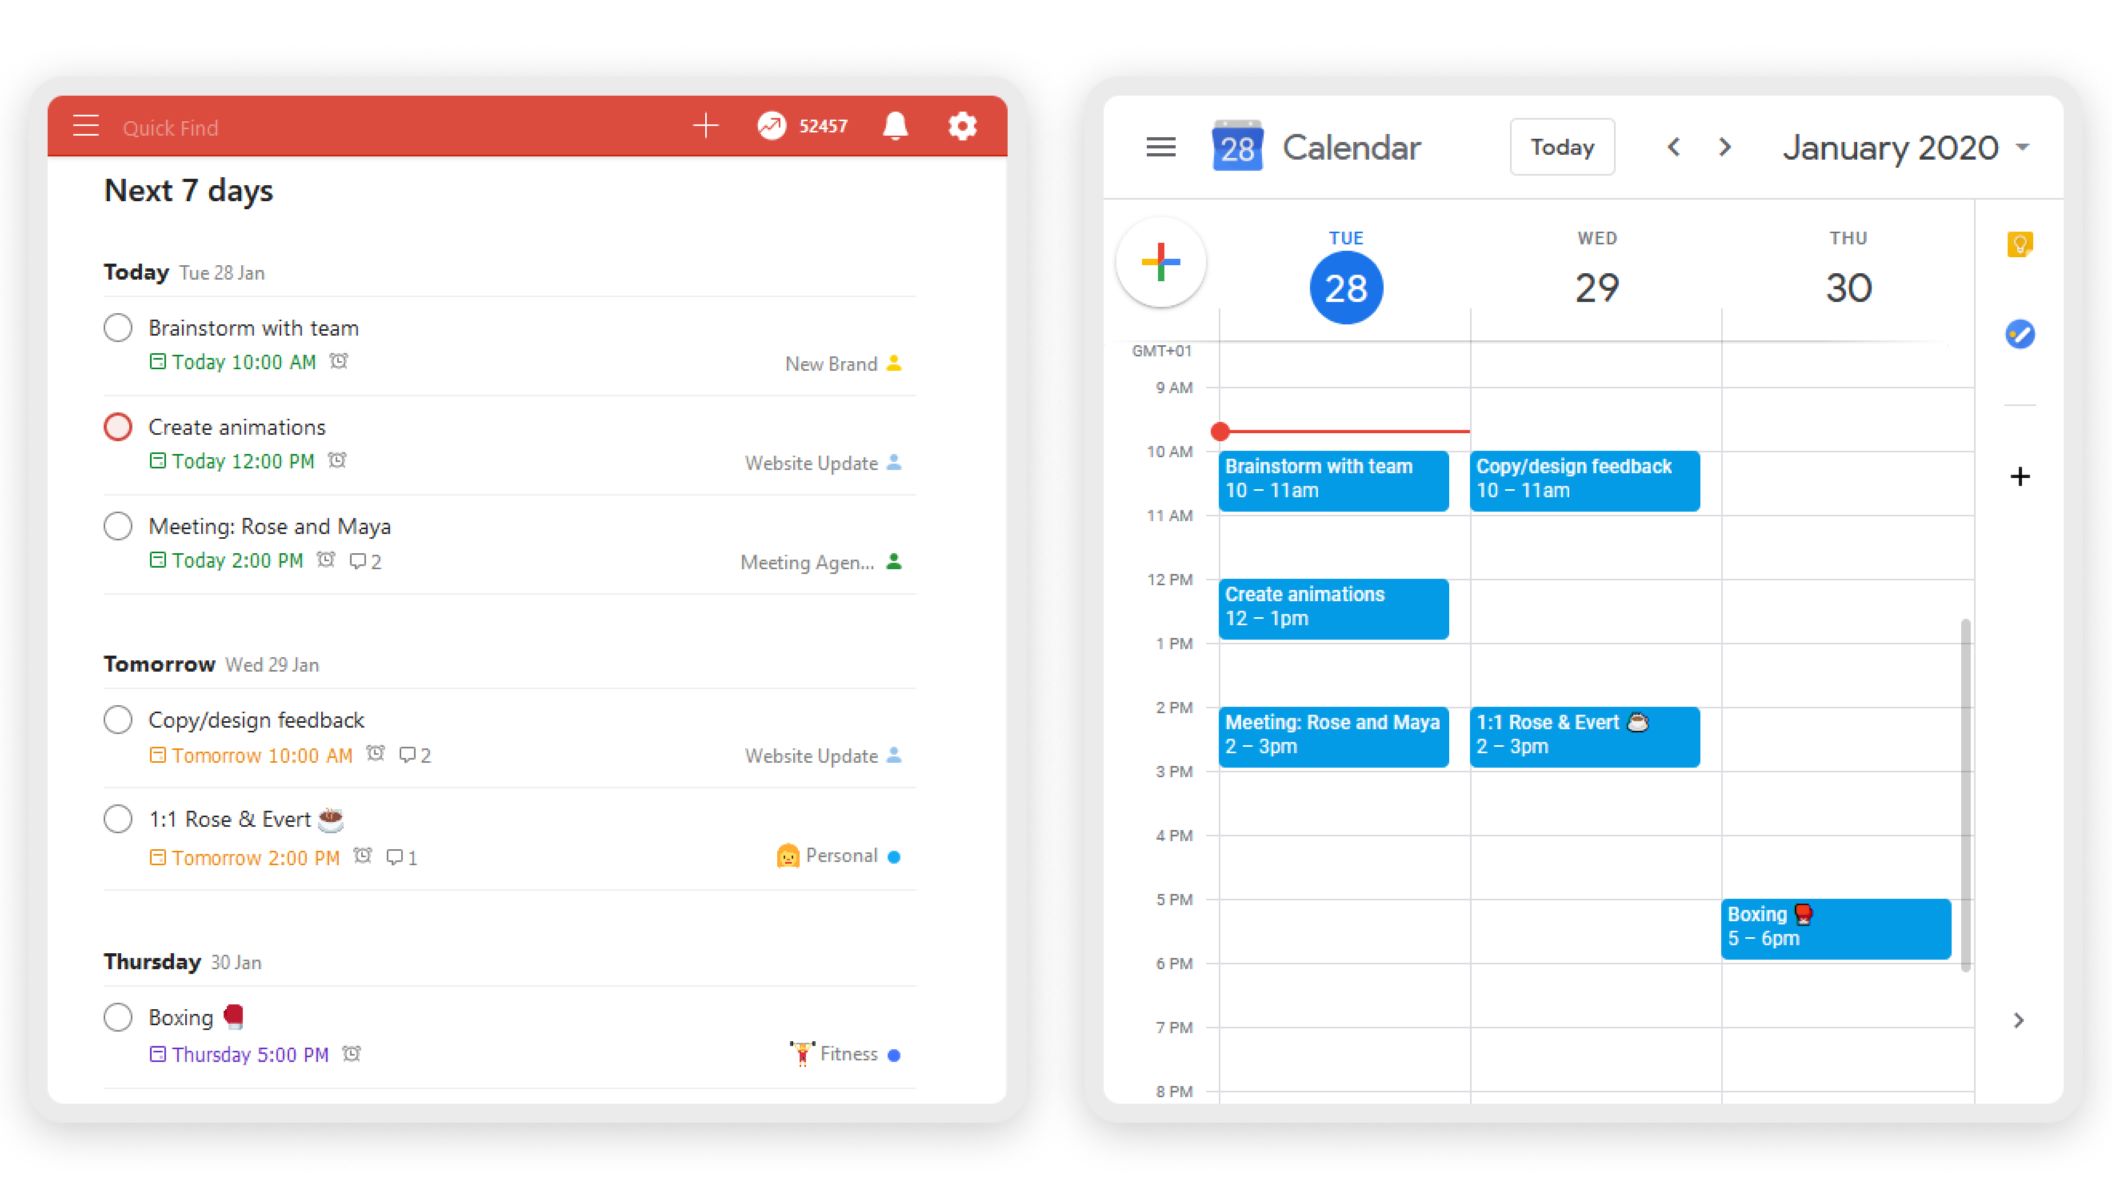
By importing your tasks from Todoist into Google Calendar, you can have a comprehensive view of your schedule without having to switch between different platforms. This integration allows you to prioritize and allocate time to your tasks alongside your other commitments, helping you to better manage your time and stay organized.
It’s important to note that the imported tasks from Todoist will appear as all-day events in Google Calendar. This helps to maintain the simplicity and visual clarity of your calendar view. Furthermore, any changes made to the tasks in Todoist, such as due date modifications or task completions, will be automatically reflected in Google Calendar after a sync.
The process of importing tasks from Todoist to Google Calendar makes it convenient and efficient to manage your tasks and events in one centralized location. With this step completed, let’s move on to the next step: syncing tasks from Google Calendar to Todoist.
Step 3: Syncing tasks from Google Calendar to Todoist
Syncing tasks from Google Calendar to Todoist allows you to have a unified view of your tasks and events across both platforms. Here’s how you can enable this synchronization:
- Open Todoist on your device or navigate to the Todoist website.
- Click on the settings icon located in the top-right corner of the screen.
- In the settings menu, select “Integrations”.
- Scroll down and find the “Google Calendar” section.
- Toggle the switch to enable “Sync Google Calendar events to Todoist”.
- You may need to sign in to your Google account and grant permissions if prompted.
Once the sync is enabled, any events or appointments in your Google Calendar will appear as tasks in Todoist. These tasks will have the event name and time, allowing you to plan and allocate time for them accordingly. Additionally, any changes made to the events in Google Calendar will be automatically reflected in Todoist after a sync.
The synchronization between Google Calendar and Todoist ensures that you have an up-to-date and unified view of your tasks and events. This seamless integration eliminates the need to manually transfer information between the two platforms, saving you time and effort.
Keep in mind that the syncing process may not be instantaneous, and it might take a few minutes for the changes to be reflected in Todoist. However, Todoist will regularly update and sync with your Google Calendar to ensure that your tasks and events are always current.
Now that you have successfully synced tasks from Google Calendar to Todoist, let’s move on to the next step: managing synced tasks between Todoist and Google Calendar.
Step 4: Managing synced tasks between Todoist and Google Calendar
Now that you have synced tasks between Todoist and Google Calendar, it’s essential to understand how to effectively manage and organize these tasks across both platforms. Here are some tips for managing synced tasks:
- Assigning priorities: In Todoist, use labels, tags, or priorities to indicate the importance or urgency of each task. This will help you prioritize your tasks and allocate your time accordingly. Make sure to sync these labels or priorities with Google Calendar so that you can visualize the importance of each task at a glance.
- Updating task details: If you need to make any changes to a task, such as the due date, description, or attachments, do it directly in Todoist. The changes will automatically sync with Google Calendar. This ensures that all the task details are consistent across both platforms.
- Completing tasks: When you complete a task in Todoist, it will be marked as done in Google Calendar after the next sync. This helps you track your progress and stay organized by keeping your completed tasks up to date in both platforms.
- Managing conflicts: In some cases, you may have overlapping tasks or events in both Todoist and Google Calendar. It’s important to review and resolve these conflicts to avoid confusion or double-booking. Regularly check your calendar view and adjust the timing or duration of tasks as needed.
- Using reminders: Take advantage of reminders in Todoist and Google Calendar to stay on top of your tasks and events. Set up reminders to notify you before important deadlines or appointments, helping you manage your time effectively.
By effectively managing and organizing your synced tasks between Todoist and Google Calendar, you can optimize your productivity and ensure that nothing falls through the cracks. The seamless integration between the two platforms provides a unified and synchronized view of your tasks and events, helping you stay organized and focused.
Remember to regularly sync your tasks between Todoist and Google Calendar to keep everything up to date. This can be done manually by clicking the sync button or by enabling automatic syncing, if available, in the settings of both platforms.
Now that you know how to manage your synced tasks, let’s move on to the final step: troubleshooting common issues that may arise during the syncing process.
Step 5: Troubleshooting Common Issues
While syncing Todoist with Google Calendar is generally a smooth process, you may encounter certain issues along the way. Here are some common problems and their potential solutions:
- Syncing delays: If you notice a delay in syncing tasks between Todoist and Google Calendar, try manually triggering a sync by clicking the sync button in both platforms. This should initiate an immediate update and ensure that your tasks are synced promptly.
- Missing tasks: If you find that certain tasks are not appearing or syncing between Todoist and Google Calendar, check if the tasks have any specific filters applied in Todoist that may exclude them from syncing. Verify that the tasks have due dates assigned and that they are not hidden or archived.
- Duplicate tasks: Occasionally, you may encounter duplicate tasks in Todoist and Google Calendar. This can happen when there are inconsistencies in the syncing process. To resolve this, manually delete the duplicate tasks from either platform and allow the sync to update to avoid further duplication.
- Invalid credentials: If you are prompted to re-enter your credentials or sign in again, make sure that you provide the correct login information for both Todoist and Google Calendar. Double-check your username and password to ensure that they are entered accurately.
- Unsupported platforms: Keep in mind that certain older or outdated versions of Todoist or Google Calendar may not support the full capabilities of syncing. To avoid potential issues, make sure you are using the latest versions of both platforms and update them if necessary.
If you encounter any persisting issues or encounter an error that you cannot resolve, consult the help documentation or support channels of Todoist and Google Calendar. They will have additional troubleshooting steps specific to their platforms and can provide personalized assistance.
By troubleshooting common issues that may arise during the syncing process, you can ensure a seamless and effective integration between Todoist and Google Calendar. Taking the time to address any problems promptly will help you maintain a well-organized and synchronized task management system.
With the troubleshooting steps covered, you now have a comprehensive understanding of how to sync Todoist with Google Calendar effectively. By following the steps outlined in this article, you can optimize your productivity and streamline your task management process.
Conclusion
Syncing Todoist with Google Calendar offers a powerful solution for managing tasks and events in one centralized location. By seamlessly integrating these two platforms, you can optimize your productivity, improve time management, and ensure that you never miss a deadline or appointment.
In this article, we explored the step-by-step process of connecting Todoist to Google Calendar, importing tasks from Todoist into Google Calendar, syncing tasks from Google Calendar to Todoist, and managing synced tasks between the two platforms. We also discussed common troubleshooting issues that may arise during the syncing process.
By following these steps, you can enjoy a unified view of your tasks and events, allowing you to efficiently plan, prioritize, and allocate your time. The seamless integration between Todoist and Google Calendar eliminates the need for manual transfer of information, streamlining the task management process and keeping you organized.
Remember to regularly sync your tasks between Todoist and Google Calendar to ensure that any changes or updates are reflected in both platforms. Take advantage of the features offered by Todoist, such as labels, tags, and priorities, to enhance task organization and visibility.
If you encounter any difficulties during the syncing process or encounter any issues, consult the help documentation or support channels of Todoist and Google Calendar. They will provide specific guidance to address any challenges you may face.
With the powerful integration of Todoist and Google Calendar, you can take control of your tasks and events, maximize your productivity, and stay on top of your commitments. Embrace this synchronization and experience enhanced task management like never before.

![20 Best Productivity Apps to Get Things Done [PC & Mac]](https://robots.net/wp-content/uploads/2020/05/write-593333_1920-300x177.jpg)