Introduction
Are you struggling to keep track of your schedule and tasks across multiple platforms? Look no further than the seamless integration between Google Calendar and ClickUp. With this powerful integration, you can effortlessly sync your events and tasks, ensuring that you stay organized and on top of your commitments.
Whether you’re a busy professional juggling multiple projects or a student trying to balance assignments and extracurricular activities, the integration between Google Calendar and ClickUp can be a game-changer. Say goodbye to the hassle of manually transferring information between platforms and hello to a streamlined workflow that saves you time and energy.
By connecting Google Calendar with ClickUp, you can enjoy the benefits of a comprehensive task management tool and a robust calendar system working together harmoniously. Keep all your important dates, events, and tasks in one place and enjoy the convenience of accessing them from anywhere, on any device.
In this article, we will guide you through the process of setting up the Google Calendar integration with ClickUp, as well as show you how to sync your events and tasks seamlessly. We will also provide tips on managing your calendar sync settings and troubleshooting any potential issues that may arise. By the end of this guide, you’ll be a pro at leveraging the power of Google Calendar and ClickUp to supercharge your productivity.
So, let’s dive in and explore the world of Google Calendar and ClickUp integration, and discover how it can revolutionize the way you manage your schedule and tasks.
Connecting Google Calendar with ClickUp
Before you can start syncing your Google Calendar with ClickUp, you’ll need to establish a connection between the two platforms. Thankfully, the process is quick and straightforward. Follow these steps to get started:
- Sign in to your ClickUp account and navigate to the Workspace Settings.
- Click on the “Integrations” tab and search for Google Calendar.
- Select Google Calendar from the list of available integrations.
- Click on the “Connect” button and authorize ClickUp to access your Google Calendar data.
- Once connected, you’ll be able to choose which Google Calendar account you want to sync with ClickUp.
- Click on the “Save” button to complete the integration setup.
That’s it! Your Google Calendar is now connected to ClickUp, and you’re ready to start syncing your events and tasks.
It’s worth noting that the integration allows for a two-way sync between Google Calendar and ClickUp. This means that any changes you make in either platform will be reflected in the other. Whether you add, edit, or delete events or tasks, the synchronization ensures that your information stays up to date across both platforms.
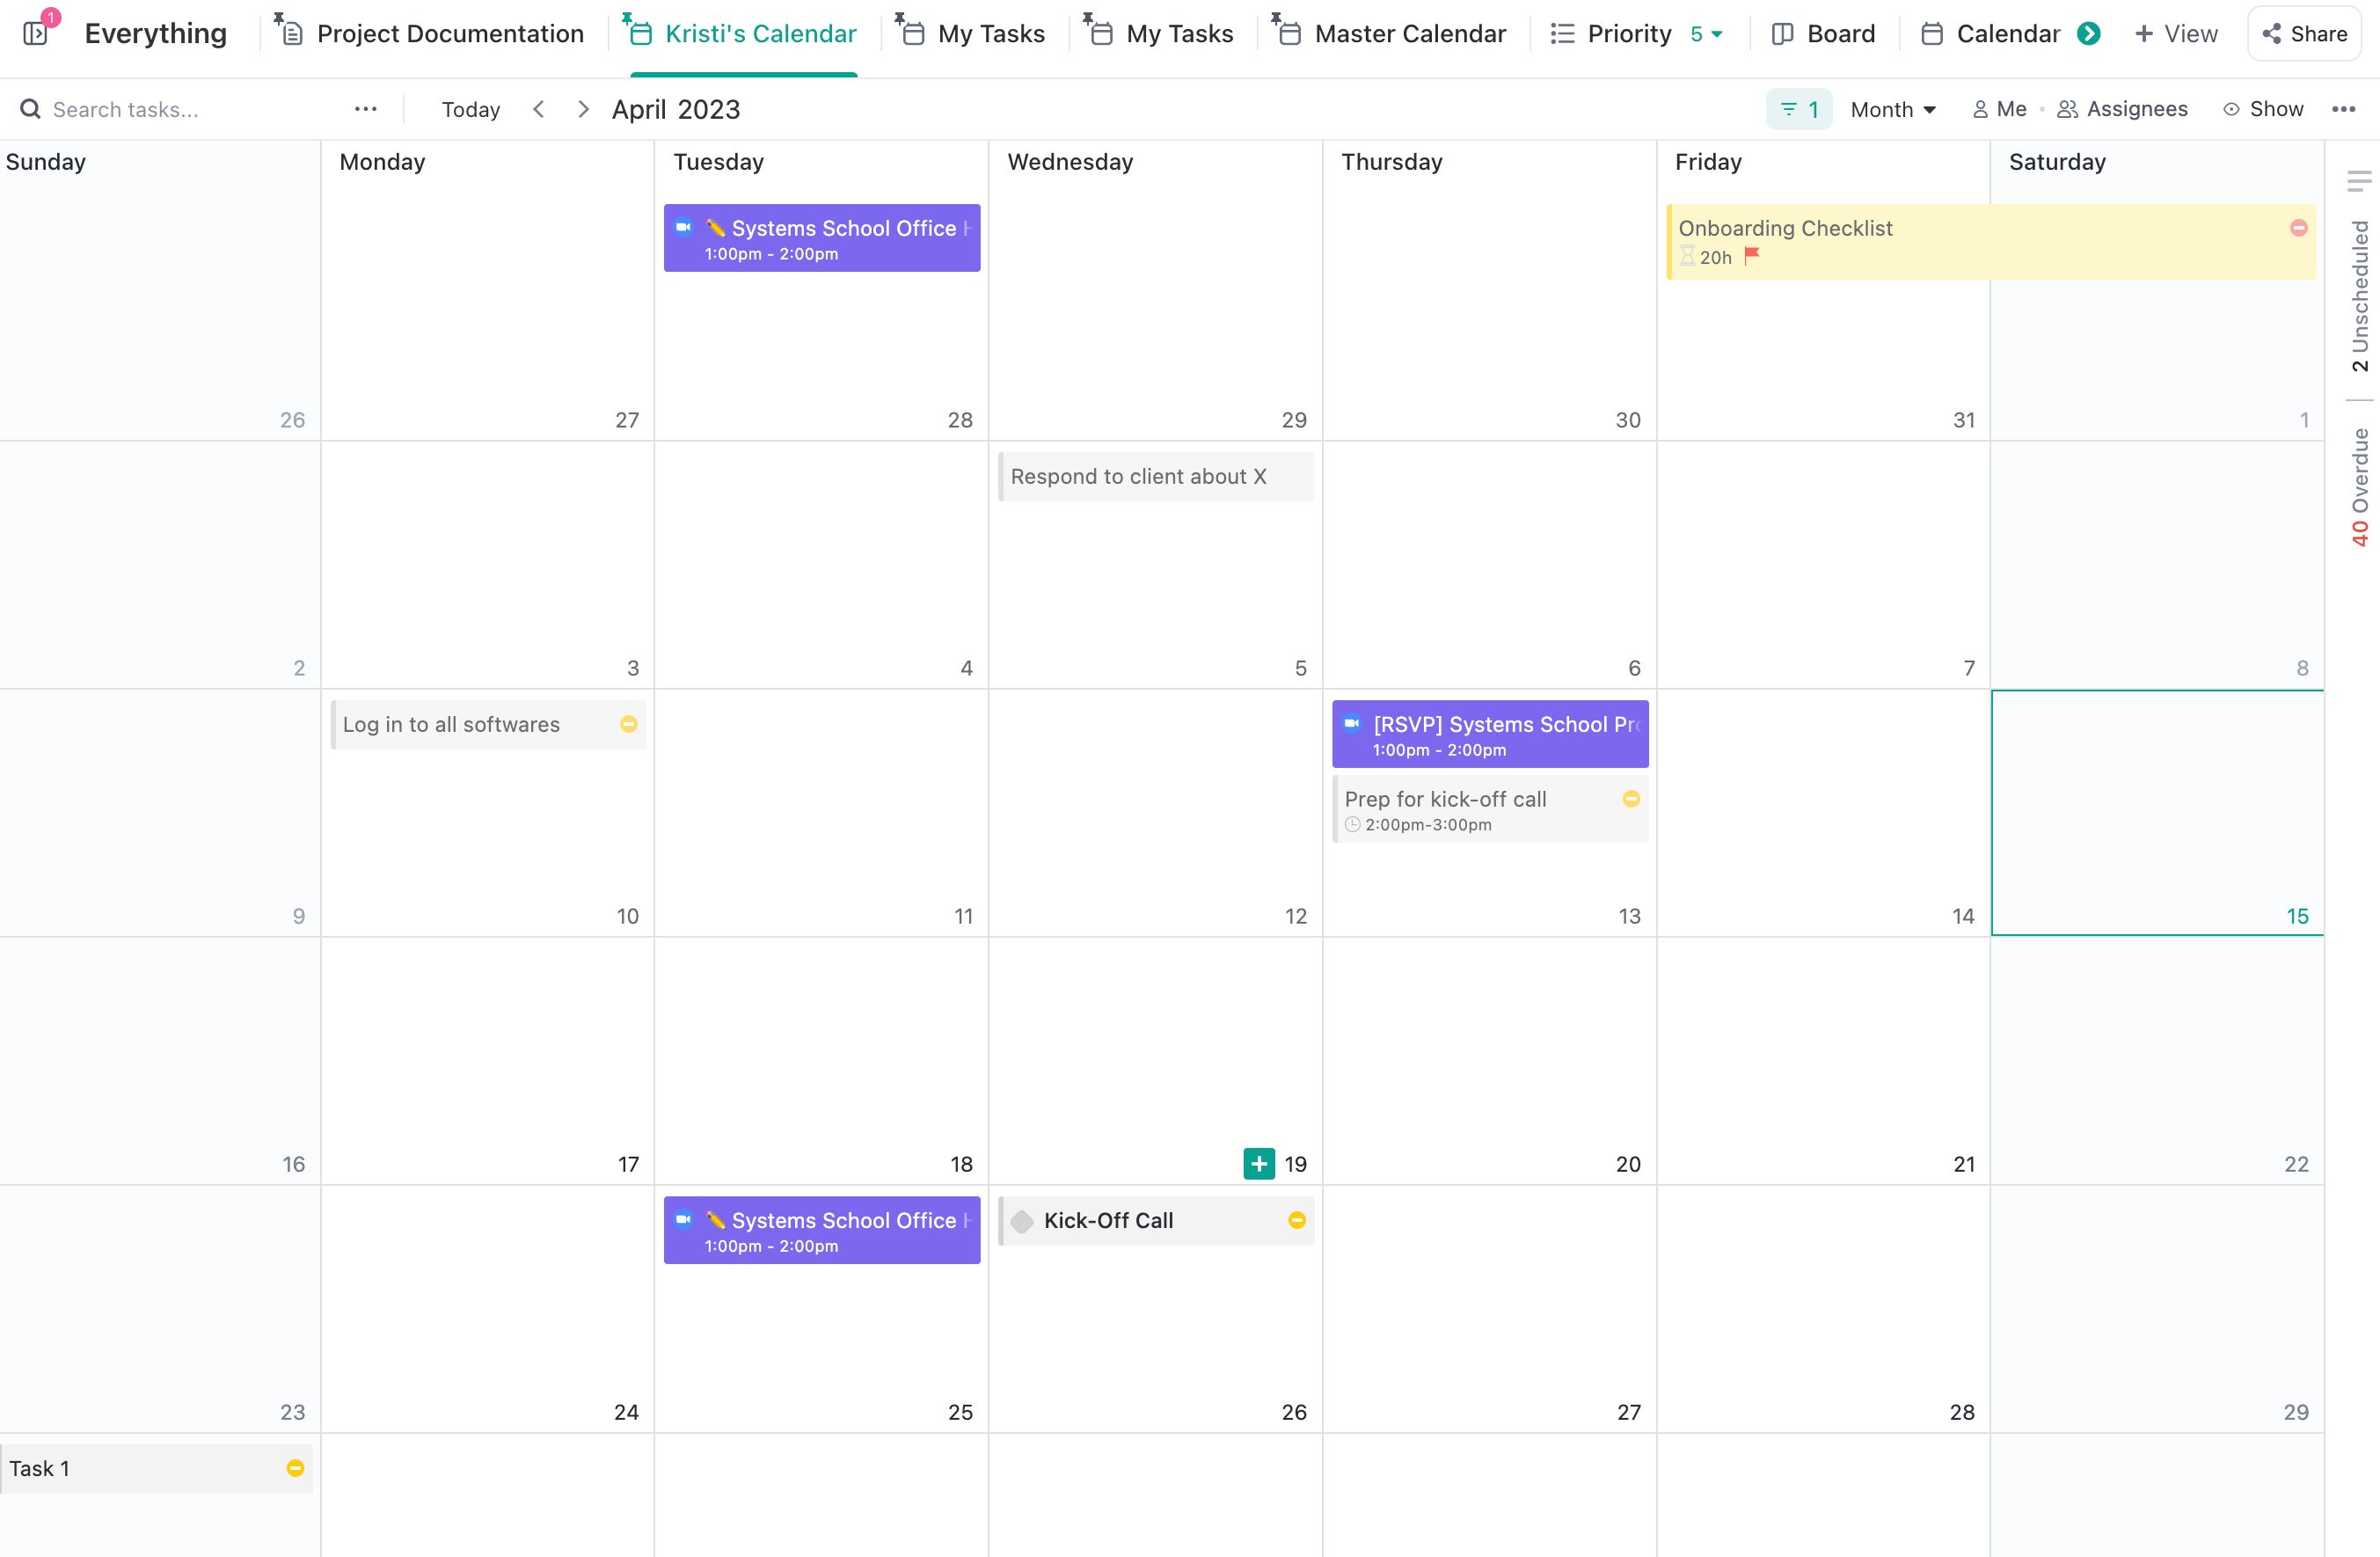
Having the ability to connect Google Calendar with ClickUp provides a seamless experience for managing your schedule and tasks. You can easily view and update your events and tasks in ClickUp while still having access to the familiar interface of Google Calendar.
Now that you have successfully connected Google Calendar with ClickUp, let’s move on to the next section to learn how to sync your events from Google Calendar to ClickUp.
Setting up the Integration
Now that you have connected Google Calendar with ClickUp, it’s time to set up the integration to ensure a smooth syncing process. Follow these steps to configure the integration settings:
- Go to your ClickUp Workspace and click on your profile picture in the top-right corner.
- Select “Apps” from the dropdown menu and choose “Google Calendar.”
- You’ll be presented with various options to customize the integration settings.
- Choose the calendars you want to sync from your Google Calendar account. You can select multiple calendars if needed.
- Decide how you want events to be created in ClickUp. You can choose to create individual tasks for each event or create a single task for all events within a specific time frame.
- Specify the time range for syncing events. You can choose to sync events from a specific date range or select the option to sync all events.
- Enable or disable the option to automatically sync new events added to your Google Calendar.
- Review and customize other options available based on your preferences.
- Once you have configured the integration settings, click on the “Save” button to apply the changes.
By setting up the integration, you have now tailored the synchronization process to suit your specific needs. You can choose which calendars to sync, how events should be created, and the time range for syncing. This flexibility allows you to have full control over how your Google Calendar and ClickUp work together.
It’s important to regularly review and update the integration settings to ensure they align with your changing requirements. This way, you can optimize the syncing process and ensure that your Google Calendar and ClickUp remain in harmony.
Now that you have successfully set up the integration, let’s move on to the next section to learn how to sync your Google Calendar events to ClickUp.
Syncing Google Calendar Events to ClickUp
Now that you have set up the integration between Google Calendar and ClickUp, it’s time to start syncing your events. Follow these steps to sync your Google Calendar events to ClickUp:
- Open ClickUp and navigate to the desired space and project where you want to sync your events.
- Click on the “+ New” button to create a new task or select an existing task to update.
- In the task details panel, click on the “Sync” tab.
- Click on the “Sync with Google Calendar” button.
- A pop-up window will appear. Choose the desired Google Calendar that contains the events you want to sync.
- Select the specific events or choose to sync all events from the selected calendar.
- Click on the “Sync” button to initiate the sync process.
- Wait for ClickUp to import the selected events from Google Calendar.
- Once the sync is complete, you will see the synced events listed in the task details panel.
- Any changes you make to the events in Google Calendar will automatically sync with ClickUp, ensuring that both platforms stay updated.
By syncing your Google Calendar events to ClickUp, you can have a centralized view of all your tasks and events in one place. This integration allows you to conveniently manage your schedule, set reminders, and collaborate with your team members directly in ClickUp.
Now that you have successfully synced your Google Calendar events to ClickUp, let’s move on to the next section to learn how to sync tasks from ClickUp to Google Calendar.
Syncing ClickUp Tasks to Google Calendar
In addition to syncing Google Calendar events to ClickUp, you can also sync tasks from ClickUp to your Google Calendar. This allows you to have a comprehensive view of all your commitments in one place. Follow these steps to sync your ClickUp tasks to Google Calendar:
- Open ClickUp and navigate to the task you want to sync.
- In the task details panel, scroll down to the “Sync” tab.
- Click on the “Sync with Google Calendar” button.
- A pop-up window will appear. Select the Google Calendar you want to sync the task with.
- Choose the specific due date and time for the task in Google Calendar.
- Click on the “Sync” button to initiate the sync process.
- The task will be added to your Google Calendar on the specified due date and time.
- Any updates or changes you make to the task in ClickUp will automatically sync with Google Calendar.
Syncing your ClickUp tasks to Google Calendar ensures that you have a unified view of your schedule across both platforms. This integration allows you to manage your tasks in ClickUp while still receiving reminders and notifications in your Google Calendar.
By syncing tasks from ClickUp to Google Calendar, you can leverage the power of both platforms to stay organized and on top of your commitments. Whether it’s a deadline, a meeting, or a personal to-do, having your ClickUp tasks synced to your Google Calendar ensures that you never miss an important event.
Now that you know how to sync tasks from ClickUp to Google Calendar, let’s move on to the next section to learn about managing your calendar sync settings.
Managing Calendar Sync Settings
As you continue to use the integration between Google Calendar and ClickUp, you may need to adjust your calendar sync settings to better suit your needs. Here are some key settings you can manage:
- Selective Calendar Sync: You can choose which specific calendars in your Google Calendar account you want to sync with ClickUp. This flexibility allows you to have control over which events and tasks are shared between the two platforms.
- Task Creation Options: ClickUp offers different options for creating tasks from your Google Calendar events. You can choose to create individual tasks for each event or consolidate multiple events into a single task with a specific time range.
- Sync Frequency: You can specify how often the sync process should run. Choose between regular intervals (such as every hour or every day) or set it to manual syncing, allowing you to control when the synchronization occurs.
- Two-way Sync: The integration allows for a two-way sync, meaning changes made in either platform will be reflected in the other. However, you have the option to enable or disable specific sync directions based on your preferences.
- Sync Notifications: ClickUp can notify you when there are conflicts or issues during the syncing process. You can choose to receive these notifications via email or within your ClickUp account.
By managing your calendar sync settings, you can customize the integration to align with your unique workflow and preferences. Regularly reviewing and adjusting these settings ensures that your Google Calendar and ClickUp work seamlessly together, providing you with an optimal scheduling and task management experience.
Remember, the integration between Google Calendar and ClickUp is designed to enhance your productivity and simplify your workflow. By taking control of your calendar sync settings, you can maximize the benefits of this powerful integration and stay organized with ease.
Now that you understand how to manage your calendar sync settings, let’s move on to the next section, where we will address common troubleshooting issues related to calendar sync.
Troubleshooting Calendar Sync Issues
Although the Google Calendar and ClickUp integration is designed to provide a seamless syncing experience, you may occasionally encounter some issues. Here are some common troubleshooting tips to help you resolve calendar sync issues:
- Check Connection: Ensure that your Google Calendar account is still connected to ClickUp. If the connection is lost, you may need to reconnect the accounts and reconfigure the integration settings.
- Verify Permissions: Confirm that ClickUp has the necessary permissions to access and sync your Google Calendar. Double-check the authorization settings to ensure that ClickUp is granted the appropriate access.
- Sync Frequency: If you notice a delay in syncing or missing events/tasks, check the sync frequency settings. Adjust the interval to a more frequent option to ensure a more real-time sync process.
- Conflicting Events: Cross-check for any conflicting events or tasks between Google Calendar and ClickUp. If there are any inconsistencies, resolve them by manually updating the events or tasks in either platform.
- Error Messages: Pay attention to any error messages or notifications you receive during the sync process. These messages may provide insights into the specific issue and guide you towards the appropriate troubleshooting steps.
- Update Software: Ensure that you are using the latest version of ClickUp and that your web browser is updated. Outdated software or browser versions can sometimes cause compatibility issues with the integration.
- Reach Out for Support: If you have tried the above troubleshooting steps and are still experiencing issues, don’t hesitate to reach out to ClickUp’s support team. They can provide further assistance and guidance to help resolve any persistent sync problems.
Remember, syncing issues are usually temporary and can often be resolved with a few simple steps. By troubleshooting and addressing the root cause of the problem, you can ensure that your calendar sync between Google Calendar and ClickUp remains smooth and reliable.
Now that you’re equipped with troubleshooting tips, you’ll be better prepared to address any calendar sync issues that may arise. Let’s move on to the final section to wrap up our exploration of integrating Google Calendar with ClickUp.
Conclusion
Integrating Google Calendar with ClickUp provides a powerful solution for managing your schedule and tasks seamlessly. With the ability to sync events and tasks in both directions, you can enjoy a centralized view of your commitments across these platforms.
By connecting Google Calendar with ClickUp, you can eliminate the hassle of manually transferring information and ensure that your calendar remains up to date. Whether you’re a busy professional, a student, or someone with multiple responsibilities, this integration can greatly enhance your productivity and organization.
In this article, we explored the process of connecting Google Calendar with ClickUp, setting up the integration, syncing events from Google Calendar to ClickUp, syncing tasks from ClickUp to Google Calendar, managing calendar sync settings, and troubleshooting common issues. By following these steps, you can fully leverage the power of this integration and create a harmonized workflow.
Remember to review and customize your calendar sync settings based on your preferences, regularly update the integration, and troubleshoot any issues that may arise. By maintaining the integration and addressing any syncing concerns, you’ll ensure that your Google Calendar and ClickUp work harmoniously together.
So, take advantage of the Google Calendar and ClickUp integration today, and experience the benefits of a streamlined workflow, improved productivity, and effective time management. Say goodbye to disjointed schedules and scattered tasks, and welcome a seamless integration that enriches your daily life.


