Why Stream from an All-In-One PC to a Smart TV?
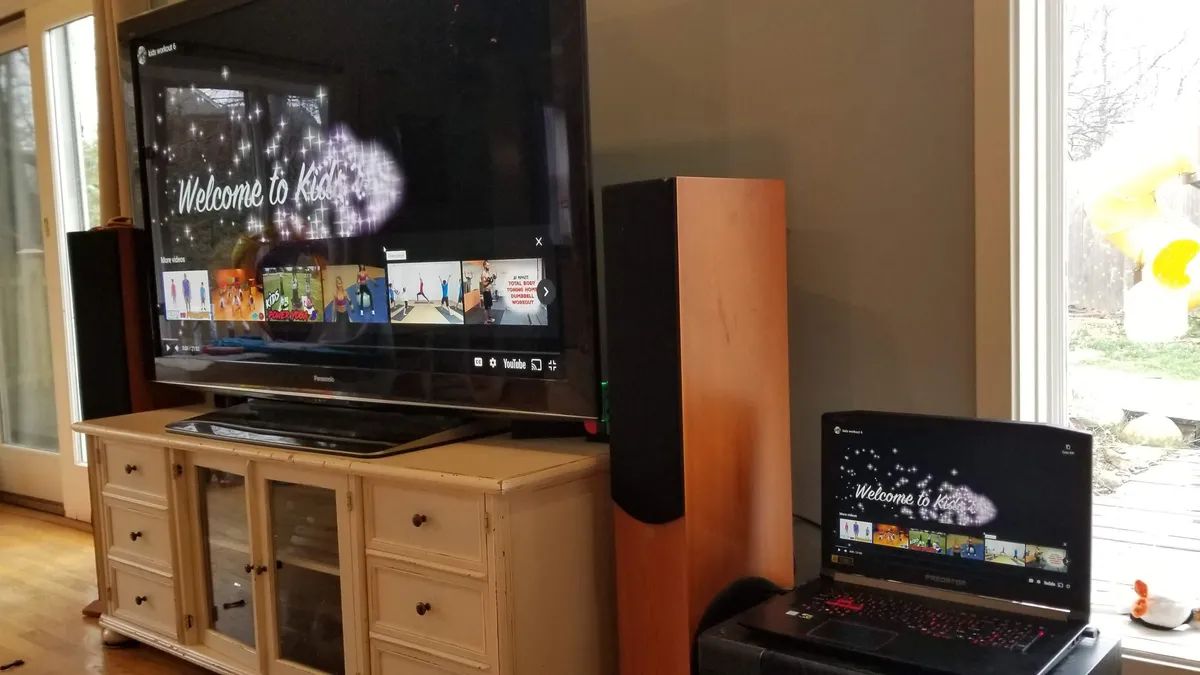
Streaming content from an all-in-one PC to a smart TV opens up a whole new world of entertainment possibilities. Here are a few reasons why you should consider this setup:
- Maximize Screen Size: While all-in-one PCs offer a decent display size, nothing beats the immersive experience of watching your favorite movies or TV shows on a big-screen smart TV. By streaming content from your all-in-one PC to your smart TV, you can enjoy your media on a larger, more vibrant display.
- Enhance Audio Quality: Most smart TVs come with built-in speakers or support for external sound systems. By streaming content from your all-in-one PC to your smart TV, you can take advantage of superior audio quality, turning your living room into a mini home theater.
- Convenience and Accessibility: Streaming from your all-in-one PC to your smart TV eliminates the need for cables and additional devices. It allows you to access your media library and streaming platforms directly from your PC, without having to transfer files or switch between devices. It’s a seamless and convenient way to enjoy your favorite content.
- Multi-tasking: An all-in-one PC typically offers more processing power and multitasking capabilities compared to a smart TV. By streaming content from your all-in-one PC to your smart TV, you can free up your PC for other activities while enjoying uninterrupted streaming on your television.
- Internet Browsing: Most smart TVs have limited internet browsing capabilities. By streaming from your all-in-one PC, you can enjoy a full-fledged web browsing experience on your TV screen. You can easily access websites, social media platforms, and online services, expanding your entertainment options beyond traditional TV channels.
Streaming from an all-in-one PC to a smart TV provides numerous benefits, from maximizing screen size and audio quality to enhancing convenience and multitasking capabilities. It offers a seamless and immersive entertainment experience, bringing your media to life on the big screen. So, if you want to level up your entertainment setup, consider streaming from your all-in-one PC to your smart TV.
What You’ll Need
Before you can start streaming from your all-in-one PC to your smart TV, there are a few things you’ll need to ensure a smooth setup and experience:
- All-In-One PC: Ensure that you have an all-in-one PC with Wi-Fi capabilities. It should have a reliable internet connection for seamless streaming.
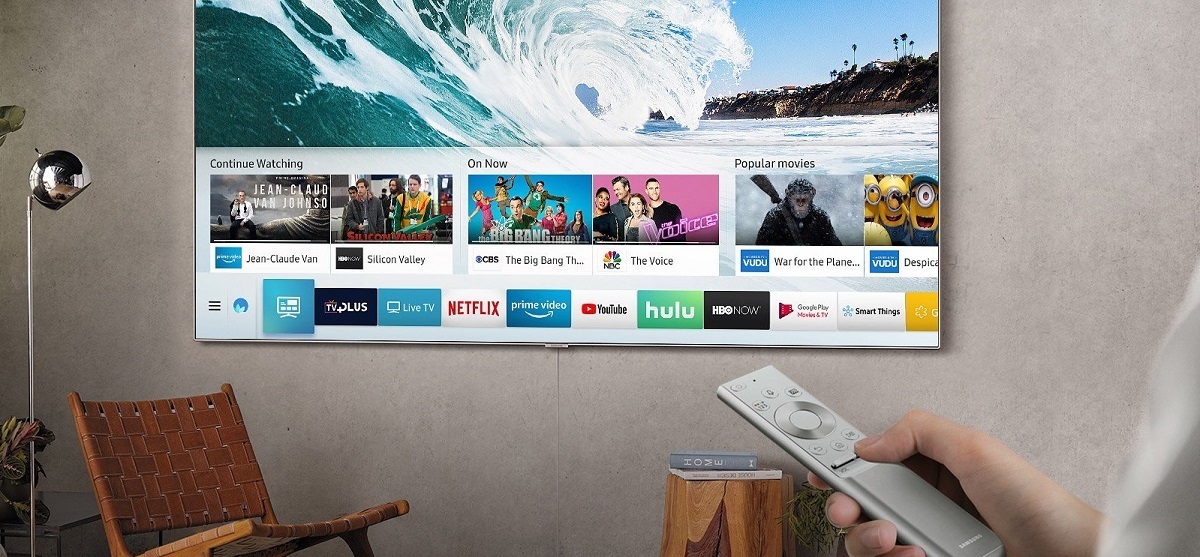
- Smart TV: You’ll need a smart TV that supports screen mirroring or casting. Make sure your smart TV is compatible with the PC’s operating system.
- Wi-Fi Network: Both your all-in-one PC and smart TV should be connected to the same Wi-Fi network. This is essential for establishing a connection between the two devices.
- Compatible Operating Systems: Check if your all-in-one PC and smart TV have compatible operating systems. Windows, macOS, and Linux are commonly supported by all-in-one PCs, while smart TVs often support Android, webOS, or other specific systems.
- Screen Mirroring Support: Ensure that both your all-in-one PC and smart TV offer screen mirroring or casting functionality. This feature allows you to mirror your PC’s screen on the TV.
- Screen Mirroring Software: Depending on your PC’s operating system and smart TV brand, you might need to install screen mirroring software or apps. Research and find the appropriate software or app for your specific devices.
- HDMI or VGA Cable (optional): In case wireless streaming is not possible or not preferable, you can use an HDMI or VGA cable to connect your PC and smart TV directly. This is a reliable alternative that ensures stable and high-quality streaming.
By ensuring you have the necessary hardware, software, and Wi-Fi connectivity, you’ll be well-equipped to stream from your all-in-one PC to your smart TV. Keep these requirements in mind and gather everything you need before proceeding to the setup process.
Step 1: Check Your PC and TV Compatibility
Before you begin the setup process, it’s important to check the compatibility between your all-in-one PC and smart TV. Here’s what you need to do:
- Operating System Compatibility: Verify that your all-in-one PC and smart TV have compatible operating systems. For example, if your PC runs on Windows, ensure that your smart TV supports Windows screen mirroring. Similarly, if your PC runs on macOS or Linux, check if your smart TV is compatible with those operating systems.
- Screen Mirroring Support: Look for screen mirroring or casting support on both your all-in-one PC and smart TV. Check the user manuals or the manufacturer’s website for information regarding screen mirroring capabilities. If screen mirroring is not available on either device, you may need to consider alternative solutions such as using a streaming device or connecting your PC and TV with cables.
- Wireless Connectivity: Ensure that both your all-in-one PC and smart TV are connected to the same Wi-Fi network. This is crucial for establishing a connection between the devices. If your PC or smart TV does not have Wi-Fi capabilities, you may need to use an Ethernet cable to connect them to your router.
- Hardware Requirements: Check if your all-in-one PC and smart TV meet the hardware requirements for streaming and screen mirroring. Make sure your PC has sufficient processing power, memory, and graphics capabilities to handle streaming tasks. As for your smart TV, ensure that it has the necessary processing power and memory to receive and display the mirrored content.
By thoroughly checking the compatibility between your all-in-one PC and smart TV, you can avoid any potential issues or frustrations during the setup process. This step is crucial to ensure that both devices are capable of establishing a reliable connection and performing seamless screen mirroring. Take the time to research and verify compatibility before proceeding to the next steps.
Step 2: Enable Screen Mirroring on Your PC
Once you’ve ensured compatibility between your all-in-one PC and smart TV, the next step is to enable screen mirroring on your PC. Here’s how to do it:
- Open Display Settings: On your all-in-one PC, go to the Display Settings. You can usually access this by right-clicking on the desktop and selecting “Display settings” or through the Control Panel.
- Identify the Screen Mirroring Option: Look for the screen mirroring or projection settings. The terminology may vary depending on your PC’s operating system. For example, on Windows, it is usually called “Project” or “Connect to a Wireless Display.”
- Enable Screen Mirroring: Once you’ve found the screen mirroring option, click on it to enable it. Your PC will start scanning for available devices to connect to.
- Select Your Smart TV: From the list of available devices, select your smart TV. The name of your TV should appear in the list. Click on it to establish the connection between your PC and TV.
- Confirm Connection: After selecting your smart TV, your PC will attempt to establish a connection. You may see a prompt or confirmation message on both your PC and TV screens. Follow the prompts and confirm the connection.
- Adjust Display Settings (if necessary): Once the connection is established, you can adjust the display settings to optimize the streaming experience. This may include adjusting the screen resolution, orientation, or screen duplication mode.
Enabling screen mirroring on your all-in-one PC allows it to connect and mirror its display onto your smart TV. This step is crucial for establishing the connection between the two devices. Once you have enabled screen mirroring, you’re ready to move on to the next step of connecting your PC and smart TV together.
Step 3: Connect Your PC and Smart TV
After enabling screen mirroring on your all-in-one PC, it’s time to connect your PC and smart TV together. Follow these steps to establish the connection:
- Ensure Both Devices are on the Same Wi-Fi Network: Make sure both your all-in-one PC and smart TV are connected to the same Wi-Fi network. This is essential for the devices to communicate and establish a connection.
- Turn on Your Smart TV: Power on your smart TV and ensure it is in normal operating mode.
- Turn on Your PC: Start up your all-in-one PC and make sure it is fully booted and running.
- Wait for Devices to Connect: Give your PC and smart TV a few moments to detect each other and establish a connection. This process may take a few seconds or up to a minute.
- Confirm Connection on Your PC: Once the connection is established, you may see a notification or confirmation message on your PC. It may indicate that your PC is connected to a wireless display or smart TV.
- Check Your Smart TV Display: On your smart TV, you should see your PC’s screen being mirrored. It may take a moment for the TV to display the mirrored content. If you don’t see anything, make sure you’ve selected the correct input source on your smart TV.
- Test the Connection: To ensure the connection is working properly, try opening an application or playing a video on your PC. The content should be mirrored and displayed on your smart TV. You can use your PC’s keyboard and mouse to control the content on the TV.
By following these steps, you can establish a connection between your all-in-one PC and smart TV. Once connected, you can begin streaming your favorite content from your PC to the big screen of your smart TV.
Step 4: Set Up Screen Mirroring On Your Smart TV
Now that your all-in-one PC is connected to your smart TV, you need to set up screen mirroring on your smart TV. Follow these steps to complete the setup:
- Access Settings Menu: On your smart TV’s remote, locate the Settings or Menu button. Press it to access the settings menu.
- Navigate to Display or Screen Mirroring: In the settings menu, look for the Display or Screen Mirroring option. The exact location and name may vary depending on your TV brand and model. Refer to the user manual if needed.
- Enable Screen Mirroring: Once you’ve found the screen mirroring option, select it and enable this feature. This step allows your smart TV to receive and display the content being mirrored from your all-in-one PC.
- Wait for the TV to Detect Devices: Your smart TV will now scan for available devices to connect to. This process may take a few seconds or up to a minute. Make sure that your all-in-one PC is turned on and connected to the same Wi-Fi network.
- Select Your PC: Once the scanning is complete, you should see a list of available devices. Look for your all-in-one PC in the list and select it to initiate the connection between your TV and PC.
- Confirm Connection: After selecting your PC, your smart TV may display a confirmation message or prompt. Follow the on-screen instructions to confirm and establish the connection.
- Adjust Screen Mirroring Settings (optional): Depending on your TV, you may have additional screen mirroring settings to adjust, such as picture quality, screen ratio, or audio settings. Feel free to customize these settings according to your preferences.
By setting up screen mirroring on your smart TV, you allow it to receive and display the content being mirrored from your all-in-one PC. Follow these steps carefully to ensure a smooth and successful setup. Once the screen mirroring is set up on your smart TV, you are almost ready to start streaming and enjoying your media on the big screen.
Step 5: Select Your PC as the Mirroring Source
With screen mirroring enabled on both your all-in-one PC and smart TV, it’s time to select your PC as the mirroring source. Follow these steps to complete the process:
- Access the Screen Mirroring Menu: Using your smart TV remote, go back to the screen mirroring or casting menu on your TV. This is where you previously enabled screen mirroring.
- Select Your All-In-One PC: In the screen mirroring menu, you should now see a list of available devices. Look for your all-in-one PC in the list and select it as the mirroring source.
- Wait for the Connection: After selecting your PC, your smart TV will attempt to establish a connection. This may take a few moments, and you may see a loading or connection status on your TV screen.
- Confirm Connection on Your PC: As the connection is established, your all-in-one PC may prompt you to confirm the connection or enter a PIN. Follow the on-screen instructions on your PC to complete the connection.
- Adjust Display Settings (if necessary): Once the connection is established, you can adjust the display settings on your PC if needed. This may include selecting the appropriate screen resolution or optimizing the display for your smart TV.
- Begin Streaming: With your all-in-one PC selected as the mirroring source, you can now start streaming your favorite content. Open a media player, video streaming service, or any other application on your PC, and the content will be mirrored and displayed on your smart TV.
- Control Playback: You can use your all-in-one PC’s keyboard and mouse or a compatible remote control to control playback and navigate through the content on your smart TV.
By selecting your all-in-one PC as the mirroring source on your smart TV, you establish a connection between the two devices and begin streaming the content from your PC to the TV screen. Enjoy the convenience of watching media on a larger display and make the most of your streaming experience.
Step 6: Enjoy Streaming from Your All-In-One PC to Your Smart TV
Now that you have successfully set up screen mirroring between your all-in-one PC and smart TV, it’s time to sit back, relax, and enjoy streaming your favorite content on the big screen. Here’s how:
- Select Your Media: Open your preferred media player, streaming service, or any other application on your all-in-one PC.
- Play Your Content: Choose the movie, TV show, or video you want to watch and start playing it on your PC.
- Observe Mirroring: As the media plays on your PC, you will see it mirrored and displayed on your smart TV screen in real-time.
- Control Playback: You can use your PC’s keyboard, mouse, or a compatible remote control to control playback, adjust volume, navigate through the content, and make any necessary adjustments.
- Enjoy the Big Screen Experience: Sit back and enjoy the immersive experience of watching your favorite movies, TV shows, or videos on the larger display of your smart TV. Take advantage of the enhanced audio quality and visual impact that a big screen provides.
- Explore More Content: With an all-in-one PC connected to your smart TV, you can easily access your media library, streaming platforms, or even browse the internet on the TV screen. Explore a wide range of content options and expand your entertainment possibilities.
- Adjust Settings as Needed: If you encounter any issues with the streaming quality or need to adjust the display settings further, you can make the necessary adjustments on your PC. Experiment with different settings to optimize your streaming experience.
By following these steps, you can now enjoy the seamless streaming of your favorite content from your all-in-one PC to your smart TV. Make the most of your entertainment setup, sit back, and indulge in an immersive viewing experience on the big screen.
Troubleshooting Tips
While setting up screen mirroring and streaming from your all-in-one PC to your smart TV is generally a straightforward process, you might encounter some issues along the way. Here are a few troubleshooting tips to help you overcome common problems:
- Ensure Wi-Fi Connectivity: Make sure both your all-in-one PC and smart TV are connected to the same Wi-Fi network. If you’re experiencing connectivity issues, check your Wi-Fi router and ensure it is functioning properly.
- Restart Devices: Try restarting both your PC and smart TV. This can often resolve minor connectivity or performance issues.
- Update Software and Firmware: Ensure that your all-in-one PC’s operating system, screen mirroring software, and smart TV’s firmware are up to date. Outdated software can cause compatibility issues and affect performance.
- Check System Requirements: Verify that your all-in-one PC meets the minimum hardware requirements for streaming and screen mirroring. Inadequate processing power or insufficient memory can lead to lag or poor performance.
- Disable Firewall or Antivirus: Temporarily disable your PC’s firewall or antivirus software, as they might interfere with the connection between your PC and smart TV. Remember to re-enable them after you’ve completed the setup.
- Verify Resolution Settings: If you’re experiencing problems with the display quality, ensure that your PC’s screen resolution matches your smart TV’s supported resolution. Adjust the settings accordingly to achieve the best picture quality.
- Check HDMI or VGA Connection (if applicable): If you’re using a cable connection instead of wireless streaming, ensure that the HDMI or VGA cable is securely connected to both your PC and smart TV. Examine the ports for any damage or loose connections.
- Restart or Reset Network Settings: If you’re encountering persistent connectivity issues, try restarting or resetting your network settings on both your PC and smart TV. This can help to resolve network-related problems.
- Consult User Manuals and Online Resources: If you’re still experiencing difficulties during the setup or encounter a specific error message, refer to the user manuals and online support resources for your all-in-one PC and smart TV. They often provide troubleshooting steps and solutions for common issues.
By following these troubleshooting tips, you can overcome common issues and ensure a smooth streaming experience from your all-in-one PC to your smart TV. Don’t hesitate to seek additional support if needed, as each setup may have specific factors that require attention.
Conclusion
Streaming from your all-in-one PC to your smart TV opens up a world of possibilities for enjoying your favorite content on a larger screen with enhanced audio quality. By following the steps outlined in this guide, you can easily set up screen mirroring and start streaming in no time.
First, ensure compatibility between your all-in-one PC and smart TV, checking their operating systems and screen mirroring capabilities. Then, enable screen mirroring on your PC and establish a connection with your smart TV. Once connected, select your PC as the mirroring source on your TV, and you’re ready to start streaming.
Remember to troubleshoot any issues that may arise, such as Wi-Fi connectivity problems or software compatibility. Restarting devices, updating software, and adjusting settings can help resolve common issues. Consult the user manuals and online resources for additional assistance if needed.
Streaming from your all-in-one PC to your smart TV provides a convenient and immersive entertainment experience that can transform your viewing habits. Enjoy the benefits of a larger screen, better audio quality, and the ability to access your media library and streaming platforms all in one place.
So, gather your all-in-one PC, smart TV, and Wi-Fi network, follow the steps outlined in this guide, and begin streaming your favorite movies, TV shows, and videos on the big screen. Sit back, relax, and immerse yourself in the world of entertainment from the comfort of your living room.