Introduction
Music has always been a powerful medium for bringing people together, and in the age of digital connectivity, there are innovative ways to share and enjoy music with friends and loved ones. One such method is hosting a Spotify listening party on Discord.
Discord is a popular chat and voice communication platform, widely used by gamers and communities to connect and share experiences. With the integration of Spotify, Discord provides a seamless way to stream music and create a virtual listening party that transcends geographic boundaries.
In this guide, we will walk you through the steps to start a Spotify listening party on Discord, allowing you to enjoy your favorite music with friends, family members, or fellow music enthusiasts.
Whether you want to celebrate the release of a new album, share a playlist you’ve curated, or simply create a space for friends to discover new music together, a Spotify listening party on Discord is the perfect way to immerse yourself in a communal music experience. So, let’s get started on setting up the ultimate musical gathering!
Step 1: Setting Up a Discord Server
The first step in hosting a Spotify listening party on Discord is to create a server or use an existing one. If you have never used Discord before, don’t worry – the process is straightforward.
To begin, go to the Discord website (discord.com) and sign in to your account. If you don’t have an account, you can quickly create one by providing a valid email address and choosing a unique username.
Once you’re logged in, you’ll be directed to the Discord home page. On the left side of the screen, click on the “+” icon next to the “Servers” section. This will bring up a pop-up window with two options: “Create a Server” or “Join a Server.” Since we are starting from scratch, select “Create a Server.”
Next, you’ll need to give your server a name. Be creative and choose a name that reflects the theme or purpose of your Spotify listening party. You can also add an optional server icon if you wish.
After setting the server’s name, click the “Create” button, and voila! You now have your very own Discord server. Take a moment to explore the server settings and customize the layout to your liking. You can add different channels, categories, and assign roles to users for better organization and control.
Now that your Discord server is set up, it’s time to invite your friends to join and start the Spotify listening party. Move on to the next step to learn how to do this.
Step 2: Inviting Friends to Your Discord Server
Now that you have set up your Discord server for the Spotify listening party, it’s time to invite your friends and make sure they can join in on the musical fun.
To invite your friends to your Discord server, follow these simple steps:
- On the left side of the screen, locate the server name in the Discord interface and right-click on it. A drop-down menu will appear.
- From the drop-down menu, select “Invite People.” This will open a pop-up window with an invitation link.
- Copy the invitation link by clicking the “Copy” button. You can also customize the link settings if needed.
- Share the invitation link with your friends through email, messaging apps, or any other communication method you prefer. They can simply click on the link to join your Discord server.
It’s important to note that Discord allows you to generate a temporary invite link with an expiration time, or you can create a permanent invite link that will never expire. Choose the option that suits your needs and the duration of your Spotify listening party.
Once your friends click on the invitation link, they will need to create a Discord account (if they don’t have one already) and log in. They will then be added to your server, where they can actively participate in the listening party.
Remember to communicate with your friends and let them know the date, time, and details of the Spotify listening party, so everyone can join in at the same time and share the musical experience together.
Now that your friends are all set to join your Discord server, let’s move on to the next step to set up the Spotify music bot for seamless music streaming during the listening party.
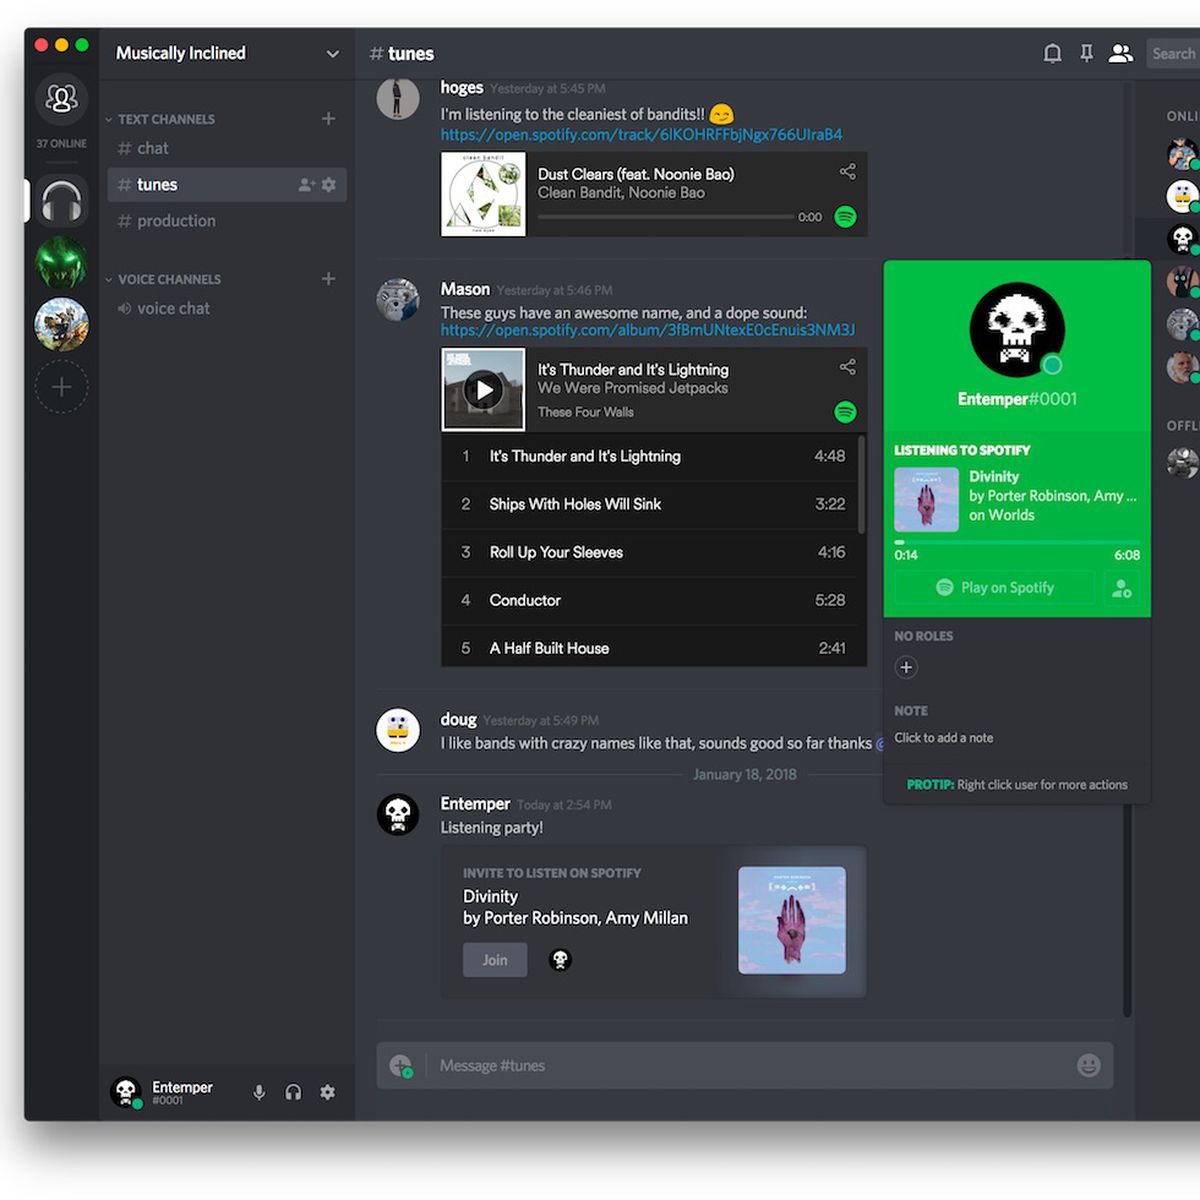
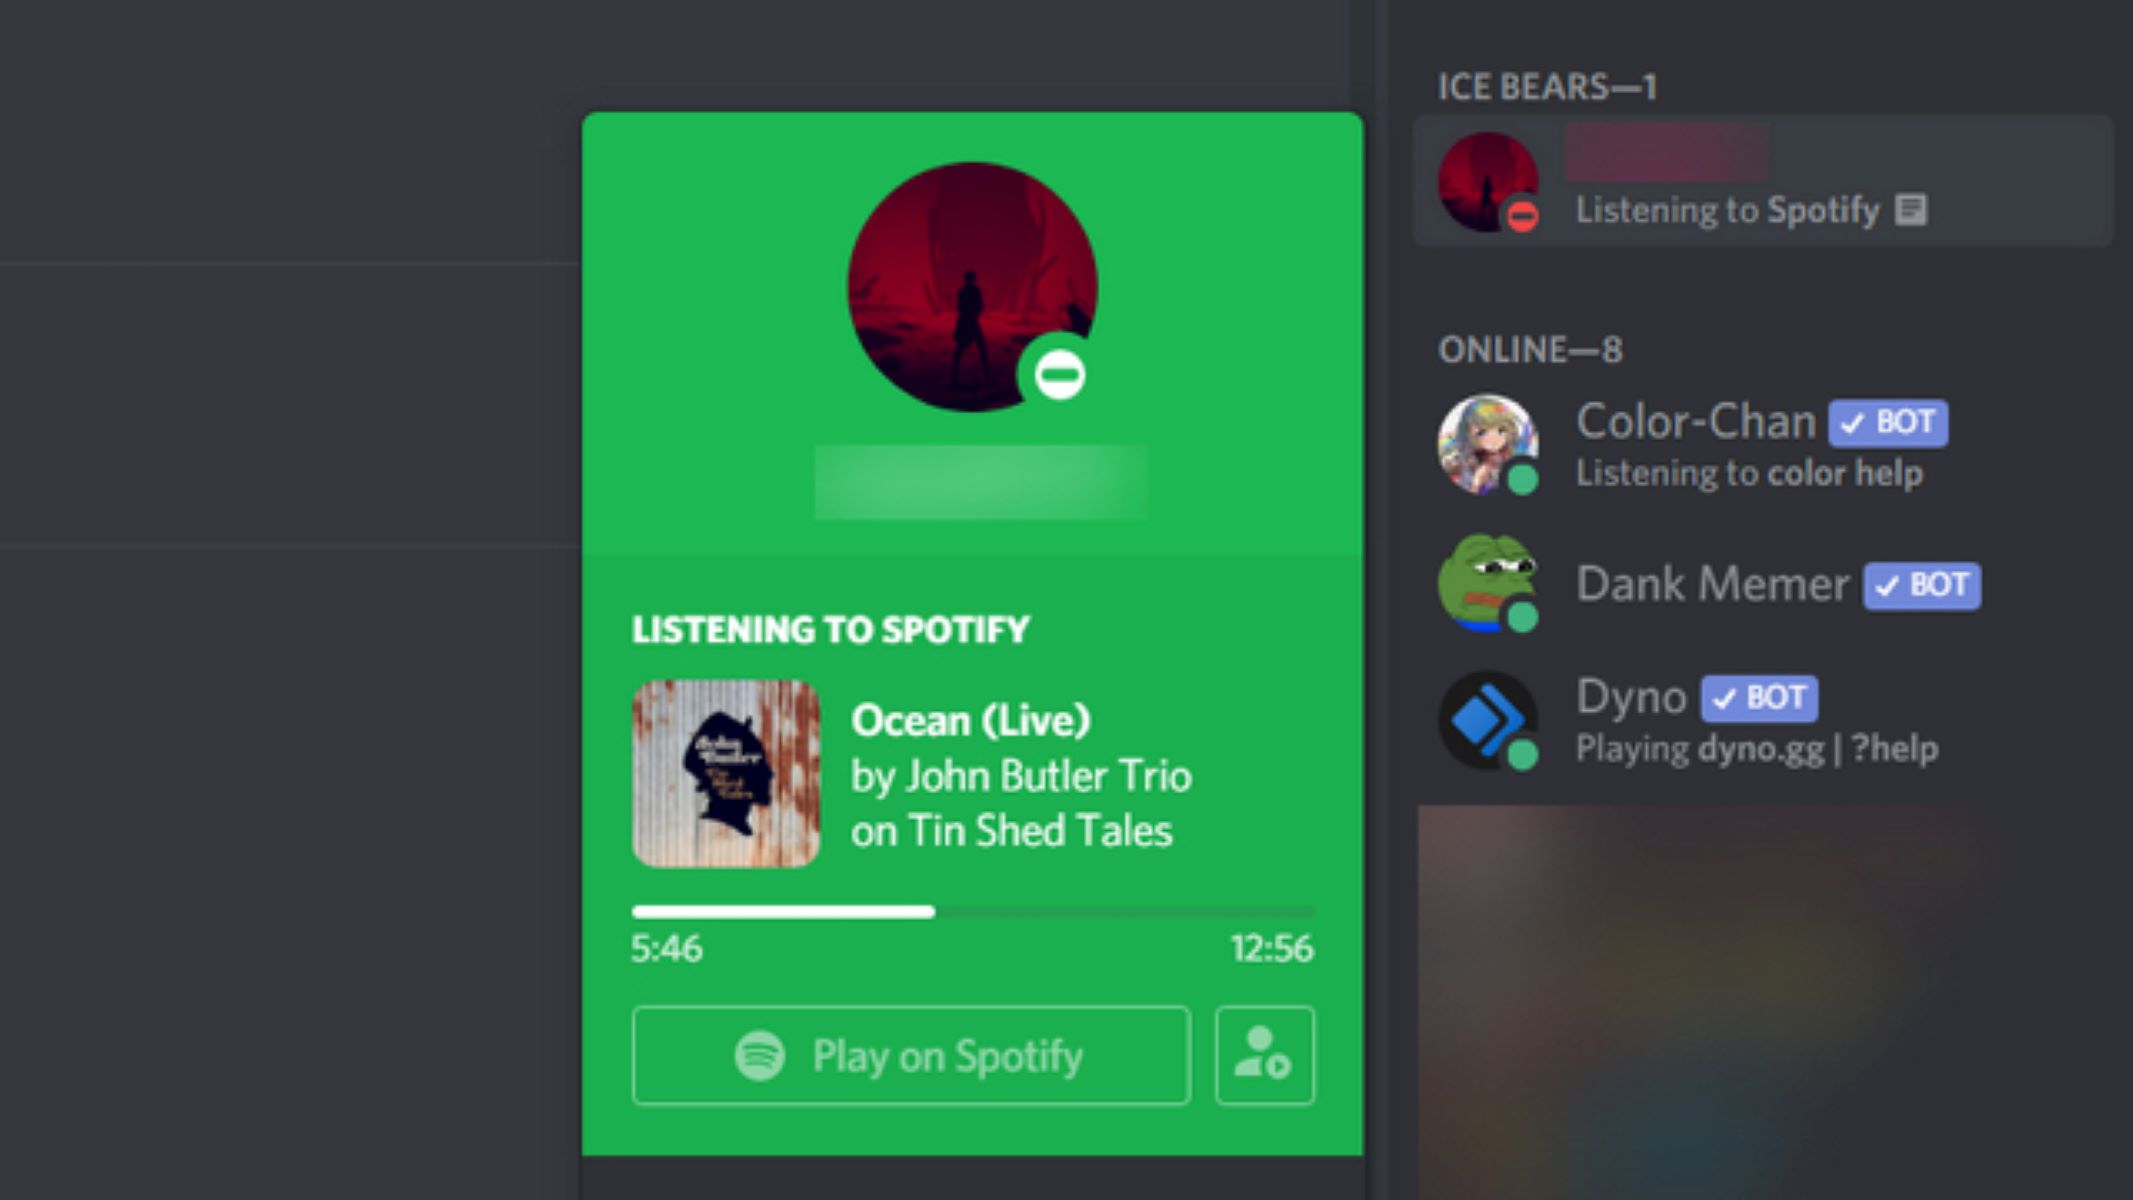
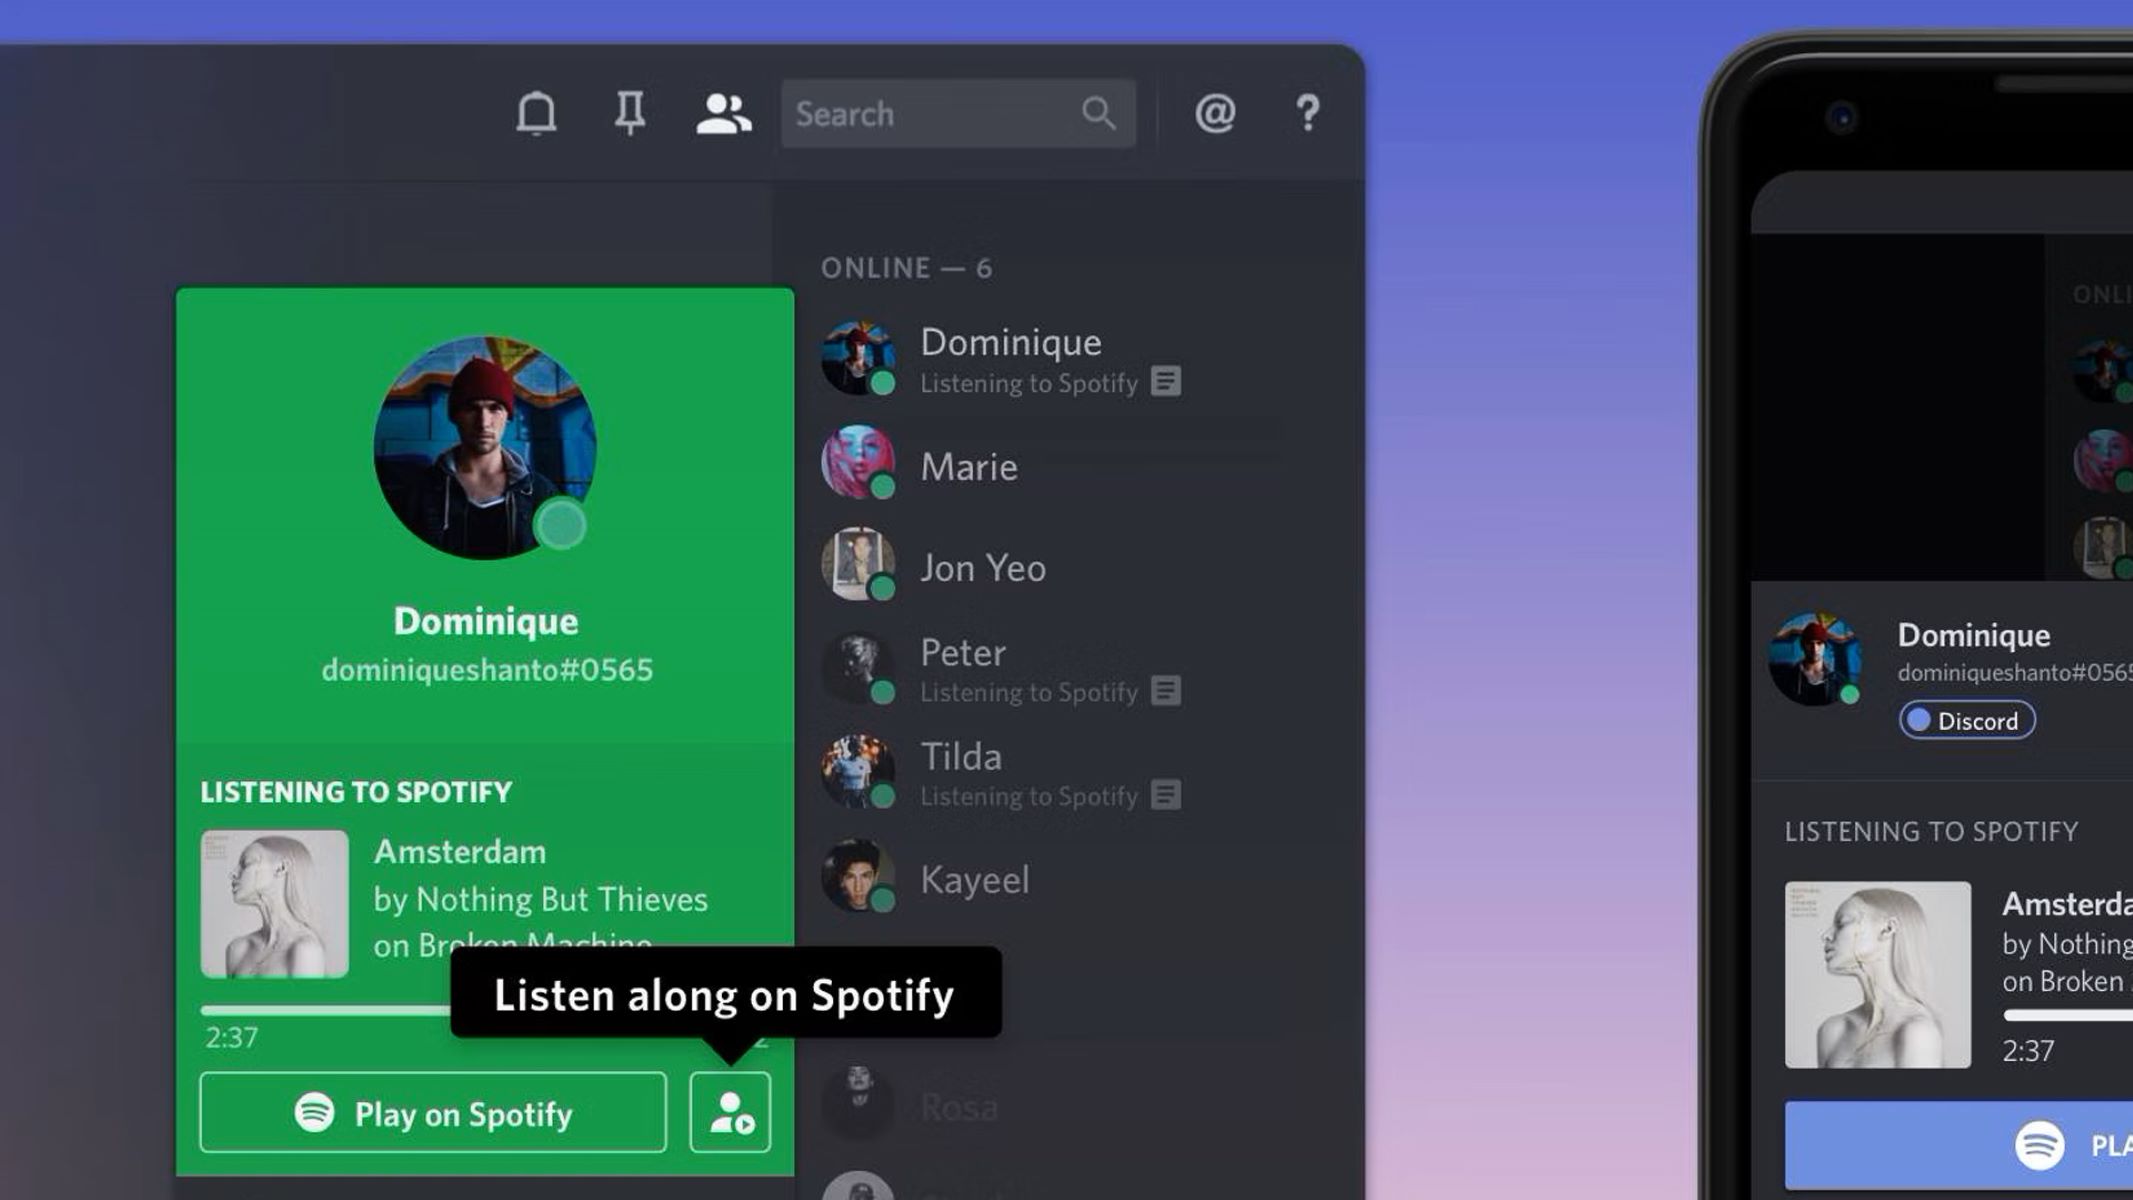
Step 3: Setting Up the Spotify Music Bot
In order to stream music from Spotify on your Discord server, you’ll need to set up a Spotify music bot. This bot will handle the playback of music and ensure a smooth listening experience for all participants in the Spotify listening party.
Here’s how you can set up the Spotify music bot:
- Visit the website ‘bots.discord.pw’, ‘top.gg’, or any other website that offers Discord bots. These platforms provide a wide range of bots that you can add to your server. Use the search bar and look for a Spotify music bot that suits your preferences.
- Once you have selected a bot, click on its profile to view more details. Look for an invitation link or a “Add to Server” button. Click on it to start the process of adding the bot to your Discord server.
- Follow the instructions provided by the bot website to grant necessary permissions to the bot. These permissions are required to access your server and play music from Spotify.
- After granting the permissions, select the server where you want to add the bot. Confirm the action and the bot will be added to your server.
- Make sure that the bot has the necessary permissions to read messages, send messages, and join voice channels. This will allow the bot to interact with users and play music in the voice channels of your Discord server.
Once the Spotify music bot has been added to your server, it will be ready to stream music from Spotify. In the next step, we will create a dedicated music channel where participants can listen to the music together.
Step 4: Creating a Music Channel
To enhance the Spotify listening party experience on your Discord server, it’s important to create a dedicated music channel where participants can gather and listen to the music together. This will ensure that the music playback remains uninterrupted and everyone can enjoy the same tracks simultaneously.
Follow these steps to create a music channel for your Spotify listening party:
- On your Discord server, locate the section where you want to create the music channel. This can be in the general category or a separate category specifically for music-related channels.
- Right-click on the category name or the channel list and select “Create Channel” from the options.
- In the pop-up window that appears, give the music channel an appropriate name. You can get creative with the name and choose something like “Jam Session,” “Music Lounge,” or anything that aligns with the theme of your Spotify listening party.
- Under the “Channel Type” option, select “Voice Channel” so that participants can join and listen to the music.
- Once you’ve filled in the necessary details, click the “Create” button to create the music channel.
Now that the music channel has been created, be sure to give a brief description or set some guidelines for participants. Let them know how the music will be shared, how to control the music bot, and any other important information they need to be aware of.
Encourage participants to join the music channel during the Spotify listening party so that everyone can interact, share their thoughts, and enjoy the music together. The dedicated music channel will enhance the immersive experience and create a sense of unity among the participants.
In the next step, we will start the Spotify listening party and begin playing music through the bot in the music channel.
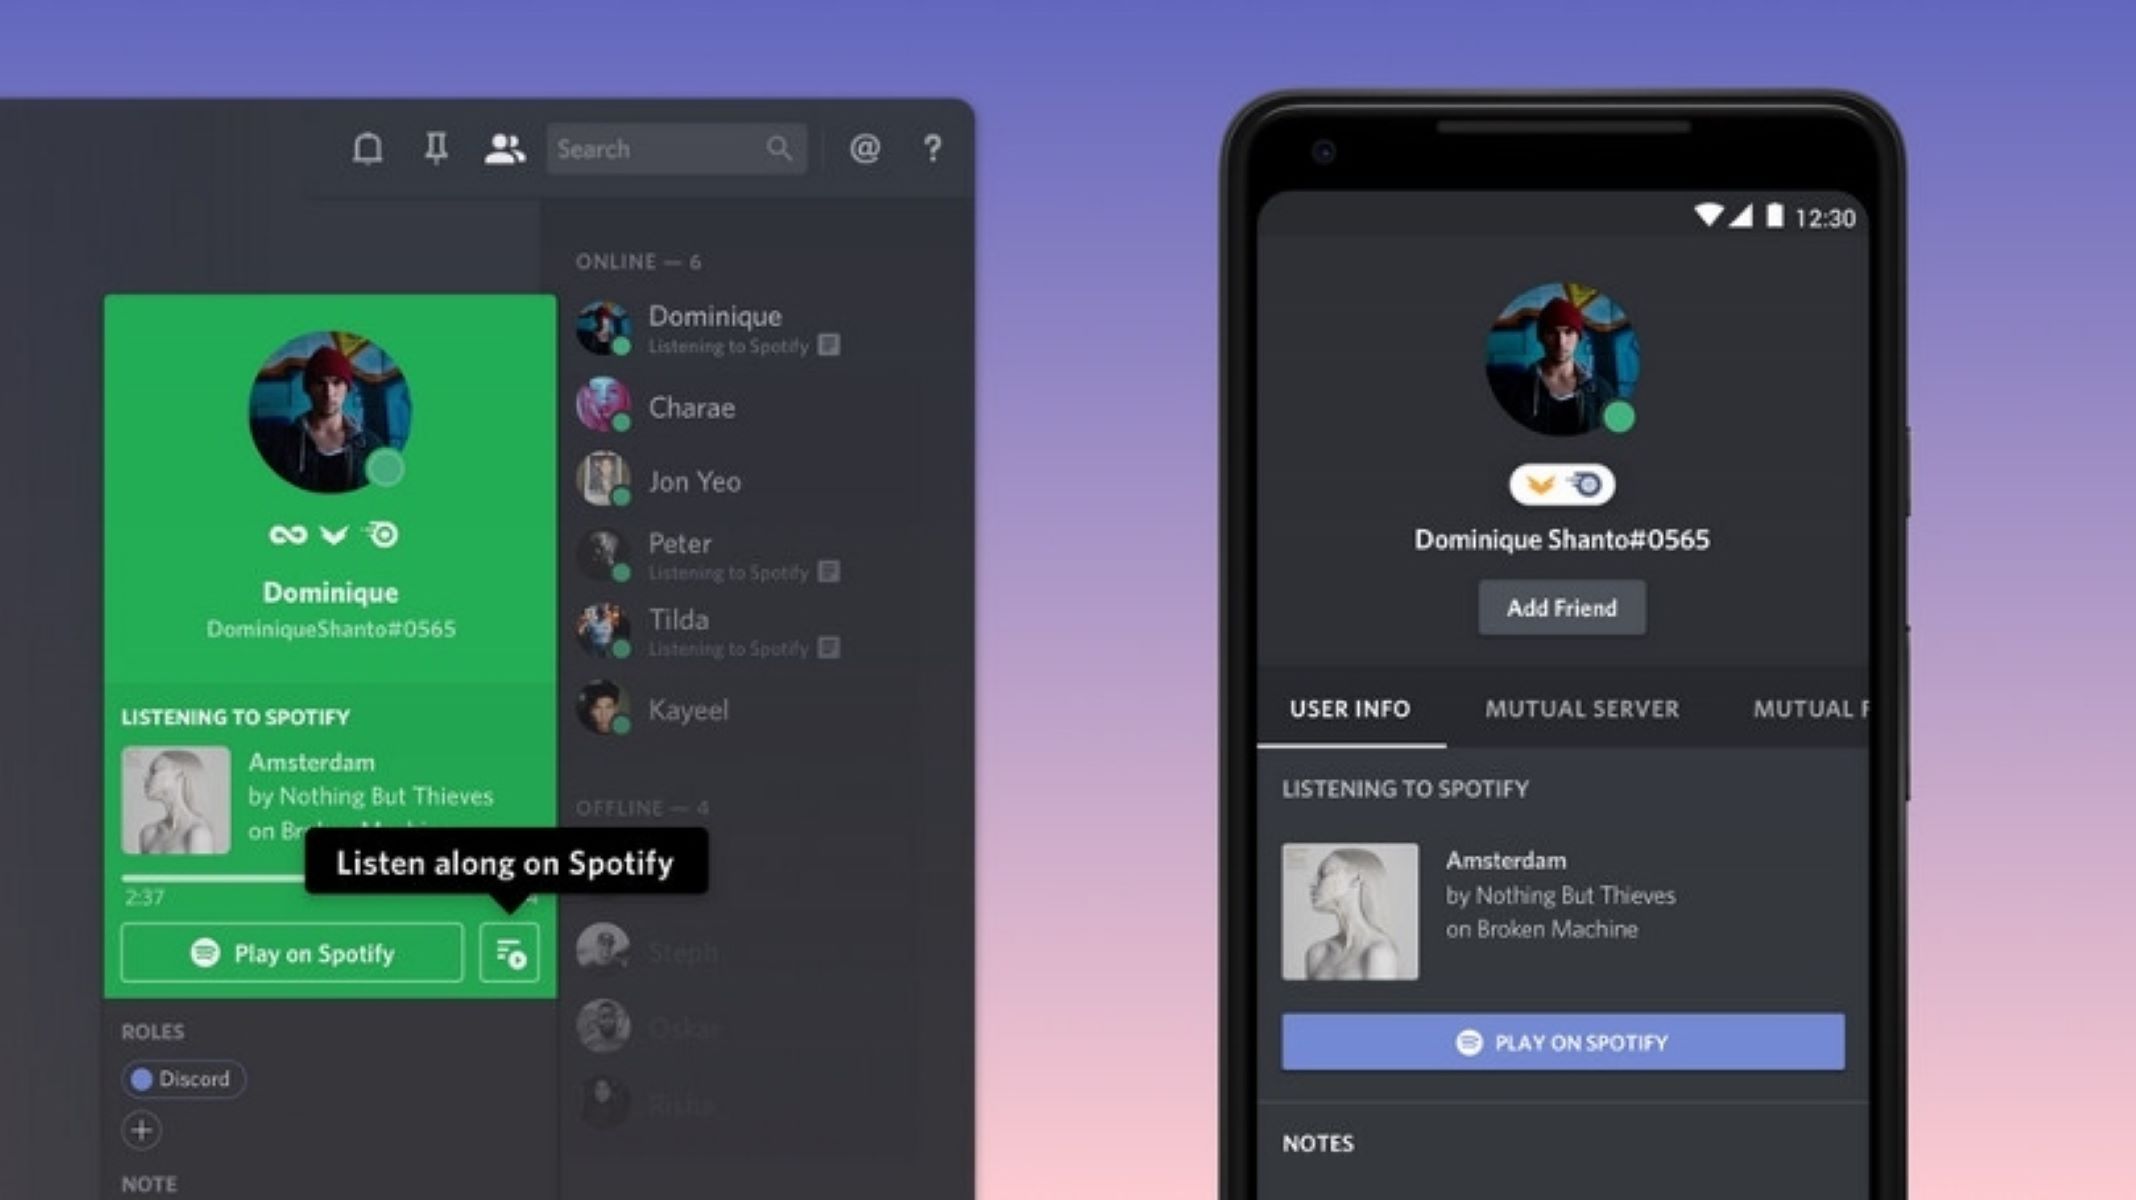
Step 5: Starting the Spotify Listening Party
With your Discord server set up and the music channel ready, it’s time to kick off the Spotify listening party and start playing music for all the participants to enjoy. Follow these steps to get the party started:
- Make sure the Spotify music bot is online and connected to your Discord server. If it’s not already online, check the bot’s documentation or website for instructions on how to start it.
- Join the music channel you created for the listening party by clicking on its name in the voice channels list on your Discord server.
- Once you’re in the music channel, type a command in the chat box to instruct the bot to start playing music. The specific command will depend on the bot you selected, so refer to its documentation for the correct syntax.
- The bot should start playing music from the selected Spotify playlist or track. Participants in the music channel will be able to hear the music and enjoy it together.
- If you want to change the playlist or track during the listening party, enter the corresponding command in the chat box. The bot will follow your instructions and switch to the new content.
Encourage participants to interact in the chat and voice channels, sharing their thoughts, reactions, and song requests. This will foster a sense of community and make the Spotify listening party a more engaging and enjoyable experience for all.
Remember to provide clear instructions on how to control the music bot, such as adjusting the volume, skipping tracks, or pausing the music. This will ensure that everyone can actively participate in shaping the playlist and managing the playback.
As the host, you have the ability to moderate the party and ensure that everyone is respecting the guidelines and enjoying the event. By actively engaging with the participants and responding to their messages, you can create an inclusive and vibrant atmosphere during the Spotify listening party.
In the final step, we will explore ways to control the music bot and enhance the overall experience of the listening party.
Step 6: Controlling the Music Bot
During your Spotify listening party on Discord, it’s important to have control over the music bot to ensure a smooth and enjoyable experience for all participants. Here are some ways to control the music bot:
- Volume Control: Adjust the volume of the music bot to your desired level. Most bots have a command that allows you to increase or decrease the volume. Use this command to make sure the music is audible but not overpowering.
- Skip Tracks: If there’s a song playing that you or the participants don’t want to listen to, you can skip it using the appropriate command for the music bot. This gives you the flexibility to curate the playlist and keep the party going with preferred tracks.
- Pause/Resume: Sometimes you may need to take a break or pause the music for announcements or conversations. Use the pause command to temporarily stop playback and resume when ready.
- Song Requests: Encourage participants to make song requests that can be added to the playlist. Many music bots have a command that allows users to suggest songs, giving them the opportunity to contribute to the party’s music selection.
As the host, it’s important to maintain a balance between controlling the music bot and allowing participants to have a say in what’s being played. Create a collaborative atmosphere where everyone feels involved and their musical preferences are valued.
Additionally, make sure to be responsive to any issues or concerns raised by participants regarding the music bot or the playback in general. Addressing these concerns promptly will contribute to a more enjoyable experience for everyone involved in the Spotify listening party.
Remember, the Spotify music bot is a tool to enhance the music-sharing experience, and it’s up to you as the host to guide and curate the playlist based on the preferences and requests of the participants. Keeping the party lively and inclusive will lead to a memorable time for all.
Congratulations! You have successfully learned how to start a Spotify listening party on Discord and control the music bot. Now it’s time to sit back, relax, and enjoy the shared musical experience with your friends, family, or fellow music enthusiasts.
Conclusion
Hosting a Spotify listening party on Discord is a fantastic way to connect with friends, family, or other music enthusiasts and enjoy a shared musical experience no matter where you are. By following the steps outlined in this guide, you can set up your own Discord server, invite friends, add a Spotify music bot, create a dedicated music channel, and control the music playback.
Discord provides the perfect platform for hosting these listening parties, allowing you to chat, exchange thoughts, and immerse yourself in the music together. The integration of Spotify enhances the experience, as you can curate playlists, share new music discoveries, and listen to your favorite songs in real-time.
Remember to communicate with your participants, provide clear instructions, and encourage interaction throughout the listening party. By fostering a sense of community and inclusivity, you can create a vibrant and enjoyable environment for everyone involved.
So gather your friends, pick a playlist, and start your own Spotify listening party on Discord. Explore new music, share your passion, and create lasting memories as you bond over the power of music.
Enjoy the magic of music, and let the Spotify listening parties on Discord bring you closer together!