Introduction
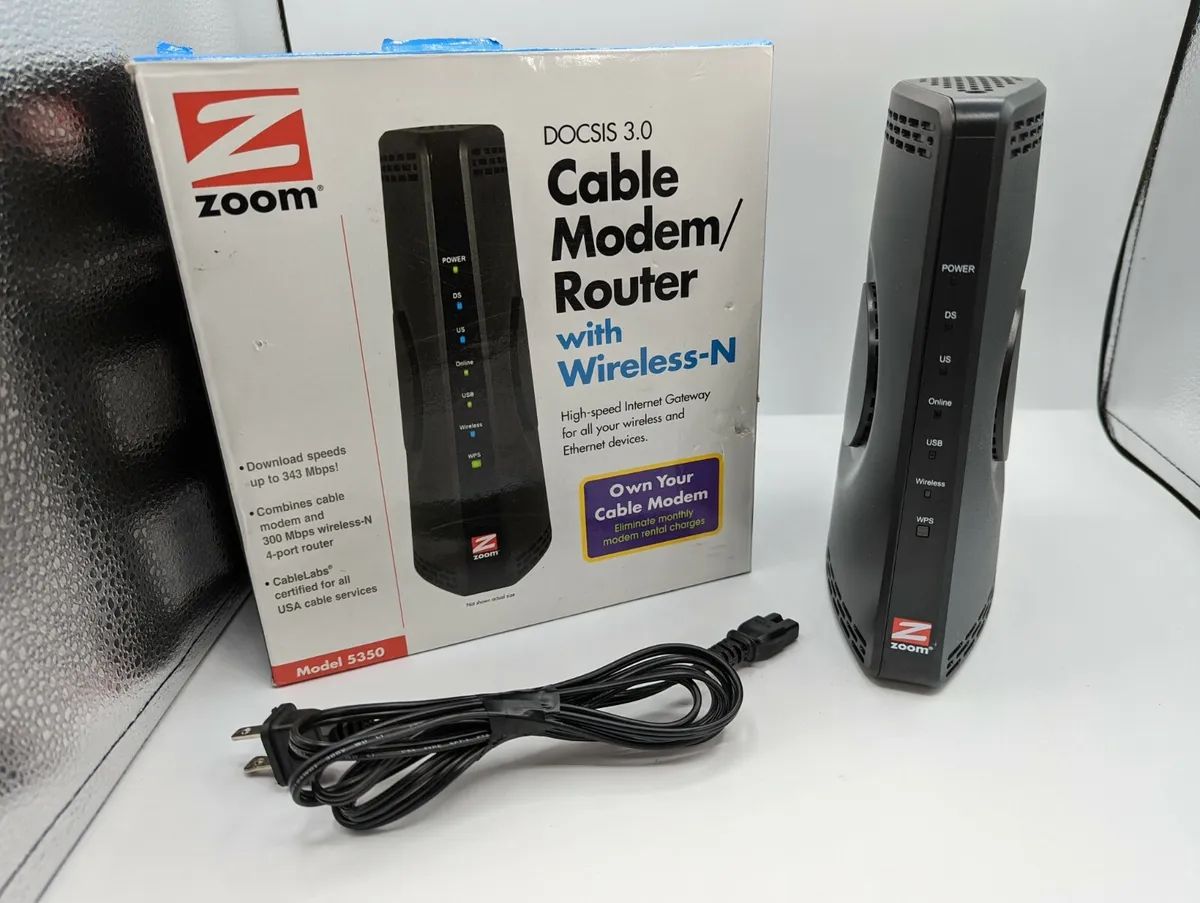
Welcome to our guide on how to set up the Zoom 5350 Wireless Cable Modem for online gaming. In today’s digital age, online gaming is becoming increasingly popular, and having a reliable and fast internet connection is crucial for a smooth gaming experience. The Zoom 5350 Wireless Cable Modem offers high-speed internet connectivity along with advanced features that can optimize your gaming performance.
Setting up the Zoom 5350 Wireless Cable Modem for online gaming is a straightforward process that requires a few simple steps. In this guide, we will walk you through the process from connecting the modem to configuring the necessary settings for an optimal gaming experience.
Before we dive into the setup process, it is important to note that the Zoom 5350 Wireless Cable Modem supports both wired and wireless connections. Therefore, you can easily connect your gaming console or PC using an Ethernet cable or utilize the modem’s wireless capabilities for a wireless gaming experience.
Now, let’s get started with the setup process and unlock the full potential of your online gaming experience with the Zoom 5350 Wireless Cable Modem!
Step 1: Connect the Zoom 5350 Wireless Cable Modem
The first step in setting up the Zoom 5350 Wireless Cable Modem for online gaming is to establish a physical connection between the modem and your internet service provider’s (ISP) network. Here’s how you can do it:
- Locate the coaxial cable that runs from your ISP’s network to your home. This cable is usually installed by the ISP and is connected to a wall outlet.
- Connect one end of the coaxial cable to the “Cable In” port on the back of the Zoom 5350 Wireless Cable Modem.
- Take another Ethernet cable and connect one end to the modem’s “Ethernet” port.
- Connect the other end of the Ethernet cable to your gaming console or PC if you prefer a wired connection. Alternatively, if you wish to use a wireless connection, you can skip this step for now.
- Finally, plug the power adapter into an electrical outlet and connect the other end to the power port on the back of the modem. The modem will power on and start establishing a connection.
Once the modem is powered on and connected to the network, it will go through a series of self-tests and initialization procedures. This process may take a few minutes, so be patient.
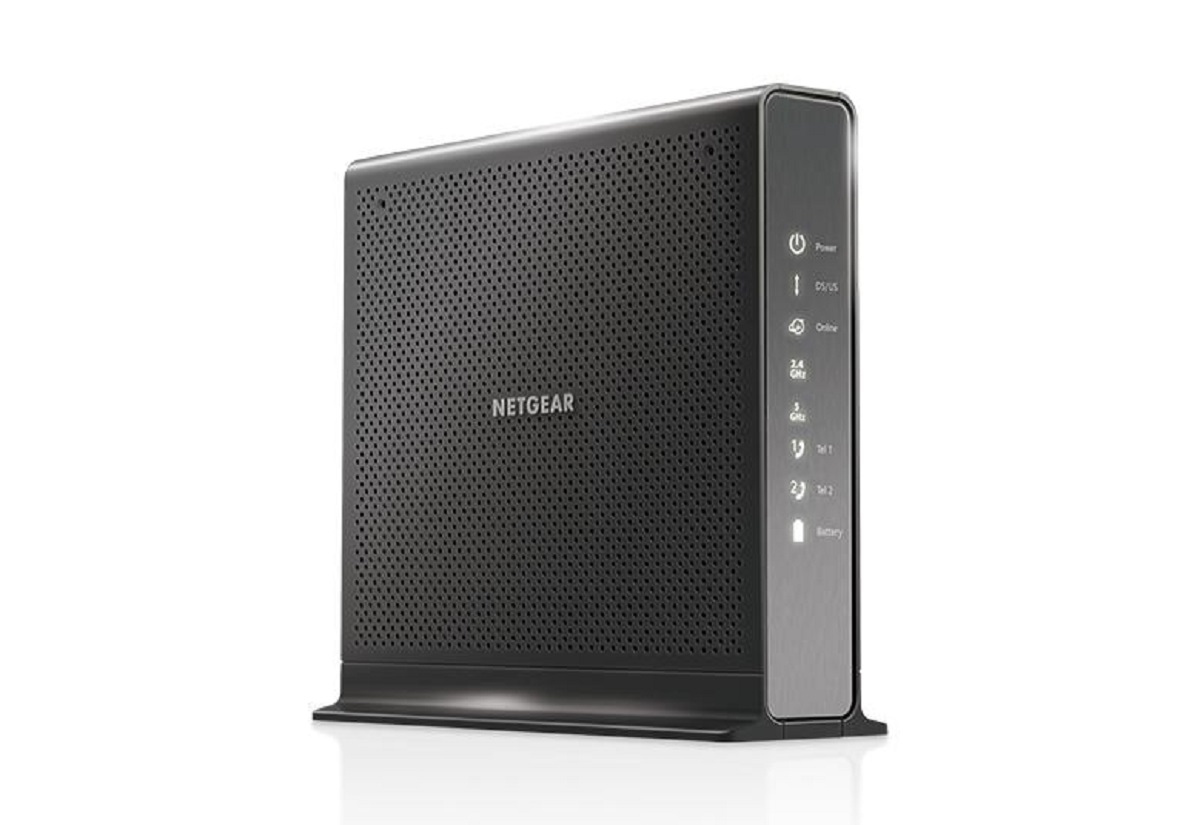
You will know that the modem is successfully connected when you see the “Online” LED light on the front panel of the modem turns solid green or blue, indicating a successful connection to your ISP’s network.
Now that you have successfully connected the Zoom 5350 Wireless Cable Modem to your ISP’s network, you’re ready to move on to the next step in the setup process.
Step 2: Access the Modem Configuration Page
After successfully connecting the Zoom 5350 Wireless Cable Modem to your ISP’s network, the next step is to access the modem’s configuration page. This page allows you to manage and customize various settings to optimize your gaming experience. Here’s how you can access the modem configuration page:
- Open your preferred web browser on your connected gaming console or PC.
- In the address bar, type in the default IP address for the Zoom 5350 Wireless Cable Modem. The default IP address is usually “192.168.0.1”.
- Press Enter or Return on your keyboard to navigate to the modem configuration page.
- You will be prompted to enter a username and password to log in to the modem’s administration interface. By default, the username is usually “admin”, and the password is “password”. However, it is recommended to refer to the modem’s user manual or contact your ISP for the correct login credentials.
- Once you have entered the correct login credentials, click on the “Login” or “Sign In” button to proceed.
After successfully logging in, you will have access to the modem’s configuration page. This page contains various settings and options that you can customize to enhance your gaming experience.
It is important to note that accessing the modem configuration page may vary depending on the specific model of the Zoom 5350 Wireless Cable Modem or your ISP’s policies. If you encounter any issues or difficulties accessing the configuration page, it is recommended to consult the modem’s user manual or contact your ISP for assistance.
Now that you have successfully accessed the modem configuration page, you can proceed to the next step to configure the wireless settings for optimal gaming performance.
Step 3: Configure the Wireless Settings
Configuring the wireless settings on the Zoom 5350 Wireless Cable Modem is essential if you intend to use a wireless connection for your gaming console or PC. By optimizing these settings, you can ensure a stable and fast wireless connection for uninterrupted gaming sessions. Here’s how you can configure the wireless settings:
- On the modem configuration page, navigate to the wireless settings section.
- Locate the SSID (Service Set Identifier) field and enter a unique name for your wireless network. It is recommended to choose a name that is easy to remember and does not disclose any personal information.
- Choose a suitable security type for your wireless network. WPA2-PSK (AES) is the most secure option and is highly recommended for gaming purposes.
- Create a strong and unique password for your wireless network. This password will be required for any devices to connect to your network.
- Adjust the wireless channel to minimize interference from neighboring networks. You can choose an automatic channel selection option or manually select a specific channel with less interference.
- Save the changes and apply the new wireless settings.
Once you have configured the wireless settings, your Zoom 5350 Wireless Cable Modem will broadcast the configured wireless network. You can now connect your gaming console or PC to the wireless network using the SSID and password you set up.
It is worth mentioning that the Zoom 5350 Wireless Cable Modem supports both 2.4 GHz and 5 GHz frequencies. If your gaming device supports the 5 GHz band, it is advisable to connect to the 5 GHz network for better performance and reduced interference.
With the wireless settings properly configured, you can now move on to the next step to enable gaming mode on the modem.
Step 4: Enable Gaming Mode on the Modem
To further optimize your online gaming experience, the Zoom 5350 Wireless Cable Modem offers a gaming mode feature. Enabling gaming mode prioritizes network traffic related to your gaming console or PC, reducing latency and ensuring a smoother gameplay experience. Follow these steps to enable gaming mode:
- Access the modem configuration page using the steps mentioned in the previous section.
- Navigate to the gaming mode or QoS (Quality of Service) settings section.
- Look for an option to enable gaming mode or prioritize gaming traffic.
- Enable the gaming mode feature.
- Save the changes and apply the settings.
Enabling gaming mode on your Zoom 5350 Wireless Cable Modem ensures that your gaming console or PC gets the necessary bandwidth and network resources needed for online gaming. This helps to reduce lag and provides a more stable connection, resulting in a better gaming experience.
It is worth noting that the gaming mode feature may vary depending on the specific model of the Zoom 5350 Wireless Cable Modem. The modem’s user manual or your ISP’s support resources can provide more details on how to enable gaming mode specific to your model.
With gaming mode enabled, you are one step closer to enjoying lag-free and uninterrupted online gaming sessions. However, there are additional steps you can take to improve gaming performance, such as port forwarding and configuring Quality of Service (QoS) settings, which we will cover in the following sections.
Step 5: Port Forwarding for Better Gaming Performance
Port forwarding is a crucial step in optimizing your gaming performance, especially for games that require a direct connection between your gaming device and the game server. By forwarding specific ports on your Zoom 5350 Wireless Cable Modem, you ensure that the necessary game data can flow freely between your device and the server, reducing latency and improving gameplay. Follow these steps to set up port forwarding:
- Access the modem configuration page as described in the previous steps.
- Navigate to the port forwarding or virtual servers section, which may be located under advanced settings or advanced configuration.
- Click on the “Add” or “Create” button to create a new port forwarding rule.
- Enter the necessary information, such as the port range and the IP address of your gaming console or PC.
- Specify whether the port forwarding rule should apply to TCP (Transmission Control Protocol) or UDP (User Datagram Protocol) or both.
- Save the changes and apply the settings.
It is important to note that the specific ports to forward will depend on the game or application you are trying to optimize. Game developers often provide documentation or support resources that specify which ports need to be forwarded for their game. Make sure to refer to these resources to ensure the correct port forwarding configuration.
Additionally, some games may require additional steps, such as enabling UPnP (Universal Plug and Play) or DMZ (Demilitarized Zone) hosting on the modem. Again, refer to the game’s documentation or support resources for the specific requirements.
By properly configuring port forwarding on your Zoom 5350 Wireless Cable Modem, you create a direct and efficient connection for your gaming device, improving online gaming performance.
With port forwarding set up, you’re now ready to optimize your gaming experience even further by configuring Quality of Service (QoS) settings, which we will explore in the next section.
Step 6: Set Up Quality of Service (QoS) Settings
Quality of Service (QoS) settings allow you to prioritize and allocate bandwidth to specific applications or devices, ensuring a smooth online gaming experience even when other devices on your network are using the internet. By configuring QoS settings on your Zoom 5350 Wireless Cable Modem, you can minimize latency and reduce the chances of experiencing lag during gameplay. Follow these steps to set up QoS:
- Access the modem configuration page using the steps mentioned earlier.
- Navigate to the QoS or bandwidth settings section.
- Enable QoS or traffic shaping if it is not already enabled.
- Specify the priority level for your gaming console or PC. You can usually select “Highest” or assign a percentage of the total bandwidth.
- If your modem allows for it, you can prioritize specific ports or protocols associated with your gaming applications.
- Save the changes and apply the settings.
With QoS settings configured, your Zoom 5350 Wireless Cable Modem will allocate a higher priority and dedicated bandwidth to your gaming device, ensuring that it receives optimal network resources for online gaming.
It is important to note that some modems implement QoS differently, and available options may vary. Consult the modem’s user manual or contact your ISP for specific guidance on setting up QoS with your Zoom 5350 Wireless Cable Modem.
By setting up QoS, you can enjoy a seamless and lag-free gaming experience, even when other devices on your network are using the internet.
Now that you have optimized your Zoom 5350 Wireless Cable Modem’s settings, including enabling gaming mode, port forwarding, and configuring QoS, you are ready to connect your gaming console or PC to the modem and test your online gaming connection. We will cover this in the next step.
Step 7: Connect Your Gaming Console or PC to the Modem
Now that you have completed the necessary configuration steps, it’s time to connect your gaming console or PC to the Zoom 5350 Wireless Cable Modem to enjoy your online gaming experience. Follow these steps to establish the connection:
- Ensure that your gaming console or PC is powered on and ready to connect to the internet.
- If you prefer a wired connection, connect one end of an Ethernet cable to the Ethernet port on your gaming console or PC.
- Connect the other end of the Ethernet cable to one of the available Ethernet ports on the back of the Zoom 5350 Wireless Cable Modem.
- For a wireless connection, make sure your gaming console or PC has Wi-Fi capabilities enabled.
- Scan for available Wi-Fi networks and select the SSID (network name) you configured on the modem during the wireless settings setup.
- If applicable, enter the password you set during the wireless settings configuration.
- Once connected, your gaming console or PC will establish a connection with the Zoom 5350 Wireless Cable Modem and your network.
It is important to ensure that the connection between your gaming console or PC and the modem is strong and stable. If you experience any connectivity issues, try moving the devices closer to each other or adjusting the wireless channel settings on the modem to minimize interference.
With the connection established, you are now ready to test your online gaming connection and enjoy an enhanced gaming experience with optimized settings on the Zoom 5350 Wireless Cable Modem.
In the next and final step, we will walk you through testing your online gaming connection to ensure everything is working as intended.
Step 8: Test Your Online Gaming Connection
After setting up and configuring the Zoom 5350 Wireless Cable Modem for online gaming, it’s crucial to test your connection to ensure that everything is working optimally. Here are some steps to perform a thorough online gaming connection test:
- Launch your preferred online gaming platform or game on your connected gaming console or PC.
- Select a multiplayer game or mode that you frequently play or want to test.
- Join a game lobby or start a match to begin your online gaming session.
- Monitor your gaming experience for any signs of lag, latency, or connection issues. Pay attention to factors such as delays in commands, stuttering gameplay, or sudden disconnections.
- Observe the in-game latency or ping indicators to check the stability of your connection.
- If you encounter significant issues, try disconnecting other devices from your network or temporarily disabling bandwidth-intensive applications running in the background.
- Make adjustments to your modem’s gaming mode, QoS settings, or wireless configurations if necessary, based on your observations during the test.
- Repeat the online gaming connection test to assess the impact of any changes made and ensure the desired improvements have been achieved.
Performing regular online gaming connection tests allows you to identify any potential issues and fine-tune your modem’s settings accordingly. By monitoring and optimizing your online gaming experience, you can enjoy uninterrupted gameplay and a competitive edge in your gaming sessions.
Keep in mind that while configuring your Zoom 5350 Wireless Cable Modem can significantly enhance your online gaming experience, external factors such as internet service provider (ISP) limitations or server-side issues can still impact your connection. If issues persist, it’s worth contacting your ISP’s support or referring to the game’s troubleshooting resources for further assistance.
With your online gaming connection successfully tested and optimized, you are now ready to fully enjoy your favorite games and experience the benefits of a reliable and high-performance network connection with the Zoom 5350 Wireless Cable Modem.
Conclusion
Setting up the Zoom 5350 Wireless Cable Modem for online gaming can greatly improve your gaming experience by providing a stable and fast internet connection. Throughout the steps outlined in this guide, we have covered everything from connecting the modem to configuring wireless settings, enabling gaming mode, setting up port forwarding, configuring QoS settings, and testing your online gaming connection.
By following these steps, you have optimized your Zoom 5350 Wireless Cable Modem for online gaming, ensuring reduced latency, minimal lag, and a smoother gameplay experience. The key takeaways from this guide include:
- Connecting the modem to your ISP’s network and accessing the modem configuration page.
- Configuring wireless settings for a reliable and secure wireless connection.
- Enabling gaming mode to prioritize gaming traffic and reduce latency.
- Setting up port forwarding to establish a direct connection with game servers.
- Configuring QoS settings to allocate bandwidth and prioritize gaming traffic.
- Testing your online gaming connection to ensure optimal performance.
Remember that while these steps are designed to enhance your online gaming experience, external factors such as your internet service provider’s network, server limitations, and your device’s hardware capabilities can also impact your gaming performance.
If you encounter any difficulties during the setup process or experience ongoing issues with your online gaming connection, don’t hesitate to consult the Zoom 5350 Wireless Cable Modem’s user manual or contact your ISP’s customer support for further assistance.
With your Zoom 5350 Wireless Cable Modem configured for online gaming, you can now enjoy seamless, lag-free gameplay, giving you the edge you need to dominate the virtual battlefield and maximize your gaming potential.


