Introduction
Raid 0, also known as a striped volume, is a popular data storage setup that combines two or more solid-state drives (SSDs) to increase performance and capacity. By distributing data across multiple drives, Raid 0 can significantly enhance read and write speeds, making it an ideal choice for users seeking improved performance in tasks like video editing, gaming, and large file transfers.
Setting up Raid 0 with two SSDs involves several steps, including checking for compatible drives, backing up data, configuring the BIOS, creating the RAID array, installing the operating system, and configuring the RAID controller software. While the process may seem daunting, following a clear and concise guide can help you navigate through it successfully.
In this article, we will guide you through the step-by-step process of setting up Raid 0 with two SSDs. Whether you’re a seasoned tech enthusiast or a beginner looking to level up your storage performance, our detailed instructions will help you achieve your goal.
Before diving into the setup process, it’s important to note that Raid 0 does not provide any data redundancy. Unlike other RAID levels, such as Raid 1 or Raid 5, Raid 0 does not offer data backup or fault tolerance. In the event of a drive failure, all data stored in the Raid 0 array may be lost. Therefore, it’s crucial to regularly back up your important files to an external storage device or cloud-based backup solution.
Now that we’ve given you a brief introduction to Raid 0 and highlighted its benefits and limitations, let’s move on to the preparation phase, where we’ll ensure compatibility and safeguard your data before proceeding with the Raid 0 setup process.
What is RAID 0?
RAID (Redundant Array of Independent Disks) 0 is a configuration that combines two or more SSDs (Solid-State Drives) into a single logical volume. Unlike other RAID levels that focus on data redundancy and fault tolerance, RAID 0 prioritizes performance and improved data transfer speeds.
In a RAID 0 setup, data is divided or “striped” across multiple drives. Each drive in the array stores a portion of the data, and when accessed, the data is read or written to/from all drives simultaneously. This parallel processing enhances the read and write speeds, leading to significant performance gains.
The speed increase in RAID 0 is a result of the workload being distributed across multiple drives. As a result, the overall bandwidth and input/output (I/O) operations per second (IOPS) are greatly improved. This makes RAID 0 an ideal choice for applications that benefit from high-speed data processing, such as video editing, 3D rendering, and database operations.
However, it’s important to understand that RAID 0 does not offer any data redundancy or fault tolerance. Unlike other RAID levels (such as RAID 1 or RAID 5), RAID 0 does not mirror data or provide any form of data protection. If one drive fails in a RAID 0 array, all data stored across the entire array may be lost.
Another consideration when using RAID 0 is that the usable capacity of the array is equal to the sum of the capacities of all the drives in the array. For example, if you have two 500GB SSDs in a RAID 0 array, the total usable capacity will be 1TB. This may be a trade-off for users who prioritize storage capacity over performance.
In summary, RAID 0 offers significant performance improvements by distributing data across multiple drives and allowing for parallel processing. However, it lacks data redundancy and should be used with caution, keeping in mind the increased risk of data loss. If speed and performance are your top priorities and data redundancy is not a concern, RAID 0 can be a valuable storage configuration for your system.
Benefits of RAID 0
RAID 0 offers several advantages that make it an attractive option for users seeking improved storage performance. Let’s explore some of the key benefits of RAID 0:
- Enhanced Read and Write Speeds: RAID 0 uses striping to distribute data across multiple drives, allowing for parallel processing. This leads to significantly faster read and write speeds compared to using a single drive. Applications that require high-speed access to data, such as video editing or gaming, can benefit greatly from RAID 0.
- Increased Storage Capacity: By combining multiple drives into a RAID 0 array, you can increase the total storage capacity. The usable capacity of a RAID 0 array is equal to the sum of the capacities of the individual drives. This makes RAID 0 an excellent choice for users who need both improved performance and increased storage space.
- Cost-Effective: RAID 0 does not require any additional hardware, such as a RAID controller. It can be easily set up using the built-in functionality of most modern motherboards. This makes RAID 0 a cost-effective solution for users looking to maximize performance without investing in expensive RAID hardware.
- Simple Configuration: Setting up RAID 0 is relatively straightforward, especially with the intuitive user interface provided by most motherboard BIOS. The configuration process involves selecting the drives, defining the RAID array, and configuring the necessary BIOS settings. With a little bit of technical knowledge, users can have their RAID 0 array up and running in no time.
- Optimized Performance for Workload Intensive Tasks: RAID 0 excels in scenarios where large files need to be processed quickly. This makes it an excellent choice for professionals working with large datasets, such as video editors, photographers, and graphic designers. The improved performance provided by RAID 0 allows for faster rendering times, smoother playback, and responsive multitasking.
While RAID 0 offers impressive speed and performance benefits, it’s important to consider the trade-offs. Unlike other RAID levels, RAID 0 does not provide data redundancy or fault tolerance. Therefore, it’s crucial to regularly back up your data to prevent data loss in the event of a drive failure.
Overall, RAID 0 is a powerful storage solution that can significantly enhance performance, increase storage capacity, and optimize workflow for demanding tasks. By understanding its benefits and limitations, users can make an informed decision about whether RAID 0 is the right choice for their specific needs.
Preparing for RAID 0 Setup
Before diving into the RAID 0 setup process, it’s important to ensure that you have everything you need and take necessary precautions to safeguard your data. Here are the essential steps to prepare for RAID 0 setup:
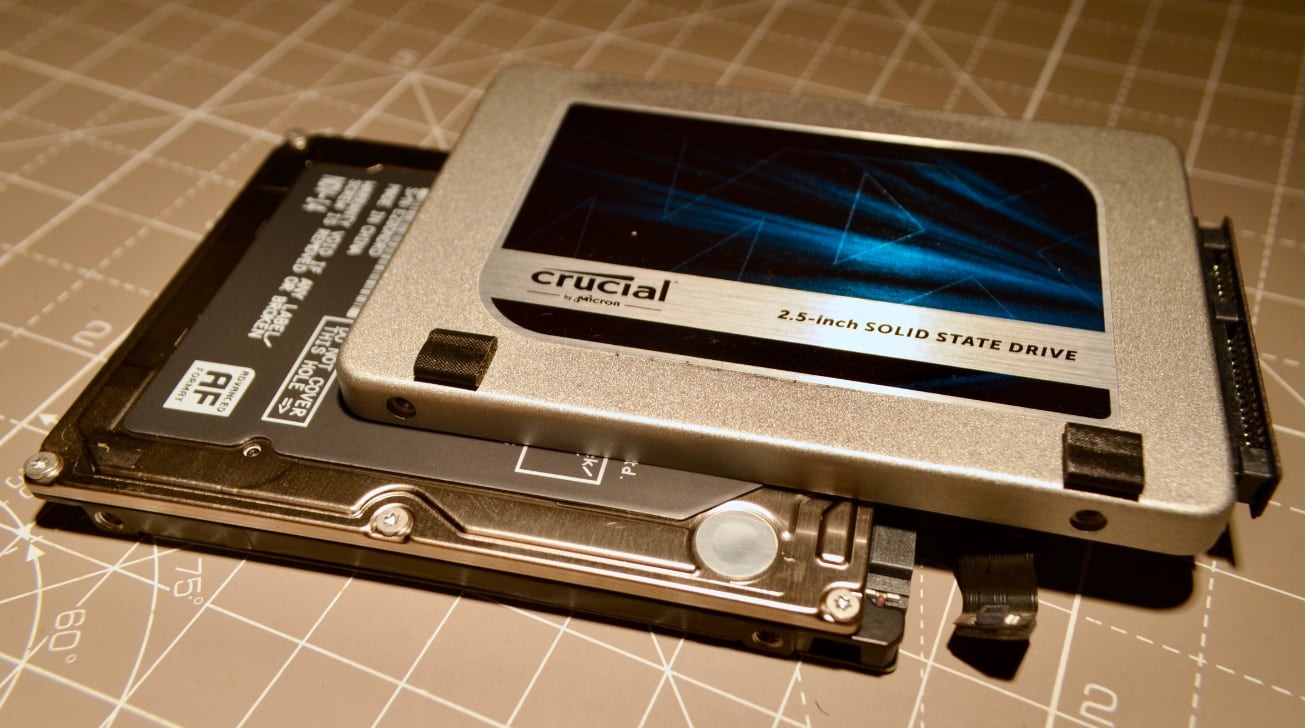
- Check Compatible SSDs: Start by checking the compatibility of your SSDs with RAID 0. Ensure that both drives are of the same make and model, as this will help optimize their performance within the array. It’s also recommended to use SSDs with similar capacities to make the most efficient use of storage space.
- Backup Your Data: Since RAID 0 does not offer data redundancy, it’s crucial to back up all your important files before proceeding with the setup. This ensures that you have a copy of your data in case of any unforeseen circumstances, such as drive failures or accidental data loss during the setup process.
- Configure BIOS Settings: RAID 0 requires specific BIOS settings to recognize and configure the array properly. Access your system’s BIOS settings by pressing a designated key (usually F2 or Del) during the boot process. Enable RAID mode in the BIOS and save the changes before exiting.
- Prepare RAID Drivers: To ensure a smooth installation process, it’s recommended to download and prepare the required RAID drivers for your motherboard model. These drivers will be needed during the operating system installation to detect and configure the RAID array properly.
- Disconnect External Drives: To avoid accidentally formatting or modifying the wrong drive during the setup process, disconnect any external drives or USB devices that are connected to your system. This helps prevent any unintended data loss or confusion during the installation procedure.
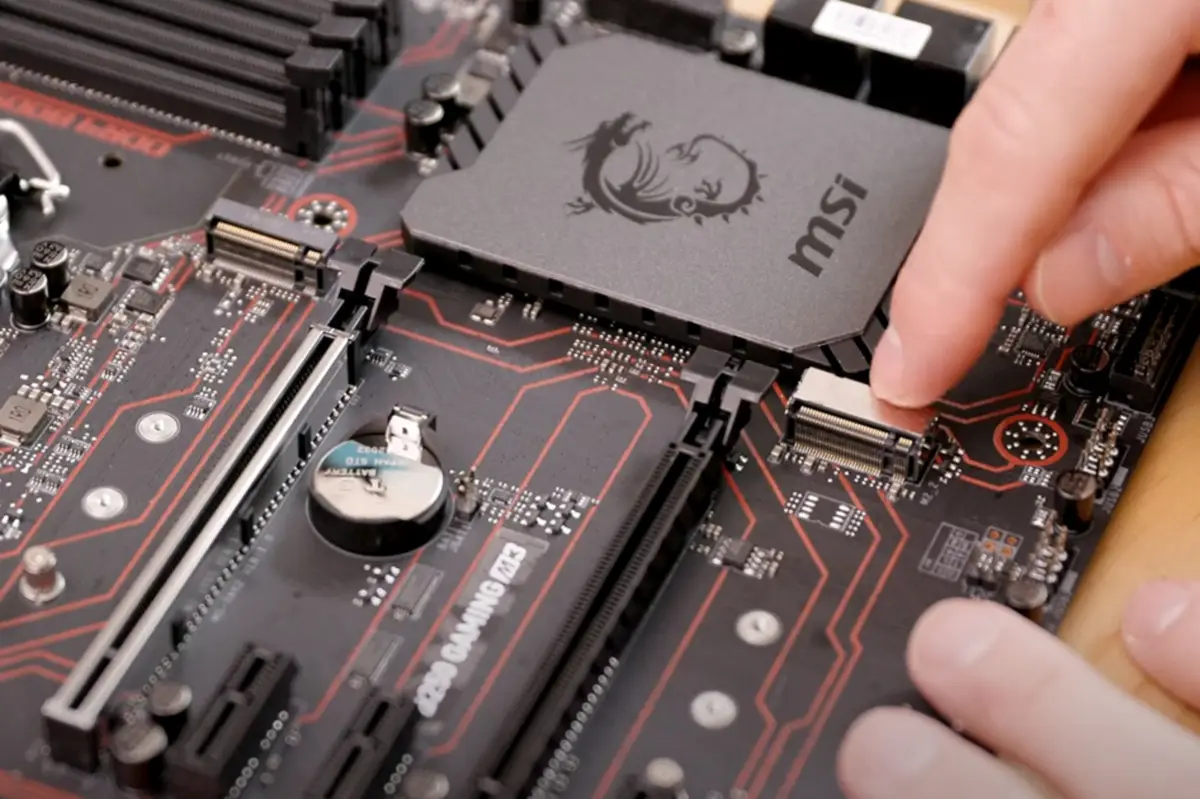
- Gather Necessary Tools: Prepare any tools you may need during the setup, such as a screwdriver for mounting the SSDs in your computer case. Ensure you have a secure and static-free environment to minimize the risk of damaging your hardware during the installation process.
- Read the Motherboard Manual: Familiarize yourself with the motherboard manual or documentation related to RAID configuration specific to your motherboard model. Each motherboard manufacturer may have different instructions or nuances regarding RAID setup, so it’s important to follow the proper guidelines provided by your specific motherboard manufacturer.
By thoroughly preparing for the RAID 0 setup, you can minimize potential issues and ensure a smooth and successful configuration process. Take the time to follow these steps carefully to ensure a stable and optimized RAID 0 setup for your system.
Step 1: Checking Compatible SSDs
Before setting up RAID 0, it’s important to ensure that the SSDs you plan to use are compatible with this configuration. Checking compatibility will help optimize the performance and stability of your RAID array. Follow these steps to check the compatibility of your SSDs:
- Research Your SSD Model: Start by researching the make and model of your SSDs. Visit the manufacturer’s website or refer to the product documentation to gather information about the specific model’s compatibility with RAID 0.
- Check RAID Support: Look for information about RAID support in the specifications of your SSDs. Ensure that the SSDs explicitly state support for RAID configurations, including RAID 0. This information can usually be found in the SSD’s product manual or on the manufacturer’s website.
- Match Drive Capacities: For optimal performance and efficient use of storage space, it’s recommended to use SSDs with similar capacities in a RAID 0 array. This allows for equal distribution of data across the drives. If the capacities of your SSDs are significantly different, the array’s total capacity will be limited by the size of the smallest drive.
- Consider the Same Make and Model: Using SSDs from the same make and model is generally recommended to ensure compatibility and optimize performance. Mixing different brands or models might introduce compatibility issues or limit the performance potential of the RAID 0 setup.
- Review User Experiences: Look for user experiences or forum discussions related to using your specific SSDs in a RAID 0 configuration. This can provide valuable insights into compatibility, performance, and any known issues or limitations. Engaging in discussion with other users who have already set up similar RAID arrays can help you make an informed decision.
By thoroughly checking the compatibility of your SSDs, you can ensure a stable and optimized RAID 0 setup. Having compatible SSDs will help maximize the performance benefits and prevent any potential issues during the setup process. Take the time to research the specifications and user experiences to ensure a smooth RAID 0 configuration.
Step 2: Backing up your Data
Before proceeding with setting up RAID 0, it is crucial to back up all your important data. RAID 0 does not provide any data redundancy, meaning that in the event of a drive failure, all data stored in the RAID 0 array could be lost. By backing up your data, you can prevent the risk of permanent data loss during the setup process. Follow these steps to back up your data:
- Create a Data Backup Plan: Determine what data needs to be backed up and develop a comprehensive backup plan. This includes identifying important files, folders, and applications that you want to safeguard. Consider organizing your data and prioritizing the most critical files to be backed up first.
- Choose a Backup Method: There are several backup methods available, such as external hard drives, network-attached storage (NAS), or cloud-based backup services. Evaluate the options and choose the method that best suits your needs in terms of capacity, reliability, convenience, and cost.
- Transfer Data to Backup Location: Connect your backup device or initiate the backup process according to the chosen method. Copy or transfer the identified files and folders to the backup location. Ensure a secure and reliable connection to minimize the risk of data loss or corruption during the transfer.
- Verify Backup Integrity: After the backup process is complete, verify the integrity of your backup files. Check that the copied files are accessible and can be restored if needed. Perform periodic checks to ensure the backup remains up to date and error-free.
- Consider Cloud Backup Services: Utilizing cloud backup services can provide an additional layer of protection for your data. Cloud services offer off-site storage with redundancy and regular backups, minimizing the risk of data loss due to local hardware failures or disasters.
- Regularly Update Backups: Data is continually changing, so it’s important to keep your backups up to date. Establish a schedule for regular backups and adhere to it. This will ensure that your most recent files and modifications are always backed up and easily accessible.
By backing up your data, you can mitigate the risk of data loss during the RAID 0 setup process. Taking the time to create a comprehensive backup plan and implementing it before proceeding with the setup will provide peace of mind and protect your valuable data.
Step 3: Setting up BIOS
Configuring the BIOS correctly is crucial for a successful RAID 0 setup. The BIOS settings control how your computer interacts with hardware components, including the SSDs you intend to use in the RAID array. Follow these steps to set up the BIOS for RAID 0:
- Access the BIOS: Restart your computer and press the appropriate key during the startup process to access the BIOS. The key to enter the BIOS varies depending on the motherboard manufacturer, but it is commonly Del, F2, or F10.
- Enable RAID Mode: Once inside the BIOS, navigate to the storage or SATA settings section. Look for an option related to RAID or disk mode. Set the SATA mode to RAID. This will enable RAID functionality for your drives.
- Save and Exit: After making the changes, save the settings and exit the BIOS. This will restart your computer and enable the RAID functionality in the BIOS. Make sure to save the changes before exiting to ensure they take effect.
- Bind the Drives: Depending on your motherboard, there may be an option to “bind” the drives together in the BIOS. This step is not always necessary, as the binding process can differ between motherboard manufacturers. Consult your motherboard’s manual or online documentation for guidance on how to bind the SSDs together.
- Configure Boot Order: While in the BIOS, navigate to the boot settings and ensure that your desired boot drive (usually the RAID array) is set as the primary boot device. This will ensure that your computer boots correctly after the RAID 0 configuration is complete.
- Save Changes and Exit: Once all the necessary settings have been adjusted, save the changes and exit the BIOS. This will restart your computer with the updated BIOS settings in place.
It’s worth noting that the exact steps and menu names may vary slightly depending on your motherboard model and BIOS version. Consult your motherboard’s manual or online documentation for specific instructions tailored to your system’s configuration.
By correctly setting up the BIOS for RAID 0, you establish the foundation for a successful RAID array configuration. Ensuring that the RAID mode is enabled and configuring the necessary settings will allow your computer to recognize and utilize the RAID array effectively.
Step 4: Configuring RAID Array
With the BIOS properly set up for RAID, you can now configure the RAID array itself. This step involves using the RAID controller software provided by your motherboard manufacturer. Follow these steps to configure the RAID array:
- Access the RAID Controller Software: Restart your computer and look for the key combination displayed on the screen to access the RAID controller software. It is usually a combination of keys, such as Ctrl+I, Ctrl+R, or Ctrl+M. Press the appropriate key combination to enter the RAID controller software interface.
- Create the RAID Array: Once inside the RAID controller software, look for an option to create a new RAID array or a similar setting. Select this option to begin the process of configuring the RAID array.
- Choose Striping Size: During the RAID array setup, you will have the option to select the striping size. The striping size determines the amount of data written to each drive before moving to the next drive. The optimal striping size may vary depending on your specific use case, but it is typically recommended to choose a smaller striping size for general use.
- Select the Drives: In the RAID controller software, select the SSDs that you want to include in the RAID 0 array. Typically, you will see a list of the available drives, and you can select the ones you want to use by highlighting them and confirming the selection.
- Choose RAID Level: In this step, select the RAID level you want to configure, which is RAID 0 in this case. Confirm the selection to proceed.
- Confirm the RAID Configuration: Review the RAID configuration summary, which will display the selected drives, striping size, and RAID level. Ensure that the information is correct before confirming the configuration.
- Save the RAID Configuration: Once you have confirmed the RAID configuration, save the changes. The RAID controller software will prompt you to confirm the creation of the RAID array, after which the configuration process will begin. This may take a few moments, depending on the size and number of SSDs in the array. Once completed, you will receive a message indicating the successful creation of the RAID 0 array.
After configuring the RAID array, your computer will recognize the RAID 0 setup as a single disk drive. The next step is to install the operating system and any necessary drivers on the RAID array, which will be covered in the following step.
By properly configuring the RAID array using the RAID controller software, you ensure that the SSDs are working together effectively and taking full advantage of RAID 0’s benefits.
Step 5: Installing Operating System
With the RAID array successfully configured, the next step is to install the operating system (OS) on the RAID 0 array. Follow these steps to install the OS:
- Prepare Installation Media: Obtain the installation media for the operating system you wish to install. This could be a bootable USB drive or a DVD. Ensure that the installation media contains the necessary drivers, especially RAID drivers, or have them available on a separate USB drive.
- Boot from Installation Media: Insert the installation media into your computer and restart it. During the boot process, access the boot menu by pressing the designated key (typically F11 or F12) and choose the option that corresponds to the installation media. This will initiate the operating system installation process.
- Load RAID Drivers (if required): If prompted, load the RAID drivers specific to your motherboard. This step ensures that the OS installer recognizes the RAID 0 array. Browse for the RAID drivers (located on the USB drive or DVD) when prompted, and select the appropriate drivers for your motherboard.
- Follow the OS Installation Process: Proceed with the installation of the operating system as you would for a standard installation. Select the RAID 0 array as the destination drive for the OS installation. Follow any on-screen instructions for entering product keys, setting up user accounts, and choosing additional options as needed.
- Complete the OS Installation: Once the installation process is complete, follow any remaining prompts to finalize the installation and allow the computer to restart. Ensure that the RAID array remains selected as the primary boot device in the BIOS to ensure the computer boots from the RAID 0 array correctly.
- Verify OS Installation: After the computer restarts, the operating system should load from the RAID 0 array. Verify that the OS installation was successful and that the RAID array is functioning correctly. Check that the system recognizes the full capacity of the RAID 0 array and that the performance is improved, reflecting the benefits of RAID 0.
During the OS installation, ensure that you choose the correct RAID 0 array and that the installation is performed on the array. Installing the OS on the RAID 0 array enables you to fully utilize the improved performance of the RAID configuration.
By following these steps, you can successfully install the operating system on the RAID 0 array and complete the setup process.
Step 6: Verifying RAID Array
After installing the operating system on the RAID 0 array, it’s crucial to verify that the RAID array is functioning correctly and providing the expected performance benefits. Here are the steps to verify the RAID array:
- Monitor Drive Health: Install a drive monitoring utility or use your motherboard’s built-in RAID monitoring software to monitor the health of your RAID array. Regularly check the status of the drives to ensure they are operating correctly and no errors or warnings are reported.
- Perform Disk Speed Tests: Use benchmarking software to test the read and write speeds of your RAID array. Compare the results to the expected performance improvements of RAID 0. Higher speeds indicate that the RAID array is operating optimally and delivering the desired performance boost.
- Test File Transfers: Transfer large files to and from the RAID array to test its performance in real-world scenarios. This will help validate that the array is delivering the enhanced data transfer speeds expected from a RAID 0 configuration.
- Ensure Proper Disk Alignment: Verify that the partitions or volumes on the RAID array are properly aligned to the stripe size of the RAID 0 configuration. Misaligned partitions can negatively impact performance. Use disk alignment tools to check and adjust if necessary.
- Continuously Monitor Backups: If you have implemented a backup system, ensure that regular backups are being performed and that your important data is being successfully backed up to an external drive or cloud-based storage. This provides an extra layer of protection in case of drive failure or data corruption.
- Monitor Storage Capacity: Keep an eye on the available storage capacity of the RAID array. As files are added or modified, make sure the array has sufficient free space to prevent performance degradation. Regularly remove unnecessary files or consider expanding the array if additional capacity is required.
By verifying the RAID array, you can ensure that it is performing as expected and providing the intended benefits. Regular monitoring and testing will help detect any issues or anomalies early on, allowing you to address them promptly and maintain the optimal performance of your RAID 0 array.
Step 7: Configuring RAID Controller Software
Configuring the RAID controller software provides additional customization options and allows you to fine-tune the settings of your RAID 0 array. Follow these steps to configure the RAID controller software:
- Access the RAID Controller Software: Restart your computer and look for the key combination displayed on the screen to access the RAID controller software. This is typically a combination of keys like Ctrl+I, Ctrl+R, or Ctrl+M. Press the appropriate key combination to enter the RAID controller software interface.
- Explore Configuration Options: Once inside the RAID controller software, navigate through the various configuration options available. These options may include adjusting striping size, enabling write caching, setting up hot spare drives, or configuring email notifications for drive failures.
- Adjust Striping Size: Striping size determines the amount of data written to each drive before moving to the next drive. Depending on your specific needs, you may choose to adjust the striping size. Keep in mind that a smaller striping size can improve performance for smaller files, while a larger striping size may optimize performance for larger files.
- Enable Write Caching (if desired): Write caching temporarily stores data in the system’s memory before writing it to the RAID array. Enabling write caching can enhance write performance. However, it is important to ensure that your system has a reliable power supply and backup solutions in place to prevent data loss in case of a power outage.
- Configure Hot Spare Drives (optional): Hot spare drives are standby drives that automatically replace a failed drive in the RAID array. If you have additional drives available, you can designate them as hot spares within the RAID controller software. This ensures that the array remains operational even if a drive fails.
- Enable Email Notifications (if available): Some RAID controller software allows you to configure email notifications for drive failures or other critical events. This feature can be helpful in promptly addressing potential issues and taking necessary action to ensure the stability and reliability of your RAID 0 array.
- Save and Exit: Once you have made the desired configuration adjustments, save the changes and exit the RAID controller software. This will update the configuration settings of your RAID 0 array and ensure that they are applied going forward.
The exact configuration options and interface of the RAID controller software may vary depending on your motherboard manufacturer and model. Refer to the documentation provided by your motherboard manufacturer for specific guidance on the features and configuration settings available for your RAID controller software.
By configuring the RAID controller software, you can fine-tune the settings of your RAID 0 array and optimize its performance according to your specific needs and requirements.
Conclusion
Setting up RAID 0 with two SSDs can significantly enhance your system’s performance and increase storage capacity. By following the step-by-step process outlined in this guide, you can successfully configure a RAID 0 array and enjoy improved read and write speeds for tasks such as video editing, gaming, and large file transfers.
Throughout the setup process, it is crucial to ensure compatibility between your SSDs, back up your data, configure the BIOS correctly, and utilize the RAID controller software provided by your motherboard. By checking compatibility, you ensure that the SSDs will work optimally in the RAID 0 array. Backing up your data helps prevent potential data loss during the setup process. Configuring the BIOS and RAID controller software correctly ensures that your system recognizes and utilizes the RAID array effectively.
It is essential to remember that RAID 0 does not provide data redundancy or fault tolerance, so regular backups are crucial to protect your data. Additionally, be aware that the performance benefits gained from RAID 0 come at the expense of data security and loss protection. It is a trade-off that should be carefully considered based on your specific requirements and priorities.
By monitoring the health of your RAID array, performing regular disk speed tests, and ensuring proper disk alignment, you can maintain optimal performance and identify any issues early on. Continuously monitoring backups, storage capacity, and the array’s overall functionality provides an extra layer of protection and allows for early intervention if problems arise.
With the RAID 0 array successfully set up, you can enjoy the enhanced performance and increased storage capacity that it provides. Whether you are a professional requiring faster data processing or a gaming enthusiast seeking improved game load times, RAID 0 can significantly improve your overall computing experience.
Keep in mind that RAID 0 is not suitable for every use case, and its limitations should be considered. Prioritize data backups, consider the potential risks, and evaluate whether the performance benefits outweigh the absence of data redundancy for your specific needs.
By following the steps outlined in this guide and making informed decisions along the way, you can confidently set up RAID 0 with two SSDs and experience the benefits of improved performance and increased storage capacity in your system.