Introduction
Setting up a static IP address can provide numerous benefits for individuals and businesses alike. In this digital age, where constant connectivity is essential, having a stable and reliable internet connection is crucial. A static IP address allows you to have a fixed, permanent IP that remains the same each time you connect to the internet. Unlike dynamic IP addresses that change every time you restart your router or reconnect to the network, a static IP provides consistency and control over your online presence.
Whether you are a regular internet user or a small business owner, understanding how to set up a static IP address can elevate your online experience and streamline your operations. In the following sections, we will explore what a static IP address is and the benefits it offers. We will then dive into the step-by-step process of setting up a static IP, ensuring that you can easily configure your network to enjoy the advantages of a static IP address.
With a static IP address, you can take advantage of services that require a fixed IP, such as remote access, hosting websites or servers, and establishing virtual private network (VPN) connections. Additionally, a static IP allows you to have better control over network security and monitoring, simplifying tasks like port forwarding and remote management.
While setting up a static IP might seem daunting for those without technical expertise, rest assured that the process can be simplified through this step-by-step guide. By the end of this article, you will have the knowledge and confidence to set up a static IP address on your own, ensuring a seamless and reliable internet connection.
What is a Static IP?
A static IP (Internet Protocol) address is a fixed, unchanging address assigned to a device or network. Unlike dynamic IP addresses, which are assigned by the Internet Service Provider (ISP) and can change periodically, a static IP remains constant, allowing for consistent access and identification.
Every device connected to the internet is assigned an IP address, which serves as its unique identifier on the network. This address is used to route data traffic between different devices and networks. With a static IP, the assigned address is manually configured and remains the same over time, providing a predictable and consistent connection.
Static IP addresses are typically used for specific purposes, such as hosting websites, running servers, or remotely accessing devices or networks. They are especially useful for businesses that require constant connectivity and reliable access to their network resources from anywhere in the world.
One of the key characteristics of a static IP is that it does not change, regardless of network reboots or device restarts. This stability ensures that services running on the network are always accessible using a fixed address. Unlike dynamic IP addresses, which can cause frequent interruptions and require reconfiguration of services whenever an IP address changes, a static IP saves time and effort by eliminating the need for constant updating.
Furthermore, a static IP address lets you have greater control over your online presence and network security. By assigning a specific IP to your server or network device, you can easily manage and monitor incoming and outgoing traffic, set up firewall rules, and establish secure remote connections. This enhanced control is particularly beneficial for businesses that handle sensitive data or require secure external access to their systems.
While static IP addresses come with numerous advantages, it’s important to note that they may require additional costs from your internet service provider. Some ISPs charge a monthly fee for allocating static IP addresses, so it’s essential to check with your provider or review the pricing plans before deciding to go static.
Why Use a Static IP?
Using a static IP address offers a range of benefits and advantages for both individuals and businesses. Let’s explore some of the key reasons why you might consider using a static IP:
1. Remote Access:
A static IP address allows you to easily access your devices or network remotely. Whether you need to connect to your office computer while traveling or manage your home security system from afar, a static IP ensures consistent and reliable access to your devices or network resources.
2. Hosting Services:
For businesses or individuals hosting websites, servers, or other online services, a static IP is essential. With a fixed IP address, your website or server can be easily accessed by users, as the address remains the same regardless of network changes.
3. VPN Connectivity:
Setting up a virtual private network (VPN) is more seamless with a static IP address. A VPN allows secure and private communication between different networks or devices over the internet. A static IP ensures stable and uninterrupted VPN connections, enhancing security and privacy for remote workers or businesses with multiple locations.
4. Enhanced Security:
Using a static IP address provides better control over network security. With a known IP address, you can easily configure firewall rules, restrict access to specific IP ranges, and monitor incoming and outgoing traffic. This level of control helps in protecting your network from unauthorized access and potential security threats.
5. Simplifies Device Management:
A static IP simplifies device management by providing a consistent and predictable IP address for each device on the network. This makes it easier to configure port forwarding, manage device settings, and identify and troubleshoot connectivity issues.
While dynamic IP addresses are sufficient for most home users, utilizing a static IP address offers a higher level of control, stability, and convenience. It is particularly advantageous for businesses that rely on consistent connectivity, secure remote access, and efficient management of network resources.
Now that we understand the benefits of using a static IP, let’s explore the step-by-step process of setting up a static IP address for your network or devices.
Steps to Set Up a Static IP
Setting up a static IP address on your router or device may vary depending on your specific network equipment. However, the following steps provide a general overview of the process:
Step 1: Determine if your internet service provider allows static IP addresses
Check with your internet service provider (ISP) to see if they offer static IP addresses and if there are any additional fees associated with obtaining one. Some ISPs may offer static IPs as part of their business plans, while others may require an extra subscription.
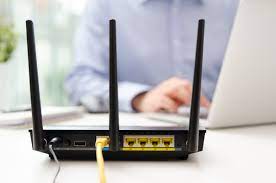
Step 2: Log in to your router’s admin page
Open a web browser and enter your router’s IP address in the address bar. This IP address is usually printed on the router itself or mentioned in the router’s user manual. Enter the administrator credentials to log in to the router’s admin page.
Step 3: Find the WAN/Internet settings section
Navigate to the WAN or Internet settings section of your router’s admin page. The location may vary depending on the router model and firmware. Look for options related to IP address assignment or connection type.
Step 4: Change the IP address assignment type to manual/static
Once you have located the WAN/Internet settings section, look for the IP address assignment or connection type setting. Change the assignment type to manual or static, as opposed to dynamic or automatic.
Step 5: Enter the static IP address details
Enter the specific IP address, subnet mask, gateway, and DNS server details provided by your ISP. These details should be issued to you when obtaining a static IP. Make sure to enter the information accurately to ensure a successful connection.
Step 6: Save the settings and restart the router
After entering the static IP details, save the settings on your router’s admin page. Once saved, restart the router to apply the new settings. This will ensure that the router assigns and uses the static IP address for your network.
Step 7: Confirm the setup is successful
Once the router has restarted, check the network settings on your devices to verify the successful setup of the static IP address. Ensure that the entered IP address, subnet mask, gateway, and DNS server details are correctly reflected in the device’s network settings.
It is important to note that the specific steps may vary depending on the router brand, model, and firmware version. Refer to the router’s user manual or online documentation for detailed instructions tailored to your specific router.
By following these general steps, you can successfully set up a static IP address for your network or devices. Enjoy the benefits of a stable, predictable, and controllable internet connection.
Step 1: Determine if your internet service provider allows static IP addresses
Before diving into the process of setting up a static IP address, it’s crucial to determine whether your internet service provider (ISP) allows static IP addresses as part of their service offerings. Not all ISPs provide this option, and some may charge additional fees for static IP allocation.
Here are a few steps to help you confirm whether your ISP supports static IP addresses:
1. Check your ISP’s website:
Visit your ISP’s official website and navigate to their residential or business internet service pages. Look for any mentions of static IP addresses, additional features, or premium plans that offer static IP allocation. The website should provide details about the availability and cost of static IPs.
2. Contact your ISP directly:
If you can’t find specific information on the website, reach out to your ISP’s customer service or technical support team. Contact them via phone, email, or online chat and inquire about their policies regarding static IP addresses. They will be able to provide you with accurate information about the availability and any associated fees.
3. Review your ISP’s terms and conditions or contract:
Go through the terms and conditions or service agreement you received from your ISP when you signed up for their internet service. Look for any clauses or sections that mention static IP addresses. These documents may outline the availability, pricing, and limitations associated with static IP allocation.
4. Research online forums or communities:
Explore online forums, discussion boards, or communities where users share their experiences with various ISPs. Look for threads or discussions related to static IP addresses and see what other customers have encountered when trying to obtain a static IP from your ISP. This can give you additional insights into the policies and procedures of different ISPs.
By conducting these steps, you will gain a clear understanding of whether your ISP supports static IP addresses and how to proceed with obtaining one. Remember to inquire about any fees or additional requirements, as these may vary depending on the ISP’s policies.
Once you have confirmed that your ISP allows static IP addresses and have gathered the necessary information, you can proceed to the next steps in setting up a static IP address for your network or devices.
Step 2: Log in to your router’s admin page
To set up a static IP address, you need to access your router’s administrative page. This web-based interface allows you to modify various settings on your router, including IP address configuration. Here’s how you can log in to your router’s admin page:
1. Identify your router’s IP address:
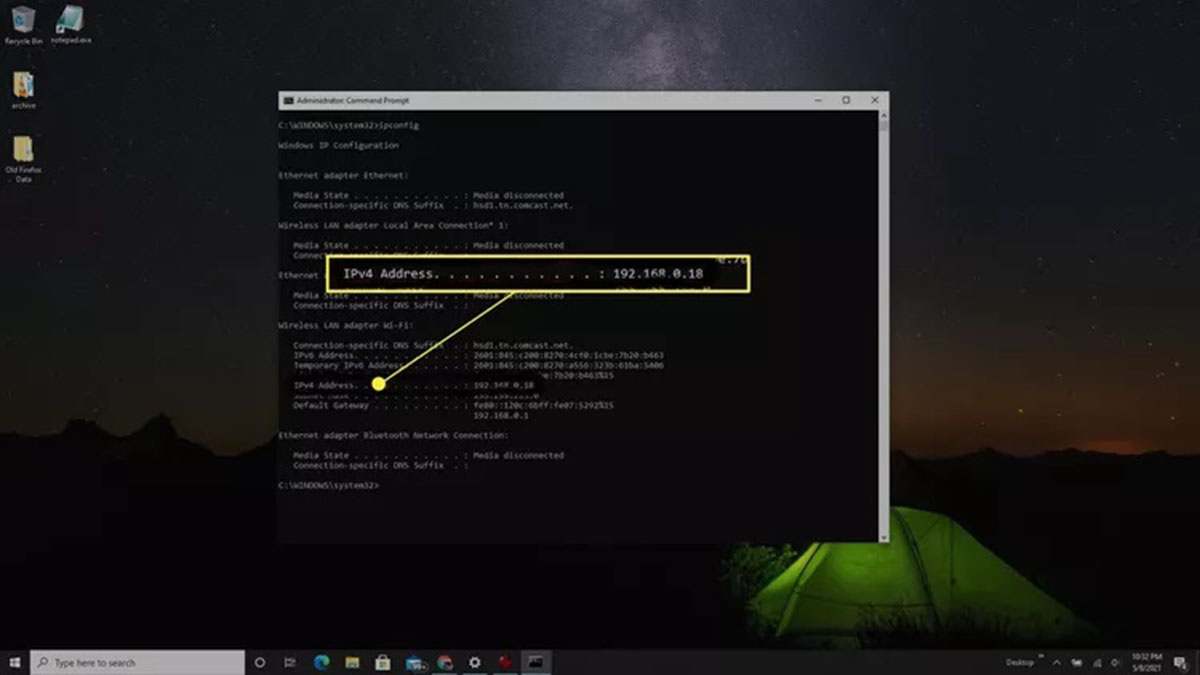
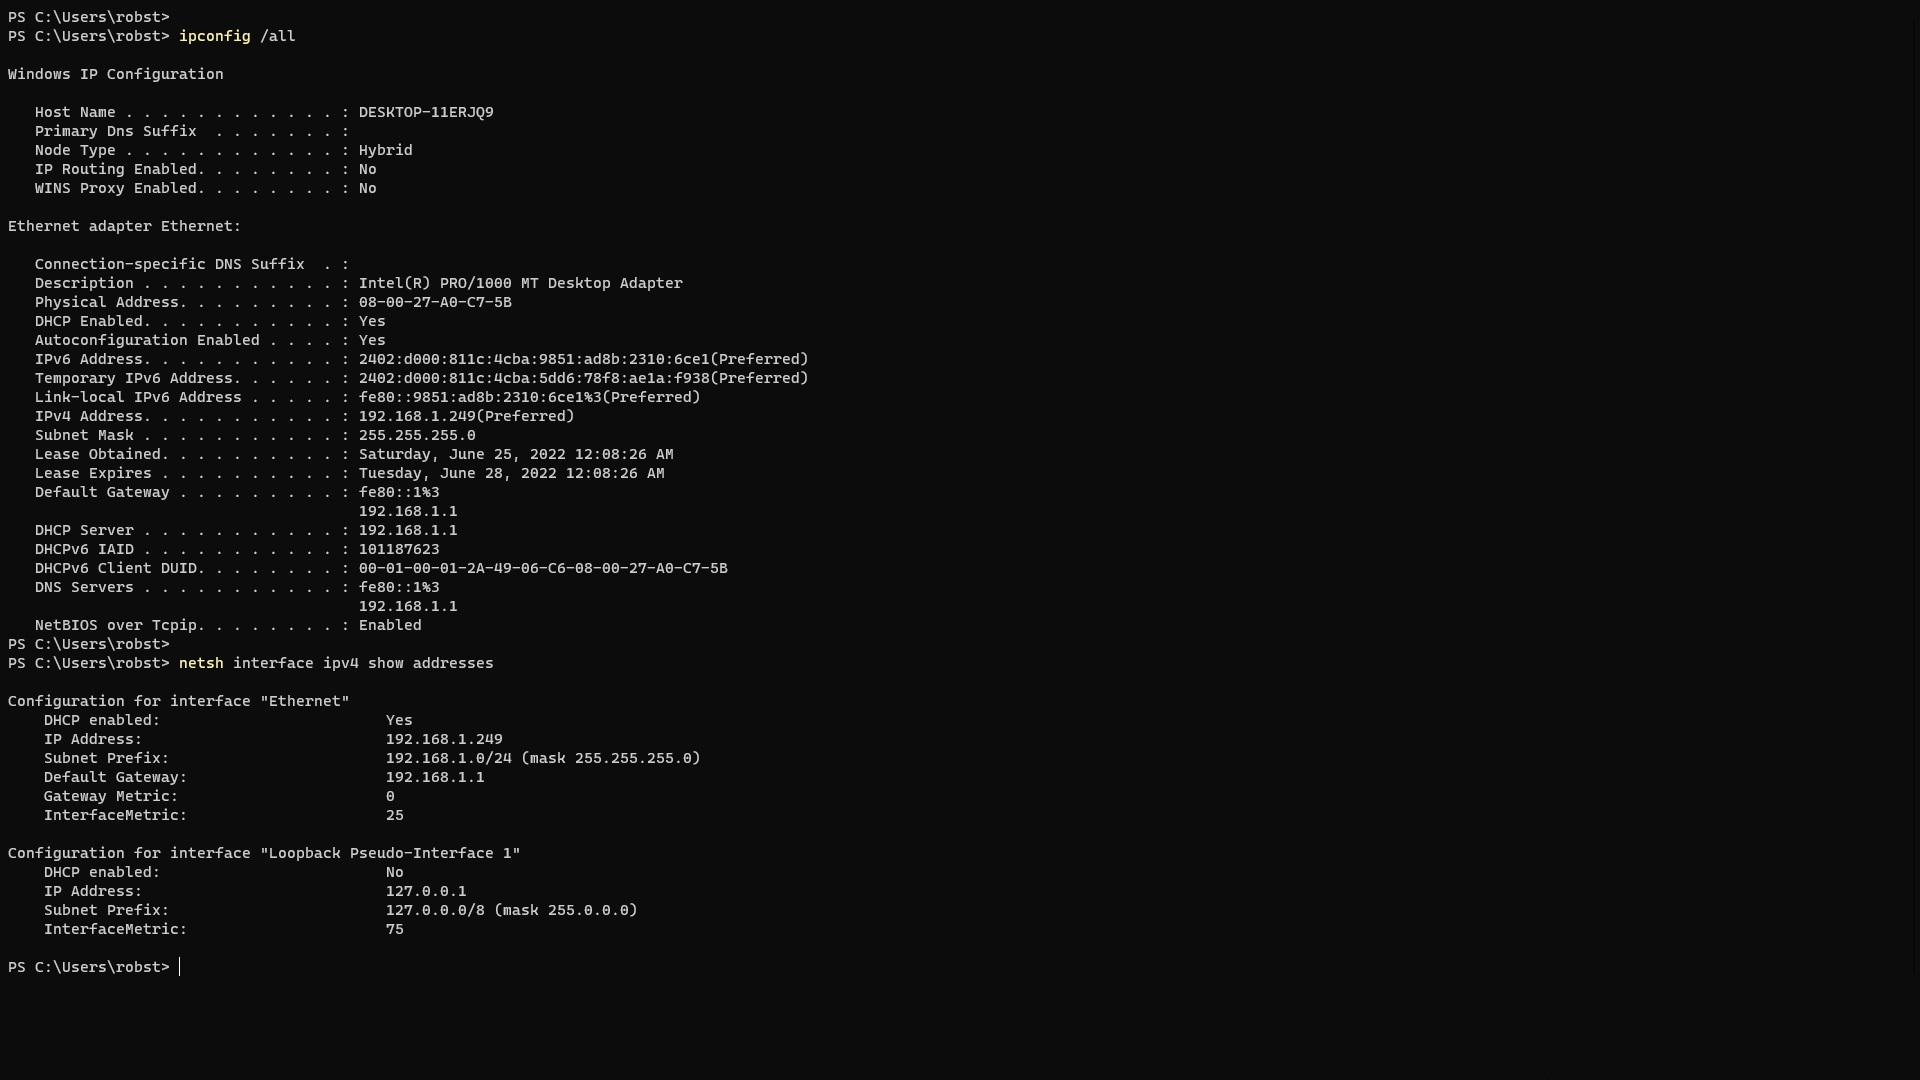
Most routers have a default IP address, such as 192.168.0.1 or 192.168.1.1, that you can use to access the admin page. Look for a label on the router itself or refer to the router’s user manual to find this information. Alternatively, you can check your computer’s network settings to find the default gateway IP address. This IP address usually corresponds to your router’s admin page.
2. Open a web browser:
Launch a web browser on a computer or device that is connected to the same network as your router. It can be a desktop computer, laptop, or even a smartphone or tablet.
3. Enter the router’s IP address:
Type the router’s IP address into the address bar of your browser. Make sure to enter the IP address accurately. For example, if your router’s IP address is 192.168.0.1, you would type “http://192.168.0.1” in the browser’s address bar.
4. Press Enter:
Press Enter or click the “Go” button to navigate to the router’s admin page. The browser will establish a connection to your router using the specified IP address.
5. Enter login credentials:
Depending on your router model and settings, you may be prompted to enter a username and password to log in. By default, many routers use “admin” as the username and “password” or a blank field as the password. However, it’s important to note that some routers may have different default login credentials, so refer to your router’s documentation or check with your ISP if you are unsure.
6. Access the admin page:
Once you have entered the correct login credentials, you will gain access to your router’s admin page. This page provides access to various settings and configurations that allow you to modify and customize your network settings.
Note that routers from different manufacturers may have slightly different interfaces and layouts for their admin pages. However, most routers have a similar structure and should allow you to access the necessary settings for configuring a static IP address.
By successfully logging in to your router’s admin page, you are now ready to proceed to the next steps and configure your network for a static IP address.
Step 3: Find the WAN/Internet settings section
In order to set up a static IP address, you need to locate the WAN (Wide Area Network) or Internet settings section within your router’s administrative page. This section allows you to configure the network settings specifically related to your internet connection. Here’s how you can find the WAN/Internet settings section:
1. Navigate to the main settings menu:
Once you have logged in to your router’s admin page, look for the main settings menu. This menu is typically displayed on the homepage or in a navigation sidebar. The exact location and appearance may vary depending on your router’s firmware and interface.
2. Look for the WAN/Internet settings:
Within the main settings menu, locate the WAN or Internet settings option. This option is usually labeled accordingly and may be found under a section titled “Network Settings,” “Internet Setup,” or something similar. Some routers may include submenus or tabs for different types of Internet connections (Wired, Wireless, etc.). Choose the appropriate option for your specific connection type.
3. Access the WAN/Internet settings:
Click on the WAN or Internet settings option to access the corresponding configuration page. This page allows you to modify the settings related to your internet connection, such as IP address assignment, DNS server settings, and connection type.
4. Explore the available options:
Once you are on the WAN/Internet settings page, take a moment to explore the available options and settings. Look for options related to IP address assignment, connection type (static or dynamic), or DHCP (Dynamic Host Configuration Protocol) settings. These options will be essential for configuring a static IP address.
Remember that the specific layout and options within the WAN/Internet settings section may vary between different router brands and models. Refer to your router’s user manual or online documentation for more precise instructions tailored to your specific router.
By successfully finding and accessing the WAN/Internet settings section, you are now ready to proceed with the next steps and configure your router for a static IP address. In the following steps, you will learn how to change the IP address assignment type and enter the specific details for your static IP configuration.
Step 4: Change the IP address assignment type to manual/static
To set up a static IP address, you need to change the IP address assignment type from dynamic to manual or static within the WAN/Internet settings section of your router’s admin page. This step ensures that your router assigns a fixed IP address to your network or device. Here’s how to change the IP address assignment type:
1. Locate the IP address assignment options:
Within the WAN/Internet settings page, look for the options related to IP address assignment. These options may be labeled as “IP address mode,” “Connection Type,” or similar terminology.
2. Select the manual/static IP address mode:
Once you have identified the IP address assignment options, choose the manual or static IP address mode. This ensures that your router assigns a fixed IP address instead of dynamically assigning one.
3. Disable DHCP (if required):
In some cases, you may need to disable DHCP (Dynamic Host Configuration Protocol) in order to manually assign a static IP address. DHCP automatically assigns IP addresses to devices on the network. If DHCP is enabled, you will need to disable it to proceed with the manual/static IP configuration. Refer to your router’s documentation for instructions on disabling DHCP if necessary.
4. Save the changes:
Once you have selected the manual/static IP address mode and made any additional required changes, save the settings. Look for a “Save,” “Apply,” or “OK” button within the WAN/Internet settings page, and click on it to save your changes.
5. Restart your router:
After saving the changes, it is recommended to restart your router to ensure that the new IP address assignment settings take effect. This can typically be done by going to the router’s main settings page and selecting the option to restart or reboot the device. Allow the router a few moments to restart fully.
By changing the IP address assignment type to manual/static, you have now configured your router to assign a fixed IP address to your network or device. In the next steps, you will learn how to enter the specific details for your static IP address, such as the IP address, subnet mask, gateway, and DNS server information.
Step 5: Enter the static IP address details
Now that you have changed the IP address assignment type to manual/static, it’s time to enter the specific details for your static IP address within the WAN/Internet settings section of your router’s admin page. These details include the IP address, subnet mask, gateway, and DNS server information. Follow these steps to enter the static IP address details:
1. Locate the IP address configuration fields:
Within the WAN/Internet settings page, look for the fields to enter the IP address, subnet mask, gateway, and DNS server information. These fields may be labeled according to their respective terms.
2. Obtain the static IP address details:
Contact your internet service provider (ISP) to obtain the specific static IP address details they have assigned to you. These details typically include the IP address, subnet mask, gateway, and DNS server information. Make sure to accurately record the information provided by your ISP.
3. Enter the IP address:
In the corresponding field, enter the specific static IP address provided by your ISP. This is the unique address assigned to your network or device. Ensure that you enter the IP address correctly to avoid any connectivity issues.
4. Enter the subnet mask:
Next, enter the subnet mask associated with your static IP address. The subnet mask determines the size of the network and helps devices identify which parts of the IP address represent the network identifier and the host identifier. The most common subnet mask is 255.255.255.0, but your ISP may provide you with a different subnet mask.
5. Enter the gateway:
Enter the gateway address provided by your ISP. The gateway is the IP address of the router or networking device that connects your local network to the internet. It serves as the access point to external networks.
6. Enter the DNS server information:
Finally, enter the DNS (Domain Name System) server information. DNS servers translate domain names into IP addresses, allowing devices to locate and access websites and services on the internet. Your ISP should provide you with the IP addresses of their DNS servers. You may need to enter primary and secondary DNS server addresses.
7. Save the changes:
After entering all the necessary static IP address details, save the changes within the WAN/Internet settings page. Look for a “Save,” “Apply,” or “OK” button and click on it to save your settings.
By entering the static IP address details accurately, you have successfully configured your router to use a static IP address for your network or device. In the next step, you will learn how to restart your router to apply the new settings and ensure a seamless connection.
Step 6: Save the settings and restart the router
After entering the static IP address details in the WAN/Internet settings section of your router’s admin page, it is important to save the changes you made. Saving the settings ensures that your router will use the new static IP address configuration. To complete the setup process, you will also need to restart the router. Follow these steps to save the settings and restart your router:
1. Save the settings:
Look for a “Save,” “Apply,” or “OK” button within the WAN/Internet settings page of your router’s admin page. Click on this button to save the static IP address configuration. The router will apply the new settings and update the network configuration accordingly.
2. Restart the router:
To ensure that the new static IP address configuration takes effect, it is necessary to restart the router. Locate the option to restart or reboot the router within the admin page. This option is typically found in the main settings menu or on a separate system or maintenance page. Click on the restart option to initiate the restart process.
3. Allow the router to restart:
After clicking on the restart option, the router will undergo the restart process. It may take a few moments for the router to fully reboot and apply the new settings. During this time, it is normal for the router’s lights to flash or for it to temporarily lose internet connectivity.
4. Verify the new IP address configuration:
Once the router has restarted, double-check the IP address configuration on your network or device to confirm that the static IP address settings are successfully applied. Ensure that the entered IP address, subnet mask, gateway, and DNS server details match the information you provided to the router. Any discrepancies may indicate an issue with the configuration, requiring further troubleshooting.
By saving the settings and restarting the router, you have completed the process of configuring your network or device to use a static IP address. The router will now assign and utilize the specified static IP address for your network, providing stability and consistency for your internet connection.
Step 7: Confirm the setup is successful
After setting up a static IP address on your router, it’s important to confirm that the configuration was successful and that your network is now using the assigned static IP. Here are a few steps to help you verify the setup:
1. Check network settings on devices:
Access the network settings on your devices (computers, smartphones, etc.) that are connected to the router. Look for the network connection settings and check if the assigned IP address matches the static IP address you configured. Verify that the subnet mask, gateway, and DNS server information is also correctly displayed.
2. Test network connectivity:
Ensure that all devices connected to the network can access the internet and communicate with other devices as expected. Open web browsers, use online applications, and perform network-dependent tasks to confirm that the static IP address configuration has not disrupted network connectivity.
3. Perform a reboot test:
Restart your router and observe the behavior of the network after the reboot. Check if the devices reconnect to the network using the assigned static IP addresses without any issues. This test helps to confirm that the static IP configuration persists even after a router restart.
4. Test remote access or hosted services:
If you set up a static IP address for remote access or hosting services, test the functionality from external networks. Ensure that you can access the devices or services using the assigned static IP. For example, if you are hosting a website, check if it can be accessed using the domain name associated with the static IP address.
5. Consult the router logs:
Some routers maintain logs of network activities and events. Check the router’s administrative interface for any logs related to the allocation and usage of IP addresses. This can help confirm if the static IP address was successfully assigned to your network.
By following these steps to confirm the setup’s success, you can ensure that your network is now utilizing the static IP address you configured. If any issues are encountered, refer to your router’s documentation or consult with your internet service provider for further assistance.
Conclusion
Setting up a static IP address can greatly benefit individuals and businesses by providing stability, control, and enhanced connectivity for their network. A static IP allows for remote access, simplifies hosting services, enables secure VPN connections, enhances network security, and facilitates device management. By following the step-by-step process outlined in this guide, you can successfully configure a static IP address for your network or device.
Begin by determining if your internet service provider offers static IP addresses and if there are any associated fees. Then, log in to your router’s admin page, locate the WAN/Internet settings section and change the IP address assignment type to manual/static. Next, enter the specific static IP address details provided by your ISP, such as the IP address, subnet mask, gateway, and DNS server information. Save the settings and restart your router to apply the new configuration.
After completing the setup, confirm that the static IP address is successfully assigned to your network by checking the network settings, testing network connectivity, performing a reboot test, and validating remote access or hosted services. By ensuring the setup is successful, you can enjoy the benefits of a stable and predictable internet connection.
Remember to refer to your router’s documentation or contact your internet service provider if you encounter any issues or require further assistance during the setup process. With a static IP address, you can take control of your network, streamline your online activities, and unlock new possibilities for remote access and hosting services.