Introduction
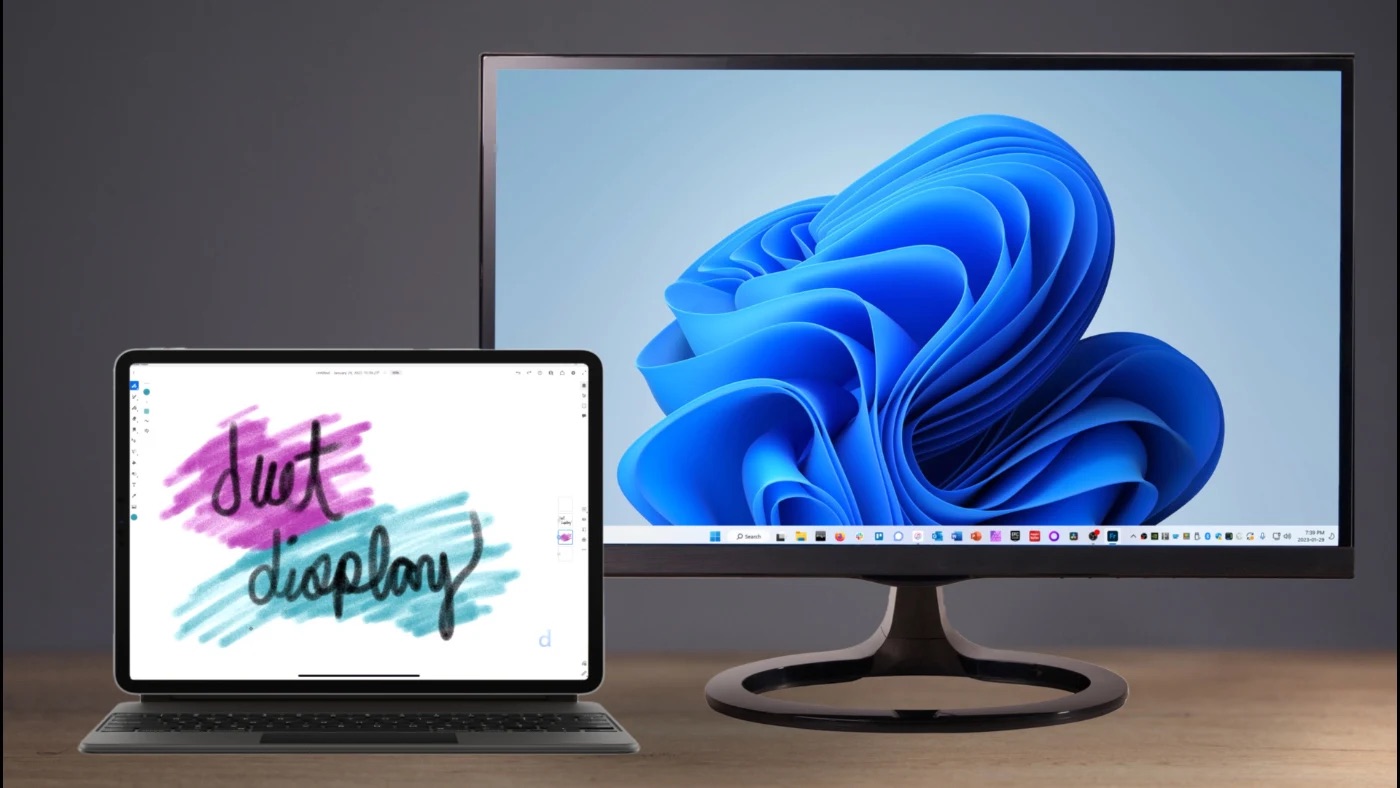
With the ever-increasing demand for productivity and multitasking, it’s no surprise that many people are looking for creative ways to make the most out of their devices. One innovative solution that has gained significant popularity is using an iPad as a second monitor. This setup allows users to extend their workspace and increase their efficiency by utilizing the iPad’s touchscreen capabilities.
While the idea of using an iPad as a second monitor may seem daunting, it’s actually a straightforward process that can be accomplished with just a few simple steps. Whether you’re a student, professional, or digital nomad, this setup can greatly enhance your productivity and provide a more immersive work environment.
In this article, we will explore the benefits of using an iPad as a second monitor, the compatibility and requirements for setting it up, as well as various methods to get you started. Additionally, we will share tips for adjusting settings and troubleshooting common issues that may arise during the setup process.
Before we dive into the step-by-step instructions, let’s take a moment to discuss the compelling advantages of using your iPad as a second monitor.
Benefits of Using iPad as a Second Monitor
Increased Screen Real Estate: One of the primary benefits of setting up your iPad as a second monitor is the expanded screen space. This allows you to have multiple windows open simultaneously, making it easier to multitask and work efficiently. You can have your main work application on your primary display while using the iPad display for reference material, communication tools, or even as a dedicated space for video playback.
Portability and Flexibility: An iPad is incredibly portable compared to a traditional monitor. This means you can take your dual display setup on the go, whether working from a coffee shop, traveling, or simply switching between different rooms in your house. The flexibility of using an iPad as a second monitor gives you the freedom to have a multi-screen setup wherever you need it.
Touchscreen Functionality: Unlike a standard monitor, an iPad offers touchscreen capabilities, allowing you to interact directly with your applications, documents, and creative projects. This makes tasks such as editing, drawing, and navigating more intuitive and fluid. It’s particularly advantageous for artists, designers, and those who rely heavily on touch-based interactions.
Cost-Effective Solution: If you already own an iPad, utilizing it as a second monitor is a cost-effective alternative to purchasing a separate monitor. It maximizes the value of your existing device by adding extra functionality without the need for additional investment.
Now that we’ve explored the benefits, it’s time to delve into the compatibility and requirements for setting up your iPad as a second monitor.
Benefits of Using iPad as a Second Monitor
Using an iPad as a second monitor offers a multitude of advantages that can greatly enhance your productivity and workflow. Here are some of the compelling benefits you can expect:
1. Increased Screen Real Estate: One of the primary benefits of setting up your iPad as a second monitor is the expanded screen space it provides. With two displays, you can have multiple windows open simultaneously, making it easier to multitask and work efficiently. Whether you’re writing code, editing documents, or managing spreadsheets, having the extra screen real estate can significantly boost your productivity.
2. Portability and Flexibility: Unlike a traditional monitor, an iPad is lightweight and portable, making it ideal for on-the-go professionals or digital nomads. You can easily carry it in your bag and set up your dual display wherever you go. This flexibility allows you to have a multi-screen setup in various environments, whether you’re working in a coffee shop, traveling, or switching between different rooms in your house.
3. Touchscreen Functionality: One of the standout features of an iPad is its touchscreen capabilities. When using it as a second monitor, you gain the advantage of interacting directly with your applications, documents, and creative projects. This makes tasks such as editing photos, manipulating designs, or navigating through documents more intuitive and natural. Artists, designers, and anyone who relies heavily on touch-based interactions will find this feature particularly beneficial.
4. Cost-Effective Solution: Utilizing your existing iPad as a second monitor is not only convenient but also cost-effective. Instead of purchasing a separate monitor, you can maximize the value of your iPad by adding extra functionality without the need for additional investment. This makes it an attractive option for individuals who are conscious of their budget but still want to enjoy the benefits of a dual screen setup.
5. Seamless Integration: Many third-party apps and software solutions have made it seamless to use your iPad as a second monitor. With the right app, you can easily extend your desktop or mirror your main display onto the iPad. The integration is often user-friendly, offering intuitive controls and options for customizing your display preferences.
6. Provide a Dedicated Space: Using an iPad as a second monitor allows you to create a dedicated space for specific tasks or tools. For example, you can use your main monitor for your primary work application while utilizing the iPad display for email, messaging, or reference material. This organized setup can help reduce distractions and improve your focus on essential tasks.
These are just a few of the benefits that come with using your iPad as a second monitor. Whether you’re a professional who needs more screen real estate, an artist looking for a more interactive workspace, or someone who values the portability and flexibility of a dual screen setup, leveraging your iPad can transform your productivity and enhance your overall working experience.
Compatibility and Requirements
Before diving into the process of setting up your iPad as a second monitor, it’s crucial to ensure compatibility and meet the necessary requirements. Here’s what you need to consider:
1. Device Compatibility: Not all iPads are compatible with the second monitor feature. Make sure you have an iPad that supports this functionality. Generally, iPads running iPadOS 13 or later have the built-in ability to function as a second monitor. However, older iPads or those running older operating systems may require third-party apps to enable the dual display feature.
2. Operating System Compatibility: If you’re using a Mac computer, your macOS version should be compatible with the iPad-to-Mac second monitor feature called Sidecar. For Sidecar support, ensure you’re running macOS Catalina 10.15 or later. On the Windows side, there are third-party apps available that offer iPad-to-PC second monitor functionality, but they may have their own operating system compatibility requirements that you need to verify.
3. Connection Type: The type of connection you’ll use to connect your iPad to your computer will depend on the method you choose. Some methods require a wired connection using a USB cable, while others allow for wireless connections via Wi-Fi or Bluetooth. Consider which connection type is most convenient for you and ensure that your devices have the necessary ports or connectivity options.
4. App Requirements: If you’re using a third-party app to set up your iPad as a second monitor, make sure to check the app’s compatibility with your devices and operating systems. Verify if there are any specific system requirements or additional software installations needed for the app to function properly.
5. Performance and Network Requirements: Keep in mind that using your iPad as a second monitor may require significant computing resources, particularly if you’re running resource-intensive applications on multiple displays. Ensure that your computer and iPad meet the minimum hardware specifications to maintain smooth performance. Additionally, if you’re using a wireless connection, make sure that your Wi-Fi network is stable and has sufficient bandwidth to handle the data transfer between devices.
By taking the compatibility and requirements into consideration, you can ensure a smooth and successful setup process for using your iPad as a second monitor. Once you’ve confirmed compatibility, it’s time to explore different methods to set up your iPad as a second monitor.
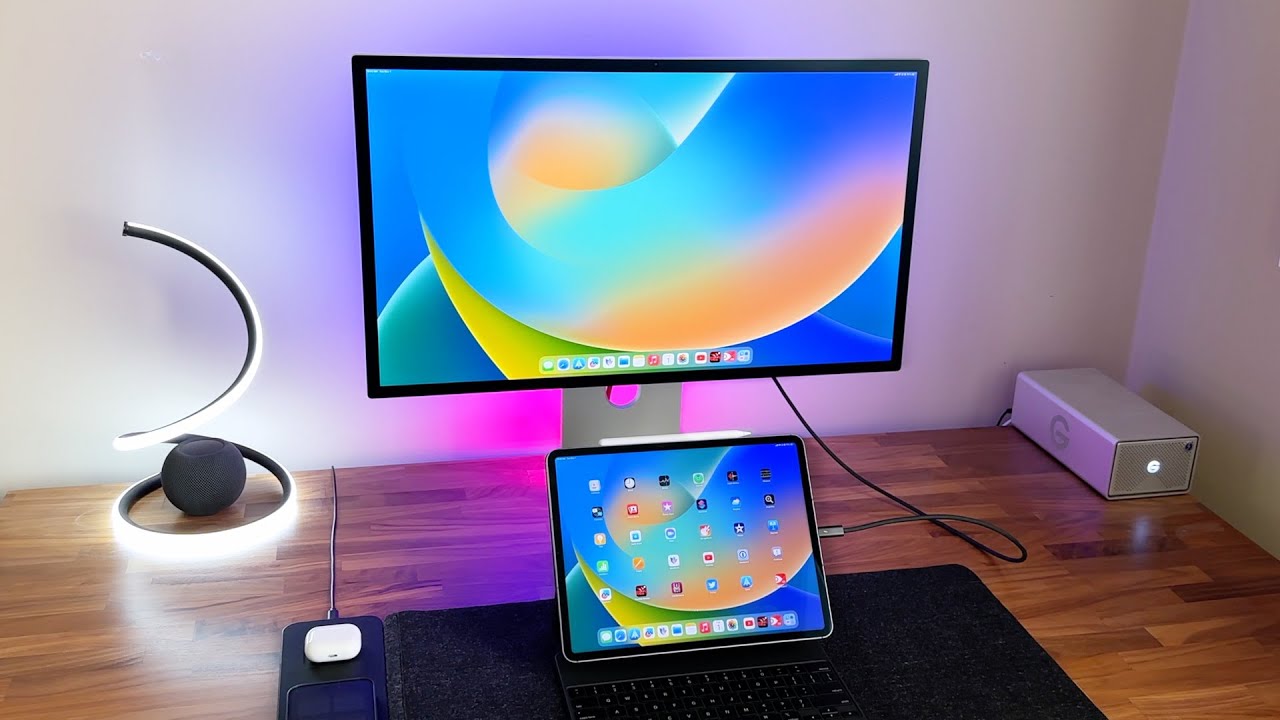
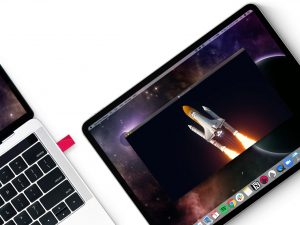
Setting Up Your iPad as a Second Monitor
Setting up your iPad as a second monitor may vary depending on the method you choose and the devices you are using. Here are several methods you can try:
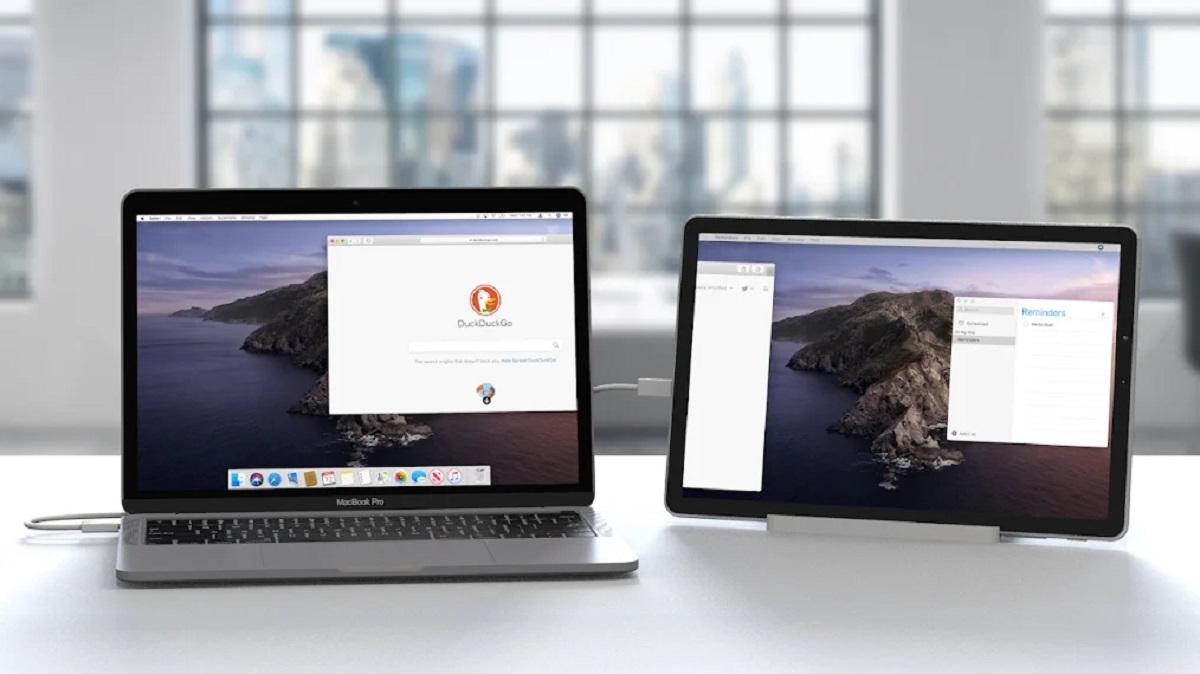
1. Using Sidecar (For Mac Users): If you have a Mac running macOS Catalina 10.15 or later, you can take advantage of the built-in Sidecar feature. To enable Sidecar, make sure both your Mac and iPad are signed in to the same iCloud account and within Bluetooth and Wi-Fi range of each other. Simply click on the AirPlay icon in the menu bar of your Mac and select your iPad to extend or mirror your display wirelessly.
2. Using Duet Display: Duet Display is a popular app that allows you to extend your display by connecting your iPad to your computer via a USB cable. After installing the Duet Display app on your iPad and the corresponding software on your computer, simply connect your iPad to your computer using the USB cable, and the app will automatically detect your device as a second display.
3. Using Splashtop Wired XDisplay: Splashtop Wired XDisplay is another app that enables you to use your iPad as a second monitor. Start by installing the Splashtop Wired XDisplay app on your iPad and the Splashtop Wired XDisplay software on your computer. Connect your iPad to your computer using the appropriate USB cable, and the app will establish a wired connection, allowing you to extend your desktop onto your iPad.
4. Using iDisplay: iDisplay is a versatile app that supports both wired and wireless connections. You can connect your iPad to your computer either via a USB cable or wirelessly over Wi-Fi. Install the iDisplay app on your iPad and the iDisplay desktop software on your computer. Follow the app’s instructions to establish a connection and configure your display settings.
5. Using Air Display 3: Air Display 3 is another popular choice for using your iPad as a second monitor. Install the Air Display 3 app on your iPad and the necessary server software on your computer. Connect your iPad to your computer wirelessly or via USB, depending on your preference. The app will guide you through the setup process and allow you to adjust your display preferences as needed.
Once you’ve chosen the method that suits your needs, follow the instructions provided by the respective app or software to complete the setup process. You may be prompted to configure display settings, such as resolution, orientation, and arrangement, to optimize your dual screen experience.
It’s worth noting that the specific steps and features may vary depending on the app or software you choose. Make sure to refer to the respective documentation and guides provided by the developer to ensure a successful setup.
With your iPad successfully set up as a second monitor, you can now start enjoying the benefits of an extended workspace and increased productivity.
Method 1: Using Sidecar (For Mac Users)
If you have a Mac running macOS Catalina 10.15 or later, you can take advantage of the built-in Sidecar feature to use your iPad as a second monitor. Sidecar offers a seamless and convenient way to extend or mirror your Mac display onto your iPad. Here’s how you can set it up:
Step 1: Connect Your Devices
Ensure that both your Mac and iPad are signed in to the same iCloud account and connected to the same Wi-Fi network. Place your iPad within Bluetooth and Wi-Fi range of your Mac to establish a stable connection.
Step 2: Enable Sidecar
On your Mac, click on the AirPlay icon located in the menu bar. This icon resembles a rectangle with a triangle at the bottom. From the dropdown menu, select your iPad from the available options. You can choose to extend your Mac display to the iPad or mirror the Mac display onto your iPad.
Step 3: Configure Display Options
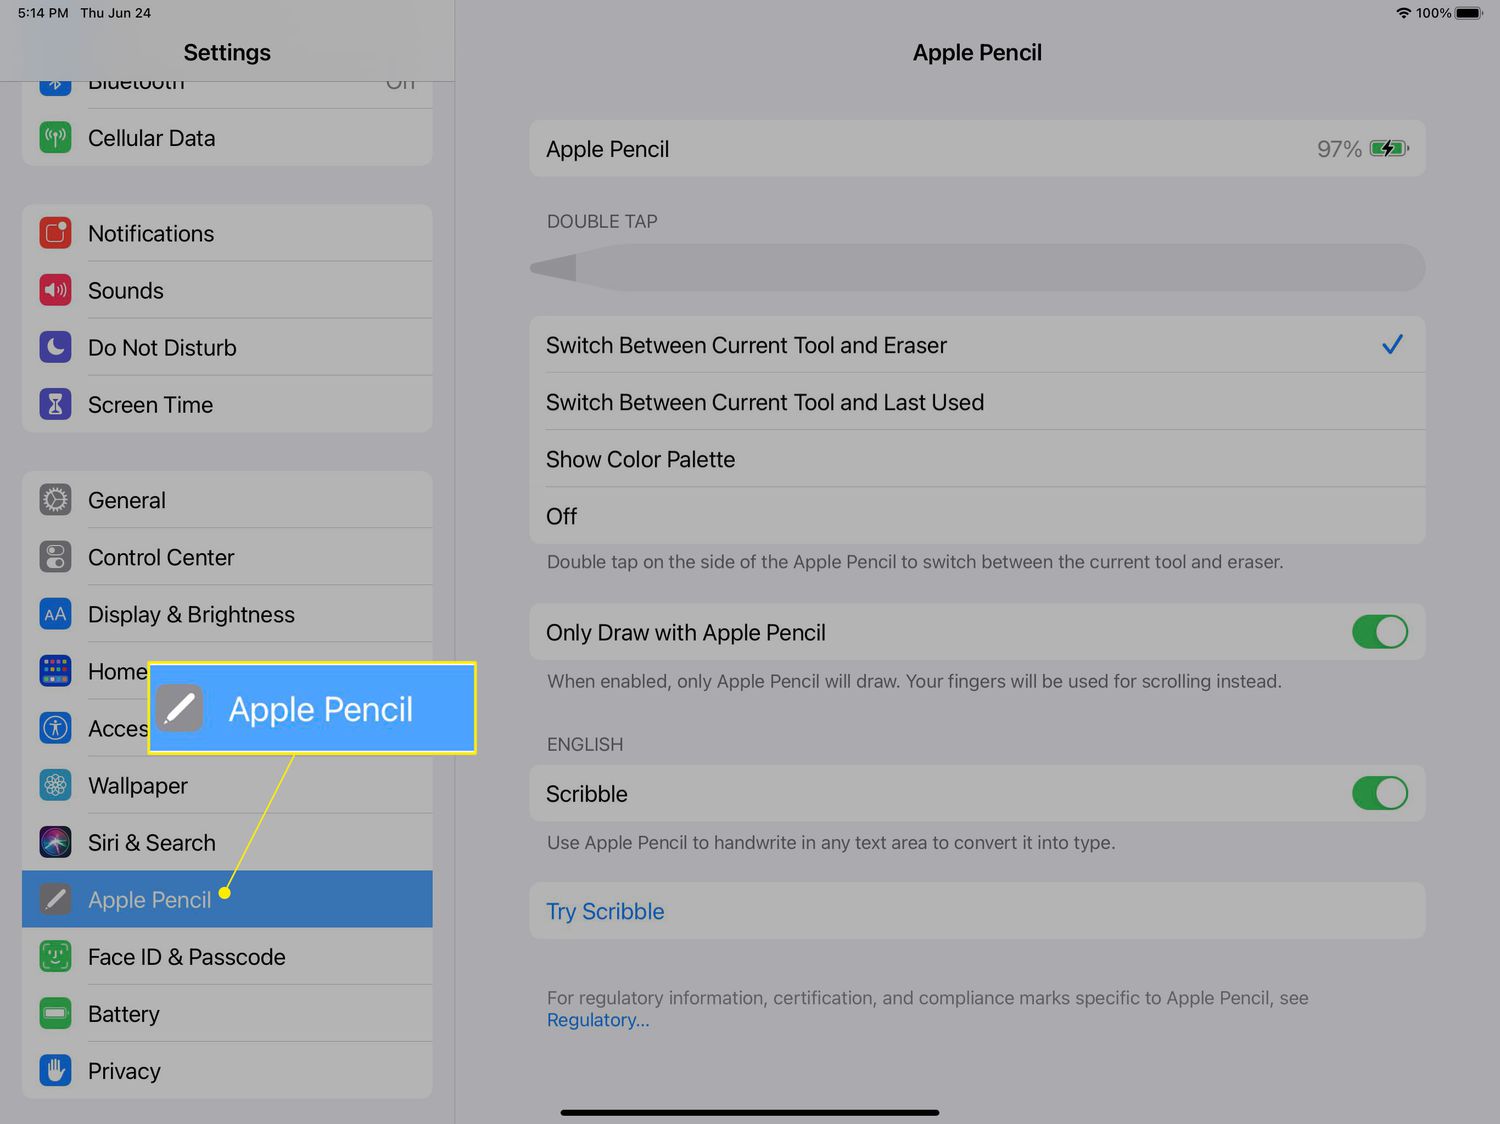
Once Sidecar is enabled, you can customize your display preferences. Open System Preferences on your Mac and navigate to the Displays settings. Here, you can adjust various options such as the resolution, brightness, and arrangement of your dual displays.
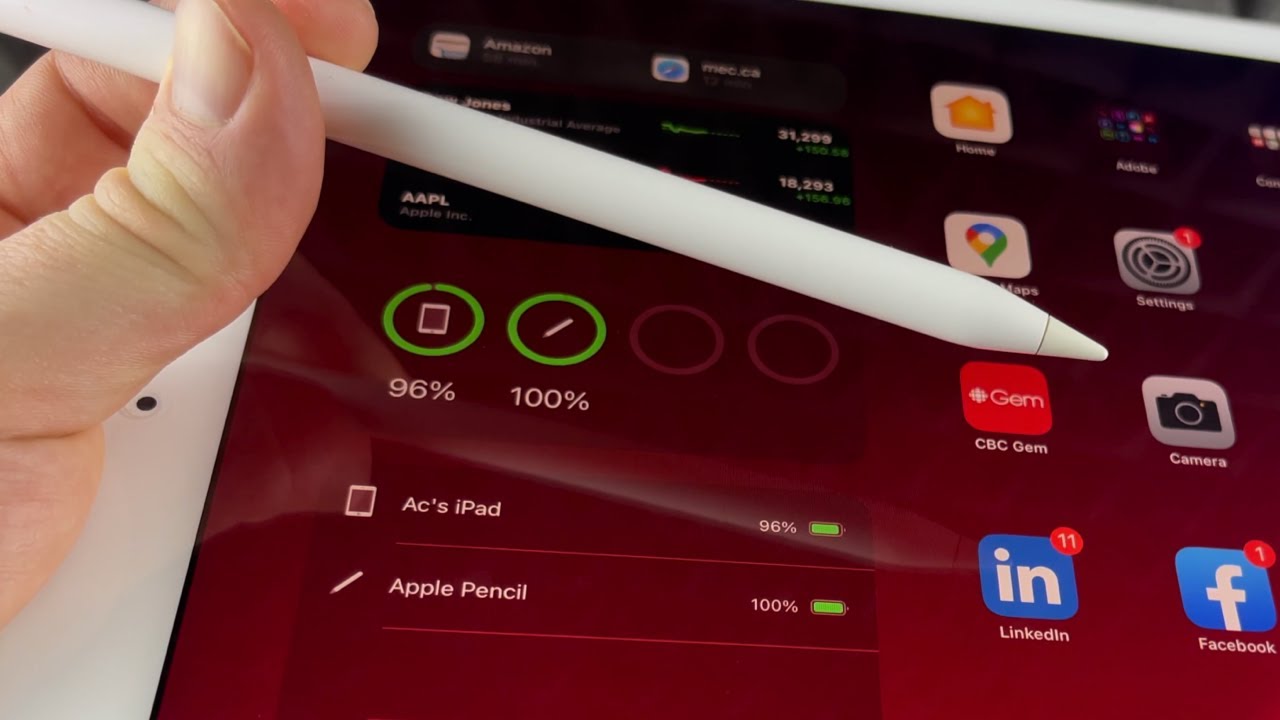
Step 4: Utilize Touch and Apple Pencil
If you want to take advantage of the touchscreen functionality of your iPad, you can freely interact with your Mac applications using your fingers or an Apple Pencil. This is particularly useful for tasks that require precise input, such as drawing, annotating, or navigating through applications designed for touch interactions.
Step 5: Disconnect Sidecar
When you’re done using Sidecar, you can easily disconnect your iPad as a second monitor. Either click on the AirPlay icon in the menu bar and select “Disconnect” for your iPad, or simply close the Sidecar window on your iPad. Your Mac display will return to its original configuration.
Using Sidecar provides a seamless experience for Mac users who want to extend their workspace using an iPad as a second monitor. It not only increases productivity but also offers the convenience of touch interactions on your iPad. Whether you’re using Sidecar for work, creative projects, or simply to enhance your multitasking capabilities, this built-in feature is a valuable addition to your Mac workflow.
Method 2: Using Duet Display
Duet Display is a popular app that allows you to utilize your iPad as a second monitor, providing an extended workspace for your computer. This method is suitable for both Mac and Windows users. Follow these steps to set up Duet Display:
Step 1: Install Duet Display
Start by downloading and installing the Duet Display app on your iPad. The app is available for purchase on the App Store. Once installed, open the app and proceed to the next step.
Step 2: Install Duet Display Software on Your Computer
Next, you’ll need to download and install the Duet Display software on your computer. Visit the Duet Display website (duetdisplay.com) and navigate to the Downloads section. Choose the appropriate software version for your operating system (Mac or Windows) and follow the on-screen instructions to complete the installation.
Step 3: Connect Your iPad to Your Computer
After the installation is complete, connect your iPad to your computer using a USB cable. Once connected, the Duet Display app will automatically detect your iPad and establish a connection between your devices.
Step 4: Configure Display Settings
On the Duet Display app on your computer, you’ll have access to various display settings. You can configure options such as resolution, orientation, and scaling to match your preferences. Customize the settings based on how you want your extended display to appear.
Step 5: Adjust Touch and Apple Pencil Interactions (Optional)
If you want to utilize the touchscreen functionality of your iPad or Apple Pencil, you have the option to enable touch interactions in the Duet Display settings. This allows you to interact directly with your applications, making tasks such as drawing, annotating, and navigating more intuitive.
Step 6: Enjoy Your Dual Display Setup
With Duet Display set up, you can now enjoy the benefits of a dual display setup. Use your iPad as a second monitor, extending your desktop and increasing your productivity. You can move windows and applications between your computer’s screen and the iPad, giving you more screen real estate to work with.
Step 7: Disconnect Duet Display
To disconnect Duet Display, simply unplug the USB cable connecting your iPad to your computer. The Duet Display app will automatically disconnect, and your iPad will return to its regular functionality.
Using Duet Display is a convenient and user-friendly way to transform your iPad into a second monitor. Whether you’re working on complex projects, multitasking between applications, or simply want more screen space, Duet Display provides a seamless dual display experience for enhanced productivity.
Method 3: Using Splashtop Wired XDisplay
If you’re looking for a method to use your iPad as a second monitor using a wired connection, Splashtop Wired XDisplay is an excellent option. This app allows you to extend your computer’s screen onto your iPad display using a USB connection. Follow these steps to set up Splashtop Wired XDisplay:
Step 1: Install Splashtop Wired XDisplay
Start by downloading and installing the Splashtop Wired XDisplay app on your iPad. You can find the app on the App Store. Once the installation is complete, launch the app on your iPad.
Step 2: Install the Splashtop Wired XDisplay Software on Your Computer
Next, you’ll need to download and install the Splashtop Wired XDisplay software on your computer. Visit the Splashtop website (splashtop.com/wiredxdisplay) and select the appropriate software download for your operating system (Mac or Windows). Follow the on-screen instructions to complete the installation.
Step 3: Connect Your iPad to Your Computer
Once the software installation is complete, connect your iPad to your computer using a compatible USB cable. The Splashtop Wired XDisplay app on your iPad will detect the connection and establish a wired connection with your computer.
Step 4: Configure Display Settings
On your computer, open the Splashtop Wired XDisplay software. Here, you can configure various display settings, such as resolution, orientation, and screen arrangement. Adjust these settings to match your preferences and optimize the dual display experience.
Step 5: Utilize Dual Display Capabilities
With Splashtop Wired XDisplay set up, you can now use your iPad as a second monitor. Move windows and applications between your computer’s screen and the iPad screen, effectively extending your workspace. This allows for increased productivity and multitasking capabilities.
Step 6: Disconnect Splashtop Wired XDisplay
To disconnect Splashtop Wired XDisplay, simply unplug the USB cable that connects your iPad to your computer. Once disconnected, the Splashtop Wired XDisplay app will stop functioning, and your iPad will revert to its regular functionality.
Splashtop Wired XDisplay offers a reliable and wired solution for using your iPad as a second monitor. It provides an extended workspace that can significantly enhance your productivity, especially when working on complex tasks that require multiple windows and applications to be open simultaneously. By leveraging the wired connection, Splashtop Wired XDisplay ensures minimal lag and high-quality display output for an optimal user experience.
Method 4: Using iDisplay
If you’re seeking a flexible solution that supports both wired and wireless connections, iDisplay is a versatile app that allows you to use your iPad as a second monitor. With iDisplay, you can extend your computer’s screen onto your iPad display and enjoy the benefits of a dual display setup. Follow these steps to set up iDisplay:
Step 1: Install iDisplay
Start by downloading and installing the iDisplay app on your iPad. You can find the app available for purchase on the App Store. Install the app on your iPad and launch it.
Step 2: Install the iDisplay Software on Your Computer
Next, download and install the appropriate iDisplay software on your computer. Visit the iDisplay website (idisplay.app) and select the software version that matches your operating system (Mac or Windows). Follow the on-screen instructions to complete the installation process.
Step 3a: Wired Connection
If you prefer a wired connection, connect your iPad to your computer using a USB cable. Once connected, the iDisplay app will automatically establish a wired connection with your computer.
Step 3b: Wireless Connection
If you prefer a wireless connection, ensure that both your iPad and computer are connected to the same Wi-Fi network. Open the iDisplay app on your iPad and tap on the “Connect” button. From the list of available devices, select your computer to establish a wireless connection.
Step 4: Configure Display Settings
On your computer, open the iDisplay software to access the display settings. Here, you can adjust the resolution, orientation, and positioning of your extended display. Customize these settings based on your preferences to optimize the dual monitor experience.
Step 5: Utilize Your Dual Display Setup
With iDisplay set up, you can now enjoy the benefits of using your iPad as a second monitor. Move applications and windows to your iPad screen to expand your workspace and improve multitasking capabilities. Take advantage of the additional screen real estate to increase your productivity and efficiency.
Step 6: Disconnect iDisplay
To disconnect iDisplay, simply unplug the USB cable if you’re using a wired connection. For a wireless connection, go to the iDisplay app on your iPad and tap on the “Disconnect” button to end the connection with your computer.
iDisplay provides a flexible option for users who want to extend their computer’s display onto their iPad. Whether you prefer a wired or wireless connection, iDisplay offers a reliable and user-friendly experience, giving you the freedom to work with an extended workspace and optimize your productivity.
Method 5: Using Air Display 3
If you’re looking for a method to use your iPad as a second monitor with both wired and wireless capabilities, Air Display 3 is an excellent choice. This app allows you to extend your computer’s screen onto your iPad display, providing a seamless dual display experience. Follow these steps to set up Air Display 3:
Step 1: Install Air Display 3
Start by downloading and installing the Air Display 3 app on your iPad. You can find the app available for purchase on the App Store. Once the app is installed, launch it on your iPad.
Step 2: Install the Air Display 3 Software on Your Computer
Next, download and install the Air Display 3 software on your computer. Visit the Air Display website (avatron.com/air-display) and select the software version that matches your operating system (Mac or Windows). Follow the on-screen instructions to complete the installation process.
Step 3a: Wired Connection
If you prefer a wired connection, connect your iPad to your computer using a USB cable. Once connected, the Air Display 3 app on your iPad will automatically detect the wired connection and initiate the setup process.
Step 3b: Wireless Connection
If you prefer a wireless connection, ensure that both your iPad and computer are connected to the same Wi-Fi network. Open the Air Display 3 app on your iPad and tap on the “Connect” button. From the list of available devices, select your computer to establish a wireless connection.
Step 4: Configure Display Settings
On your computer, open the Air Display 3 software to access the display settings. Here, you can adjust various display options, such as resolution, orientation, and screen arrangement. Customize these settings according to your preference to optimize the dual display experience.
Step 5: Utilize Dual Display Capabilities
Once Air Display 3 is set up, you can use your iPad as a second monitor to extend your computer’s screen. Move applications and windows to your iPad screen to expand your workspace and enhance multitasking capabilities. The added screen real estate can significantly improve your productivity and efficiency.
Step 6: Disconnect Air Display 3
To disconnect Air Display 3, simply unplug the USB cable if you’re using a wired connection. For a wireless connection, go to the Air Display 3 app on your iPad and tap on the “Disconnect” button to end the connection with your computer.
Air Display 3 offers a versatile solution for using your iPad as a second monitor, providing both wired and wireless options. Whether you prefer the convenience of wireless connectivity or the stability of a wired connection, Air Display 3 ensures a seamless dual display experience, enabling you to optimize your workflow and boost your productivity.
Adjusting Settings and Display Options
Once you have successfully set up your iPad as a second monitor, it’s essential to familiarize yourself with the settings and display options available to customize your dual display experience. Here are some key settings you can adjust:
1. Display Arrangement: Adjusting the display arrangement allows you to position your iPad in relation to your primary monitor. This determines the virtual location of your iPad’s display within your extended workspace. You can choose to align it to the left, right, above, or below your primary display, depending on your preference and workflow.
2. Orientation and Resolution: You can modify the orientation and resolution of your iPad’s display to best suit your needs. By adjusting the orientation, you can switch between landscape and portrait modes, depending on the nature of the task at hand. Additionally, modifying the resolution allows you to fine-tune the display output and ensure optimal clarity and readability.
3. Touch Interactions: If your iPad supports touch input or you have an Apple Pencil, consider enabling touch interactions. This will allow you to tap, swipe, and perform touch gestures directly on your iPad’s display. It’s particularly useful for tasks that benefit from a hands-on approach, such as drawing, editing, or navigating touch-optimized applications.
4. Sound and Audio: Depending on the setup, you may also want to configure the audio output of your extended display. Choose whether you want audio to play through your iPad’s speakers or your computer’s speakers. Adjust the volume levels accordingly for a more immersive audio experience.
5. Keyboard and Mouse Integration: In certain setups, you may prefer to use your iPad as a touchscreen input device while utilizing your computer’s keyboard and mouse for text input and interaction. Configure the settings to enable keyboard and mouse integration, allowing you to seamlessly switch between input methods as needed.
6. External Display Preferences: Some apps and software solutions provide additional options and preferences specific to external displays. Explore these options to further tailor your dual display setup based on your workflow requirements. This may include features like window snapping, app-specific settings, or multi-touch gestures.
Take the time to experiment with these settings and display options to find the configuration that best suits your needs. Adjust them as necessary to accommodate different tasks, workflows, or even different devices you may connect as a second monitor to your computer.
Remember to consult the documentation and support resources provided by the specific app or software you are using for your dual display setup. The available settings and options may vary depending on the method you choose and the compatibility of your devices.
By customizing and fine-tuning the settings and display options, you can fully leverage the power and flexibility of using your iPad as a second monitor, enhancing your productivity and creating a comfortable and efficient work environment.
Troubleshooting Common Issues
While setting up your iPad as a second monitor can greatly enhance your productivity, you may encounter some common issues along the way. Here are a few troubleshooting steps you can take to resolve these issues:
1. Connection Issues: If you’re experiencing connectivity problems, ensure that both your iPad and computer are connected to the same network (in the case of wireless connections) or that the USB cable is securely connected (for wired connections). Restarting both devices can often help resolve connection issues.
2. Display Resolution and Scaling: If you notice that the resolution or scaling of your extended display is not to your liking, adjust these settings in the display preferences of your operating system or the specific app/software you’re using. Experiment with different settings until you achieve the desired display appearance.
3. Lag or Performance Issues: If you’re experiencing lag or performance issues, ensure that your iPad and computer meet the minimum system requirements for using the second monitor functionality. Close any unnecessary applications or processes running in the background that may be consuming system resources.
4. Touchscreen Interactions Not Working: If you’re unable to use touch input on your iPad or encounter issues with the touchscreen interactions, ensure that the app or software you’re using has compatibility with touch input. Update to the latest version of the app or software to ensure optimal functionality.
5. App or Software Compatibility: If you’re using third-party apps or software to set up your iPad as a second monitor, make sure that the app or software is compatible with your specific operating system version. Check for any available updates or patches to address compatibility issues.
6. Audio Output Not Working: If you’re unable to hear audio through your iPad’s speakers or your computer’s speakers, verify that the audio settings are correctly configured. Ensure that the audio output settings on your iPad and computer are set to the desired output device.
7. Disconnecting or Freezing: If you encounter issues with disconnecting or freezing during the use of your iPad as a second monitor, try restarting the iPad and computer, and then re-establish the connection. Additionally, check for any updates to the app or software you’re using, as updates often include bug fixes and stability improvements.
8. App-Specific Issues: If you notice issues with specific applications not functioning properly on the extended display, ensure that the app has support for multiple displays. Consult the app’s documentation or support resources for any additional instructions or troubleshooting steps specific to the app.
If you’ve tried the troubleshooting steps above and are still experiencing issues, consult the documentation or support resources provided by the app or software developer. They may have additional troubleshooting steps or be able to provide guidance specific to your setup.
Keep in mind that the troubleshooting steps may vary depending on the method you are using to set up your iPad as a second monitor. The specific app or software you choose may have unique solutions for the issues you encounter.
By addressing and resolving these common issues, you can ensure a smooth and enjoyable experience while using your iPad as a second monitor, maximizing your productivity and workflow efficiency.
Conclusion
Setting up your iPad as a second monitor is a fantastic way to expand your workspace and boost your productivity. Whether you’re a student, professional, or digital nomad, the benefits of using an iPad as a second monitor are undeniable. The increased screen real estate, portability, touchscreen functionality, and cost-effectiveness make it an attractive option for those seeking a more versatile and immersive work environment.
In this article, we explored various methods for setting up your iPad as a second monitor, including using Sidecar, Duet Display, Splashtop Wired XDisplay, iDisplay, and Air Display 3. Each method has its unique features and requirements, allowing you to choose the one that best suits your needs and preferences.
We also discussed the importance of adjusting display settings, troubleshooting common issues, and ensuring compatibility between your devices. These steps ensure a seamless and uninterrupted dual display experience, maximizing the benefits of using your iPad as a second monitor.
Remember to experiment with different display arrangements, resolutions, and touch interactions to find the setup that works best for you. Should you encounter any connectivity issues, lag, or other problems, refer to the troubleshooting steps outlined in this article or seek support from the app or software developers.
With your iPad successfully set up as a second monitor, you now have an expanded workspace that can significantly improve your productivity. Take advantage of the additional screen real estate to multitask, organize your workflow, and enhance your creative endeavors.
By utilizing your iPad as a second monitor, you’re leveraging the power of technology to create a more efficient and enjoyable work environment. Embrace the possibilities of a dual display setup and explore the new opportunities it presents for your daily tasks and projects.