Introduction
Welcome to this article on how to set out of office on Google Calendar. Whether you’re going on a vacation, attending a conference, or simply taking a day off, setting an out of office notification helps to inform your colleagues, clients, and contacts about your unavailability.
Google Calendar offers a convenient and easy way to set out of office events, allowing you to communicate your availability status without the need for manual email or message responses.
In this tutorial, we will guide you through the step-by-step process of setting up and customizing your out of office event using Google Calendar. By following these instructions, you’ll be able to efficiently manage your time away and ensure that everyone you work with is informed about your absence.
Keep in mind that setting an out of office event on Google Calendar not only helps to manage expectations but also helps your team plan their tasks and assignments accordingly. It’s a valuable tool for maintaining communication and productivity, even when you’re not physically present.
So, let’s dive in and learn how to effectively set out of office on Google Calendar!
Step 1: Accessing Google Calendar
The first step in setting out of office on Google Calendar is to access your calendar. Here’s how you can do it:
- Open your web browser and navigate to https://calendar.google.com.
- Enter your Google account credentials to sign in. If you don’t have a Google account, you can create one by clicking on the “Create account” button.
- Once you’re signed in, you will be redirected to your Google Calendar dashboard.
If you are using the Google Calendar mobile app, you can follow these steps:
- Launch the Google Calendar app on your mobile device.
- Sign in with your Google account if you haven’t already.
- You will be taken to the main calendar screen.
Accessing Google Calendar is essential to proceed with setting up your out of office event. It allows you to view, edit, and manage your calendar events from any device with an internet connection.
Now that you have successfully accessed Google Calendar, let’s move on to the next step: opening the out of office event.
Step 2: Opening the Out of Office Event
Once you have accessed Google Calendar, the next step is to open the out of office event. Follow these instructions:
- Locate the date on which you want to set your out of office event. You can navigate through different months and weeks using the arrow buttons or by selecting the month from the dropdown menu.
- Click or tap on the desired date to open a new event creation window.
- In the event creation window, you will see various fields to enter information about your out of office event, such as event title, time, and description.
By opening the out of office event, you gain access to the details you need to customize it according to your preferences. This includes setting the date and time, adding a description or explanation, and selecting the availability status.
Now that you have opened the event, let’s proceed to the following step: setting the date and time for your out of office event.
Step 3: Setting the Date and Time
Setting the date and time for your out of office event is an essential part of ensuring that your availability is accurately communicated. Here’s how you can do it:
- In the event creation window, locate the field that allows you to set the start and end time for your out of office event.
- Click or tap on the field to open a calendar and time picker.
- Select the date and start time of your out of office period by clicking or tapping on the corresponding options in the picker.
- Choose the end date and time for when you will be back and available.
- Review the selected date and time to ensure it accurately represents your out of office duration.
Setting the date and time is crucial for effectively communicating your unavailability. It provides clarity to your colleagues and contacts regarding when you will be out of office and when you will resume your regular activities.
Now that you have successfully set the date and time for your out of office event, let’s move on to the next step: adding a description or explanation.
Step 4: Adding a Description or Explanation
Adding a description or explanation to your out of office event can provide additional context for your absence. This step allows you to communicate important information to your colleagues, clients, and contacts. Follow these instructions:
- In the event creation window, locate the field where you can enter a description or explanation for your out of office event.
- Click or tap on the field and start typing your message.
- Provide relevant details such as the reason for your absence, any alternate points of contact, or any specific instructions for urgent matters.
- Review the description to ensure it effectively conveys the necessary information.
Adding a description or explanation helps others understand the context of your out of office event and allows them to make informed decisions regarding communication and task assignments.
Now that you have added a description or explanation to your out of office event, let’s move on to the next step: selecting the availability status.
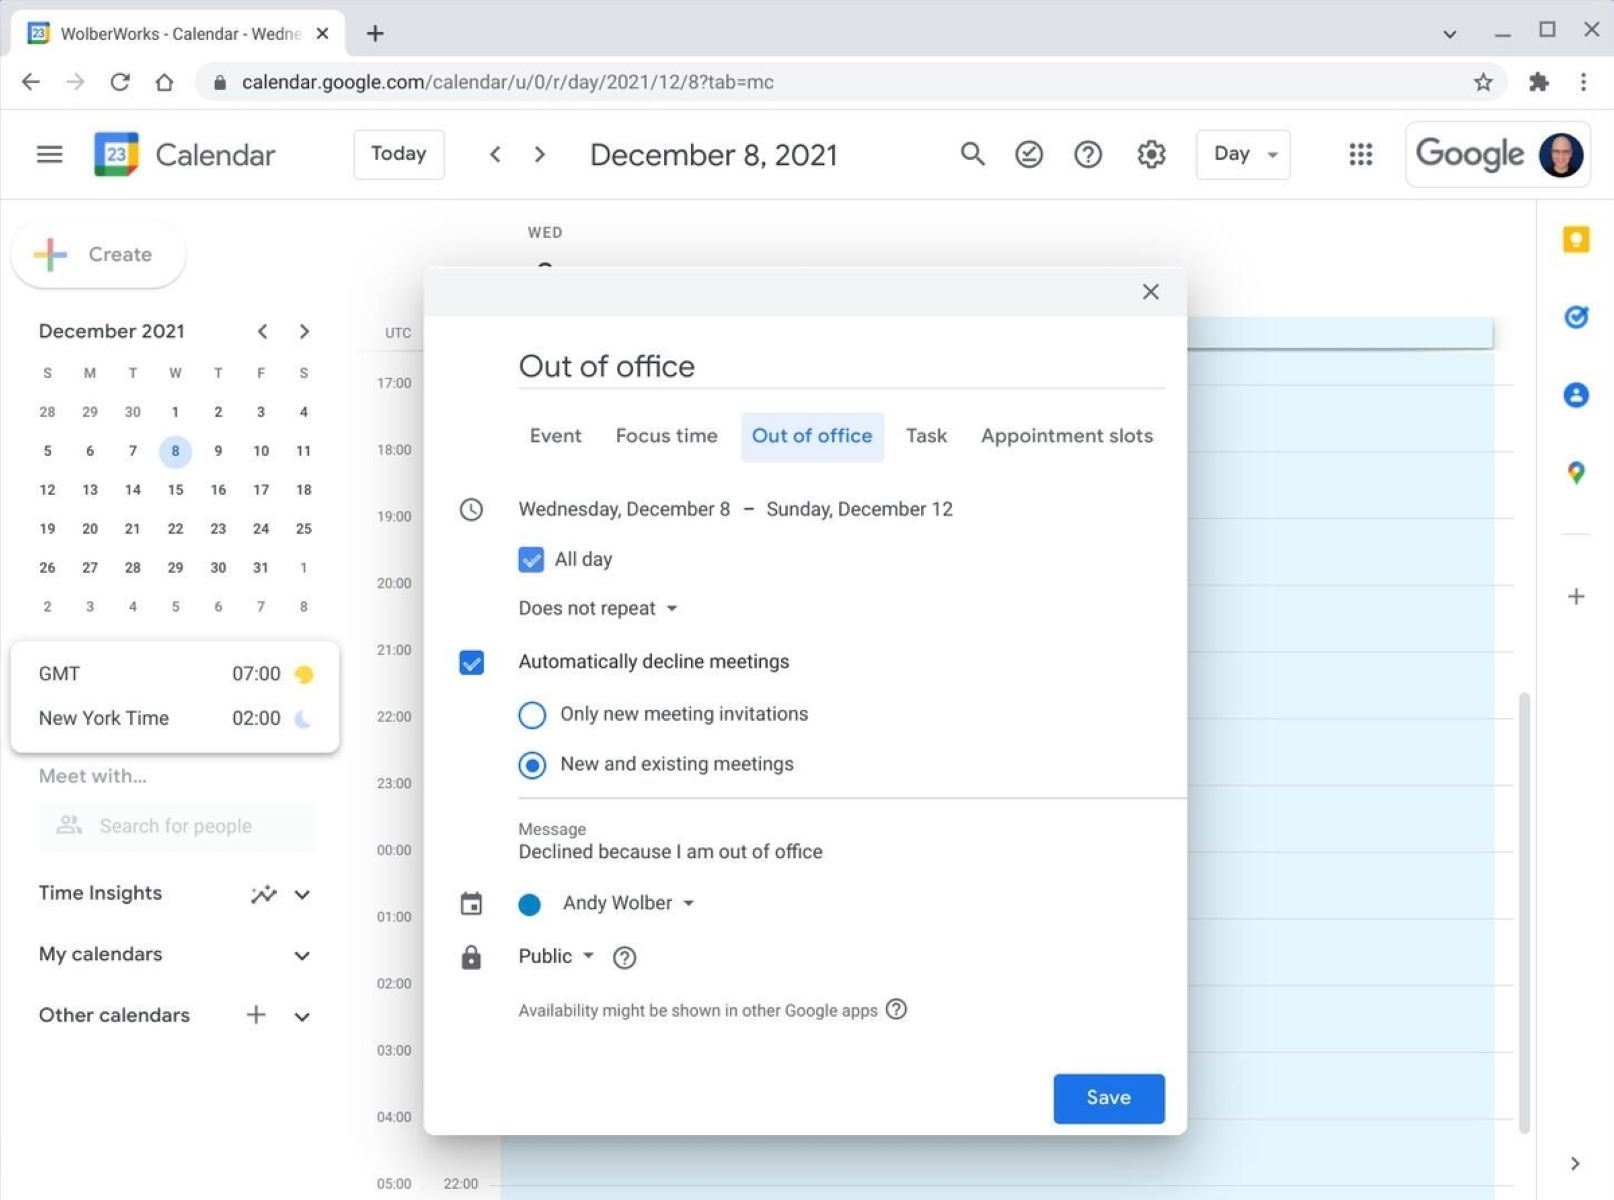
Step 5: Selecting Availability Status
Selecting the availability status is an important step in setting out of office on Google Calendar, as it helps others easily identify your availability during your absence. Follow these instructions to select the availability status:
- In the event creation window, look for the availability status or “Show me as” option.
- Click or tap on the dropdown menu to reveal the available options.
- Select the status that best represents your availability during your out of office period. Some common options include “Out of office,” “Busy,” or “Unavailable.”
- Review the selected availability status to ensure it accurately reflects your availability.
Selecting the availability status is vital for effective communication and helps manage expectations among your colleagues and contacts. It helps them understand whether you are completely unavailable or if there is a possibility of reaching you for urgent matters.
Now that you have successfully selected the availability status for your out of office event, let’s move on to the next step: customizing notifications.
Step 6: Customizing Notifications
Customizing notifications for your out of office event is an important aspect of managing your communication while you are away. By setting up notifications, you can ensure that you stay informed about any urgent matters or important updates. Follow these instructions to customize your notifications:
- In the event creation window, locate the notification settings or “Add notification” option.
- Click or tap on the option to reveal the notification customization options.
- Choose the type of notification you prefer, such as email, pop-up reminder, or both.
- Select the timing for the notification, such as “At the time of the event” or customizing it to a specific duration before the event.
- Review the notification settings to ensure they align with your preferences.
Customizing notifications allows you to stay informed about any critical updates or urgent matters without having to constantly check your calendar. It ensures that you can address important issues promptly while still maintaining your out of office status.
Now that you have successfully customized your notifications for the out of office event, let’s move on to the final step: saving and applying the event.
Step 7: Saving and Applying the Out of Office Event
Once you have completed all the necessary configurations for your out of office event, it’s time to save and apply the event to ensure that your availability status is accurately reflected. Follow these instructions to save and apply the out of office event:
- In the event creation window, locate the “Save” or “Create” button.
- Click or tap on the button to save the event.
- Confirm that all the details, including the date, time, description, availability status, and notifications, are correct.
- Once you have reviewed the event details, click or tap on the “Save” or “Create” button to apply the out of office event.
- Google Calendar will now update your calendar to reflect your out of office period and notify anyone with access to your calendar about your unavailability.
Saving and applying the out of office event ensures that your colleagues, clients, and contacts are informed about your absence during the specified period. It allows them to plan their communications and tasks accordingly, minimizing any potential disruptions during your time away.
Congratulations! You have successfully set out of office on Google Calendar. By following these steps, you can effectively communicate your availability status and manage your time away from work.
Remember, once you return to the office, don’t forget to remove or update your out of office event to resume normal scheduling and communication.
Conclusion
Setting out of office on Google Calendar is a practical and convenient way to communicate your availability status to your colleagues, clients, and contacts. By following the step-by-step process outlined in this article, you can efficiently manage your time away and ensure that everyone is informed about your absence.
We started by accessing Google Calendar, either through the web browser or the mobile app. Then, we opened the out of office event and set the date and time for your period of unavailability. Adding a description or explanation provides additional context and instructions to those who interact with your calendar.
Next, we discussed the importance of selecting the availability status to clearly indicate your level of availability during your absence. Customizing notifications helps you stay informed about urgent matters without constantly checking your calendar. Finally, saving and applying the out of office event completes the process and notifies others about your unavailability.
Remember, setting out of office on Google Calendar is a helpful tool for maintaining communication and productivity, even when you’re not physically present. It allows your team to plan their tasks and assignments accordingly and helps manage expectations among your colleagues and contacts.
So, the next time you plan to go on vacation, attend a conference, or take a well-deserved day off, make sure to set out of office on Google Calendar and enjoy your time away with peace of mind.