Introduction
Setting Google as the default browser on Windows 11 can greatly enhance your browsing experience. Google Chrome is known for its speed, reliability, and vast range of features, making it a popular choice among users worldwide. By following a few simple steps, you can easily set Google as your default browser and enjoy seamless web browsing on your Windows 11 device.
Windows 11 comes with Microsoft’s Edge browser as the default option. While Edge offers its own set of features, you may prefer the familiarity and customization options offered by Google Chrome. Fortunately, changing the default browser is a straightforward process that can be completed in just a few minutes.
In this article, we will guide you through the steps to set Google Chrome as the default browser on your Windows 11 device. Whether you are new to Windows 11 or simply want to switch from the default browser, these instructions will help you make Google Chrome your go-to browser for all your online activities.
Step 1: Open Settings
The first step to setting Google as the default browser on Windows 11 is to open the Settings app. You can access the Settings app in multiple ways, but the simplest method is to click on the Start button in the bottom-left corner of the taskbar and then click on the gear icon labeled “Settings”. Alternatively, you can press the Windows key + I on your keyboard to directly open the Settings app.
Once the Settings app is open, you will see various categories and options. Look for the category labeled “System” and click on it. This category contains a wide range of settings related to your device, including display, sound, and notifications.
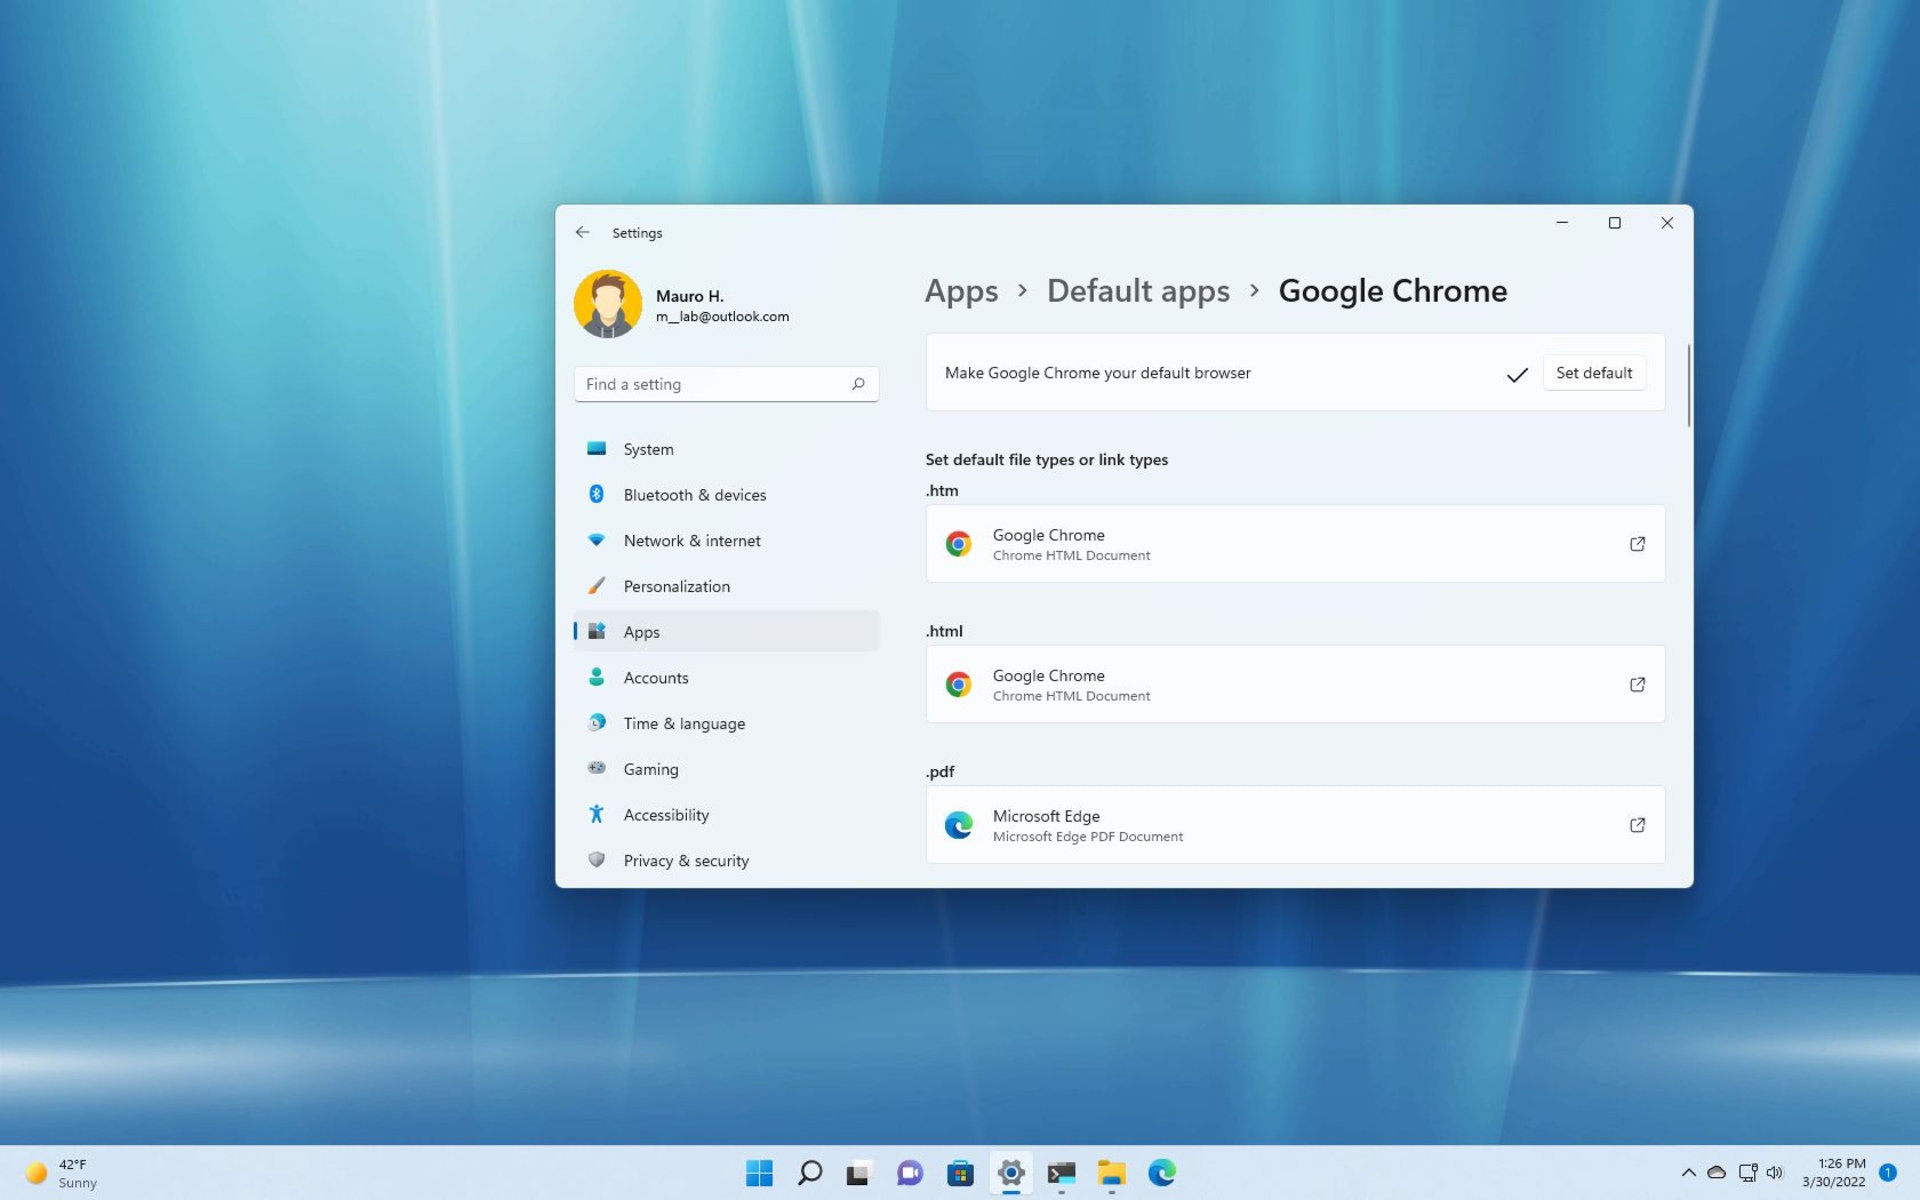
Within the “System” category, you will find a sidebar on the left-hand side. Scroll down until you see the option called “Default apps”. Click on it to proceed to the next step.
The “Default apps” section allows you to manage various default applications on your Windows 11 device, including the default browser. This is where you can make the necessary changes to set Google Chrome as your default browser.
By following these steps, you can easily access the Settings app and navigate to the “Default apps” section, where you will be able to change the default browser on your Windows 11 device with ease. Once you have reached this stage, you are ready to proceed to the next step and select Google Chrome as your preferred browser.
Step 2: Select Default Apps
After opening the Settings app in Windows 11, you will need to navigate to the “Default apps” section to continue setting Google Chrome as your default browser. This section allows you to manage various default applications on your device, including web browsers, email clients, and more.
To select the default apps, locate and click on the “Default apps” option in the sidebar of the Settings app. Once clicked, you will be presented with a screen displaying your current default applications.
Within the “Default apps” screen, you will find a list of default apps categories, such as web browser, email, music player, and more. Since we are focusing on setting Google as the default browser, you will need to locate the “Web browser” category. Click on it to proceed.
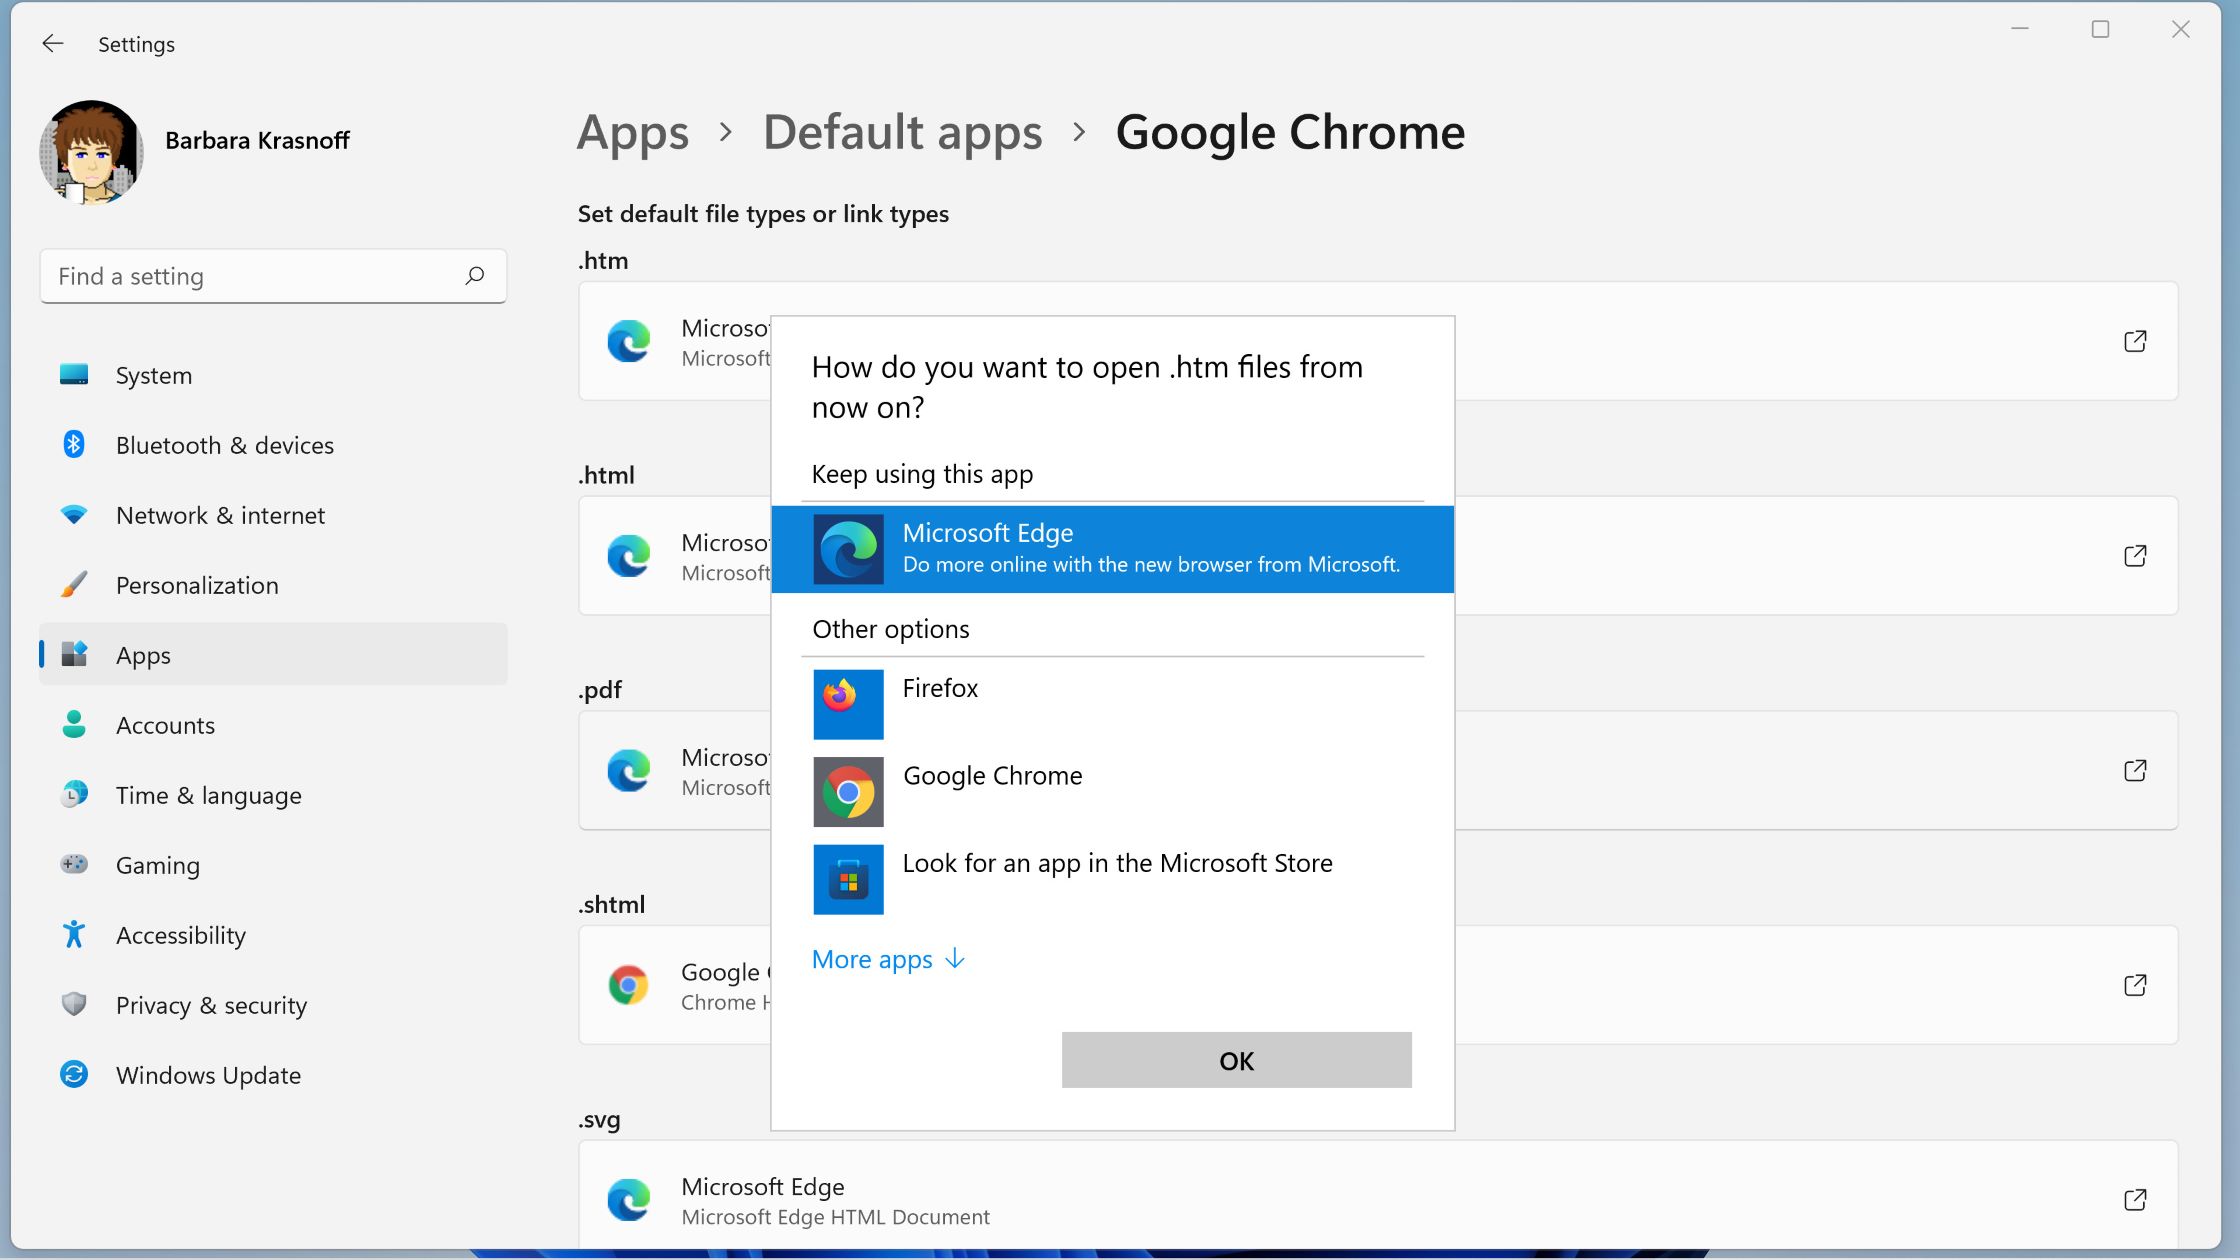
In the “Web browser” category, you will see the currently set default browser. By default, this will be Microsoft Edge, the pre-installed browser on Windows 11. To change the default browser, click on the currently selected browser, and a dropdown list will appear with the available web browsers installed on your device.
Find and select “Google Chrome” from the list of options. If you do not see Google Chrome listed, ensure that you have it installed on your computer. Once you have selected Google Chrome, the Settings app will automatically save your choice, and you will be ready to move on to the next step.
By following these steps, you can easily navigate to the “Default apps” section of the Windows 11 Settings app and access the “Web browser” category. From there, you can select Google Chrome as your preferred default browser. The next step will guide you through the final process of confirming the change to ensure that Google Chrome is set as your default browser.
Step 3: Choose a Web Browser
After selecting the “Web browser” category in the “Default apps” section of the Windows 11 Settings app, you will need to choose Google Chrome as your preferred web browser. This step involves selecting Google Chrome from the list of available options.
When you click on the currently set default browser, a dropdown list will appear, displaying the web browsers installed on your Windows 11 device. Look for “Google Chrome” in the list and click on it to choose it as your default browser.
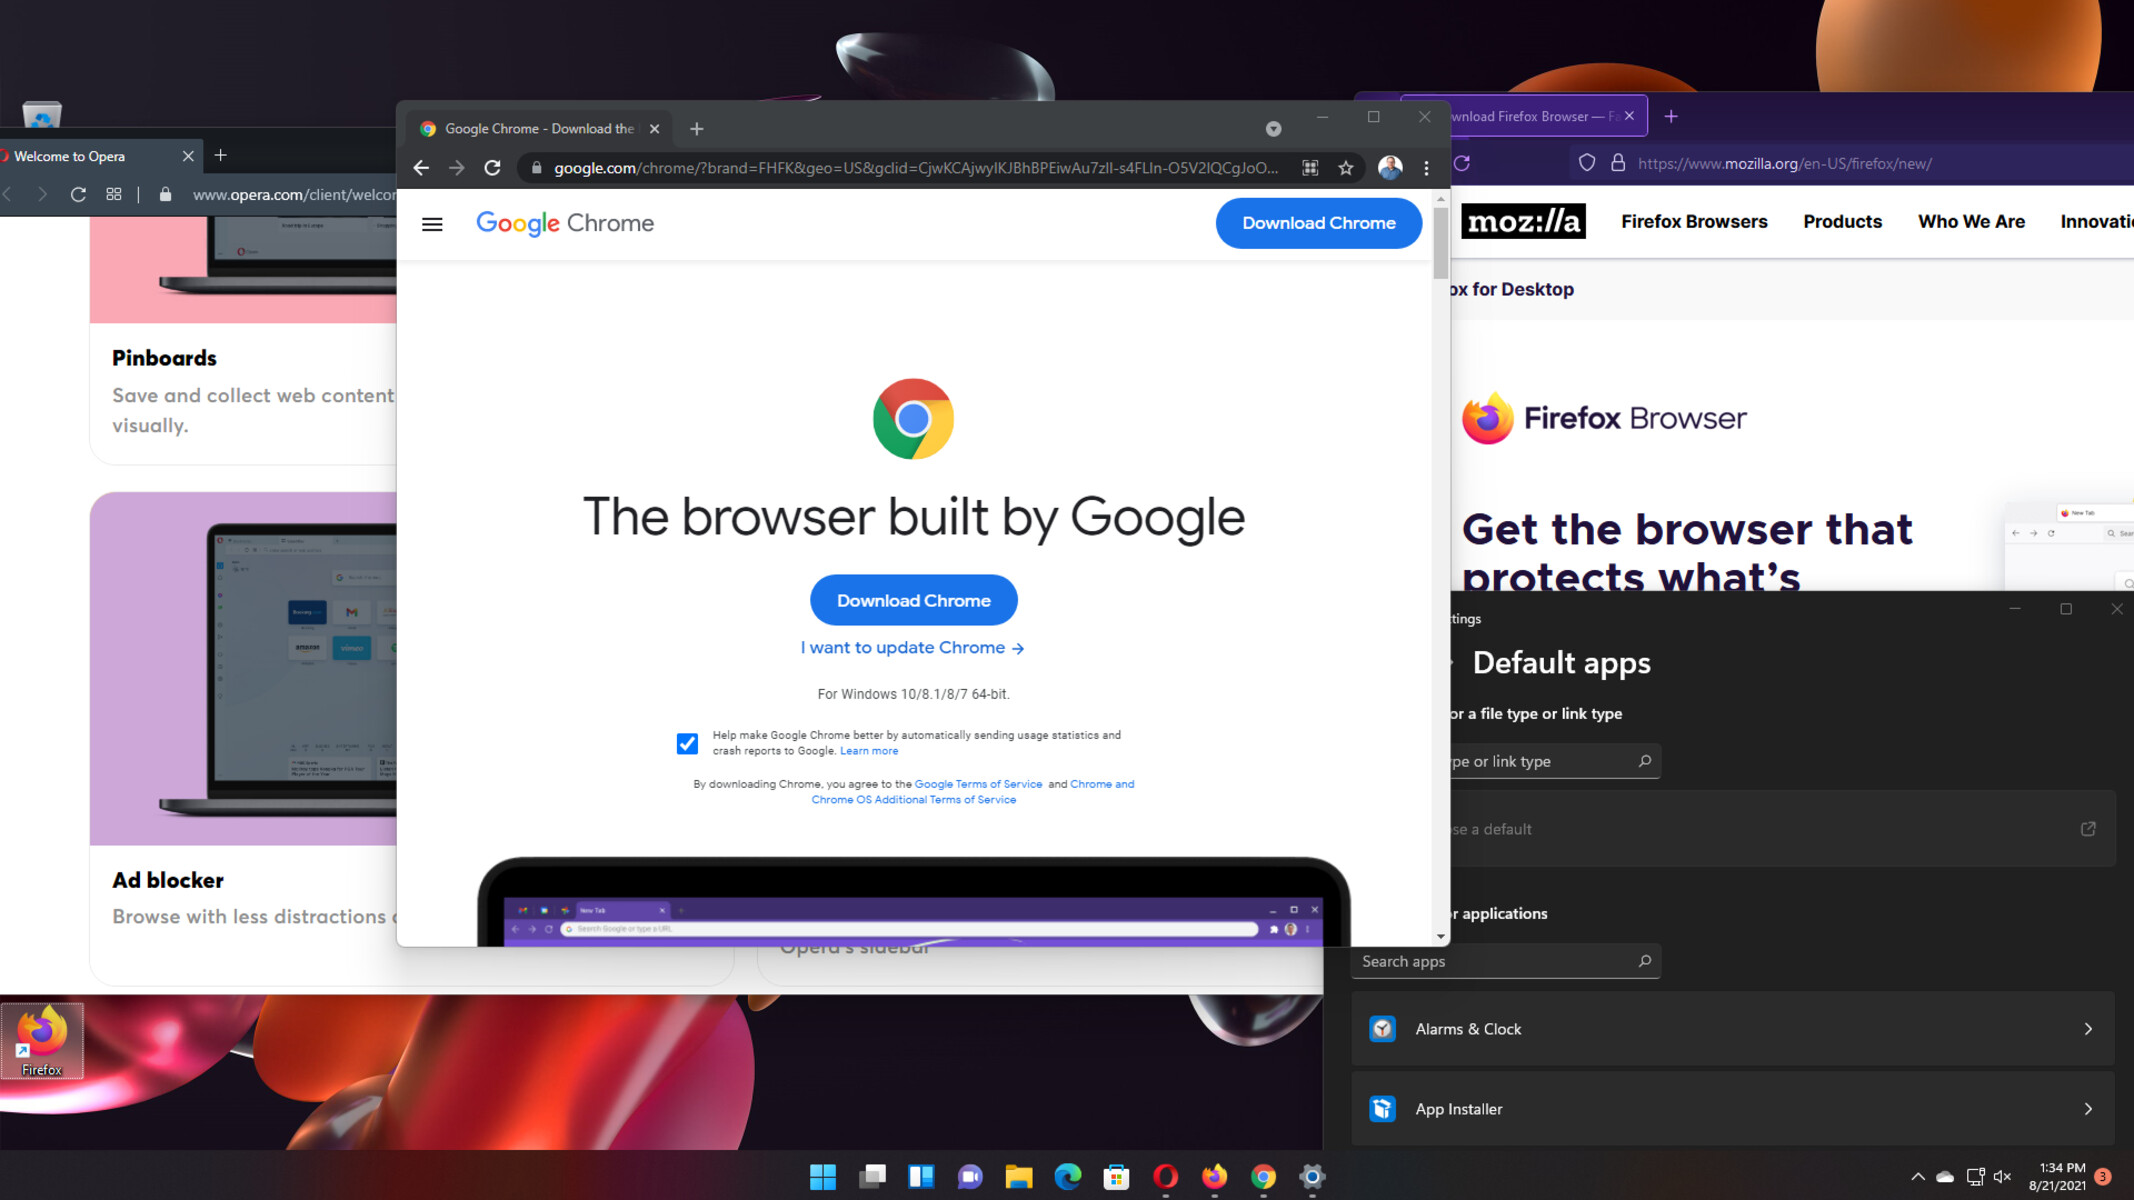
If you do not see Google Chrome listed, ensure that you have it installed on your computer. You can install Google Chrome by visiting the official Google Chrome website and downloading the latest version compatible with Windows 11. Once installed, it should appear in the list of available web browsers.
Selecting Google Chrome as your default browser will ensure that any links you click or web pages you open will automatically launch in Google Chrome. This makes it more convenient, as you won’t need to manually open Google Chrome every time you want to browse the web.
Choosing Google Chrome as your default browser also allows you to take advantage of its wide range of features, including advanced security options, extensions, personalized settings, and smooth integration with other Google services.
Once you have selected Google Chrome from the list of available web browsers, the Settings app will automatically save the changes. With this step completed, you are almost done with the process of setting Google Chrome as your default browser on Windows 11.
In the next step, you will need to confirm the change to ensure that Google Chrome is successfully set as your default browser. This will ensure that all your web browsing activities are seamlessly directed to Google Chrome for an optimized browsing experience.
Step 4: Set Google as Default Browser
Setting Google Chrome as the default browser on Windows 11 involves confirming the change you made in the previous step. This step is crucial to ensure that Google Chrome is successfully set as your default browser and that all web browsing activities are automatically directed to it.
After selecting Google Chrome as your preferred web browser in the “Web browser” category of the Windows 11 Settings app, you will notice that the chosen browser is now displayed under the “Web browser” section in the “Default apps” screen.
To set Google Chrome as the default browser, simply close the Settings app. This action will automatically save the changes you made, and Windows 11 will now recognize Google Chrome as your default web browser.
From this point forward, when you click on any web link, whether it’s in a document, email, or any other application, it will automatically open in Google Chrome. You no longer need to manually choose the browser each time.
Setting Google Chrome as the default browser provides a seamless browsing experience, as all your internet activities will be streamlined through the browser you are familiar with and prefer using. This includes accessing bookmarks, saving passwords, and enjoying the full range of functionality and features offered by Google Chrome.
By following these steps, you can successfully set Google Chrome as the default browser on your Windows 11 device. Enjoy the fast and secure web browsing experience that Google Chrome provides, with the ability to customize your settings, install extensions, and access your favorite websites with ease.
Now that you have completed the process of setting Google Chrome as your default browser on Windows 11, you can start exploring the web and enjoying all the benefits that come with using Google Chrome as your primary web browser.
Step 5: Confirm the Change
After setting Google Chrome as the default browser on Windows 11, it is important to confirm the change to ensure that it has been successfully implemented. This step allows you to verify that Google Chrome is indeed the default browser for all your web browsing activities.
To confirm the change, simply open any web link or launch a website. Windows 11 will automatically use Google Chrome as the default browser to open the link or webpage.
If Google Chrome opens and displays the web content, then the change has been successfully confirmed. You can be confident that all your web browsing activities will now be directed through Google Chrome as your default browser.
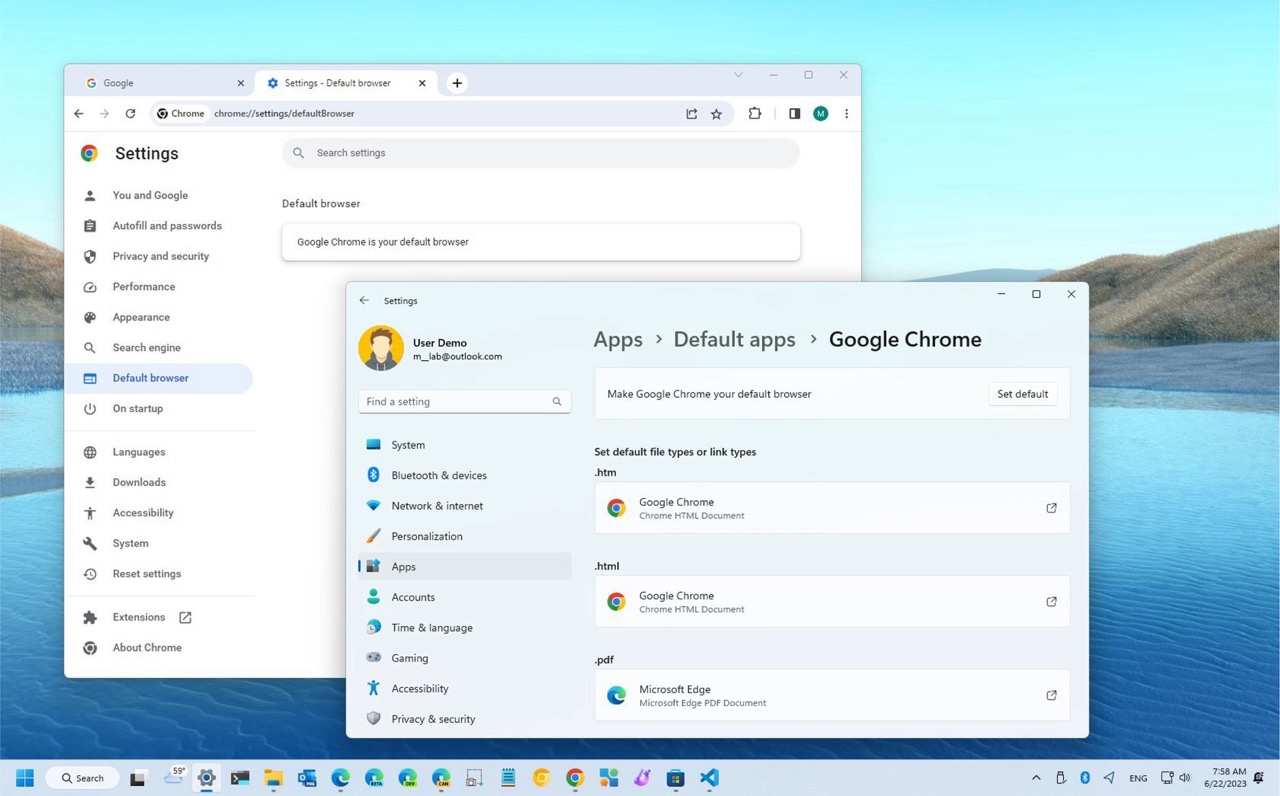
Additionally, you can check the default browser settings in the Windows 11 Settings app to ensure that Google Chrome is still selected as the default option. Open the Settings app, navigate to the “Default apps” section, and click on the “Web browser” category. You should see Google Chrome listed as the default browser.
If, for any reason, the change did not take effect or if you want to switch back to a different default browser, you can revisit the “Default apps” section in the Settings app and select a different web browser from the dropdown list.
By confirming the change, you can be confident that Google Chrome is set as the default browser on your Windows 11 device. This ensures that you can enjoy a seamless web browsing experience, taking advantage of the speed, reliability, and feature-rich nature of Google Chrome.
With Google Chrome as your default browser, you can browse the web, access your favorite websites, and enjoy a range of features such as bookmarks, extensions, and personalized settings. Whether you are a casual internet user or a power user, setting Google Chrome as your default browser on Windows 11 can greatly enhance your online experience.
Congratulations! You have successfully set Google Chrome as the default browser on your Windows 11 device. Now you can sit back and enjoy a smooth and optimized web browsing experience with your preferred browser.
Conclusion
Setting Google Chrome as the default browser on Windows 11 is a simple and effective way to enhance your web browsing experience. By following the step-by-step instructions outlined in this guide, you can easily make Google Chrome your go-to browser for all your online activities.
We started by opening the Settings app in Windows 11 and accessing the “Default apps” section. From there, we selected the “Web browser” category and chose Google Chrome as the default browser. Once the change was made, we confirmed it by opening a web link or launching a website, ensuring that Google Chrome was indeed the default browser.
By setting Google Chrome as your default browser, you can enjoy its speed, reliability, and a wide range of features. You can personalize your browsing experience with extensions, access your favorite websites with ease, and benefit from seamless integration with other Google services.
Remember, if at any point you want to switch back to a different default browser or make changes to the default apps on your Windows 11 device, you can always revisit the “Default apps” section in the Settings app.
Now that you have successfully set Google Chrome as your default browser, you can embark on a seamless and enjoyable web browsing journey. Whether you’re browsing for work, research, entertainment, or connecting with others, Google Chrome will be your reliable companion.
Embrace the speed, security, and versatility that Google Chrome offers, and make the most out of your online experiences with its intuitive interface and extensive features. With Google Chrome as your default browser, you can navigate the web with ease, confidence, and a touch of personalization.
So go ahead, explore the web, discover new websites, and make the most of your online adventures. Enjoy the benefits of using Google Chrome as your trusted default browser on Windows 11, and make your web browsing experience truly yours.