Introduction
Welcome to our guide on how to set electric water heater thermostats. Whether you’re looking to adjust the temperature for comfort or energy savings, understanding how to properly set your water heater thermostat is crucial. A water heater thermostat controls the temperature of the water inside the tank, ensuring it is at the desired level. Knowing how to access and adjust these thermostats will give you greater control over your hot water supply.
Before we delve into the step-by-step process, it’s important to note that working with electricity requires caution and adherence to safety protocols. Ensure that you take all necessary precautions and consider calling a professional if you are uncomfortable with performing the task yourself.
In this guide, we will walk you through the process of adjusting the temperature settings on your electric water heater thermostat. We’ll cover the tools and materials you’ll need, as well as provide detailed instructions for each step of the process. By the end, you’ll have the knowledge and confidence to make any necessary adjustments to ensure your water heater is operating efficiently and effectively.
It’s worth mentioning that every water heater is unique, so the specific steps in this guide may vary slightly depending on the make and model of your unit. Always consult your manufacturer’s instructions or seek professional advice if you have any doubts about the process.
So, whether you’re aiming for a higher or lower water temperature, let’s dive into the world of electric water heater thermostats and learn how to make the necessary adjustments.
Understanding Electric Water Heater Thermostats
Before you learn how to set your electric water heater thermostat, it’s essential to have a basic understanding of how these devices work. The thermostat is a crucial component of your water heater that controls the temperature of the water within the tank.
Electric water heaters typically have two thermostats – one for the upper heating element and one for the lower heating element. These thermostats are responsible for monitoring and regulating the temperature of the water in the tank. When the water temperature drops below the specified set point, the thermostat signals the heating element to activate and warm up the water to the desired temperature.
Each thermostat is equipped with a temperature dial, allowing you to adjust the water temperature. The temperature settings are typically represented in degrees Fahrenheit or Celsius. The available range for adjustment may vary depending on the model but is usually between 90°F (32°C) and 160°F (71°C).
It’s important to find a balance between having hot enough water for your needs and conserving energy. Setting the water temperature too high can not only increase the risk of scalding but it might also waste energy and increase your utility bills. On the other hand, setting it too low may not provide enough hot water for your daily needs.
It’s worth noting that some modern electric water heaters come equipped with advanced features such as digital displays and programmable settings. These features allow for more precise temperature control and energy-efficient operation. If your water heater has additional features, refer to the manufacturer’s instructions for guidance on setting and adjusting them.
Now that you have a basic understanding of electric water heater thermostats, let’s move on to the tools and materials you’ll need to make the necessary adjustments.
Tools and Materials Needed
Before you begin adjusting your electric water heater thermostat, it’s important to gather the necessary tools and materials. Here’s a list of items you’ll need:
- Screwdriver: A flat-head or Phillips screwdriver, depending on the type of screws used to secure the access panels on your water heater.
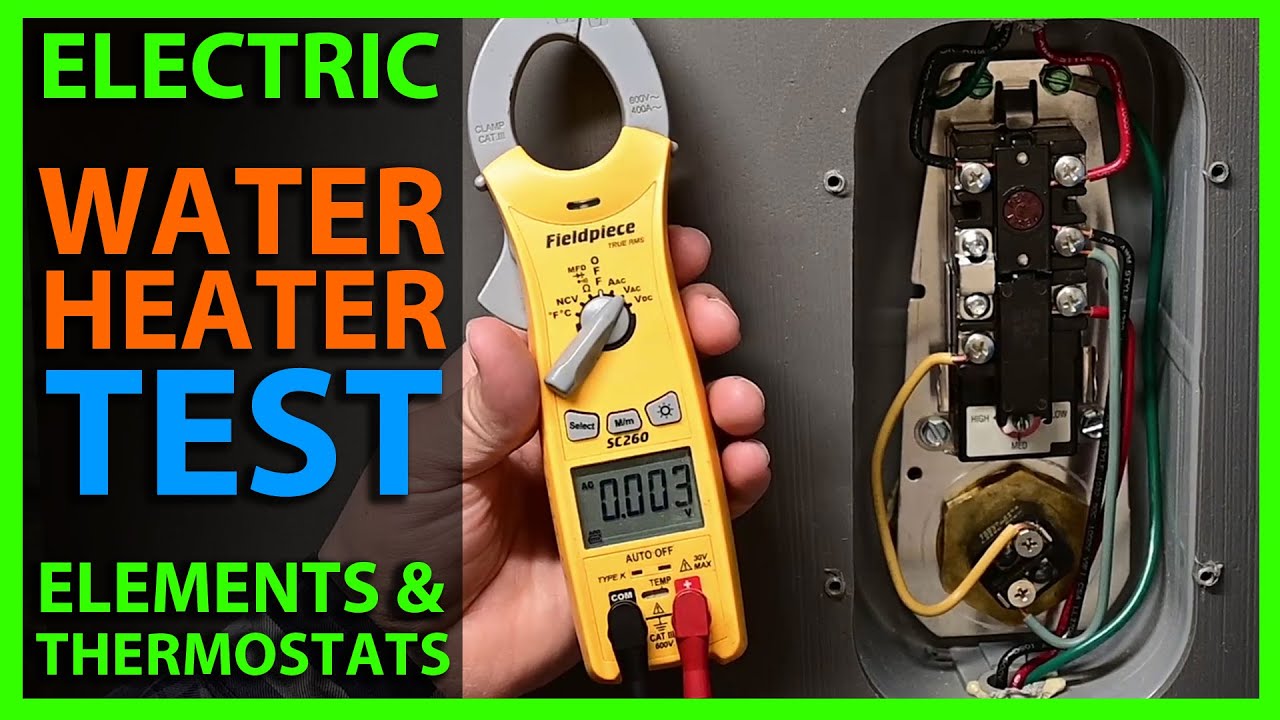
- Electrical Testing Device: This can be a non-contact voltage tester or a multimeter to ensure that the power to the water heater is turned off before you start working on it. Safety is paramount, so double-checking that there is no electrical current running through the unit is essential.
- Protective Gear: It’s always a good idea to wear gloves and safety glasses when working on your water heater to protect yourself from any potential hazards.
If you do not already have these tools at your disposal, you can typically find them at a local hardware store or online retailer. Remember to choose tools that are suitable for electrical work and ensure they are in good working condition before proceeding.
In addition to gathering the necessary tools, it’s important to familiarize yourself with the layout and components of your specific water heater. Take a moment to review the manufacturer’s manual or locate the model number and search for online resources related to your specific make and model.
By having the right tools and understanding the layout of your water heater, you’ll be well-prepared to safely and effectively adjust the temperature settings on your electric water heater thermostat.
Step 1: Safety Precautions
Working with electricity can be dangerous, so it’s essential to take proper safety precautions before adjusting your electric water heater thermostat. Follow these steps to ensure your safety throughout the process:
- Turn Off the Power: Before you begin, locate your home’s electrical panel and turn off the circuit breaker or remove the fuse that supplies power to your water heater. This step is crucial to prevent any electrical shocks or accidents during the adjustment process.
- Test for Power: Even after turning off the power at the breaker, it’s important to verify that there is no electricity flowing to your water heater. Use a non-contact voltage tester or a multimeter to test the wires connected to the water heater. Double-checking will provide an extra layer of safety, ensuring that it’s safe to proceed.
- Protective Gear: Before starting work, put on protective gear, including gloves and safety glasses, to protect your hands and eyes from any potential hazards.
- Follow Manufacturer’s Instructions: Refer to your water heater’s manual or the manufacturer’s instructions for any specific safety guidelines or precautions related to working with your particular model.
By following these safety precautions, you reduce the risk of injury and ensure a safe working environment throughout the process of adjusting your electric water heater’s thermostat.
Step 2: Turning Off Power
Now that you’ve taken the necessary safety precautions, it’s time to proceed with turning off the power to your electric water heater. Follow these steps:
- Locate the Electrical Panel: Find the electrical panel in your home, which is typically located in the basement, garage, or utility room. It may be labeled as “Electrical,” “Circuit Breaker,” or something similar.
- Identify the Water Heater Circuit: Look for the circuit breaker that is dedicated to your water heater. It should be labeled with the appropriate identification, such as “Water Heater” or “Hot Water Tank.” If you’re unsure, you can refer to the circuit breaker list or consult with a professional electrician.
- Switch Off the Circuit Breaker: Once you’ve identified the correct circuit, turn off the corresponding circuit breaker by flipping it to the “Off” position. This will cut off the power supply to your water heater and ensure that no electricity is flowing to it.
- Double-Check for Power: After turning off the circuit breaker, it’s essential to verify that no electrical current is still present in the water heater. You can do this by using a non-contact voltage tester or a multimeter to test the wires connected to the water heater. If there is still power detected, reconsider proceeding and consult a professional.
By following these steps, you ensure that there is no power running to your electric water heater, minimizing the risk of electrical shocks or accidents during the adjustment process.
Step 3: Removing Access Panels
With the power to your electric water heater turned off, you can now move on to removing the access panels to gain access to the thermostats. Follow these steps:
- Locate the Access Panels: Take a moment to familiarize yourself with the layout of your water heater and locate the access panels. These panels are typically located on the front or side of the water heater and are secured with screws.
- Choose the Correct Screwdriver: Determine the type of screws used to secure the access panels. It could be flat-head or Phillips-head screws. Make sure you have the appropriate screwdriver handy.
- Remove the Screws: Use the screwdriver to carefully remove the screws securing the access panels. Place the screws in a safe place, so you don’t lose them.
- Gently Remove the Access Panel: Once the screws are removed, gently pull the access panel away from the water heater. Be cautious not to force it or damage any components behind the panel.
Depending on your water heater model, you may have multiple access panels. For instance, if you have a top and bottom thermostat, there will be two panels to remove.
By following these steps, you will successfully remove the access panels and gain access to the thermostats of your electric water heater.
Step 4: Locating the Thermostats
With the access panels removed, it’s time to locate the thermostats on your electric water heater. Here’s how:
- Examine the Interior: Take a close look inside the water heater, where the access panels were located. You should see a series of components, including the heating elements, insulation, and the thermostats.
- Identify the Thermostats: The thermostats are small devices attached to the side of the water heater tank. They are usually oval or rectangular in shape and have wires connected to them. There will be two thermostats – one for the upper heating element and one for the lower heating element.
- Note the Temperature Dial: Each thermostat has a temperature dial or adjustment knob that allows you to change the water temperature. The temperature settings are typically marked in degrees Fahrenheit or Celsius.
It’s important to note that the location of the thermostats can vary depending on the design of your specific water heater model. However, they are typically positioned towards the bottom of the tank for the lower thermostat and towards the top for the upper thermostat.
If you’re having difficulty locating the thermostats, consult your water heater’s manual or search online resources specific to your make and model. Understanding the layout and components of your water heater will make the adjustment process easier.
Now that you have successfully located the thermostats, you can move on to identifying the upper and lower thermostats in the next step.
Step 5: Identifying Upper and Lower Thermostats
Once you have located the thermostats on your electric water heater, it’s important to identify which thermostat controls the upper heating element and which controls the lower heating element. Follow these steps:
- Observe the Wiring: Take a close look at the wiring connected to the thermostats. Each thermostat is typically connected to its respective heating element via wires.
- Follow the Wiring: Trace the wires from the thermostats to the heating elements. The wires connected to the lower thermostat should lead to the lower heating element, while the wires connected to the upper thermostat should lead to the upper heating element.
- Note the Temperature Dial: As mentioned earlier, each thermostat has a temperature dial or adjustment knob. Take note of the temperature dial associated with each thermostat. The upper thermostat is usually labeled or marked as “Upper” or “Top,” while the lower thermostat may be labeled as “Lower” or “Bottom.”
By following these steps and examining the wiring and temperature dials, you can easily identify which thermostat controls the upper heating element and which controls the lower heating element on your electric water heater.
Once you have successfully identified the upper and lower thermostats, you’re ready to move on to adjusting the temperature settings in the next step.
Step 6: Adjusting Temperature Settings
With the upper and lower thermostats identified, you can now proceed to adjust the temperature settings on your electric water heater. Follow these steps:
- Select the Desired Temperature: Decide on the desired water temperature for your specific needs. Keep in mind that the recommended temperature range is typically between 120°F (49°C) and 140°F (60°C) to balance comfort and energy efficiency.
- Turn the Temperature Dial: On each thermostat, locate the temperature dial or adjustment knob. Use a flat-head or Phillips screwdriver, depending on the thermostat design, to turn the dial in the desired direction. Turning the dial clockwise usually increases the temperature, while turning it counterclockwise decreases the temperature.
- Adjust One Thermostat at a Time: To ensure accuracy and avoid confusion, adjust the temperature settings one thermostat at a time. Begin with the upper thermostat and make the necessary adjustments, then move on to the lower thermostat.
- Wait for the Water Heater to React: After adjusting the temperature settings, give your water heater some time to react and reach the new temperature. This can take up to one hour for the changes to take effect, so be patient before testing the water temperature.
It’s important to note that different models of electric water heaters may have different methods for adjusting the temperature. Some may require pressing buttons or navigating through digital menus. Consult your water heater’s manual or the manufacturer’s instructions for guidance specific to your make and model.
By following these steps and making the necessary temperature adjustments, you can ensure that your electric water heater provides water at the desired temperature for your needs.
Step 7: Time for Testing
After adjusting the temperature settings on your electric water heater, it’s time to test the water to ensure it matches your desired temperature. Follow these steps:
- Give It Some Time: Allow your water heater some time to heat the water to the newly adjusted temperature. This typically takes about an hour for the changes to take effect.
- Turn on the Hot Water Tap: Locate a nearby hot water tap in your home, such as in the kitchen or bathroom. Open the tap and let the water flow for a few minutes to ensure you are drawing hot water from the tank.
- Check the Water Temperature: Use a thermometer or your hand to test the temperature of the hot water. Adjust the tap as needed to achieve the desired water temperature. Be cautious not to scald yourself, as water that is too hot can cause burns.
- Verify Consistency: Run the hot water for a few minutes and monitor the temperature to ensure it remains consistent. If you notice any fluctuations or inconsistent temperatures, reconsider adjusting the temperature settings or consult a professional.
It’s important to remember that the time it takes for hot water to reach your tap can vary based on your plumbing system and the distance from your water heater. Be patient when testing the water temperature, allowing enough time for the hot water to flow through the pipes.
If you find that the water temperature is not meeting your needs or there are other issues, you may need to readjust the temperature settings or seek professional assistance to diagnose and resolve any underlying problems with your water heater.
By following these steps and testing the water temperature, you can ensure that your electric water heater is delivering hot water at the desired temperature.
Step 8: Reinstalling Access Panels
Now that you have adjusted and tested the temperature settings on your electric water heater, it’s time to reinstall the access panels. Follow these steps:
- Align the Access Panel: Take the access panels that you previously removed and align them properly with the openings on the water heater. Ensure that they fit snugly and line up with the screw holes.
- Insert Screws: Once the panels are aligned, take the screws that you set aside earlier and insert them back into the screw holes. Use the appropriate screwdriver to tighten the screws securely without overtightening or stripping them.
- Double-Check the Panels: After tightening the screws, give the access panels a gentle shake or tug to ensure they are firmly in place and won’t come loose during operation.
It’s important to note that some water heater models may have additional components or insulation that require repositioning or securing when reinstalling the access panels. Refer to your water heater’s manual or the manufacturer’s instructions for guidance specific to your make and model.
By following these steps and properly reinstalling the access panels, you ensure that the thermostats and other internal components of your electric water heater are protected and secure.
Conclusion
Congratulations! You have successfully learned how to set and adjust the temperature settings on your electric water heater thermostat. By following the step-by-step process outlined in this guide, you now have the knowledge and confidence to make the necessary adjustments to ensure your water heater operates efficiently and provides hot water at the desired temperature.
Remember to always prioritize safety when working with electricity. Take the necessary precautions, such as turning off the power and wearing protective gear, to minimize the risk of accidents or electrical shocks.
Understanding how electric water heater thermostats function is crucial for achieving the perfect balance between hot water supply and energy efficiency. By making informed temperature adjustments, you can ensure comfort, safety, and cost-effectiveness in your daily hot water usage.
If you encounter any difficulties during the process or have concerns about your water heater, it’s always advisable to consult the manufacturer’s instructions or seek assistance from a professional plumber or electrician. They can provide expert guidance and address any specific issues related to your particular water heater model.
Maintaining your electric water heater and periodically checking the temperature settings will help ensure its optimal performance and longevity. Regularly test the hot water temperature and make adjustments as necessary to meet your needs and preferences.
Thank you for using this guide to learn how to set electric water heater thermostats. With your newfound knowledge, you can now enjoy the benefits of a properly adjusted water heater that provides hot water at the perfect temperature whenever you need it!