Introduction
Setting an alarm on your Apple Watch allows you to wake up or be reminded of important tasks right from your wrist. Whether you’re a busy professional, a fitness enthusiast, or someone who simply needs a gentle nudge to stay on track, utilizing the alarm feature on your Apple Watch can be incredibly helpful.
In this guide, we will walk you through the step-by-step process of setting an alarm on your Apple Watch. By following these simple instructions, you’ll be able to ensure that you never miss an important appointment, meeting, or workout again.
With its stylish design and impressive functionality, the Apple Watch has become an essential accessory for many individuals. Beyond its ability to track your fitness activities and provide important notifications, this nifty device can also serve as a reliable alarm clock.
Whether you’re using the newest Apple Watch Series 7 or an earlier model, the process of setting an alarm remains largely the same. So, grab your Apple Watch and let’s get started on configuring your personalized alarm settings.
By the end of this guide, you’ll be well-equipped with the knowledge and confidence to set alarms on your Apple Watch whenever and wherever you need them. So, let’s dive in and discover how to harness this incredible feature to make your life more organized and effortless.
Step 1: Open the Clock app
To begin setting an alarm on your Apple Watch, first, navigate to the Clock app. You can easily access it by tapping on the clock icon located on the home screen of your Apple Watch. The Clock app is a default application that comes pre-installed on all Apple Watches and is represented by a white icon with a black clock face.
Once you’ve located and opened the Clock app, you’ll be presented with various options, including World Clock, Alarm, Stopwatch, and Timer. For the purpose of setting an alarm, you’ll want to tap on the Alarm tab, which is represented by an icon of a bell.
Upon tapping the Alarm tab, you’ll be taken to a screen where you can manage and configure all your existing alarms. If you’ve never set an alarm on your Apple Watch before, this screen will be empty. Otherwise, you will see a list of your current alarms.
Now that you’ve successfully opened the Clock app and accessed the Alarm tab, you’re ready to move on to the next step in the process of setting up your desired alarm time.
Step 2: Tap on the Alarm tab
After opening the Clock app on your Apple Watch, you’ll need to navigate to the Alarm tab. To do this, simply tap on the Alarm icon, which is represented by a bell-shaped icon located at the bottom of the screen.
Tapping on the Alarm tab will bring up the list of your current alarms, if you have any already set. If it’s your first time setting an alarm, the list will be empty. Don’t worry, we’ll guide you through the process of creating a new alarm from scratch.
Once you’ve tapped on the Alarm tab, you’ll be taken to a screen where you can manage and customize your alarms. Here, you’ll have the option to view, edit, and delete existing alarms, as well as create new ones.
The Alarm tab provides a user-friendly interface, displaying your alarms in a neat and organized manner. Each alarm will be listed with its corresponding time, repeat settings, and other customizable options.
Now that you’ve successfully tapped on the Alarm tab, you’re ready to move on to the next step of setting up a new alarm on your Apple Watch.
Step 3: Tap the “+” button
To create a new alarm on your Apple Watch, you’ll need to tap the “+” button, located at the top right corner of the screen in the Alarm tab. This button is represented by a plus symbol (+) and is easily identifiable.
By tapping the “+” button, you initiate the process of adding a new alarm to your Apple Watch. Once you tap the button, you’ll be presented with options to customize the various settings of your alarm, including the time, repeat schedule, alarm options, and more.
After tapping the “+” button, you’ll be directed to a new screen where you can input the desired settings for your alarm. This screen will allow you to personalize your alarm based on your specific needs and preferences.
The addition of a “+” button makes it convenient and straightforward to create new alarms on your Apple Watch. It eliminates the need to navigate through complex menus and ensures that you can efficiently set up alarms whenever you need them.
Now that you’ve successfully tapped the “+” button, you’re ready to move on to the next step in setting up your alarm: configuring the time at which you want the alarm to sound.
Step 4: Set the time
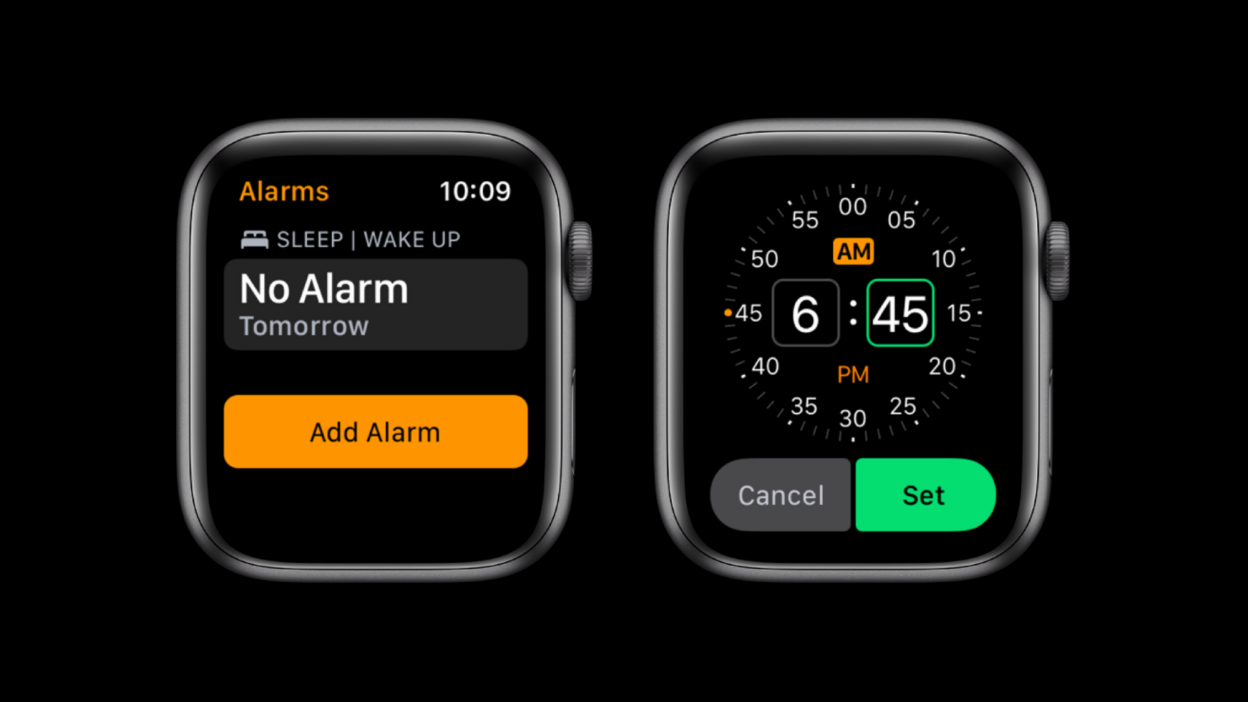
Once you’ve tapped the “+” button to create a new alarm on your Apple Watch, you’ll need to set the desired time at which you want the alarm to go off. Setting the time is a crucial step in ensuring that your alarm functions effectively and wakes you up or reminds you at the desired moment.
On the screen where you configure your alarm settings, you’ll see a section dedicated to selecting the time. You can adjust the hours and minutes using the digital crown or by tapping the “+” and “-” buttons provided.
The digital crown is the circular wheel located on the side of your Apple Watch. Scrolling it up or down allows you to adjust the time effortlessly. Alternatively, tapping the “+” button increases the time in five-minute intervals, while tapping the “-” button decreases it.
As you set the time, the screen will update in real-time to display the chosen time accurately. Take your time to select the appropriate hour and minute to match your desired wake-up or reminder time.
It’s worth noting that you can also toggle between the 12-hour and 24-hour time formats by going to the watch’s Settings app, selecting “Clock,” and adjusting the “Time” option. This allows you to customize the time display based on your preference.
Once you’ve set the desired time for your alarm, you can proceed to the next step of selecting the days you want the alarm to repeat, ensuring that it becomes a consistent part of your daily routine.
Step 5: Select the days you want the alarm to repeat
After setting the time for your alarm, it’s time to determine which days you want the alarm to repeat. This feature is particularly useful for individuals with a consistent daily schedule or those who want specific reminders on certain days.
On the alarm settings screen, you’ll find an option to select the days of the week for the alarm to repeat. By default, the alarm will be set to repeat on all days. However, you can customize this to suit your needs.
To select the days, simply tap on the “Repeat” option. You’ll be presented with a list of the days of the week, such as Monday, Tuesday, Wednesday, and so on. Tap on the specific days you want the alarm to repeat, and they will be highlighted.
The ability to choose specific days for your alarm to repeat ensures flexibility and convenience. For example, if you have a weekday routine and want your alarm to go off only from Monday to Friday, you can easily configure it to do so.
Furthermore, if you have a different schedule on weekends or prefer to sleep in on certain days, you can exclude those days from the repeat schedule. This allows you to tailor the alarm settings to match your unique lifestyle.
Once you’ve selected the days you want the alarm to repeat, you’re one step closer to completing the alarm setup process. However, there are still additional options and customizations available to make your alarm experience even more personalized.
Step 6: Choose alarm options
After setting the time and selecting the days for your alarm to repeat, you have the option to further customize your alarm settings by choosing additional alarm options. These options allow you to fine-tune the behavior of your alarm to better suit your preferences and needs.
On the alarm settings screen, you’ll find a section dedicated to alarm options. Here, you can make various choices such as the alarm label, vibration settings, and whether or not the alarm should fade in gradually.
The alarm label allows you to provide a custom name or description for your alarm. This can be helpful if you have multiple alarms set or if you want to assign a specific meaning to each alarm. To set the label, simply tap on the label field and use the on-screen keyboard to enter your desired text.
Next, you can configure the vibration settings for your alarm. You can choose from different vibration patterns, including a constant vibration or a more subtle and gentle vibration. Experiment with the options and select the one that best suits your preferences and needs.
Additionally, you can choose whether you want the alarm to fade in gradually. When enabled, the alarm will start softly and gradually increase in volume, allowing for a more peaceful wake-up experience. This gradual awakening can make the transition from sleep to wakefulness smoother and less jarring.
These alarm options provide flexibility in customizing your alarm to match your preferences and lifestyle. By selecting the appropriate label, vibration settings, and alarm fade-in options, you can create an alarm experience tailored to your unique needs.
With the alarm options configured, you’re almost done setting up your alarm. However, there’s one more important element to consider: the alarm sound. Let’s explore how you can choose and customize the sound of your alarm in the next step.
Step 7: Customize alarm sound
Customizing the alarm sound on your Apple Watch allows you to wake up or receive reminders with a tone that suits your preferences. Apple offers a variety of built-in alarm sounds, as well as the option to use your favorite song or sound as the alarm.
To customize the alarm sound, follow these steps:
- On the alarm settings screen, scroll down until you reach the “Sound” option.
- Tap on the “Sound” option to access the list of available alarm sounds.
- Browse through the list and listen to the different alarm sounds by tapping on each option.
- Once you find a sound that you like, simply tap on it to select it as your alarm sound.
If you’d prefer to use a custom sound or song for your alarm, you can do so by following these steps:
- Tap on the “Pick a Song” option, located below the list of built-in alarm sounds.
- From here, you can choose a song from your Apple Music library or select a sound from the available categories.
- Once you’ve made your selection, tap on the song or sound to set it as your alarm sound.
Customizing the alarm sound allows you to personalize your waking experience and choose a tone that best suits your preferences, whether you prefer a gentle melody or a more energetic sound to get you out of bed.
By using your favorite song or sound as the alarm, you can inject a touch of personalization and enjoyment into your waking routine. You can start your day on a positive note by waking up to a song that resonates with you or a sound that brings a smile to your face.
With the alarm sound customized to your liking, your alarm setup on the Apple Watch is almost complete. However, there’s one more feature to consider: enabling or disabling the snooze option. Let’s explore this in the next step.
Step 8: Enable or disable snooze
The snooze feature on your Apple Watch allows you to temporarily delay the alarm and get a few extra minutes of sleep before it goes off again. Whether you need a little more time to wake up or want a gentle reminder to stay on schedule, the snooze option can be a useful tool.
To enable or disable the snooze option for your alarm, follow these steps:
- On the alarm settings screen, locate the “Snooze” toggle switch.
- If you want to enable the snooze option, make sure the toggle switch is turned on. It will appear green when activated.
- If you prefer to disable the snooze option, simply toggle the switch off. It will appear gray when deactivated.
When the snooze option is enabled, your Apple Watch will provide you with the option to snooze the alarm when it goes off. You can do this by tapping the “Snooze” button that appears on the screen when the alarm rings.
The default snooze time on the Apple Watch is nine minutes. However, you can adjust the duration by going to the watch’s Settings app, selecting “Clock,” and adjusting the “Snooze” option. This allows you to customize the snooze duration according to your preferences.
Enabling or disabling the snooze option is a personal choice that depends on your sleep habits and morning routine. If you find that snoozing helps you ease into waking up gradually, then enabling the snooze option can be beneficial. On the other hand, if snoozing tends to disrupt your daily schedule, disabling it may lead to more consistent waking habits.
With the snooze option enabled or disabled according to your preference, you are now ready to save your alarm settings and complete the process of setting an alarm on your Apple Watch. Let’s move on to the final step.
Step 9: Save the alarm settings
Once you have customized all the desired settings for your alarm on your Apple Watch, it’s important to save the alarm settings to ensure they are correctly applied. Saving the settings will ensure that your alarm is set up and ready to go whenever you need it.
To save the alarm settings, follow these simple steps:
- Review all the alarm settings on the screen, including the time, repeat schedule, alarm options, and sound selection.
- If you need to make any changes, you can navigate back to the appropriate sections and adjust the settings accordingly.
- Once you are satisfied with the alarm settings, simply tap the “Save” button, usually located at the top right corner of the screen.
By tapping the “Save” button, your custom alarm settings will be saved, and your newly created alarm will be active and ready to use. Your Apple Watch will now be able to wake you up or remind you of important events at the scheduled time and with the configured options.
It’s essential to ensure that you save the alarm settings after making any changes or creating a new alarm. This will prevent any loss of settings and ensure that your alarm functions correctly at the desired time and with the chosen preferences.
With the alarm settings saved, you can rest easy knowing that your Apple Watch will reliably wake you up or remind you of your important tasks and appointments. Take a moment to double-check all the settings before closing the Clock app to ensure everything is set up exactly how you want it.
Congratulations! You have now successfully set an alarm on your Apple Watch. Enjoy the benefits of this convenient feature and wake up or stay on schedule effortlessly!
Conclusion
Setting an alarm on your Apple Watch is a simple and convenient way to ensure that you stay on track and never miss an important event or task. By following the step-by-step guide outlined in this article, you can easily configure your personalized alarm settings and start enjoying the benefits of this feature.
From opening the Clock app to selecting the alarm sound, each step in the process is designed to make setting an alarm on your Apple Watch a seamless experience. The ability to customize the time, choose repeat days, and personalize the alarm options allows you to tailor the alarm to your specific needs and preferences.
The snooze option provides flexibility for those who prefer a gradual waking experience or a gentle nudge to stay on schedule. Additionally, the ability to customize the alarm sound with built-in tones or your favorite songs adds a personal touch to your waking routine.
Remember to save your alarm settings once you have configured them to ensure that they are correctly applied and ready to use. This will give you the peace of mind knowing that your Apple Watch will reliably wake you up or remind you at the scheduled time.
Now that you have learned how to set an alarm on your Apple Watch, take advantage of this feature to enhance your daily routine and improve your time management. Whether you’re an early riser, a busy professional, or someone who simply needs reminders throughout the day, the alarm feature on your Apple Watch is a valuable tool.
So go ahead, set your alarms, and enjoy the seamless wake-up or reminder experience provided by your Apple Watch. Make the most of this incredible device and stay organized and on top of your schedule effortlessly.