Introduction
Microsoft Outlook is a popular email client that offers a plethora of features to manage your emails efficiently. However, there may be times when you need to save an important email as a PDF file for reference, archiving, or sharing purposes. Saving an email as a PDF allows you to preserve the content, formatting, and attachments in a universally compatible format.
In this guide, we will walk you through the step-by-step process of saving an Outlook email as a PDF file, ensuring that you can easily follow along and achieve the desired result. Whether you need to save a single email or multiple emails, Outlook provides a seamless method to convert them into PDF format.
By converting emails to PDF, you can maintain the integrity of the email content, including embedded images, hyperlinks, and special formatting. This makes it an ideal option for creating professional reports, preserving important communication, or securing sensitive information.
So, if you want to learn how to save Outlook emails as PDFs, continue reading to discover the simple yet effective steps. With just a few clicks, you’ll have your emails converted into PDFs, ready to be shared, stored, or printed.
Step 1: Open Microsoft Outlook
The first step in saving an Outlook email as a PDF is to open the Microsoft Outlook application on your computer. Look for the Outlook icon on your desktop or navigate to the Windows Start menu and search for Outlook.
Once you have located and opened the application, you will be greeted with the Outlook interface, which includes your inbox, folders, and various navigation options. Take a moment to familiarize yourself with the layout if you are new to Outlook.
If you have multiple email accounts set up in Outlook, ensure that you are logged into the account from which you wish to save the email as a PDF. You can switch between accounts by clicking on the account name or profile picture in the top right corner of the window.
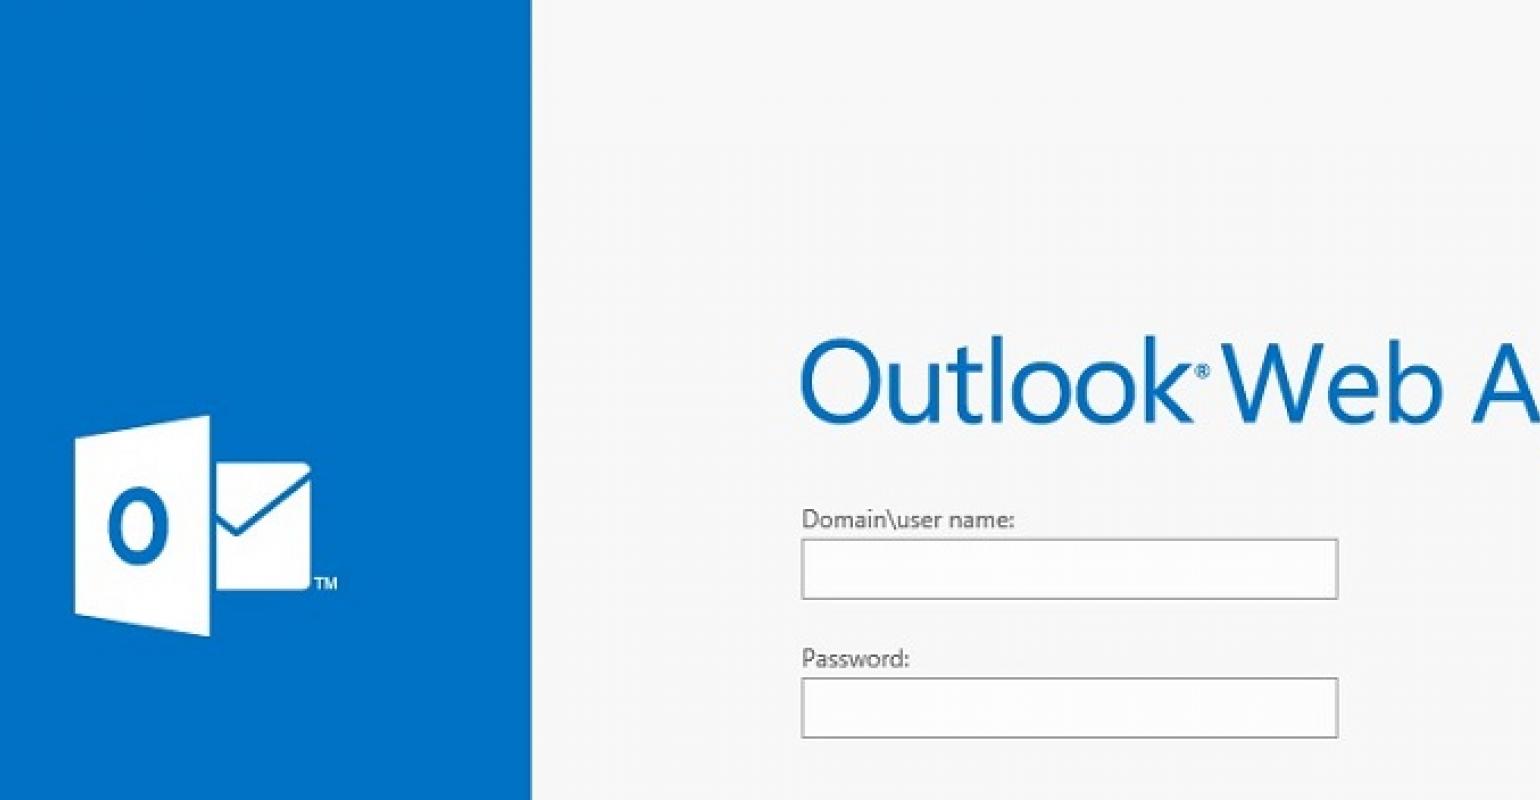
If you are already logged in to Outlook, you can proceed to the next step. Otherwise, enter your email address and password to sign in and access your emails.
It is worth mentioning that the steps provided in this guide are based on the desktop version of Outlook for Windows. If you are using a different version, such as Outlook for Mac or Outlook on the web, the process may vary slightly.
With Microsoft Outlook open and your desired email account logged in, you are now ready to move on to the next step and select the email you want to save as a PDF.
Step 2: Select the Email
Once you have opened Microsoft Outlook and are logged into your desired email account, the next step is to select the email that you want to save as a PDF. This could be an email from your inbox, a sent email, or even an email within a specific folder.
Navigate to the folder or location where the email is stored within Outlook. You can use the folder pane on the left-hand side of the Outlook window to browse through your various folders and subfolders. Click on the appropriate folder to view its contents.
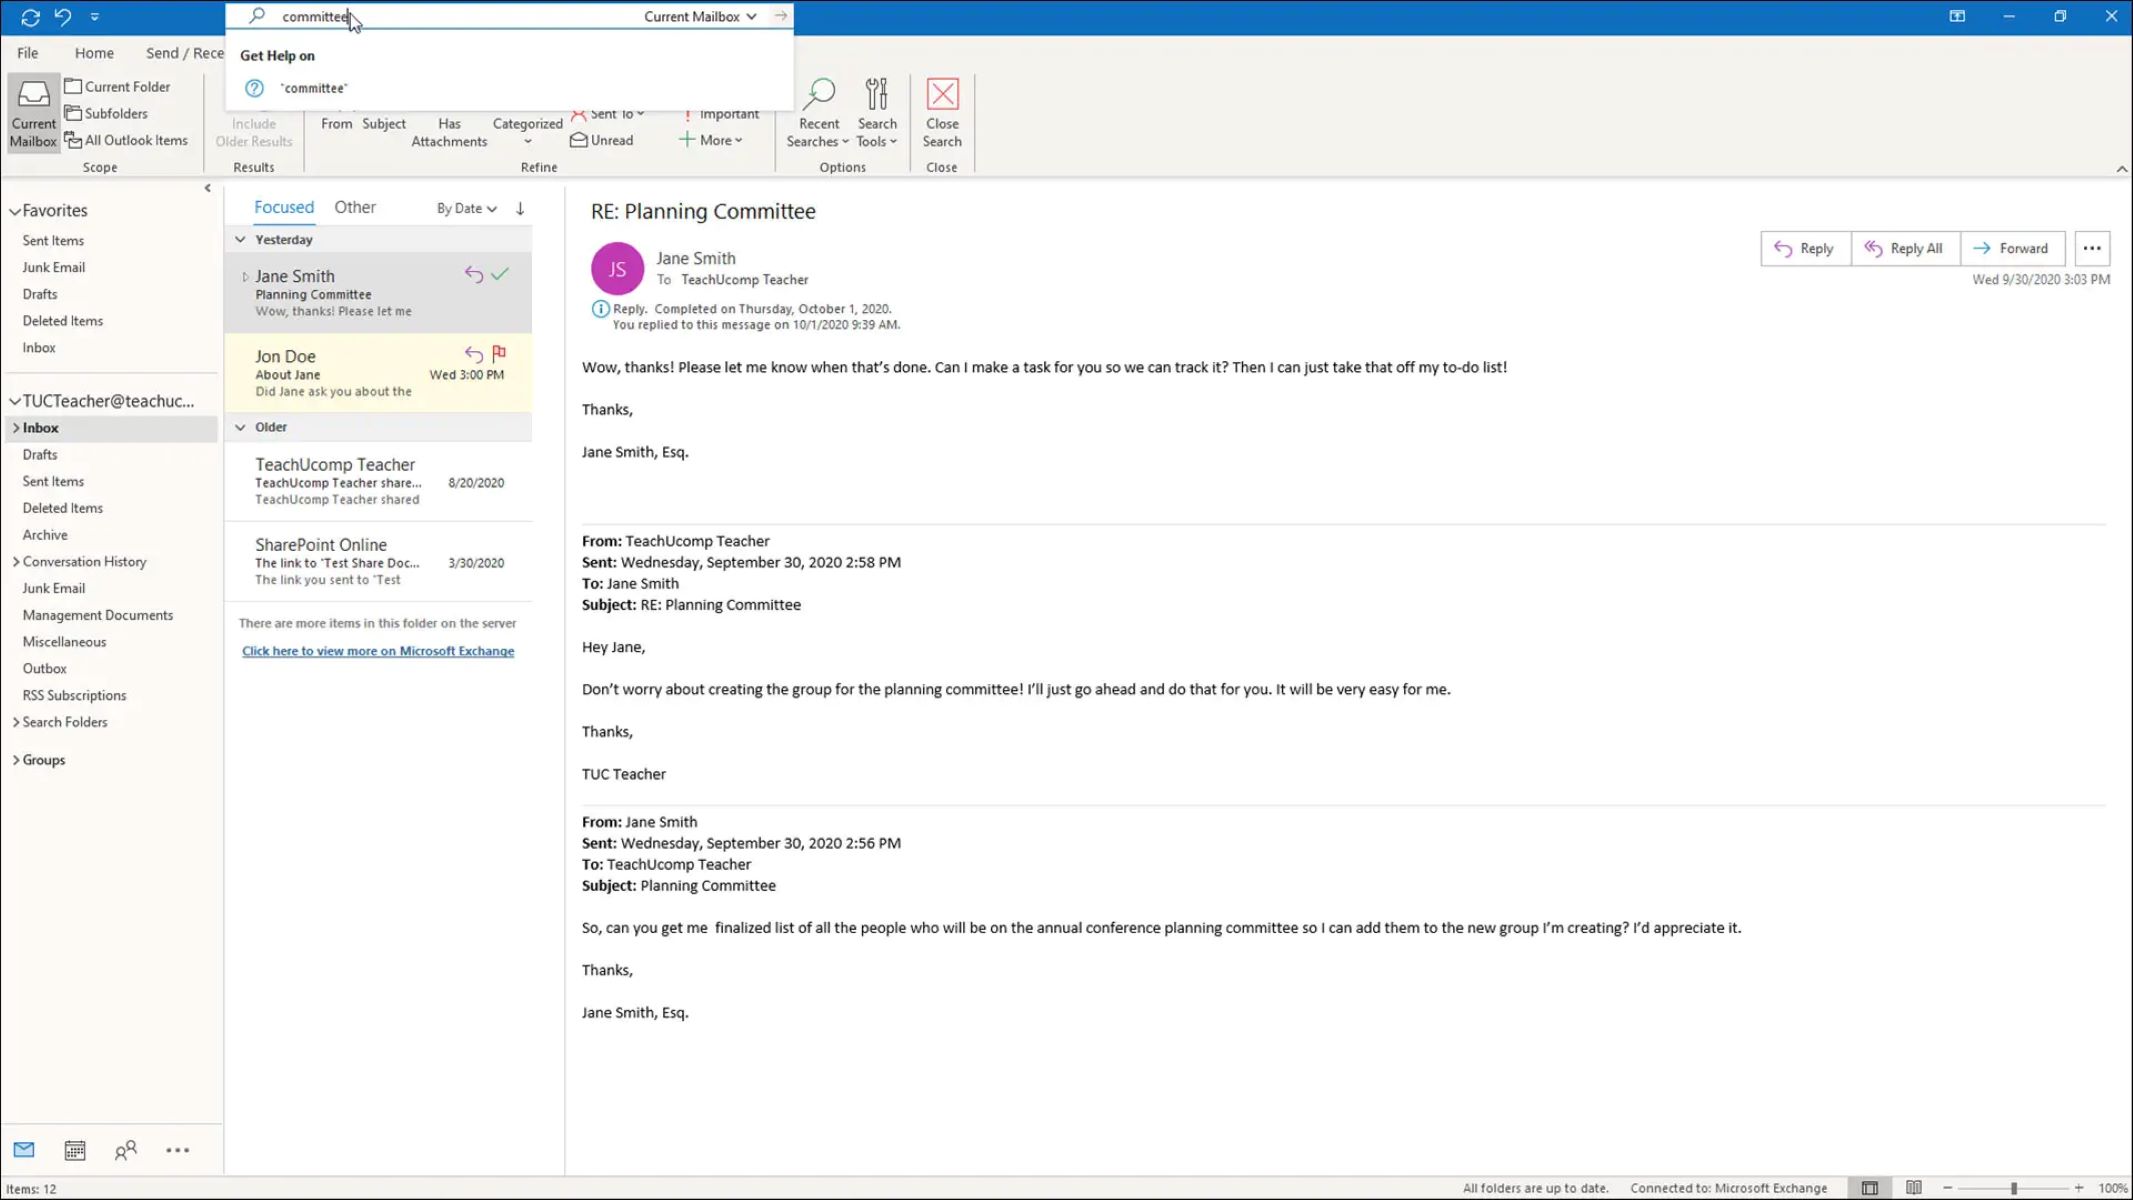
Scan through the emails in the selected folder until you find the one you want to save as a PDF. You can use the scroll bar on the right-hand side or the arrow keys on your keyboard to navigate through the list of emails. Alternatively, you can use the search bar at the top of Outlook to search for a specific email by subject, sender, or keyword.
Once you have located the email that you wish to save as a PDF, click on it to select it. The selected email will usually be highlighted or appear with a different color to indicate that it has been chosen.
It’s important to note that you can only convert one email at a time into a PDF file using the methods described in this guide. If you need to save multiple emails as PDFs, you will have to repeat the process for each email individually.
Once you have selected the email you want to save, proceed to the next step to learn how to save it as a PDF file in Microsoft Outlook.
Step 3: Save the Email as PDF
Now that you have selected the email you want to save as a PDF in Microsoft Outlook, it’s time to convert it into the desired file format. Outlook offers a built-in feature that allows you to easily save emails as PDF files without the need for any third-party software or tools.
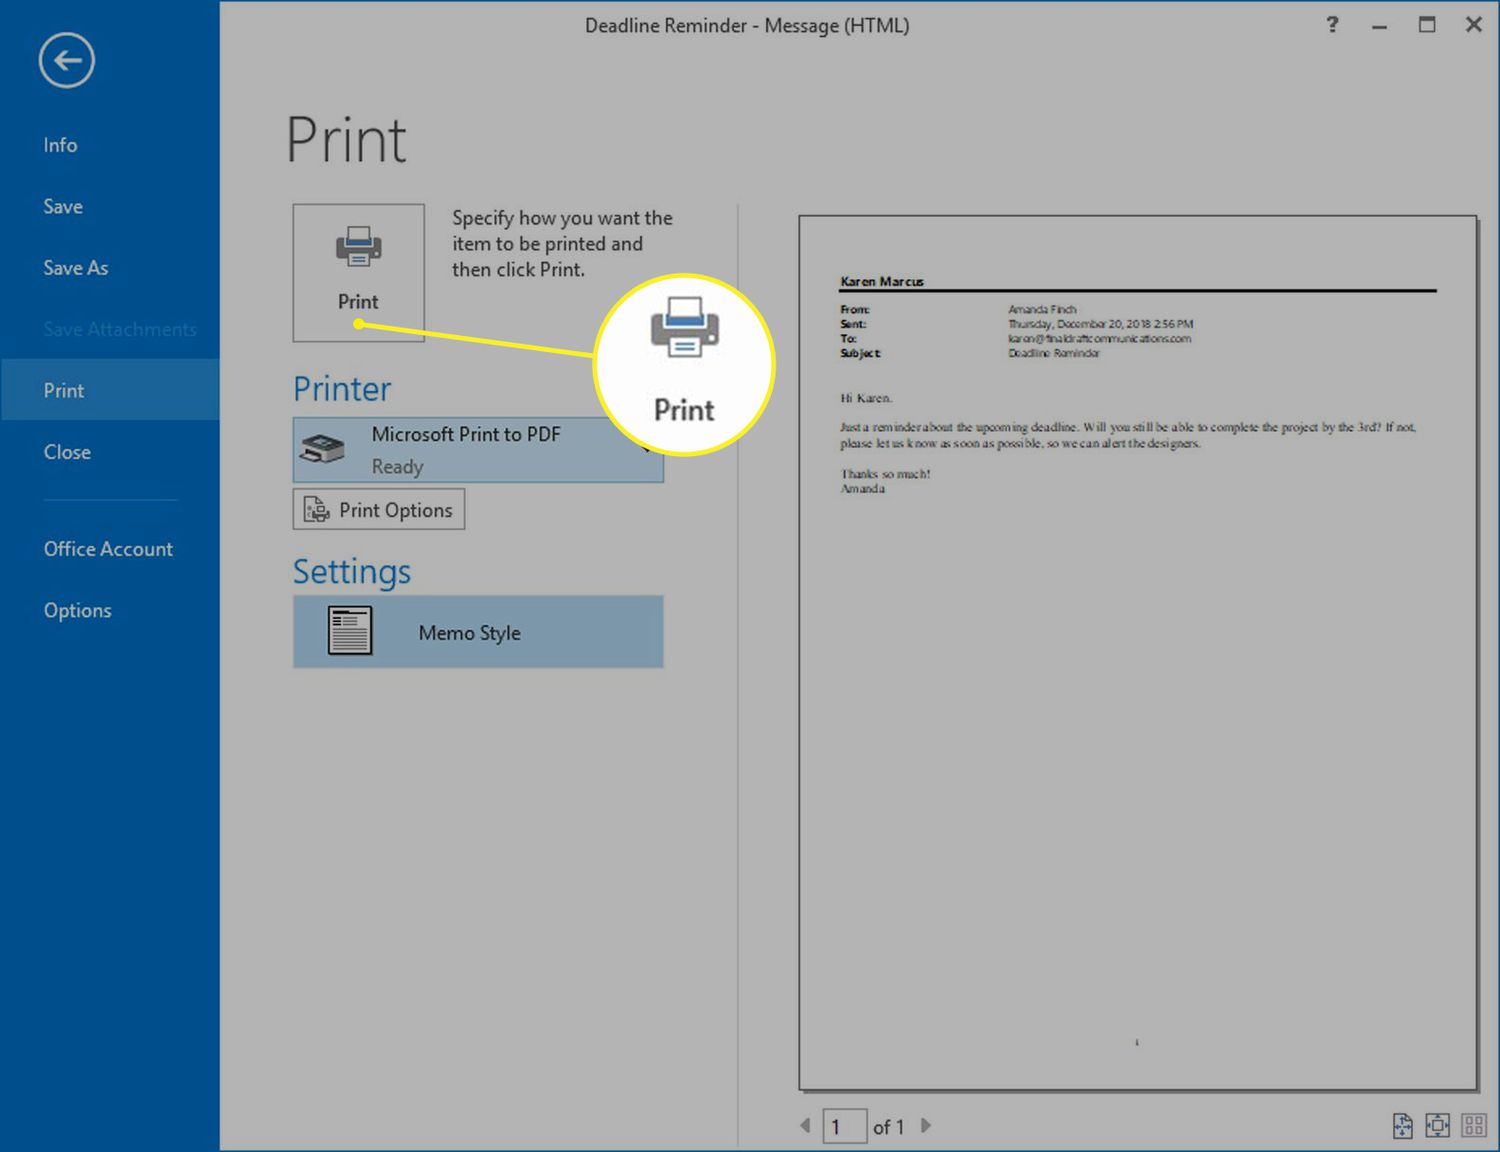
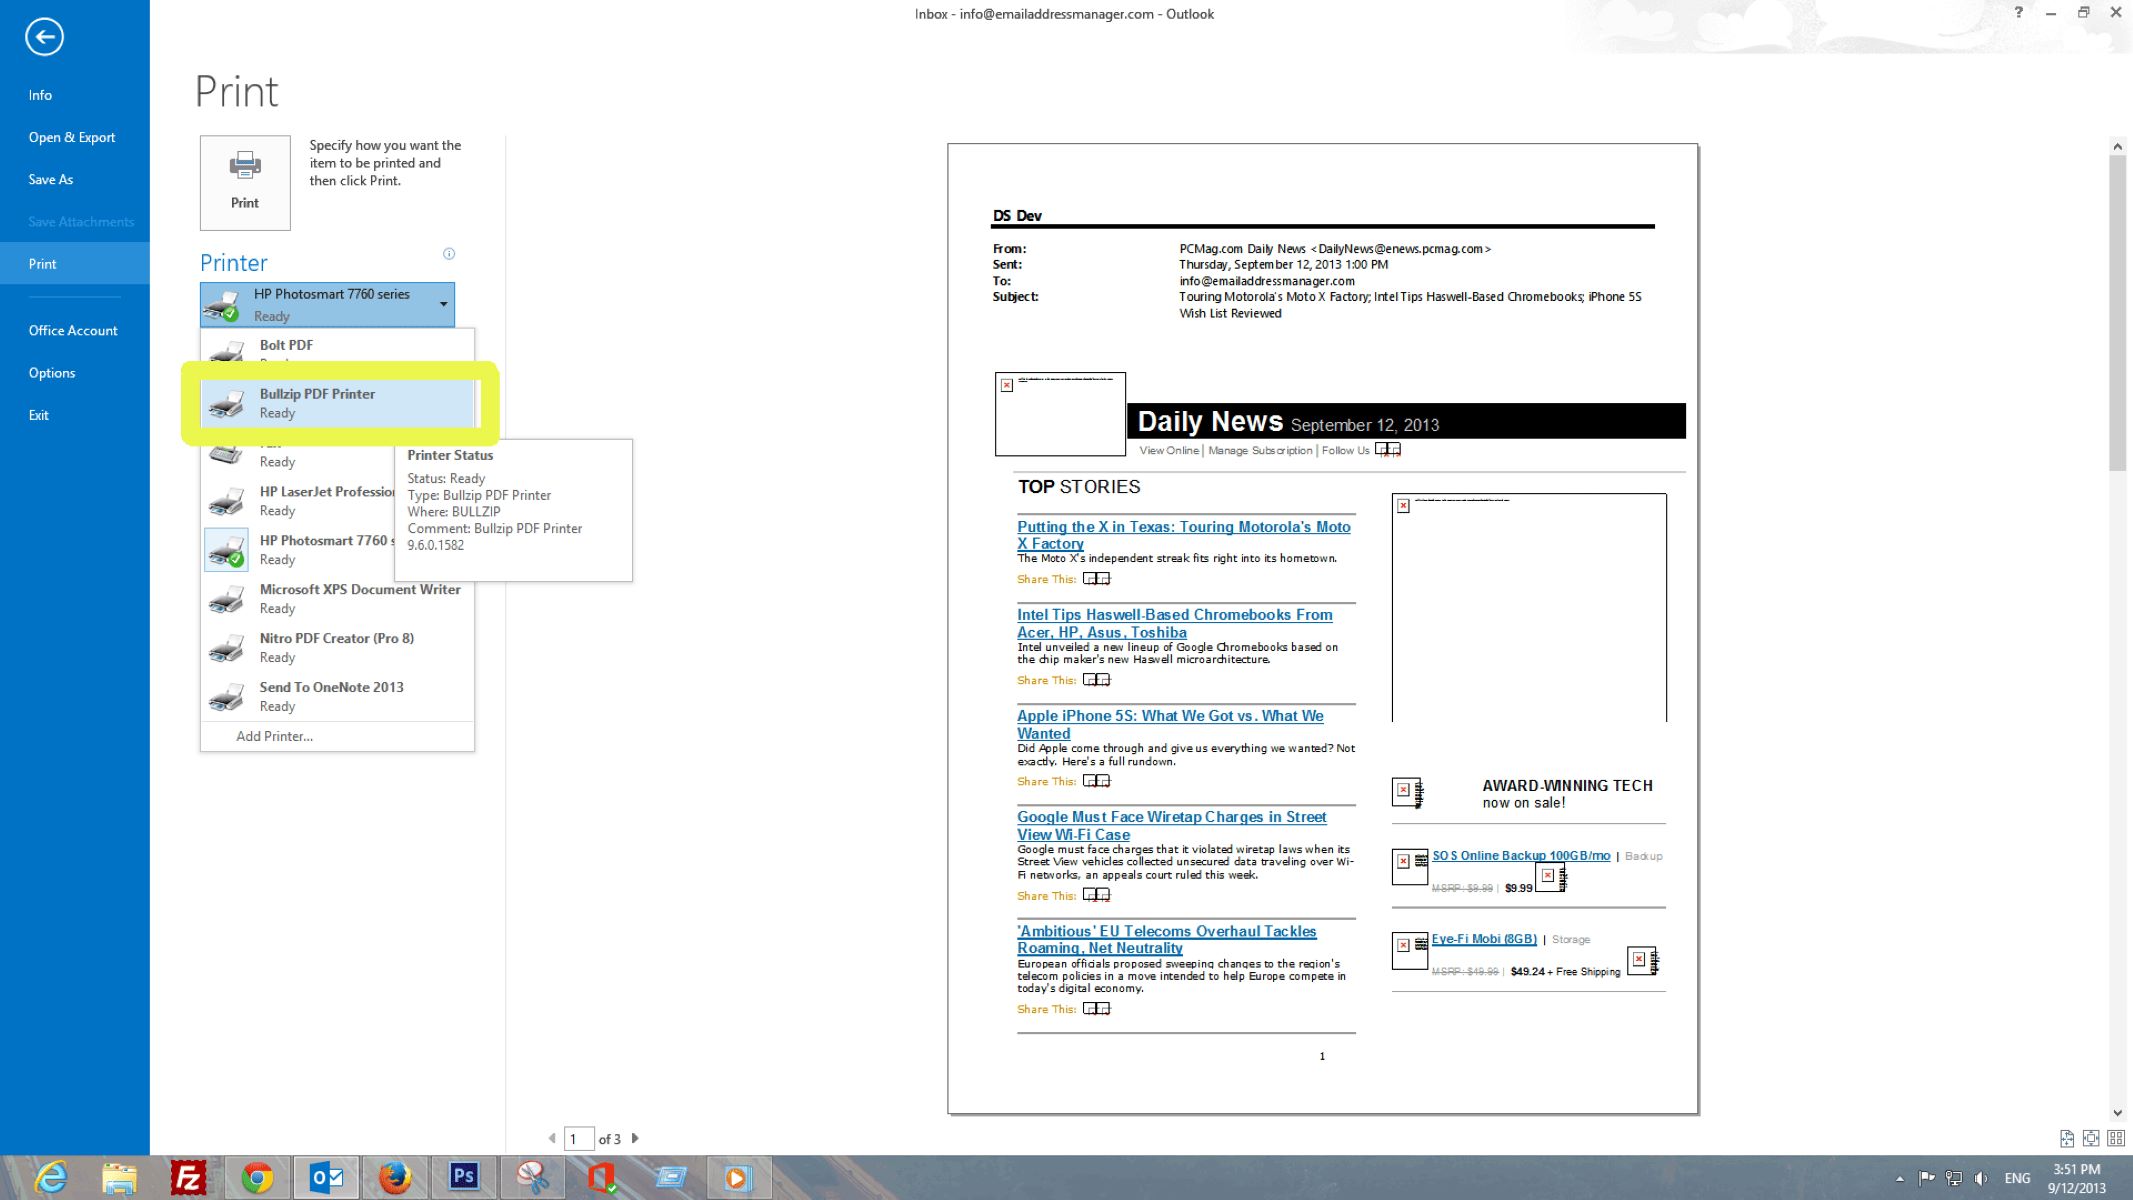
To save the selected email as a PDF, go to the Outlook ribbon at the top of the screen. Look for the “File” tab and click on it. A drop-down menu will appear with various options.
In the drop-down menu, locate and select the “Save As” or “Save As Adobe PDF” option. The exact wording of this option may vary depending on the version of Outlook you are using.
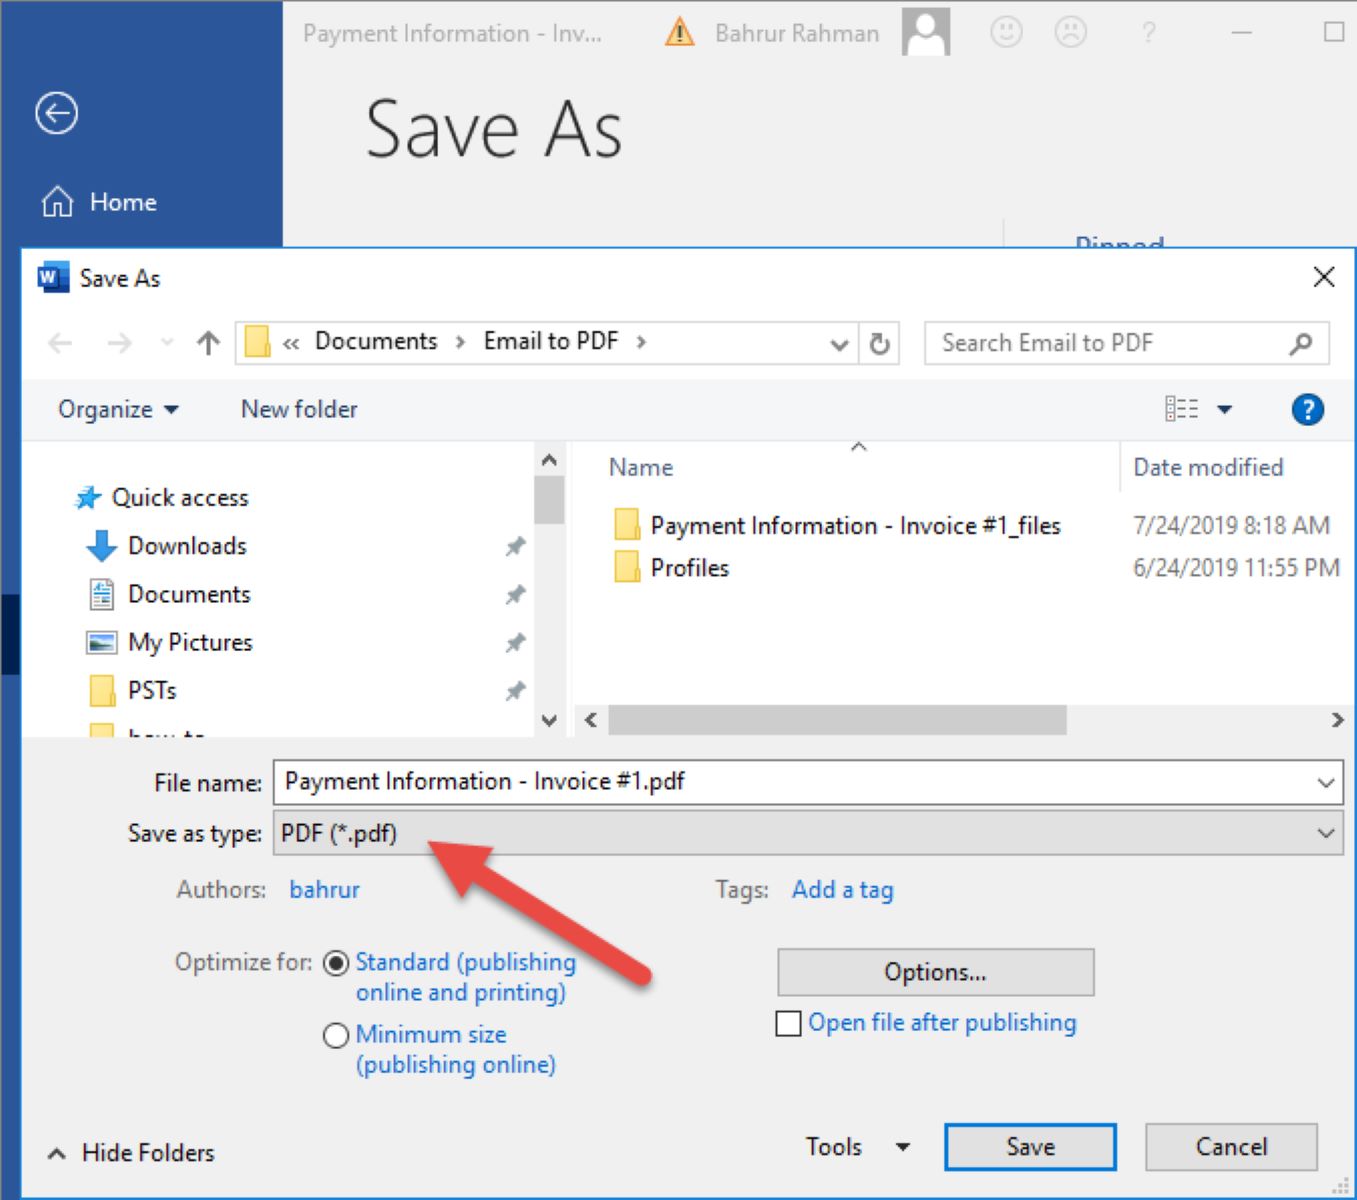
After selecting the “Save As” or “Save As Adobe PDF” option, a new window or dialog box will open, allowing you to specify the details of the PDF file. This includes the filename, saving location, and additional options such as page range and document properties.
Provide a suitable name for the PDF file in the “File name” or “Save as” field. You can choose any name that helps you identify the email or its content easily.
Next, choose the saving location where you want to store the PDF file. You can select an existing folder or create a new one to organize your saved emails. Click on the “Browse” or “Choose a folder” button to navigate to the desired location on your computer.
If you want to save only a specific range of pages from the email, you can specify it in the “Page Range” or “Pages” section. This allows you to extract and save only the pages that are relevant to your needs.
Additionally, some versions of Outlook may provide options to customize the document properties of the PDF file. You can set properties like the title, author, subject, and keywords to ensure that the PDF file is properly labeled and indexed.
Once you have set all the desired options and specified the saving location, click on the “Save” or “Convert” button to initiate the conversion process. Microsoft Outlook will then convert the selected email into a PDF file and save it to the specified location.
After the conversion is complete, you will have successfully saved the Outlook email as a PDF file. Now, let’s move on to the next step to verify the saved PDF and ensure that it contains the desired content.
Step 4: Choose the Saving Location
When saving an email as a PDF in Microsoft Outlook, it’s crucial to choose the right saving location to ensure easy access and organization. Selecting a suitable saving location enables you to quickly locate and retrieve the saved PDF files whenever needed.
After selecting the “Save As” or “Save As Adobe PDF” option in the previous step, Outlook will prompt you to choose the saving location for the PDF file. By default, Outlook may suggest a location such as the Documents folder on your computer.
If you prefer to save the PDF file in a different folder, click on the “Browse” or “Choose a folder” button to open a file explorer window. Navigate to the desired location on your computer or create a new folder specifically for storing the saved emails as PDFs.
It’s a good practice to create a separate folder for saving Outlook emails as PDFs. This helps in keeping your PDF files organized and prevents them from getting mixed up with other files on your computer.
Choose a descriptive and meaningful name for the folder, such as “Outlook PDFs” or “Archived Emails,” to make it easy to identify its purpose. You may also consider creating subfolders within the main folder to further categorize specific types or subjects of emails.
For example, you can create subfolders based on the sender, client, project, or date range. This allows you to quickly locate and retrieve specific PDF files without having to search through a large number of saved emails.
Remember to choose a saving location that you can easily remember and access in the future. It’s recommended to create a shortcut to the main folder on your desktop or pin it to the Quick Access section in the file explorer for quicker access.
Once you have chosen the saving location and created the necessary folders, click on the “Save” or “Convert” button to initiate the saving process. Outlook will then save the selected email as a PDF file in the specified location, ensuring that you can easily retrieve it whenever needed.
Now that you have successfully chosen the saving location for the PDF files, let’s move on to the next step to verify that the saved PDF contains the desired content.
Step 5: Verify the Saved PDF
After completing the process of saving an email as a PDF in Microsoft Outlook, it is crucial to verify the saved PDF to ensure that it contains the desired content and has been saved correctly. This step allows you to confirm the accuracy and integrity of the converted email.
Navigate to the saving location where you specified the PDF file to be saved in the previous step. Open the folder that contains the saved PDF file using the file explorer on your computer.
Locate the PDF file with the name you provided and double-click on it to open it in a PDF viewer, such as Adobe Acrobat Reader or any other software that supports PDF files.
Once the PDF file opens, carefully review its contents to ensure that all elements of the original email have been properly converted. Check for the accuracy of the text, the presence of any images or attachments, and the overall formatting of the email.
Scroll through the PDF document to make sure that no pages or content are missing. Pay close attention to any embedded links, hyperlinks, or clickable elements in the email and test them to confirm that they work correctly in the PDF format.
If the email contained any attachments, verify that they are included in the PDF file and can be accessed by clicking on them. Ensure that the attachments are displayed correctly and are easily accessible when needed.
Additionally, take note of any specific settings or options that you applied during the saving process, such as page range or document properties. Confirm that these settings have been accurately applied to the PDF file.
If you discover any issues or discrepancies with the saved PDF, you may need to repeat the saving process or make adjustments to your settings in Microsoft Outlook. By verifying the PDF, you can ensure that the converted email meets your requirements and can be easily accessed and referenced in the future.
Once you have confirmed the accuracy of the saved PDF file, you can consider the process complete. You have successfully saved an Outlook email as a PDF, preserving its content, formatting, and attachments for future use.
Now that you have mastered the steps to save Outlook emails as PDFs, you can apply this knowledge to convert and save important emails as easily shareable and printable files.
Conclusion
Converting and saving Outlook emails as PDF files provides a convenient and reliable method for archiving, sharing, and preserving important communication. With the step-by-step guide outlined above, you can easily save your emails as PDFs and ensure that their content, formatting, and attachments are accurately preserved.
By following the simple steps of opening Microsoft Outlook, selecting the desired email, saving it as a PDF, choosing an appropriate saving location, and verifying the saved PDF, you can streamline your email management process and have easy access to important information whenever you need it.
Remember to choose a descriptive saving location, create folders to organize your saved emails, and verify the accuracy of the converted PDF files. This will help you stay organized and facilitate efficient retrieval of specific emails in the future.
Whether you need to save emails for legal purposes, reference historical communications, or compile reports, the ability to convert Outlook emails into PDF format provides a universally compatible and easily shareable solution.
Furthermore, saving emails as PDFs ensures that you can preserve the original content, including images, formatting, and embedded links. This makes it an ideal option for creating professional reports, archiving important correspondence, or maintaining a record of essential communication.
Now that you have learned how to save Outlook emails as PDFs, you can apply this knowledge to improve your email management practices and effortlessly generate PDF versions of your important emails.
By taking advantage of the built-in features of Microsoft Outlook, you can save valuable time and effort in manually copying and pasting email contents into separate documents or relying on external PDF conversion tools.
So, the next time you come across an email that you need to save or share in a reliable and universally compatible format, simply follow the steps provided in this guide to save it as a PDF file in Microsoft Outlook.
With the ability to convert Outlook emails into PDFs, you can enhance your productivity, organization, and accessibility of important information, making your email management experience more streamlined and efficient.