Introduction
Bookmarking websites has become an essential part of our online lives. It allows us to quickly access our favorite web pages, articles, and resources with just a click. However, relying on browser-based bookmarking can be risky. If your computer crashes, or you switch to a new device, there is a chance of losing all your saved bookmarks.
Fortunately, there is a simple solution – saving your bookmarks on an external hard drive. This ensures that your bookmarks are safely stored and can be easily transferred to any computer you use. In this article, we will guide you through the process of saving bookmarks on an external hard drive, providing you with a reliable backup and peace of mind.
By saving your bookmarks on an external hard drive, you no longer have to worry about losing them due to computer malfunctions, browser crashes, or device changes. It gives you the flexibility to access your bookmarks from any computer with the external hard drive connected. Additionally, if you’re someone who regularly switches between multiple devices, such as a desktop computer and a laptop, having your bookmarks stored on an external hard drive simplifies the process of syncing them across devices.
Now let’s dive into the step-by-step process of saving bookmarks on an external hard drive.
Why Save Bookmarks on an External Hard Drive?
There are several reasons why saving bookmarks on an external hard drive is a smart choice. Let’s explore some of the benefits:
- Reliable Backup: By saving your bookmarks on an external hard drive, you create a reliable backup system. If your computer crashes or you accidentally delete your bookmarks, having them stored on an external hard drive ensures that you can easily restore them.
- Portability: One of the major advantages of using an external hard drive for bookmark storage is the portability it offers. You can carry your bookmarks with you and access them from any computer with the external hard drive connected. This is particularly useful if you frequently switch between different devices or need to work on multiple computers.
- Easy Transfer: Saving bookmarks on an external hard drive makes it effortless to transfer them to a new computer. Whether you upgrade to a new device or need to use a different computer temporarily, you can quickly import your bookmarks from the external hard drive, ensuring a seamless browsing experience.
- Syncing Across Devices: If you use multiple devices, such as a desktop computer and a laptop, saving bookmarks on an external hard drive simplifies the process of syncing your bookmarks across all your devices. You can update your bookmarks on one device and easily update them on other devices by connecting the external hard drive.
- Securing Sensitive Information: If your bookmarks contain sensitive or confidential information, saving them on an external hard drive adds an extra layer of security. You can disconnect the external hard drive when not in use, preventing unauthorized access to your bookmarks.
These reasons highlight the immense convenience and peace of mind that comes with saving bookmarks on an external hard drive. Whether you’re concerned about losing your bookmarks due to computer issues or you simply want a portable and easily accessible bookmarking solution, using an external hard drive is a reliable and efficient way to safeguard and manage your bookmark collection.
Step 1: Connect the External Hard Drive to Your Computer
The first step in saving bookmarks on an external hard drive is to ensure that the hard drive is properly connected to your computer. Follow these simple instructions:
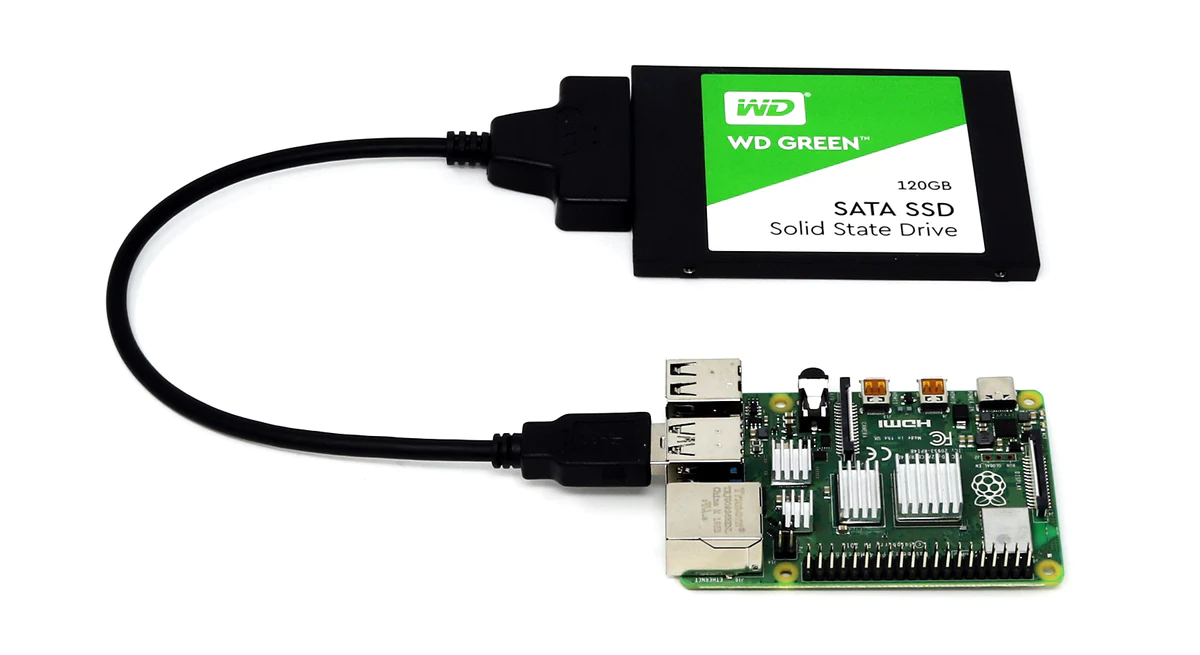
- Locate an available USB port on your computer. Most external hard drives use USB connections for easy compatibility.
- Plug the USB cable of the external hard drive into the USB port on your computer. Ensure that the connection is secure.
- Depending on the type of external hard drive you have, you may need to connect it to a power source as well. Check the manufacturer’s instructions to determine if an additional power connection is required.
- Once connected, your computer should recognize the external hard drive and assign it a drive letter. This may take a few moments, but you will typically receive a notification or see the new drive listed in File Explorer (Windows) or Finder (Mac).
- Ensure that the external hard drive is functioning properly by opening it and verifying that you can access the files stored on it. If you encounter any issues, consult the manufacturer’s documentation or online support resources for troubleshooting assistance.
When the external hard drive is successfully connected and functioning, you are ready to proceed to the next step: exporting the bookmarks from your web browser.
Step 2: Export Bookmarks from Your Web Browser
Now that your external hard drive is connected, it’s time to export your bookmarks from your web browser. The process may vary slightly depending on the browser you are using, but the general steps are as follows:
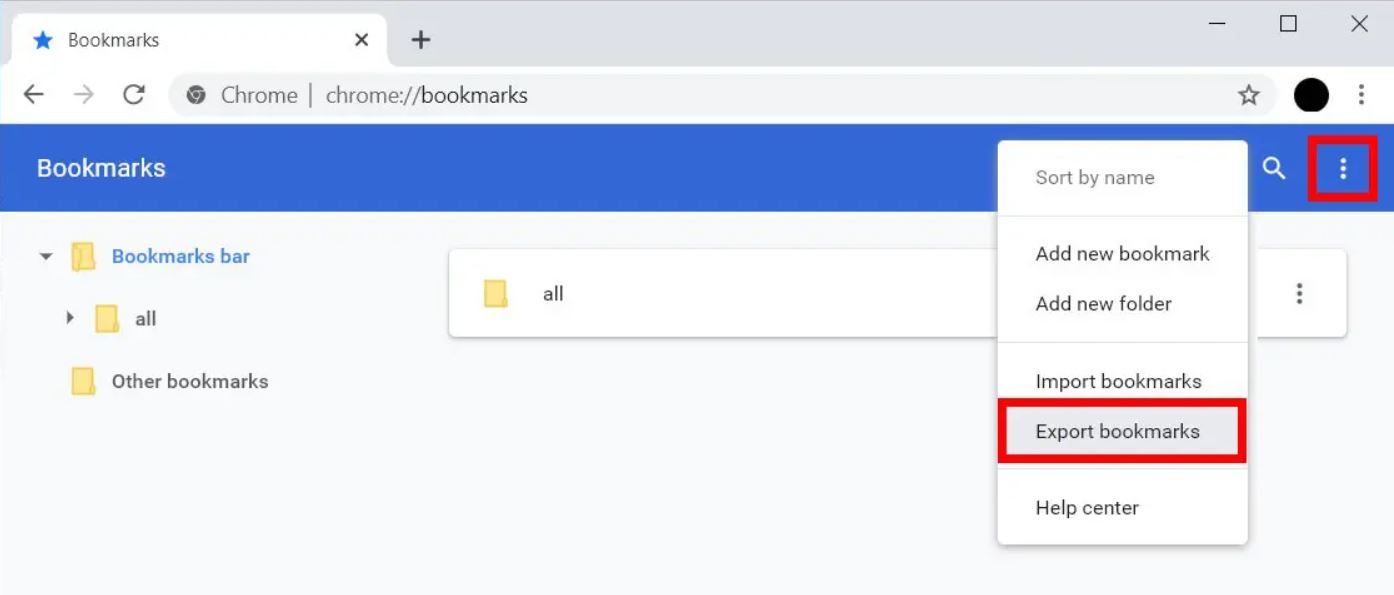
- Google Chrome: Click on the three-dot menu icon in the top-right corner of the browser window and select “Bookmarks” > “Bookmark Manager”. In the Bookmark Manager, click on the three-dot menu icon again and choose “Export bookmarks”. Save the bookmarks as an HTML file on your computer.
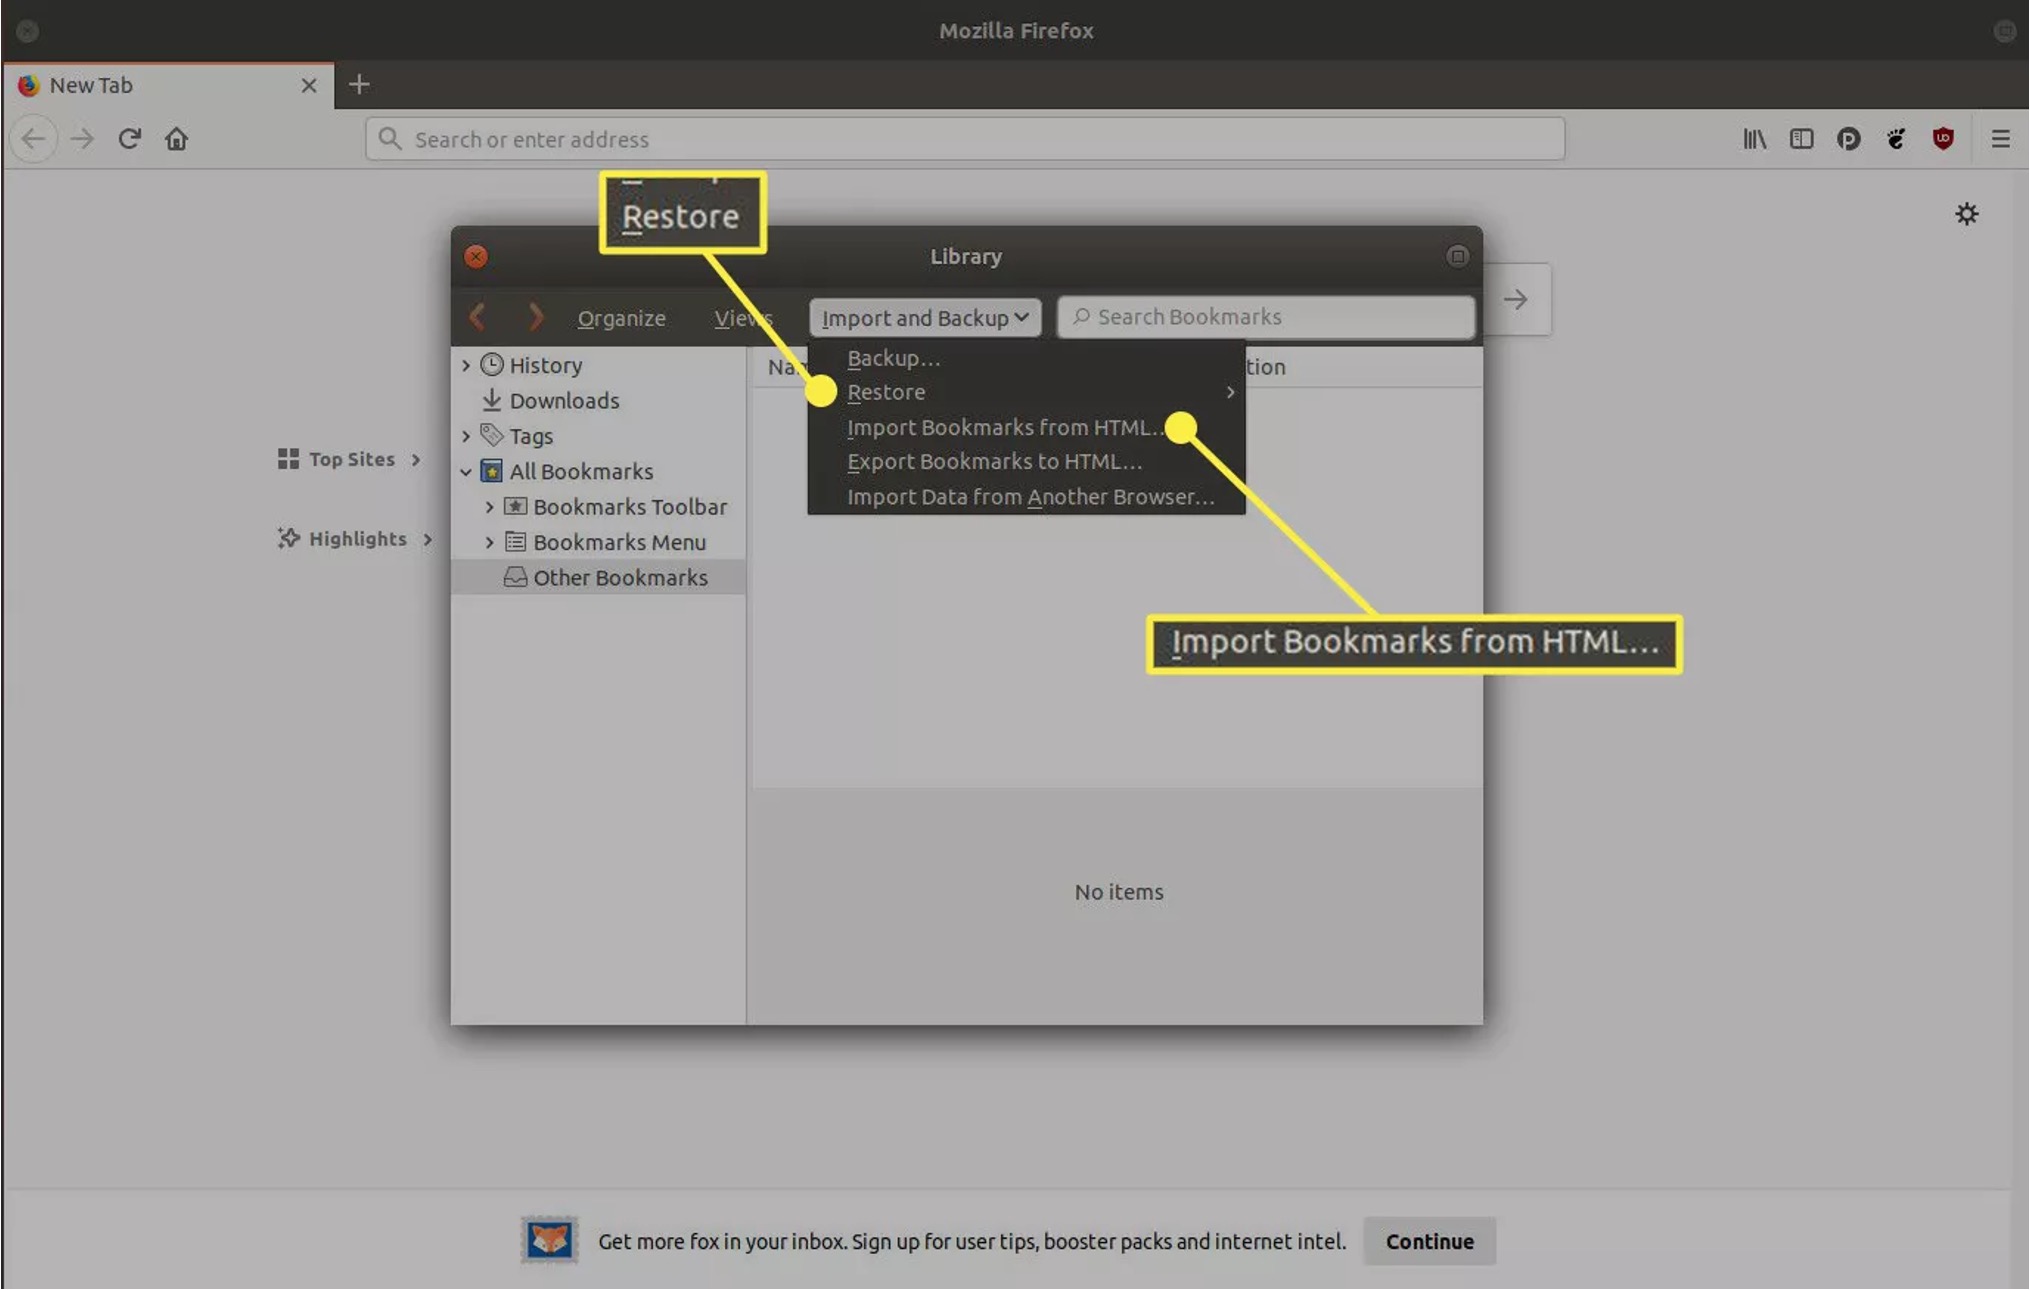
- Mozilla Firefox: Click on the three-line menu icon in the top-right corner and select “Library” > “Bookmarks” > “Show All Bookmarks”. In the Library window, click on “Import and Backup” and choose “Export Bookmarks to HTML”. Save the bookmarks file to your desired location on your computer.
- Microsoft Edge: Click on the three-dot menu icon in the top-right corner and select “Favorites” > “Manage Favorites”. In the Favorites window, click on the three-dot menu icon and choose “Export to file”. Save the bookmarks as an HTML file on your computer.
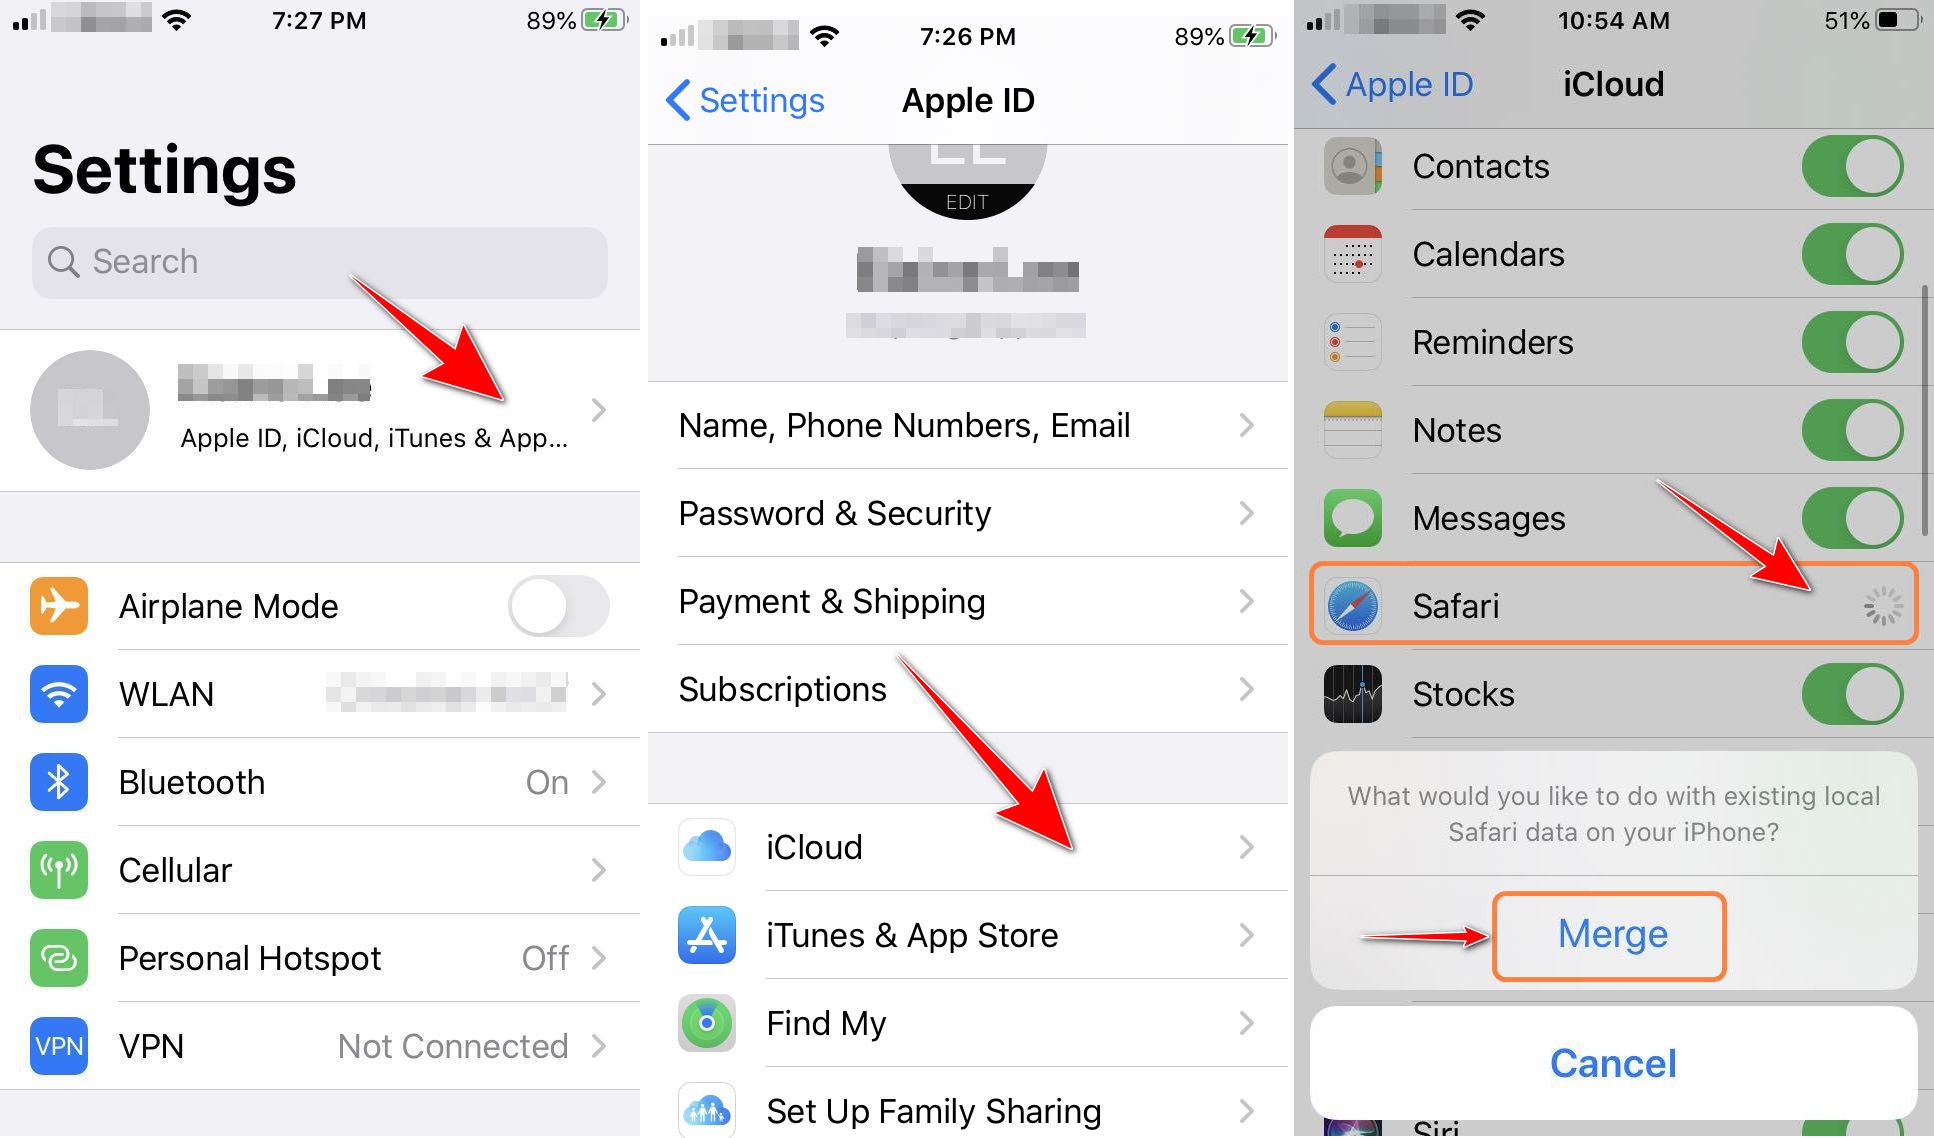
- Safari: Click on the “Bookmarks” menu in the top menu bar and select “Edit Bookmarks”. In the Bookmarks window, click on “File” > “Export Bookmarks”. Choose a location on your computer to save the bookmarks as an HTML file.
Remember to save the exported bookmarks file in a location on your computer where you can easily locate it for the next step. With your bookmarks exported, you are ready to move on to creating a folder on your external hard drive.
Step 3: Create a Folder on the External Hard Drive
With the bookmarks exported from your web browser, the next step is to create a dedicated folder on your external hard drive where you will store the bookmarks. Follow these simple instructions:
- Open File Explorer (Windows) or Finder (Mac) on your computer.
- Locate and open the external hard drive by clicking on its corresponding drive letter or name.
- Right-click on an empty space within the external hard drive window and select “New Folder” from the context menu.
- Provide a descriptive name for the folder, such as “Bookmarks” or “Web Browser Favorites”.
- Press Enter or click outside the folder name field to create the folder.
Now you have successfully created a folder on your external hard drive where you will store the exported bookmarks file. This dedicated folder will keep your bookmarks organized and easily accessible when needed.
Once the folder is created, you are ready to proceed to the next step: transferring the exported bookmarks file to the external hard drive.
Step 4: Transfer the Exported Bookmarks File to the External Hard Drive
Now that you have created a folder on your external hard drive, it’s time to transfer the exported bookmarks file from your computer to the external hard drive. Follow these steps:
- Open File Explorer (Windows) or Finder (Mac) on your computer.
- Navigate to the location where you saved the exported bookmarks file in Step 2.
- Click and drag the bookmarks file from your computer to the folder you created on the external hard drive.
- Release the mouse button to drop the file into the folder on the external hard drive.
- Wait for the file transfer to complete. This may take a few moments depending on the file size and the speed of your external hard drive.
Once the transfer is completed, you can safely disconnect the external hard drive from your computer. Your bookmarks are now securely saved on the external hard drive, providing you with a reliable backup and easy access whenever you need them.
Now that you have transferred the exported bookmarks file to the external hard drive, you are ready to import the bookmarks to your web browser from the external hard drive. This will ensure that your bookmarks are accessible whenever you use your web browser on any computer.
Step 5: Import Bookmarks to Your Web Browser from the External Hard Drive
After successfully transferring the exported bookmarks file to your external hard drive, the final step is to import those bookmarks back into your web browser. Follow these instructions based on your specific browser:
- Google Chrome: Open Chrome and click on the three-dot menu icon in the top-right corner. Select “Bookmarks” > “Bookmark Manager”. In the Bookmark Manager, click on the three-dot menu icon and choose “Import bookmarks”. Navigate to your external hard drive, select the bookmarks file you transferred, and click “Open” to import the bookmarks.
- Mozilla Firefox: Open Firefox and click on the three-line menu icon in the top-right corner. Select “Library” > “Bookmarks” > “Show All Bookmarks”. In the Library window, click on “Import and Backup” and choose “Import Bookmarks from HTML”. Navigate to your external hard drive, select the bookmarks file, and click “Open” to import the bookmarks.
- Microsoft Edge: Open Edge and click on the three-dot menu icon in the top-right corner. Select “Favorites” > “Manage Favorites”. In the Favorites window, click on the three-dot menu icon and choose “Import from file”. Navigate to your external hard drive, select the bookmarks file, and click “Import” to import the bookmarks.
- Safari: Open Safari and click on the “Bookmarks” menu in the top menu bar. Select “Edit Bookmarks”. In the Bookmarks window, click on “File” > “Import From” > “Bookmarks HTML File”. Navigate to your external hard drive, select the bookmarks file, and click “Import” to import the bookmarks.
Once you have imported the bookmarks from your external hard drive to your web browser, you can start accessing and organizing them just as you did before. Your bookmarks are now readily available in your browser, ensuring a seamless browsing experience.
Congratulations! You have successfully saved and imported your bookmarks to your external hard drive. Now you can enjoy the convenience and peace of mind that comes with having a reliable backup and the ability to access your bookmarks from any computer with your external hard drive.
Conclusion
Saving your bookmarks on an external hard drive is a practical and efficient way to ensure their safety, portability, and easy access across multiple devices. By following the steps outlined in this guide, you can effectively backup and manage your bookmark collection.
Throughout the process, we’ve discussed the importance of saving bookmarks on an external hard drive, including the benefits of having a reliable backup, the convenience of portability and device syncing, and the added security for sensitive information.
We covered the step-by-step instructions, starting with connecting the external hard drive to your computer and exporting the bookmarks from your web browser. Then, we guided you through the process of creating a dedicated folder on the external hard drive and transferring the exported bookmarks file to that folder. Finally, we explained how to import the bookmarks back into your web browser, completing the process.
By saving your bookmarks on an external hard drive, you can protect yourself from potential loss due to computer issues, easily transfer your bookmarks to a new device, and keep them organized and accessible whenever you need them. The portability and flexibility offered by an external hard drive ensure that you can take your bookmarks with you wherever you go, making your browsing experience seamless and convenient.
So, take the initiative to safeguard your valuable bookmark collection by following these steps. Enjoy the peace of mind that comes with knowing your bookmarks are safely stored and readily available whenever and wherever you need them.