Introduction
Welcome to this guide on how to root the Verizon Ellipsis 7 Tablet. If you are looking to gain full control over your device and unlock its true potential, you’ve come to the right place. Rooting your tablet gives you the ability to customize the operating system, install custom ROMs, and access advanced features that are not available to unrooted devices.
The Verizon Ellipsis 7 Tablet is a popular Android device known for its sleek design and powerful performance. By rooting your tablet, you can enhance its capabilities and take advantage of a wide range of apps and modifications that require root access.
Before you proceed with the rooting process, it is important to understand that rooting your device can void your warranty and may also cause unforeseen issues if not done correctly. However, if you are willing to take the risk and follow the steps carefully, you will be rewarded with a device that is truly customizable and optimized to fit your needs.
In this guide, we will walk you through the step-by-step process of rooting the Verizon Ellipsis 7 Tablet. But before we dive into the technical steps, let’s talk about the requirements you need to fulfill to ensure a smooth rooting process.
Requirements
Before you begin rooting your Verizon Ellipsis 7 Tablet, there are several requirements that you need to fulfill. It is crucial to meet these requirements in order to ensure a successful and smooth rooting process. Here’s what you’ll need:
- A Verizon Ellipsis 7 Tablet: Obviously, you will need the actual device that you want to root. Make sure it is charged and in working condition before proceeding.
- A Computer: You will need a computer with a stable internet connection to download the necessary files and tools for rooting.
- USB Cable: You will need a USB cable to connect your tablet to the computer. Ensure that the cable is in good condition and capable of data transfer.
- Backup Your Data: Rooting your device can sometimes lead to data loss or other issues. It is essential to back up your important data such as contacts, photos, and documents before proceeding with the rooting process.
- Enable Developer Options: To enable USB debugging and unlock the bootloader, you need to enable Developer Options on your tablet. This can be done by going to Settings > About Tablet and tapping on the “Build Number” seven times until you see a message confirming developer mode has been enabled.
- USB Debugging: USB debugging allows your computer to communicate with your tablet and transfer files during the rooting process. You will need to enable USB debugging in the Developer Options menu.
- ADB and Fastboot Drivers: ADB (Android Debug Bridge) and Fastboot are essential tools for interacting with your Android device from a computer. You will need to install these drivers on your computer to proceed with the rooting process.
By ensuring that you have met these requirements, you will be one step closer to successfully rooting your Verizon Ellipsis 7 Tablet. Now that you are ready, let’s move on to the next step: enabling Developer Options on your tablet.
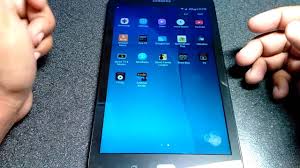
Step 1: Enable Developer Options
Before you can proceed with rooting your Verizon Ellipsis 7 Tablet, you need to enable Developer Options. This option allows you to access advanced settings and debugging features that are necessary for the rooting process. Here’s how you can enable Developer Options:
- Open the Settings app on your tablet.
- Scroll down and tap on “About Tablet.”
- Look for the “Build Number” option and tap on it seven times.
- You will see a message that says, “You are now a developer!” This means that Developer Options has been successfully enabled.
Once you have enabled Developer Options, you will be able to access advanced settings and features that were previously hidden. This includes USB debugging, which is essential for the rooting process. In the next step, we will guide you on how to enable USB debugging on your Verizon Ellipsis 7 Tablet.
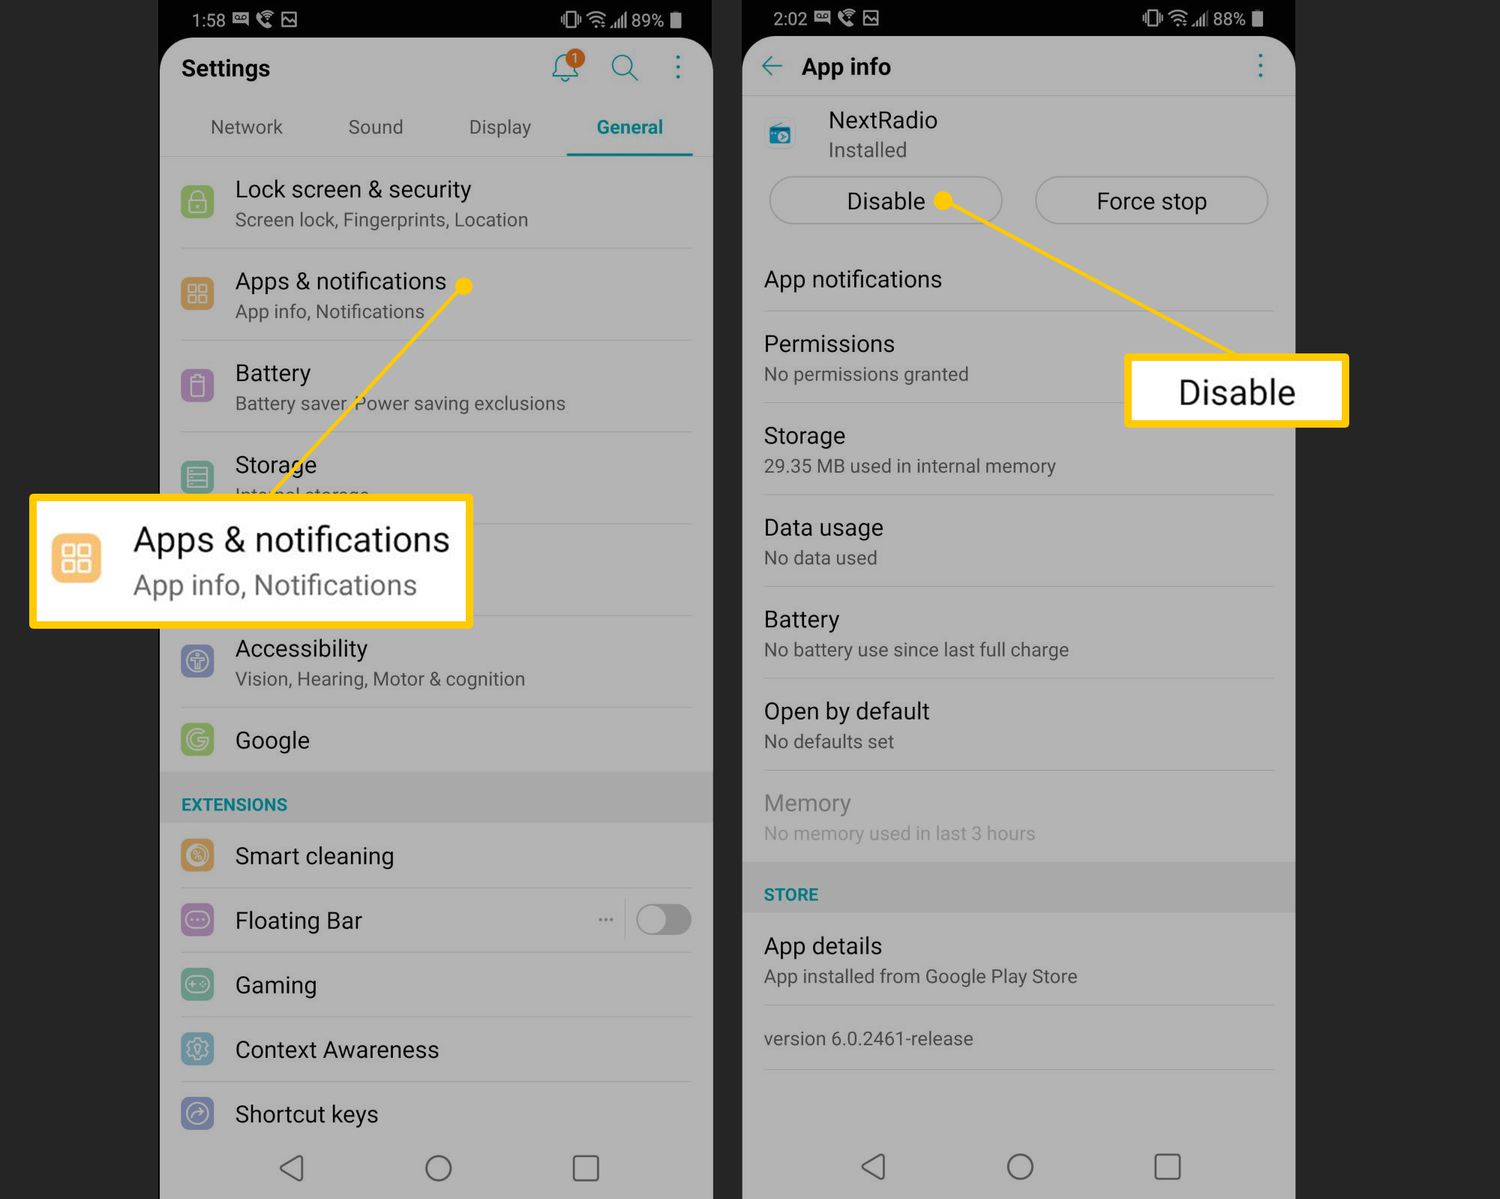
Step 2: Enable USB Debugging
Enabling USB debugging is a crucial step in the rooting process for your Verizon Ellipsis 7 Tablet. USB debugging allows your computer to communicate with your device and transfer files. Here’s how you can enable USB debugging:
- Go to the Settings app on your tablet.
- Scroll down and tap on “Developer Options.”
- Toggle the switch next to “USB Debugging” to enable it.
- You may see a prompt asking for your confirmation. Tap on “OK” to proceed.
Once you have enabled USB debugging, your tablet will be ready to connect to your computer and interact with the rooting tools. It is important to note that USB debugging must be enabled for the entire duration of the rooting process. If at any point you need to disable it, make sure to enable it again before proceeding.
With USB debugging enabled, you can now move on to the next step: installing the necessary ADB and Fastboot drivers on your computer. These drivers are essential for communicating with your tablet during the rooting process.
Step 3: Install ADB and Fastboot
In order to successfully root your Verizon Ellipsis 7 Tablet, you need to have ADB (Android Debug Bridge) and Fastboot drivers installed on your computer. These tools allow you to interact with your device from the command line and perform various actions. Here’s how you can install ADB and Fastboot:
- First, download the ADB and Fastboot drivers package specific to your operating system (Windows, macOS, or Linux). You can easily find these drivers by doing a quick search online.
- Once the download is complete, extract the contents of the package to a folder on your computer. The folder should preferably be easily accessible.
- Next, open the extracted folder and look for the “adb” or “adb.exe” file.
- Now, you need to add the location of the “adb” file to your computer’s system PATH variable. This is necessary for your computer to recognize the ADB and Fastboot commands. You can find instructions on how to modify the PATH variable based on your operating system online.
- Once you have added the ADB location to your PATH variable, you can test if the installation was successful by opening a command prompt or terminal window on your computer and typing “adb” followed by the Enter key. If you see a list of ADB commands, it means the installation was successful.
With ADB and Fastboot successfully installed and configured on your computer, you are now ready to proceed with unlocking the bootloader of your Verizon Ellipsis 7 Tablet. The bootloader is a piece of software that initializes the operating system on your device. Unlocking it will allow you to install custom firmware and gain further control over your tablet.
Step 4: Unlock the Bootloader
In order to gain full control over your Verizon Ellipsis 7 Tablet and proceed with the rooting process, you need to unlock the bootloader. Unlocking the bootloader is a necessary step that allows you to install custom firmware and make system-level modifications. Here’s how you can unlock the bootloader:
- Make sure your tablet is powered off.
- Press and hold the Volume Down button and Power button simultaneously until the tablet enters the bootloader mode.
- In the bootloader mode, use the volume buttons to scroll and navigate to the “Unlock Bootloader” option.
- Once the “Unlock Bootloader” option is highlighted, press the Power button to select it.
- A warning message will appear on the screen, informing you about the potential risks of unlocking the bootloader. Use the volume buttons to scroll to the “Yes” option and press the Power button to confirm.
- The bootloader unlocking process will begin, and it may take a few minutes to complete. Do not interrupt the process or turn off your tablet.
- Once the bootloader is successfully unlocked, your tablet will reboot automatically.
With the bootloader unlocked, your Verizon Ellipsis 7 Tablet is now ready for the next step: downloading the necessary files for rooting and connecting it to your computer. Stay tuned for the upcoming steps to successfully root your device!
Step 5: Download the Necessary Files
Now that you have unlocked the bootloader of your Verizon Ellipsis 7 Tablet, it’s time to download the necessary files that will be used to root your device. These files include the rooting package and any specific tools or drivers required for the process. Here’s how you can download the necessary files:
- Open a web browser on your computer.
- Search online for a reliable source that provides the rooting package for your specific tablet model. Make sure to download the package from a trusted and reputable source to avoid any potential security risks.
- Once you find the appropriate rooting package, click on the download link and save the file to a easily accessible location on your computer.
- In addition to the rooting package, you may also need to download any specific drivers or tools recommended by the rooting guide for your tablet model. These drivers or tools are often required to establish a connection between your tablet and computer during the rooting process.
- After downloading the required files, make sure to scan them with an up-to-date antivirus software to ensure they are safe to use.
By downloading the necessary files beforehand, you will have everything ready for the next steps to root your Verizon Ellipsis 7 Tablet. In the next step, we will guide you through the process of connecting your tablet to the computer.
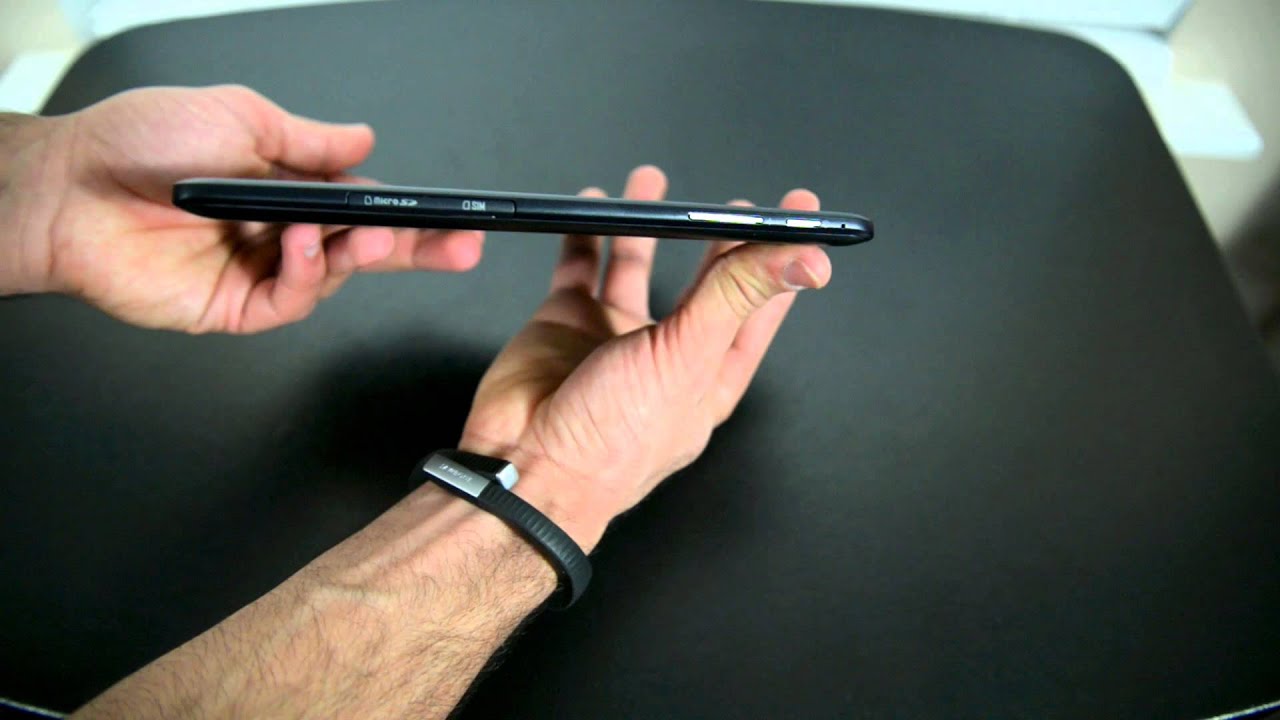
Step 6: Connect the Tablet to the Computer
With the necessary files downloaded, it’s time to connect your Verizon Ellipsis 7 Tablet to the computer. Establishing a connection between the tablet and computer is essential for transferring files, running commands, and executing the rooting process. Here’s how you can connect your tablet to the computer:
- Using a USB cable, connect one end to the micro USB port on your Verizon Ellipsis 7 Tablet.
- Connect the other end of the USB cable to an available USB port on your computer.
- Once the tablet is connected to the computer, you should see a notification on your tablet’s screen indicating that it is connected as a media device or in USB debugging mode.
- Unlock your tablet and swipe down from the top of the screen to access the notification panel.
- Tap on the USB connection notification and select the appropriate mode, such as MTP (Media Transfer Protocol) or File transfer mode.
By selecting the appropriate mode, you can ensure that your computer recognizes your Verizon Ellipsis 7 Tablet and can access its files and folders. This step is crucial for the successful execution of the rooting process. Once your tablet is connected and the appropriate mode is selected, you are now ready to move on to the final step: rooting the Verizon Ellipsis 7 Tablet.
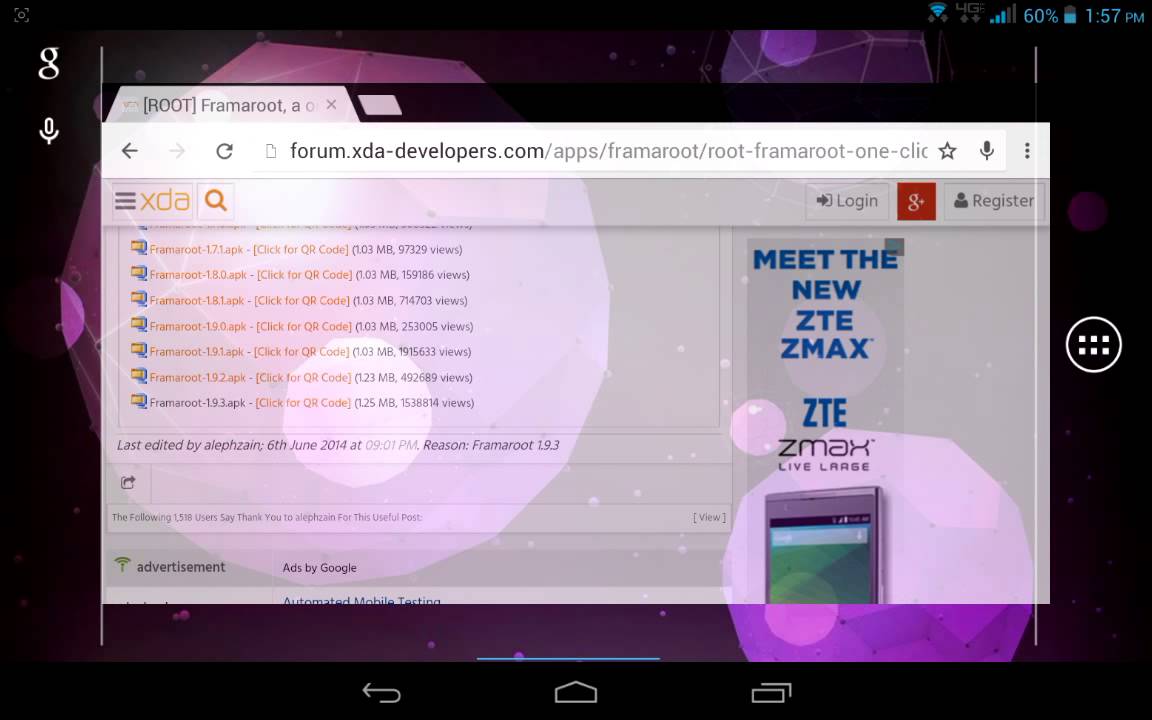
Step 7: Root the Verizon Ellipsis 7 Tablet
Finally, it’s time to root your Verizon Ellipsis 7 Tablet and unleash its full potential. Rooting your tablet will grant you administrative privileges, allowing you to customize the operating system, install custom ROMs, and access advanced features. Here’s how you can root your tablet:
- Open the folder where you downloaded the rooting package and extract its contents if necessary.
- Within the extracted folder, look for the file or executable that initiates the rooting process. This could be a .exe file, a script, or a specific rooting tool.
- Launch the rooting tool or execute the file to start the rooting process.
- Follow the on-screen instructions provided by the rooting tool or guide to proceed with the rooting process. This may involve confirming prompts, selecting options, and granting necessary permissions.
- Wait for the rooting process to complete. This may take a few minutes, and your tablet may reboot during the process.
- Once the rooting process is finished, your Verizon Ellipsis 7 Tablet will be successfully rooted.
Congratulations! You have successfully rooted your Verizon Ellipsis 7 Tablet. Now, you have full control over your device, and you can explore a wide range of customizations and optimizations to enhance your Android experience.
Remember that rooting your device comes with certain risks, such as voiding the warranty or causing potential software issues. It is important to proceed with caution and follow the rooting guide or tool instructions carefully to avoid any complications.
Now that your tablet is rooted, you can enjoy the freedom and flexibility to install custom ROMs, optimize performance, and customize your device to suit your preferences. Take your time to explore the possibilities and make the most out of your rooted Verizon Ellipsis 7 Tablet.
Conclusion
Congratulations on successfully rooting your Verizon Ellipsis 7 Tablet! By following the steps outlined in this guide, you have gained full control over your device and unlocked its true potential. Rooting allows you to customize the operating system, install custom ROMs, and access advanced features that were previously unavailable.
It’s important to remember that rooting your tablet can void its warranty and may introduce certain risks. Proceeding with caution and following the instructions carefully is key to avoiding any complications during the rooting process. Additionally, it’s always a good idea to back up your data beforehand to prevent any potential loss.
With your tablet now rooted, you can explore a plethora of customization options, optimize performance, and customize every aspect of your device according to your preferences. Whether it’s installing custom firmware, tweaking system settings, or trying out new apps, the possibilities are endless.
We hope this guide has provided you with a clear understanding of how to root your Verizon Ellipsis 7 Tablet. Remember to stay informed about the latest updates and developments in the rooting community to make the most out of your rooted device.
Rooting offers a world of opportunities for power users and enthusiasts who want to take their Android experience to the next level. Enjoy your newly rooted Verizon Ellipsis 7 Tablet, and embark on an exciting journey of customization and optimization!