Introduction
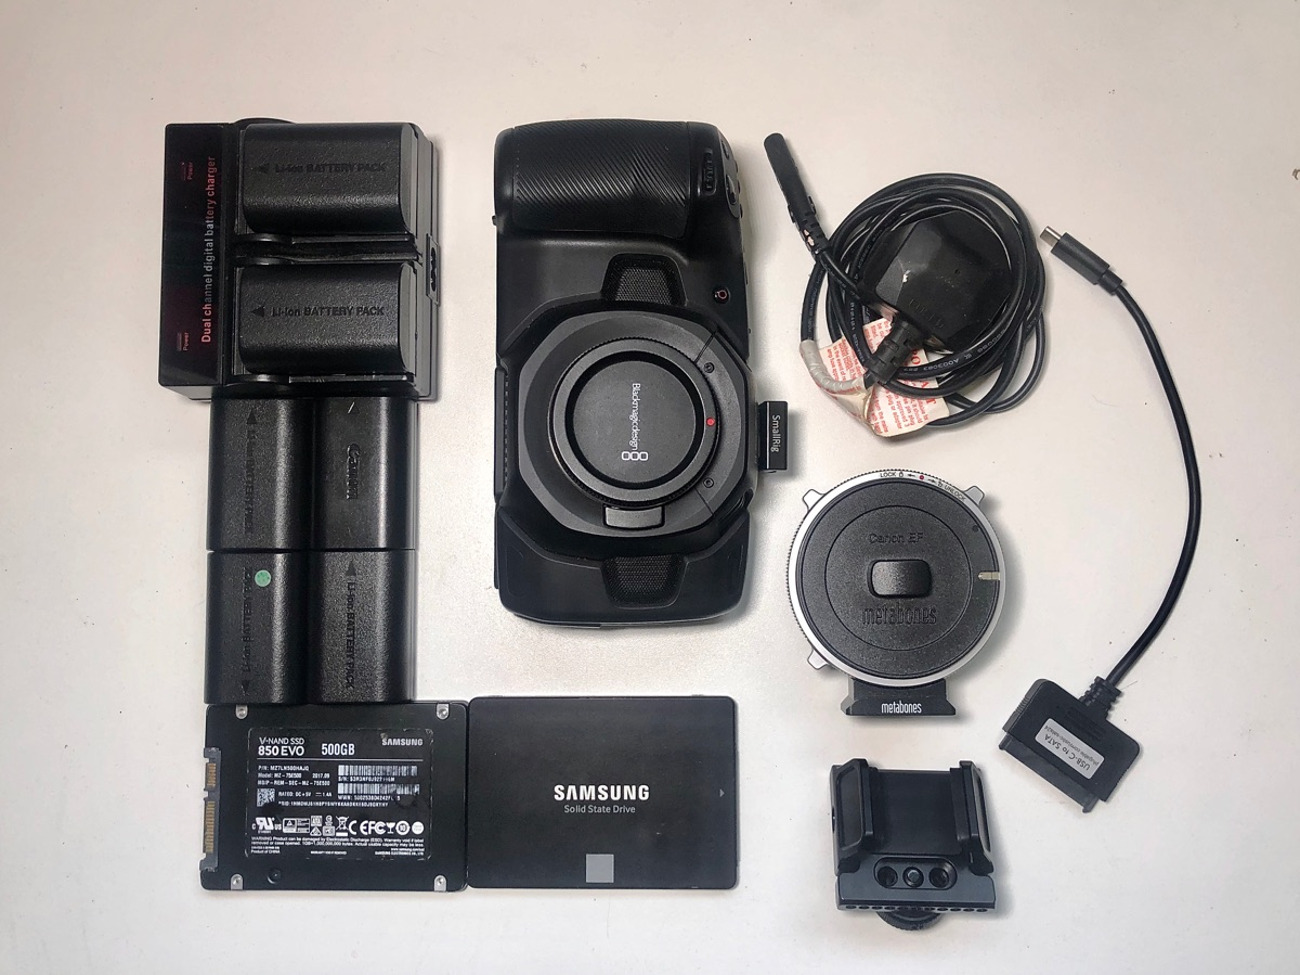
Welcome to this guide on how to rig a Solid State Drive (SSD) to a Blackmagic 4K camera. In today’s fast-paced digital world, high-quality video recording is essential for professional filmmakers, videographers, and content creators. The Blackmagic 4K camera is renowned for its exceptional image quality and versatility. By adding an SSD to your setup, you can enhance your recording capabilities and maximize the potential of this powerful camera.
To effectively rig a solid state drive to a Blackmagic 4K camera, it is crucial to understand the fundamentals of SSDs and how they can improve the performance of your camera. Additionally, selecting the right SSD and properly connecting and configuring it are key steps in the process. This guide will take you through a step-by-step process, providing you with practical tips and insights to help you rig your SSD effectively.
As you read through this guide, you will learn the importance of choosing the right SSD for your Blackmagic 4K camera setup. We will explore the various factors to consider, such as storage capacity, read and write speeds, and durability. Understanding these factors will enable you to make an informed decision and harness the full potential of your camera.
Once you have selected the appropriate SSD, you will discover how to connect it to your Blackmagic 4K camera. We will cover the necessary cables and connectors, as well as the specific steps to follow for a seamless connection. Additionally, you will learn how to configure the camera to enable SSD recording, ensuring optimal performance and compatibility.
Furthermore, this guide will walk you through the process of mounting and securing the SSD onto your Blackmagic 4K camera rig. Proper mounting is essential for stability and ease of use during recording sessions. We will discuss different mounting options and provide practical recommendations to help you achieve a secure and sturdy rigging setup.
Another crucial aspect of rigging an SSD is to correctly power it on your Blackmagic 4K camera rig. Power management is essential for uninterrupted recording and preventing any potential data loss. We will provide insights into power sources and best practices to ensure reliable and consistent power supply for your SSD.
Finally, we will explore ways to enhance data transfer speed and stability between your SSD and Blackmagic 4K camera. This includes optimizing settings, using the appropriate file formats, and implementing other techniques to improve the overall performance of your rig.
By following the steps outlined in this guide, you will be well-equipped to efficiently rig a solid state drive to your Blackmagic 4K camera. Let’s dive in and unlock the full potential of your camera!
Understanding Solid State Drives (SSDs)
Solid State Drives, commonly known as SSDs, have revolutionized the world of storage technology. Unlike traditional hard disk drives (HDDs) that use spinning magnetic disks, SSDs are built using solid-state flash memory, which offers numerous advantages in terms of speed, reliability, and efficiency.
One of the key benefits of SSDs is their incredible speed. Unlike HDDs that rely on mechanical parts to read and write data, SSDs use flash memory chips, which offer almost instantaneous access to stored information. This means faster boot times, quicker application launches, and seamless data transfer when using an SSD.
Another significant advantage of SSDs is their durability. With no moving parts, SSDs are more resistant to physical damage caused by drops, vibrations, or shock compared to HDDs. This robustness makes them ideal for portable devices such as cameras, where stability and reliability are essential.
SSDs also consume less power and generate less heat than HDDs. This energy efficiency is especially beneficial for portable devices as it helps to extend battery life, allowing for more extended recording or shooting sessions. Additionally, the reduced heat production of SSDs makes them less prone to overheating, which can be a significant issue during extended periods of camera use.
When it comes to storage capacity, SSDs are available in a wide range of options, from a few hundred gigabytes up to several terabytes. The ample storage capacity of SSDs allows for extended recording sessions without the need for frequent data backups or transfers. However, it is important to consider your specific needs and budget when selecting the appropriate capacity for your SSD.
It’s worth mentioning that, as technology advances, SSDs have become more affordable, making them a viable option for both professional filmmakers and enthusiasts alike. While the cost per gigabyte may still be higher compared to HDDs, the performance and reliability benefits offered by SSDs certainly justify the investment.
Overall, understanding the capabilities and advantages of SSDs is crucial for any filmmaker or content creator looking to optimize their recording setup. By harnessing the speed, durability, efficiency, and ample storage capacity of SSDs, you can enhance the performance of your camera and elevate the quality of your videos.
Choosing the Right SSD for Blackmagic 4K
When it comes to choosing an SSD for your Blackmagic 4K camera, there are several factors to consider to ensure compatibility, performance, and reliability. Let’s explore the key considerations to help you make an informed decision.
The first aspect to evaluate is the storage capacity. Think about your recording needs and the types of projects you typically work on. SSDs are available in various capacities, ranging from smaller options of 250GB to 1TB and larger capacities of 2TB or more. It’s essential to determine how much storage space you require for your projects to avoid running out of space during critical recording sessions.
In addition to storage capacity, it’s crucial to pay attention to the read and write speeds of the SSD. Blackmagic 4K cameras are known for their ability to capture high-quality videos at high frame rates and bitrates. To ensure smooth recording and data transfer, look for an SSD with fast read and write speeds. This will help prevent dropped frames and ensure that your camera can fully utilize its capabilities.
Another important consideration is the form factor of the SSD. Blackmagic 4K cameras typically accept SSDs in a 2.5-inch form factor. Ensure that the SSD you choose is compatible with the camera’s SSD slot or, if necessary, has the appropriate adapters or enclosures to make it compatible.
Reliability is another crucial factor when selecting an SSD for your Blackmagic 4K camera. Look for SSDs from reputable manufacturers known for their quality and reliability. Reading reviews and checking reliability ratings can provide valuable insights into the performance and durability of different SSD models.
Consider the durability features of the SSD, such as shock resistance and temperature tolerance. Filming often involves moving around and working in various environments. An SSD that can withstand shocks and wide temperature ranges will ensure your data remains safe and accessible in demanding shooting conditions.
Finally, keep your budget in mind when selecting an SSD. Prices for SSDs can vary based on capacity, brand, and performance. While it’s tempting to opt for the highest-performing SSD available, ensure that it fits within your budget constraints. Consider the balance between performance and cost to find the right SSD that meets your needs without breaking the bank.
By carefully considering storage capacity, read and write speeds, form factor compatibility, reliability, durability features, and budget, you can choose the right SSD for your Blackmagic 4K camera. This will allow you to capture high-quality video footage without worrying about storage limitations or performance bottlenecks.
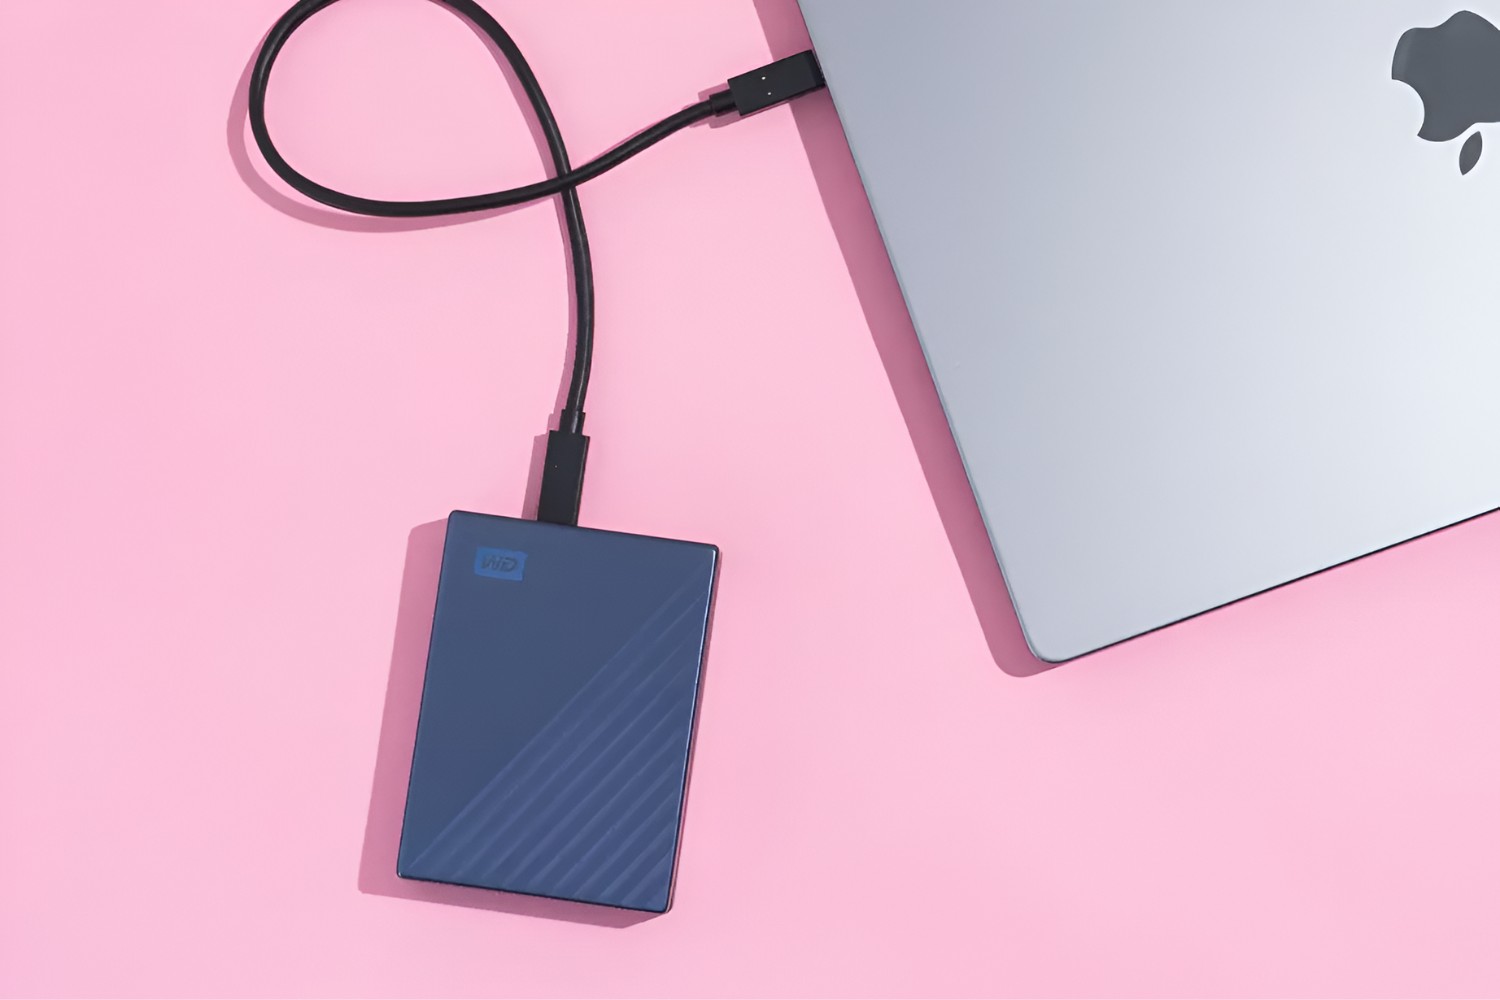
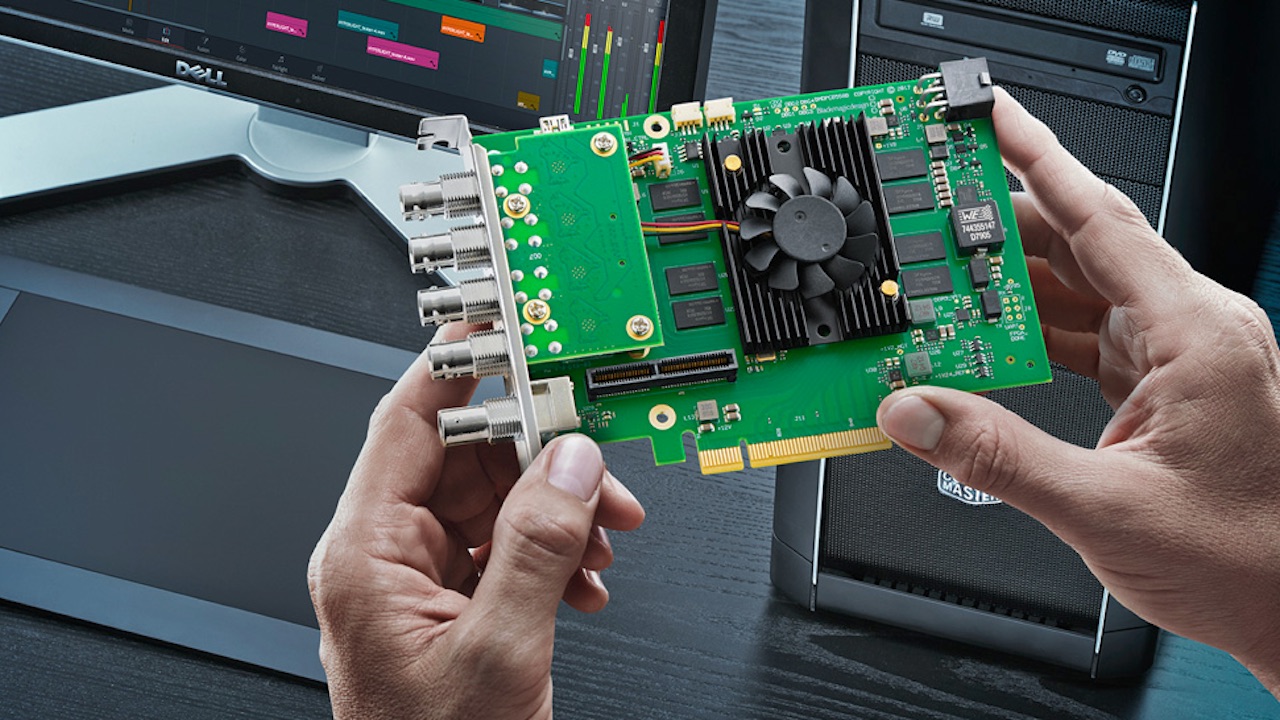
Connecting the SSD to Blackmagic 4K
Once you have selected the right SSD for your Blackmagic 4K camera, the next step is to connect it to the camera to enable seamless recording. Follow these steps to ensure a successful connection:
- Locate the SSD slot on your Blackmagic 4K camera. Depending on the model, it may be located on the rear or side of the camera body.
- Ensure that the camera is turned off before connecting the SSD to avoid any potential damage to the drive or the camera.
- Using the appropriate cable, connect one end to the SSD and the other end to the SSD slot on the camera. Typically, a SATA or USB 3.0 cable will be required, depending on the type of SSD and camera model.
- Ensure that the connection is secure by gently tugging on the cable. A loose connection can lead to data transfer issues or interruptions during recording.
- Before powering on the camera, double-check that the SSD is properly connected and secured. Also, ensure that the SSD is formatted correctly and is compatible with the camera’s file system requirements.
- Once you have confirmed the connection and formatting, you can power on the camera and access the camera’s menu to configure the recording settings.
- Verify that the camera recognizes the SSD by navigating to the storage settings in the camera menu. Ensure that the SSD is listed as the default or selected storage option for recording.
- If the camera does not recognize the SSD or there are any issues with the connection, double-check the cable connections and consult the camera’s manual for specific troubleshooting steps.
By following these steps, you can successfully connect your SSD to your Blackmagic 4K camera. It is essential to ensure a secure and stable connection to prevent any data loss or interruptions during your recording sessions.
Configuring Blackmagic 4K for SSD Recording
Configuring your Blackmagic 4K camera to enable SSD recording is a straightforward process. By following these steps, you can optimize your camera’s settings for seamless recording onto your connected SSD:
- Power on your Blackmagic 4K camera and access the camera’s menu.
- Navigate to the recording settings or preferences section in the menu.
- Ensure that the SSD is selected as the default or preferred recording medium. This may be labeled as “Storage” or “Media” in the camera menu.
- Check and adjust the recording format and codec settings to match your desired recording specifications. Consider factors such as frame rate, resolution, and bit depth. These settings will have a direct impact on the file size and quality of your recorded footage.
- Configure the file naming and organization settings to suit your workflow. This includes options such as file naming conventions, folder structures, and metadata settings.
- Explore additional recording settings and features offered by the camera, such as audio settings, timecode settings, and white balance adjustments. Customize these settings according to your specific recording requirements.
- Once you have configured the necessary settings for SSD recording, save your changes and exit the camera menu.
- Perform a test recording to ensure that the camera is successfully writing data onto the SSD. Check the recorded files on the SSD and verify their playability and quality.
- If any issues arise, double-check the settings and consult the camera’s manual or online resources for troubleshooting guidance.
Configuring your Blackmagic 4K camera for SSD recording allows you to take full advantage of the benefits provided by SSDs, such as faster data transfer speeds and ample storage capacity. By customizing the recording settings to suit your preferences and project requirements, you can achieve high-quality recordings with ease.
Mounting the SSD for Rigging
Properly mounting the SSD onto your Blackmagic 4K camera rig is essential for stability, accessibility, and convenience during recording sessions. Follow these steps to effectively mount your SSD:
- Assess your Blackmagic 4K camera rig and identify the most suitable location for mounting the SSD. Consider factors such as balance, weight distribution, and easy access to the SSD’s connectivity ports.
- Determine the mounting option that best suits your needs. There are various options available, including dedicated SSD mounting brackets, cages, or even attaching the SSD directly to the camera body using adhesive Velcro or straps.
- Ensure that the SSD mounting option you choose provides a secure and stable connection to prevent any accidental dislodging or damage during movement.
- If using a dedicated SSD mounting bracket or cage, attach it to the rig using the appropriate screws or connectors. Make sure the mounting bracket aligns with the chosen location and provides a snug fit for the SSD.
- If using alternative mounting methods like Velcro or straps, securely attach them to both the SSD and the camera rig. Ensure that the SSD is firmly held in place to prevent any unwanted movement or vibrations.
- Double-check the stability of the SSD once mounted. Gently shake the rig and verify that the SSD remains securely in place. This will help avoid any potential disruptions or damage to the SSD during shooting.
- Consider the accessibility of the SSD’s connectivity ports. Ensure that the mounting option allows easy access to connect and disconnect cables without hindrance.
- If necessary, adjust the positioning of the SSD and mounting option to find the optimal balance and positioning for your specific shooting setup.
- Once the SSD is securely mounted, conduct some test movements to ensure that the SSD remains stable and does not interfere with the camera’s operation or balance.
By carefully considering the mounting location, selecting the suitable mounting option, and ensuring a secure and stable connection, you can effectively mount your SSD onto your Blackmagic 4K camera rig. This will provide you with easy access to the SSD and contribute to a stable and efficient shooting experience.
Securing the SSD on Blackmagic 4K Rig
Securing the SSD on your Blackmagic 4K camera rig is crucial to ensure its stability and protection during filming sessions. By following these steps, you can effectively secure the SSD and minimize the risk of accidental dislodging or damage:
- Assess the specific design and structure of your Blackmagic 4K camera rig to identify suitable secure mounting points for the SSD.
- Choose the appropriate mounting hardware or accessories such as screws, brackets, or straps that are compatible with your rig and the SSD mounting option you have selected.
- Attach the mounting hardware to the rig using the provided screws or connectors, ensuring a tight and secure fit.
- Position the SSD onto the mounting hardware, aligning it with the pre-drilled holes or slots, and ensure a secure connection.
- Tighten the screws or straps on the SSD mounting hardware, being careful not to overtighten as this could damage the SSD or the rig.
- Double-check the stability of the SSD by gently shaking the rig and ensuring that the SSD remains securely in place. If there is any wobbling or movement, readjust the mounting hardware as needed.
- Consider using additional security measures such as adhesive-backed Velcro or cable ties to further secure the SSD. This can provide an extra layer of stability and protection during rigorous filming activities.
- Verify that the SSD does not interfere with any camera controls or obstruct the viewfinder or LCD screen. Make any necessary adjustments to prevent any hindrance to your filming process.
- Regularly inspect and tighten the mounting hardware to ensure it remains secure over time. With regular use, vibrations and movements can cause the screws or straps to loosen.
- Perform test movements and simulate filming scenarios to check the SSD’s secure positioning and stability. This will help identify any potential issues that may arise during actual filming and enable you to address them proactively.
By taking these steps to secure the SSD on your Blackmagic 4K camera rig, you can minimize the risk of accidental dislodging or damage, ensuring a stable and reliable setup throughout your filming sessions. This will allow you to focus on capturing excellent footage without any distractions or concerns about the SSD’s security.
Powering the SSD on Blackmagic 4K Rig
Properly powering the SSD on your Blackmagic 4K camera rig is essential for uninterrupted recording and data transfer. Follow these steps to ensure that your SSD receives a reliable power supply:
- Determine the power source for your Blackmagic 4K camera rig. This may include battery packs, external power adapters, or power banks.
- Identify the power requirements of your SSD and ensure that the chosen power source meets those specifications. Check the SSD’s user manual or manufacturer’s website for specific power input details.
- Connect the power cable or adapter to the appropriate power port on your Blackmagic 4K camera rig. Make sure the connection is secure to prevent any accidental disconnection.
- Connect the other end of the power cable or adapter to the designated power input port on the SSD. Ensure a secure connection to maintain a reliable power supply.
- Double-check that the power source is turned on and providing power to the SSD. Confirm that the SSD’s indicator lights or display show signs of power, indicating successful connection.
- Consider using a power regulator or surge protector to safeguard your SSD from power fluctuations or surges. This provides an additional layer of protection against potential damage.
- If using battery packs, ensure that they are fully charged or have sufficient power to last throughout your intended recording session. Carry extra batteries or a backup power source to avoid unexpected power outages in the middle of filming.
- During filming breaks or when the camera is not in use, consider powering off the SSD to conserve energy and extend its lifespan. Refer to the SSD’s user manual for specific instructions on power management.
- Regularly monitor the power levels of the SSD and the power source throughout your recording sessions. This will help you anticipate any potential power-related issues and take necessary precautions.
- If you experience any power-related issues, such as intermittent power supply or sudden power loss, troubleshoot by checking the connections, power source, and battery life to identify and resolve the problem.
By following these steps, you can ensure a reliable and uninterrupted power supply for your SSD on your Blackmagic 4K camera rig. This allows you to focus on capturing the perfect shots without any disruptions or worries about power-related issues.
Ensuring Data Transfer Speed and Stability
When using an SSD with your Blackmagic 4K camera rig, ensuring data transfer speed and stability is crucial for seamless recording and efficient workflow. Follow these steps to optimize data transfer:
- Use high-quality and reliable cables for connecting the SSD to your camera rig. Poor-quality or damaged cables can result in slower transfer speeds or even data loss.
- Properly format the SSD using the appropriate file system recommended by the camera manufacturer. This ensures compatibility and optimal performance for data transfer.
- Keep the SSD clean and free from dust or debris. Regularly check and clean the SSD and connectors to avoid any potential disruptions in data transfer caused by debris buildup or oxidation.
- Ensure that the firmware of the SSD and the camera are up to date. Manufacturers often release firmware updates that improve performance and address any compatibility or stability issues.
- Consider using SSDs with higher read and write speeds for faster data transfer. Faster SSDs can handle higher bitrates and frame rates without dropping frames or experiencing data bottlenecks.
- When recording, monitor the SSD’s storage capacity to prevent running out of space or slowing down the data transfer speed. Regularly offload recorded files to a secure storage solution to free up space on the SSD.
- Optimize the camera’s recording settings for efficient data transfer. This includes selecting appropriate video formats, codecs, and compression settings that balance file size and image quality.
- Avoid interrupting or disconnecting the SSD during recording or data transfer. Abruptly removing the SSD or interrupting the transfer process can result in corrupted or lost data.
- Consider using a backup solution to ensure data redundancy and minimize the risk of data loss. This can involve making duplicate copies of recorded files on additional storage devices.
- Regularly test the SSD’s data transfer speed by recording and transferring files of different sizes and formats. This will help identify any inconsistent or slow transfer speeds that may require troubleshooting or SSD replacement.
By following these steps, you can ensure a smooth and reliable data transfer process when using an SSD with your Blackmagic 4K camera rig. This allows you to focus on your creative process and confidently capture high-quality footage without worrying about data transfer issues.
Safely Removing the SSD from Blackmagic 4K Rig
Safely removing the SSD from your Blackmagic 4K camera rig is crucial to protect your data and prevent any potential damage to the SSD or the rig itself. Follow these steps to ensure a safe and proper removal:
- Stop the recording on your Blackmagic 4K camera and pause any ongoing data transfers involving the SSD.
- If the camera is still powered on, power it off before removing the SSD. This eliminates the risk of data corruption or accidental damage caused by disconnecting the SSD while it is actively being used.
- Gently grasp the SSD and check that it is securely mounted and there is no excessive tension or strain on the connectors or cables.
- Disconnect the power cable from the SSD and ensure that the power source is turned off or unplugged to prevent any electrical hazards.
- If there are any other cables or connectors attached to the SSD, such as data transfer cables, gently detach them one by one, taking care not to pull on the cables or connectors forcefully.
- Once all the cables are disconnected, carefully remove the SSD from its mounting hardware or bracket. Ensure a steady, controlled motion to prevent any accidental drops or impacts.
- Place the removed SSD in a protective case or antistatic bag if available. This provides an additional layer of protection against physical damage, dust, and static electricity.
- Store the SSD in a safe and dry location away from extreme temperatures, moisture, or magnetic fields. Avoid placing heavy objects on top of or near the SSD to prevent any potential damage.
- If the SSD requires any additional care or maintenance, refer to the manufacturer’s guidelines for specific instructions on cleaning or storage recommendations.
- Regularly inspect the SSD, connectors, and cables for any signs of damage or wear. Address any issues promptly to avoid potential complications in future use.
By following these steps, you can safely remove the SSD from your Blackmagic 4K camera rig, protecting your valuable data and ensuring the longevity of the SSD. Taking proper care when removing the SSD is essential to maintain optimal performance and minimize the risk of damage or data loss.
Conclusion
By rigging a solid-state drive (SSD) to your Blackmagic 4K camera, you can enhance your recording capabilities and maximize the potential of your camera’s performance. Understanding the fundamentals of SSDs, choosing the right SSD, properly connecting and configuring it, mounting it securely on your rig, and ensuring reliable power and data transfer are essential steps to achieve optimal results.
When selecting the right SSD, consider factors such as storage capacity, read and write speeds, durability, and compatibility with your camera. Take into account your specific recording needs and budget to make an informed decision.
Properly connecting the SSD to your Blackmagic 4K camera involves using the appropriate cables and connectors, ensuring a secure and stable connection, and configuring the camera’s settings to enable SSD recording.
Mounting the SSD onto your camera rig requires assessing the rig’s structure, selecting suitable mounting options, and securing the SSD firmly in place to prevent accidental dislodging or damage during filming.
Powering the SSD on your rig involves using a compatible power source, connecting the power cables securely, and monitoring the power levels to prevent interruptions or power-related issues during recording.
Ensuring data transfer speed and stability involves using high-quality cables, proper formatting of the SSD, regular cleaning and maintenance, and optimizing camera settings for efficient data transfer.
Lastly, safely removing the SSD from your Blackmagic 4K rig requires powering off the camera, disconnecting cables carefully, removing the SSD from its mounting hardware, and storing it in a safe and protective manner.
By following these guidelines, you can effectively rig an SSD to your Blackmagic 4K camera, allowing you to capture high-quality video footage with speed, stability, and ease. Remember to always consult the camera and SSD manufacturers’ guidelines and user manuals for specific instructions and recommendations. With the right SSD and a well-rigged setup, you can unlock the full potential of your Blackmagic 4K camera and elevate your filmmaking or videography projects to new heights.