Introduction
Overclocking your CPU can provide a significant performance boost, allowing your computer to handle demanding tasks with ease. However, there may be times when you want to revert to the default settings and reset the overclock. Whether you’re experiencing instability, overheating, or simply want to start fresh, this guide will show you how to reset the overclock on your CPU.
Before proceeding, it’s important to note that overclocking can pose certain risks, such as increased power consumption and potential damage to your hardware if not done properly. If you’re unsure about the overclocking process or its implications, consider consulting a professional or doing extensive research before attempting any modifications.
Resetting the overclock on your CPU involves accessing the Basic Input/Output System (BIOS) and adjusting the settings to their default values. The BIOS is a firmware responsible for controlling the hardware settings of your computer. By following the steps outlined in this guide, you’ll be able to reset the overclock and restore your CPU to its original performance.
It’s important to ensure that your computer is powered off before attempting any modifications. Additionally, please note that the steps to enter the BIOS may vary depending on your computer’s manufacturer and model. Refer to your computer’s documentation or manufacturer’s website for specific instructions if needed. With that in mind, let’s dive into the step-by-step process of resetting the overclock on your CPU.
Step 1: Shut Down Your Computer
The first step in resetting the overclock on your CPU is to shut down your computer completely. This ensures that all processes are stopped and the system is powered off properly for the next steps. To shut down your computer, follow these simple steps:
- Close any open programs or files that you’re currently working on.
- Click on the “Start” button located in the bottom left corner of your screen.
- Select the “Power” option from the menu that appears.
- Click on “Shut down” to initiate the shutdown process.
Wait for your computer to completely power off before proceeding to the next step. This helps to ensure that any residual power is discharged and the system is ready for the next steps in resetting the overclock on your CPU.
It is also a good idea to unplug the power cord from the wall socket or surge protector to fully disconnect your computer from the power source. This minimizes the risk of any electrical surges or accidental power-ups during the process. Safety should always be a priority when working with your computer’s hardware.
Now that your computer is properly shut down, you’re ready to move on to the next step: restarting your computer and accessing the BIOS.
Step 2: Restart Your Computer
To continue with the process of resetting the overclock on your CPU, you’ll need to restart your computer. Restarting your computer enables you to access the BIOS, where you can make the necessary adjustments to reset the overclock settings. Follow these steps to restart your computer:
- If your computer is completely powered off, press the power button to turn it on. If it is in a sleep or hibernation mode, wake it up by pressing any key on the keyboard or clicking the mouse.
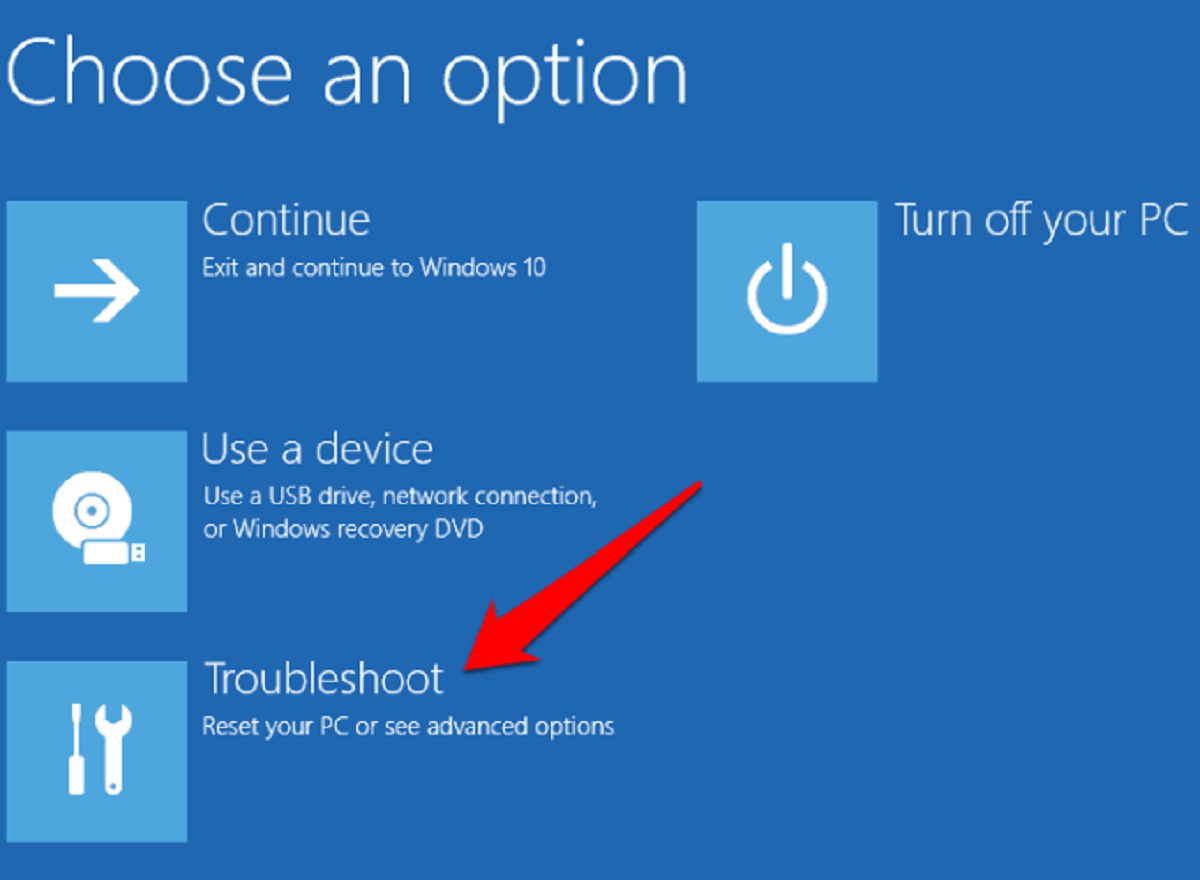
- As your computer starts up, be prepared to press a specific key to enter the BIOS. The key you need to press may vary depending on the manufacturer and model of your computer. Common keys to enter the BIOS include F2, Del, Esc, or F10. Refer to your computer’s documentation or check the manufacturer’s website for the exact key to press.
- Continuously press the designated key until the BIOS screen appears. The BIOS screen typically displays the manufacturer’s logo and a menu of options.
Restarting your computer and accessing the BIOS is a crucial step in resetting the overclock on your CPU. It allows you to access and modify the settings that control the performance of your processor.
Once you have successfully entered the BIOS, you’re ready to proceed to the next step: resetting the overclock settings. It’s important to proceed with caution and carefully follow the instructions to avoid any unintended consequences or damage to your hardware.
Now that you’re in the BIOS, let’s move on to the next step: resetting the overclock settings to their default values.
Step 3: Enter BIOS
Entering the BIOS is a crucial step in resetting the overclock on your CPU. The BIOS allows you to access and modify the settings that control the performance of your processor. Follow these steps to enter the BIOS:
- Restart your computer if you haven’t already done so. As your computer starts up, be prepared to press a specific key to enter the BIOS. The key you need to press may vary depending on the manufacturer and model of your computer. Common keys to enter the BIOS include F2, Del, Esc, or F10. Refer to your computer’s documentation or check the manufacturer’s website for the exact key to press.
- Continuously press the designated key until the BIOS screen appears. The BIOS screen typically displays the manufacturer’s logo and a menu of options.
- Navigate through the BIOS menu using the arrow keys on your keyboard. Look for an option related to overclocking or processor settings. The location of this option may vary depending on the BIOS version and the manufacturer, so carefully explore the different menus and submenus to find the appropriate setting.
It’s important to note that not all BIOS versions have an explicit overclocking option. In some cases, the overclocking settings may be located under a different menu or may not be accessible at all. If you’re unable to find the overclocking settings in the BIOS, refer to your computer’s documentation or check the manufacturer’s website for further assistance.
Now that you have successfully entered the BIOS, we can proceed to the next step: resetting the overclock settings to their default values.
Step 4: Reset Overclock Settings
Now that you’re in the BIOS and have located the overclocking or processor settings, it’s time to reset the overclock settings to their default values. Follow these steps to reset the overclock settings:
- Select the overclocking or processor settings option in the BIOS menu. This option may be labeled as “CPU Settings,” “Performance,” or similar.
- Navigate to the option that allows you to reset the overclock settings. This option may be named “Reset to Default,” “Load Optimized Defaults,” or something similar. Press Enter or a designated key to access this option.
- Confirm the reset by selecting “Yes” or “OK” when prompted. Keep in mind that resetting the overclock settings will revert any customized values back to their default values.
- Once the reset is complete, navigate to the “Save and Exit” option in the BIOS menu. Select this option to save the changes and exit the BIOS.
Resetting the overclock settings will restore your CPU to its default performance specifications, eliminating any overclocking adjustments that were previously applied. This is useful if you’re experiencing stability issues, overheating problems, or simply want to start fresh with the default settings.
It’s important to note that while resetting the overclock settings will eliminate any potential issues caused by overclocking, it will also remove any performance gains that overclocking might have provided. If you still wish to overclock your CPU, make sure to thoroughly research and understand the process to ensure proper stability and cooling.
Now that you’ve successfully reset the overclock settings, you’re ready to proceed to the next step: saving and exiting the BIOS.
Step 5: Save and Exit BIOS
After resetting the overclock settings to their default values in the BIOS, the next step is to save and exit the BIOS. This ensures that the changes you made to the settings are applied and the system can boot up with the new configuration. Follow these steps to save and exit the BIOS:
- Navigate to the “Save and Exit” option in the BIOS menu. This option is usually located towards the bottom of the menu and may be labeled as “Save Changes and Exit” or something similar.
- Select the “Save and Exit” option and press Enter or a designated key to proceed.
- When prompted to confirm the changes, select “Yes” or “OK” to save the changes and exit the BIOS.
After confirming the changes, the BIOS will save the new configuration and exit, restarting your computer with the default settings restored. The system will now boot up without the previous overclocked settings, ensuring stability and compatibility with the default CPU specifications.
It’s important to note that upon exiting the BIOS, your computer may take slightly longer to boot up as it adjusts to the new configuration. This is perfectly normal and should not be a cause for concern.
With the overclock settings reset and the BIOS changes saved, you’re now ready to move on to the final step: verifying that the overclock has indeed been reset.
Step 6: Verify Reset
After resetting the overclock settings in the BIOS, it’s important to verify that the reset has been successfully applied. This step allows you to ensure that your CPU is running at its default settings without any overclock adjustments. Follow these steps to verify the reset:
- Power on your computer and let it boot up normally.
- Once your computer has fully started, check the system information to confirm that the CPU is running at its default settings. You can do this by accessing the Task Manager (Ctrl + Shift + Esc), System Information utility (Win + R, type “msinfo32” and hit Enter), or any other system monitoring software.
- In the respective utility, locate the CPU information and check that the clock speed and voltage values are within the normal range for your specific CPU model.
- Compare the obtained values to the default specifications provided by the CPU manufacturer. You can typically find this information on the manufacturer’s website or in the documentation that came with your CPU.
If the clock speed and voltage values match the default specifications of your CPU, congratulations! You have successfully reset the overclock settings and restored your CPU to its original performance. This ensures stability and compatibility with the default settings.
If, however, you notice that the clock speed or voltage values still deviate from the default specifications, it’s possible that the reset was not applied correctly, or there may be other factors at play. In this case, consider revisiting the BIOS and repeating the steps to reset the overclock. Alternatively, seek professional assistance for further troubleshooting.
By verifying the reset, you can have peace of mind knowing that your CPU is no longer overclocked and is running at its default settings, ready to tackle your computing needs efficiently and reliably.
Conclusion
Resetting the overclock on your CPU can be a useful step to restore default settings, resolve stability issues, or start fresh with your computer’s performance. By following the step-by-step guide outlined in this article, you can confidently and safely reset the overclock settings on your CPU.
Starting with shutting down your computer and proceeding to restart it, access the BIOS, reset the overclock settings to their default values, and save and exit the BIOS. Finally, verify the reset by checking the CPU’s clock speed and voltage values.
It’s important to remember that overclocking carries inherent risks, and resetting the overclock is a prudent decision if you encounter stability issues or excessive heat generation. By restoring the default settings, you can ensure the stability and compatibility of your CPU with the rest of the system.
If you’re considering overclocking your CPU again in the future, be sure to research the process thoroughly, understand the risks involved, and follow proper cooling and stability measures.
Remember to consult your computer’s documentation or the manufacturer’s website for specific instructions or assistance if needed, as the steps and options may vary depending on your computer’s make and model.
By following these steps, you can confidently navigate your computer’s BIOS, reset the overclock on your CPU, and enjoy the benefits of a stable and reliable system.