Introduction
Welcome to our guide on how to reset a PlayStation 4 controller. The PlayStation 4 has revolutionized the world of gaming with its powerful hardware, immersive gameplay, and user-friendly interface. One of the essential accessories for the PlayStation 4 is the controller, which allows players to enjoy their favorite games with precision and control.
However, there may be instances when your PlayStation 4 controller is not functioning properly or experiencing connectivity issues. In such cases, performing a reset can often resolve these problems and get your controller back in working order.
In this article, we will discuss the reasons why you might need to reset your PlayStation 4 controller and provide you with a step-by-step guide on how to do so. Whether you are encountering input lag, unresponsiveness, or any other issues with your controller, this guide will help you troubleshoot and resolve them.
Before we delve into the resetting process, it’s important to note that resetting your PlayStation 4 controller will not affect any of your saved game data or settings on your console. It is simply a way to restore the controller to its default state and establish a new connection with your PlayStation 4 console.
So, without further ado, let’s explore the reasons why you might need to reset your PlayStation 4 controller and how to effectively do it.
Reasons to Reset a PlayStation 4 Controller
There are several reasons why you may need to reset your PlayStation 4 controller. Let’s take a look at the most common scenarios:
- Connectivity Issues: If you are experiencing connectivity issues between your PlayStation 4 controller and the console, such as the controller not pairing or disconnecting frequently, a reset can help establish a stable connection.
- No Response or Input Lag: Sometimes, the controller may become unresponsive or exhibit input lag, causing delays or inaccuracies in your gameplay. Resetting the controller can help resolve these issues and bring back smooth and responsive controls.
- Syncing with a New Console: If you are switching to a new PlayStation 4 console or using your controller on a friend’s console, you may need to reset the controller to establish a new pairing with the different console.
- Software Glitches: Occasionally, software glitches or firmware updates may cause the controller to malfunction. Resetting the controller can often fix these issues and restore its proper functionality.
- Controller Customization: Some players like to customize their controller settings and mappings for a personalized gaming experience. However, if you want to revert back to the default settings, a reset will ensure that all customizations are removed and the controller returns to its original configuration.
These are just a few examples of why you might need to reset your PlayStation 4 controller. Now that we understand the reasons behind performing a reset, let’s dive into the step-by-step process of resetting a PlayStation 4 controller.
How to Reset a PlayStation 4 Controller
Resetting a PlayStation 4 controller is a straightforward process that can be done using the following steps:
- Step 1: Locate the Reset Button
- Step 2: Press and Hold the Reset Button
- Step 3: Re-Pair the Controller with the Console
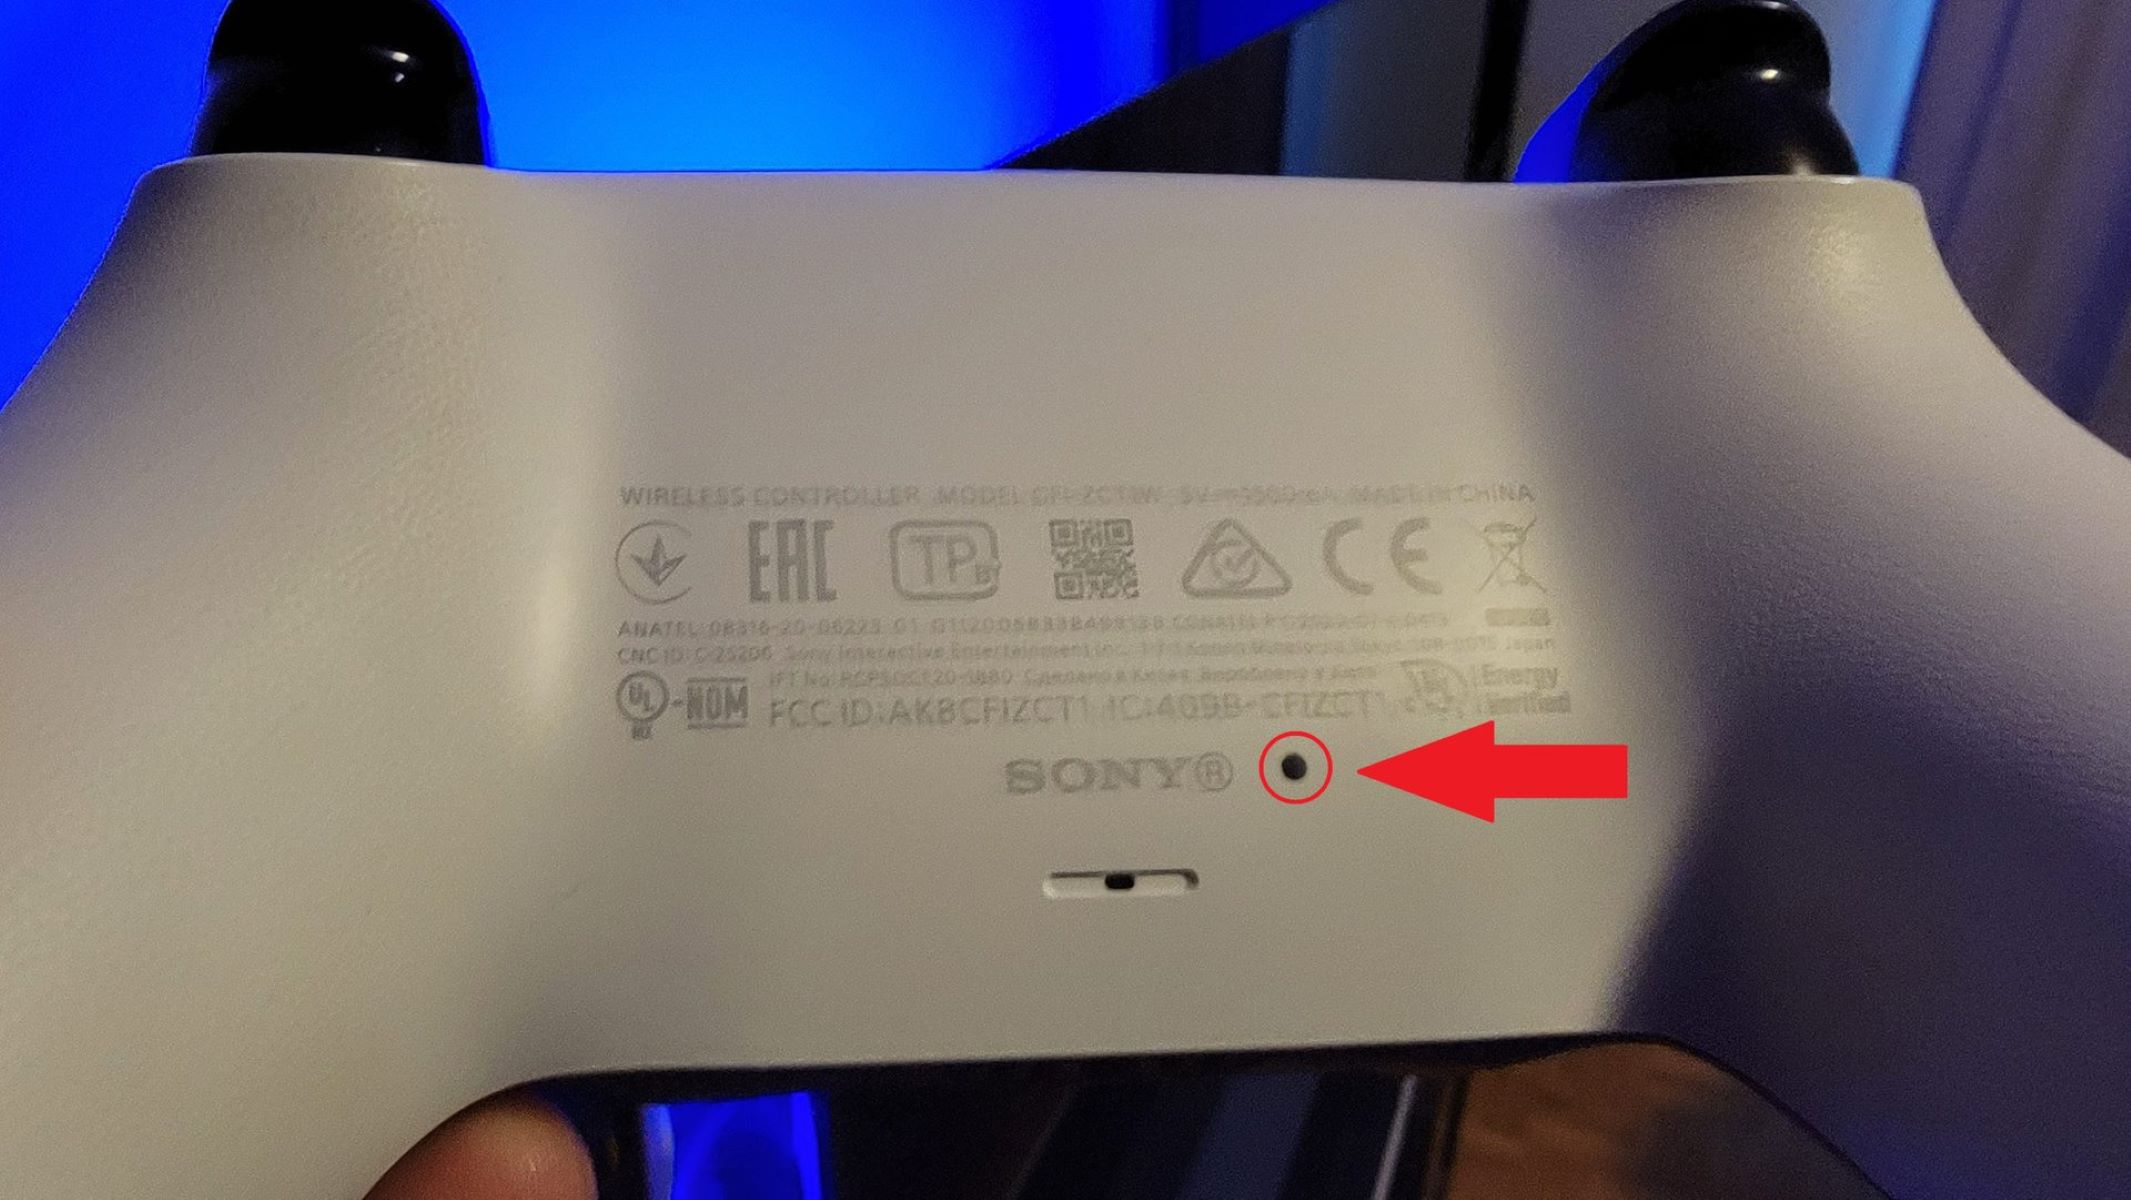
To begin the reset process, you will need to locate the reset button on your PlayStation 4 controller. The reset button is a small hole located on the back of the controller near the L2 shoulder button. You can use a paperclip or a similar small and pointed object to access the reset button.
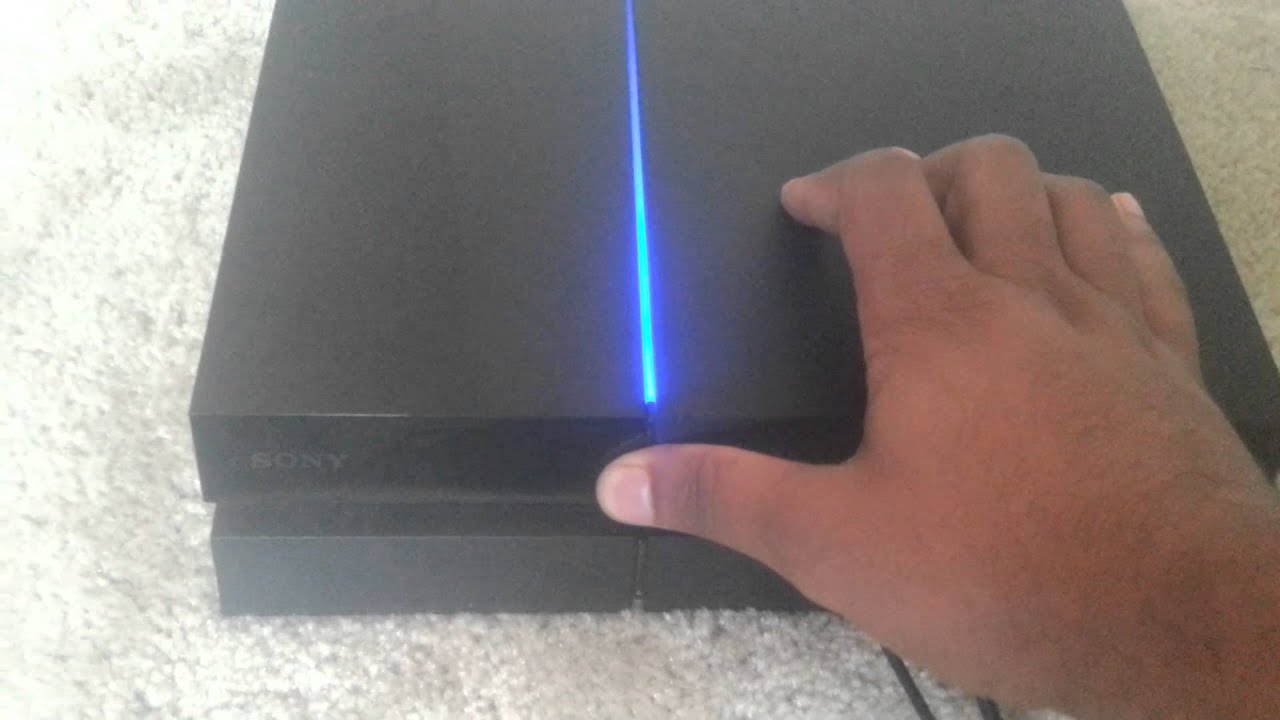
Once you have located the reset button, gently insert the paperclip or similar tool into the hole and press and hold the reset button. You should press and hold the reset button for about 5 seconds until you see the controller’s light bar briefly flash, indicating that the reset process has been initiated.
After releasing the reset button, you will need to re-pair the controller with your PlayStation 4 console. To do this, connect your controller to the console using a USB cable. Once connected, press the PlayStation button located in the middle of the controller. The console will detect the controller and establish a new pairing.
Once the pairing is successful, the light bar on the controller should show a single color to indicate that the connection has been established.
That’s it! Your PlayStation 4 controller has been successfully reset and re-paired with your console. You can now enjoy your games with improved responsiveness and connectivity.
Remember, it’s important to perform the reset process only when necessary. If you are experiencing minor issues, such as input lag, you may try other troubleshooting steps before resorting to a reset. Additionally, if resetting the controller does not resolve your issues, it’s recommended to contact Sony customer support for further assistance.
Step 1: Locate the Reset Button
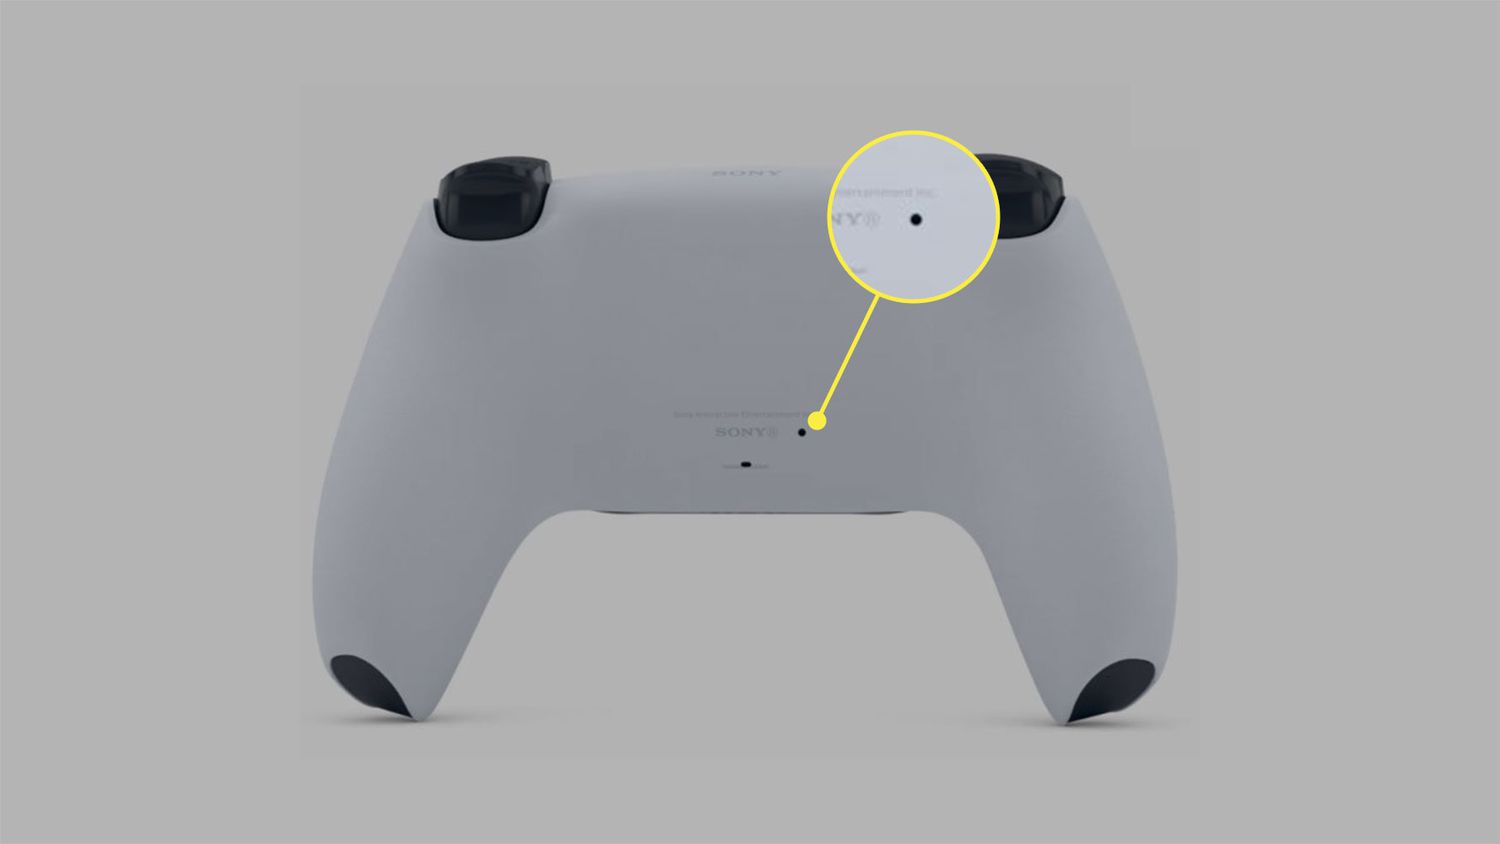
The first step in resetting a PlayStation 4 controller is to locate the reset button. The reset button is a small hole located on the back of the controller, near the L2 shoulder button.
To begin, you will need a small, pointed object like a paperclip or a pin. Take the paperclip or pin and gently insert it into the reset hole. Be sure to apply light pressure and avoid pushing too hard to prevent any damage to the controller.
Once you have inserted the paperclip or pin into the reset hole, you should be able to feel a small, recessed button beneath it. This is the reset button of the controller.
The location of the reset button may vary slightly depending on the specific model of the PlayStation 4 controller, but it is generally found in the same area near the L2 shoulder button.
Note that the reset button is quite small, so you may need to use a toothpick or another fine-tipped object if a paperclip or pin is not readily available. However, it’s important to ensure that whatever object you use is small enough to fit into the reset hole without causing any damage.
Once you have successfully located the reset button, you are ready to move on to the next step of the reset process.
Step 2: Press and Hold the Reset Button
After locating the reset button on your PlayStation 4 controller, the next step is to press and hold the reset button to initiate the reset process.
Using a small, pointed object like a paperclip or pin, gently insert it into the reset hole on the back of the controller. Apply light pressure to engage the reset button beneath it.
Once you have pressed the reset button, hold it down for about 5 seconds. During this time, you may feel a slight resistance, but it’s important to hold the button firmly until the reset process is triggered.
While holding down the reset button, you should observe the controller’s light bar. As you continue to hold the button, the light bar will briefly flash, indicating that the reset process has been initiated.
It’s important to note that the duration for holding the reset button may vary slightly depending on the model of the PlayStation 4 controller. However, it is typically around 5 seconds.
Once the controller’s light bar flashes, you can release the reset button.
By pressing and holding the reset button, you have successfully reset the PlayStation 4 controller to its default state. The controller is now ready to be re-paired with your console, which we will explore in the next step.
Step 3: Re-Pair the Controller with the Console
After successfully performing the reset process on your PlayStation 4 controller, the final step is to re-pair the controller with your console. This will establish a new connection between the controller and the PlayStation 4.
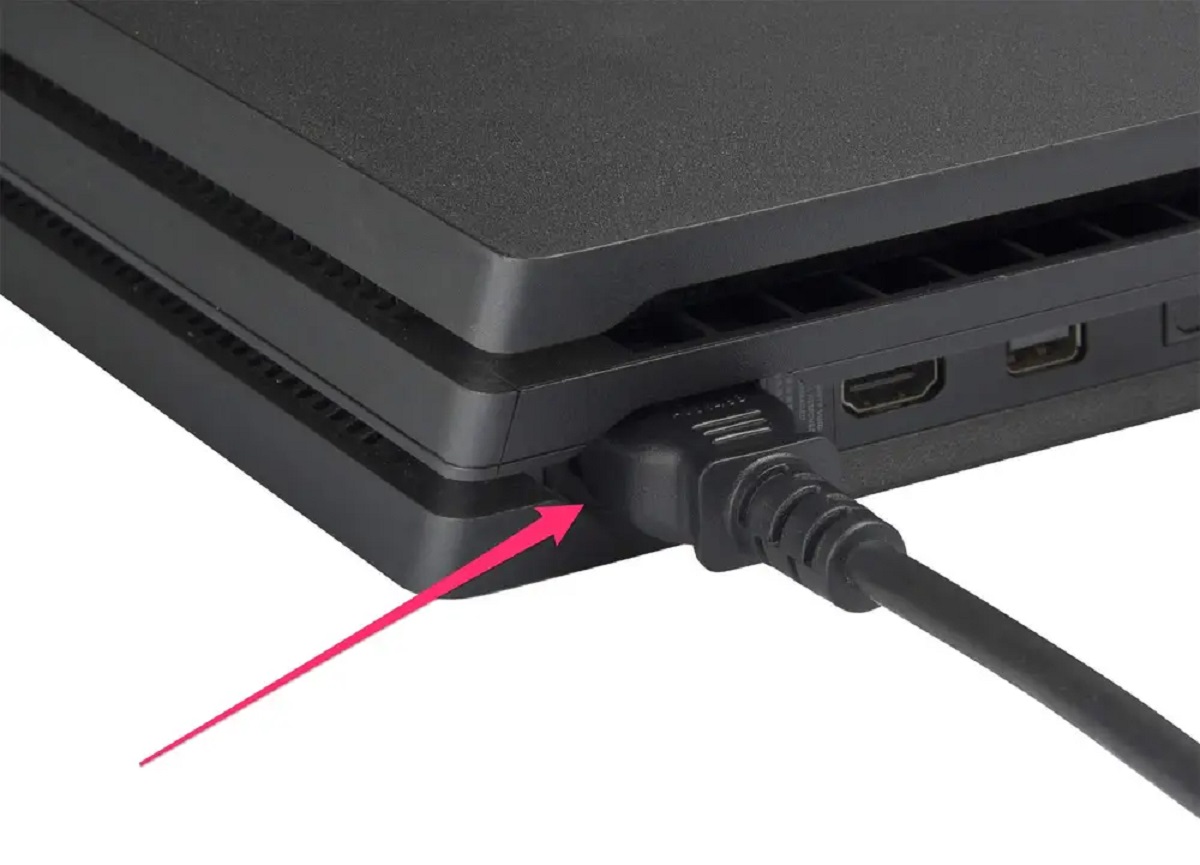
To re-pair the controller, you will need to connect it to the console using a USB cable. Plug one end of the USB cable into the micro USB port located on the top of the controller, and the other end into one of the USB ports on the front of the PlayStation 4 console.
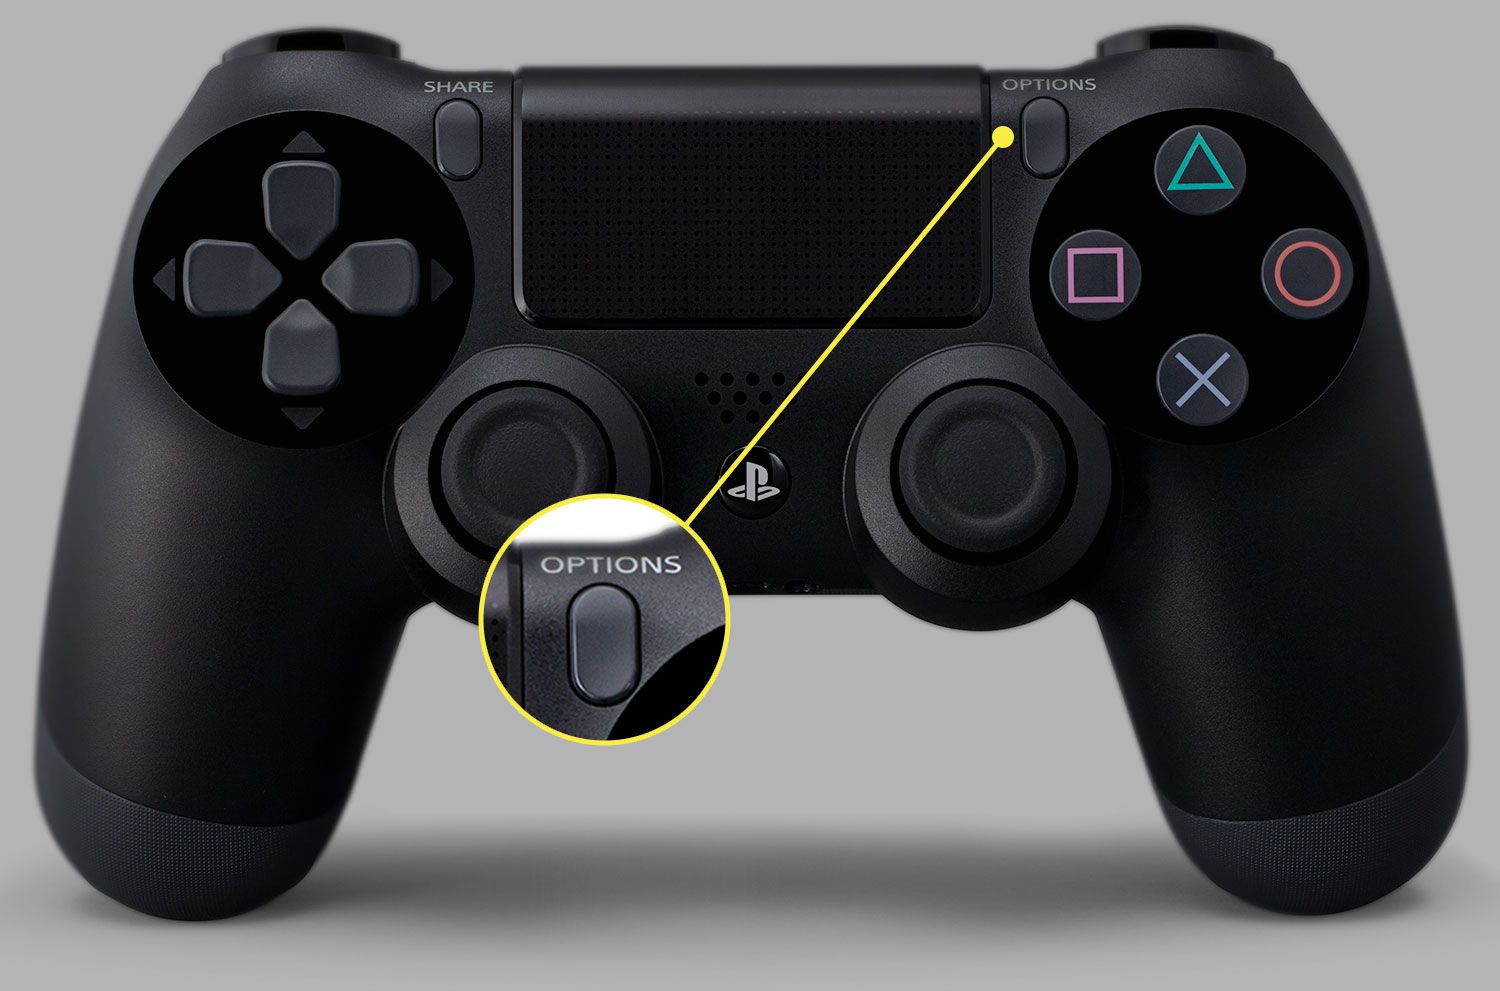
Once the controller is connected via the USB cable, press the PlayStation button located in the middle of the controller. This will power on the controller and send a signal to the console to detect it.
The console will recognize the newly reset controller and re-establish a connection. You will notice that the light bar on the controller will display a single color, indicating that the pairing process is complete.
At this point, you can disconnect the USB cable from the controller and the console. The controller is now wirelessly connected to your PlayStation 4 and ready to use.
If the re-pairing process was successful, you should have full control over your games and experience responsive gameplay.
It’s important to note that if you are re-pairing the controller with a different PlayStation 4 console, you may need to repeat the re-pairing process on the new console. However, for most situations, re-pairing the controller with the same console after a reset should be sufficient.
With that, you have successfully reset your PlayStation 4 controller and re-paired it with your console. Enjoy your gaming experience with a fully functional and responsive controller!
Conclusion
Resetting a PlayStation 4 controller can be a valuable troubleshooting step when you encounter connectivity issues, unresponsiveness, or other problems with your controller. By following the simple step-by-step process outlined in this guide, you can easily reset your controller and establish a new connection with your PlayStation 4 console.
Remember, resetting the controller will not affect any of your saved game data or console settings. It is simply a way to restore the default settings and resolve any issues that may be hindering your gaming experience.
If you find yourself experiencing input lag, disconnects, or other minor issues, it’s worth trying other troubleshooting steps before resorting to a reset. Simple steps such as ensuring your controller’s battery is fully charged, checking for any obstructions between the controller and console, or updating the console’s firmware and controller’s software can often resolve common issues.
However, if you have tried other troubleshooting methods and continue to experience problems, a reset may be the next logical step. By following the guide above, you can reset your controller in no time and enjoy a smooth and responsive gaming experience.
If resetting the controller does not resolve your issues, it’s recommended to reach out to Sony customer support for further assistance. They can provide additional troubleshooting steps or determine if your controller needs repair or replacement.
We hope this guide has been helpful in assisting you with resetting your PlayStation 4 controller. Now it’s time to get back to gaming and enjoy all the thrilling adventures that await!