Introduction
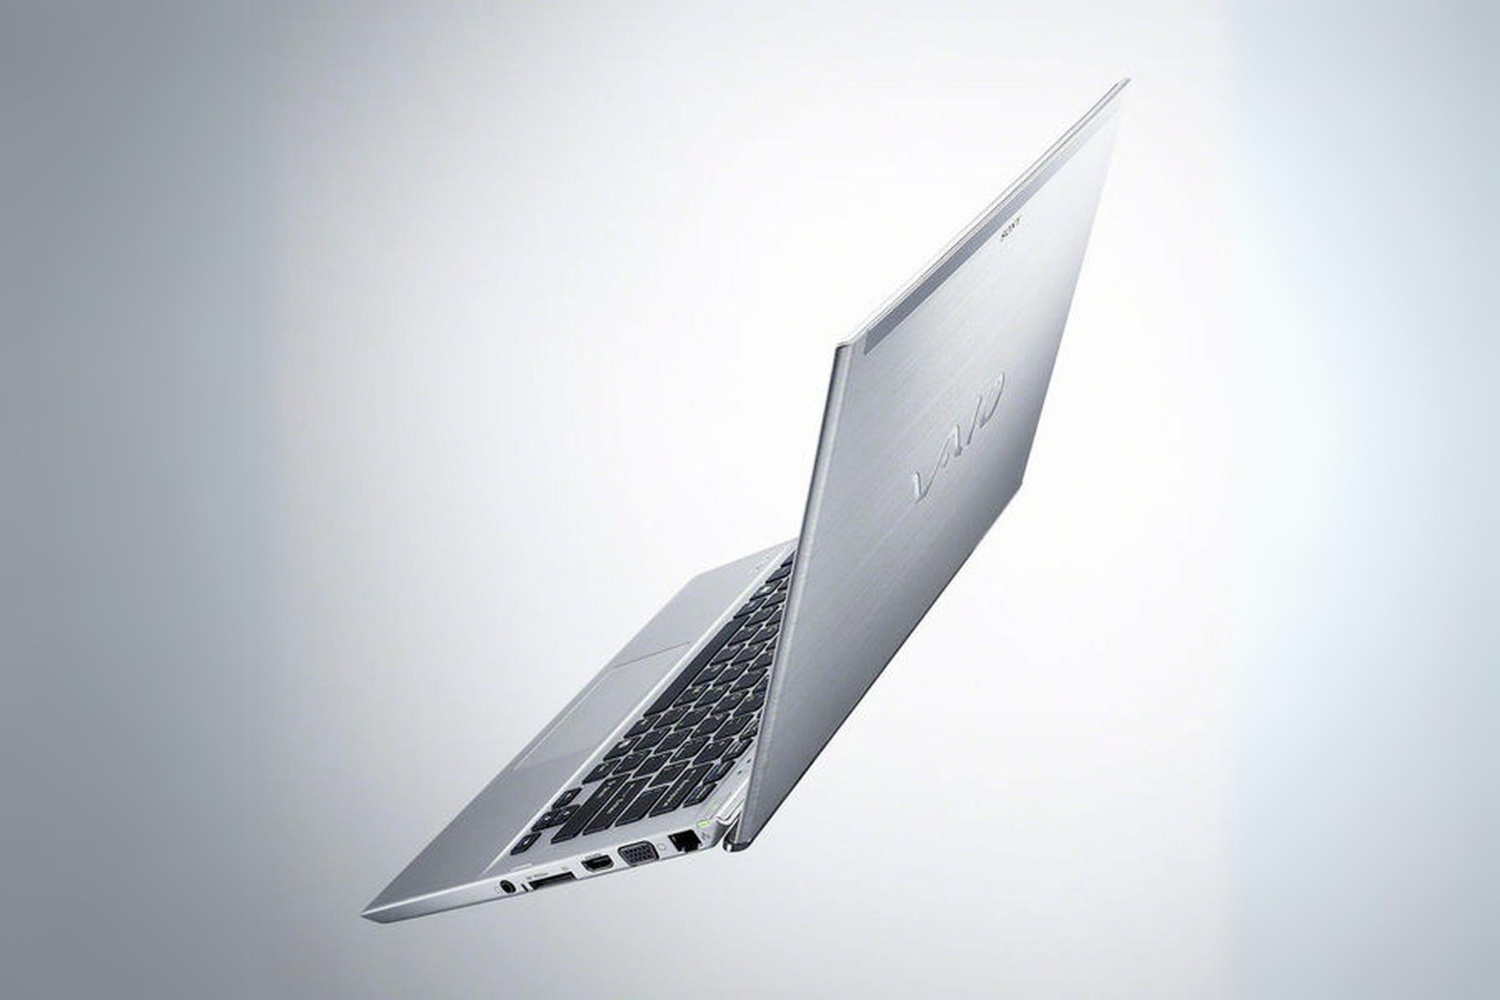
Welcome to this step-by-step guide on how to replace the hard drive in your Sony Ultrabook. Whether your current hard drive is running out of storage space or experiencing technical issues, upgrading to a new hard drive can improve the overall performance and reliability of your Ultrabook.
Before we dive into the process, it’s important to note that handling computer components can be delicate work. It’s crucial to follow the instructions carefully and to proceed with caution. If at any point you feel unsure or uncomfortable, we recommend seeking professional assistance.
Upgrading the hard drive in your Sony Ultrabook can bring multiple benefits. Not only will you have more storage capacity for your files, documents, and multimedia, but you may also experience faster boot times, improved program loading speeds, and smoother overall performance.
In addition, replacing the hard drive can be a cost-effective alternative to purchasing a new laptop. Instead of investing in a completely new system, a simple hard drive replacement can breathe new life into your existing Ultrabook.
Before we begin, it’s essential to ensure that you have all the necessary tools and materials readily available. This will help streamline the process and prevent any unnecessary interruptions.
In the next section, we’ll discuss the tools and materials you’ll need to successfully replace the hard drive in your Sony Ultrabook.
Step 1: Gather all necessary tools and materials
Before you begin the process of replacing the hard drive in your Sony Ultrabook, it’s important to gather all the necessary tools and materials. Having these items on hand will make the process smoother and more efficient.
Here’s a list of things you’ll need:
- Phillips screwdriver: This will be used to remove the screws that hold the back cover of your Ultrabook in place.
- Anti-static wristband: This wristband helps prevent static electricity from damaging your Ultrabook’s internal components. It’s an essential precautionary measure, especially when working with sensitive electronics.
- New hard drive: Ensure that you have a compatible replacement hard drive for your Sony Ultrabook. Check the specifications and dimensions to ensure a proper fit.
- External storage device: You’ll need an external storage device, such as a USB flash drive or an external hard drive, to back up your data from the old hard drive before the replacement.
- Operating system installation media: If your new hard drive doesn’t come with an operating system pre-installed, you’ll need the installation media, such as a USB or DVD, to install the operating system on the new drive.
- Clean, static-free work surface: Find a stable, clean, and static-free work surface to perform the replacement. This will help prevent any damage to your Ultrabook or the components you’re working with.
By ensuring that you have all the necessary tools and materials ready, you can proceed with confidence in the following steps. It’s always better to be well-prepared and have everything within reach before starting the process.
Once you have gathered all the required tools and materials, it’s time to move on to the next step: shutting down your Sony Ultrabook and unplugging the charger.
Step 2: Shut down the Sony Ultrabook and unplug the charger
Before you begin the process of replacing the hard drive in your Sony Ultrabook, it’s crucial to shut down the device and disconnect the charger. This step ensures your safety and prevents any potential damage to the internal components.
Follow these simple steps:
- Save your work: Make sure to save any open files and close all applications before shutting down your Ultrabook. This will prevent data loss or any unsaved changes.
- Shut down the Ultrabook: Click on the Start menu and select “Shut down” from the options. Allow the system to complete the shut down process before proceeding to the next step.
- Unplug the charger: Once the Ultrabook is completely shut down, unplug the charger from both the computer and the power outlet. This step ensures that the device doesn’t accidentally power on during the replacement process.
- Wait for a few minutes: It is recommended to wait for a few minutes before proceeding with the next steps. This allows the system to cool down and reduces the risk of accidental static discharge.
By following these steps, you are ensuring the safety of both yourself and your Sony Ultrabook. Shutting down the device and disconnecting the charger minimize the chances of any electrical mishaps or damage to the internal components.
Now that you have successfully shut down your Ultrabook and unplugged the charger, you can move on to the next step: removing the back cover of the Ultrabook.
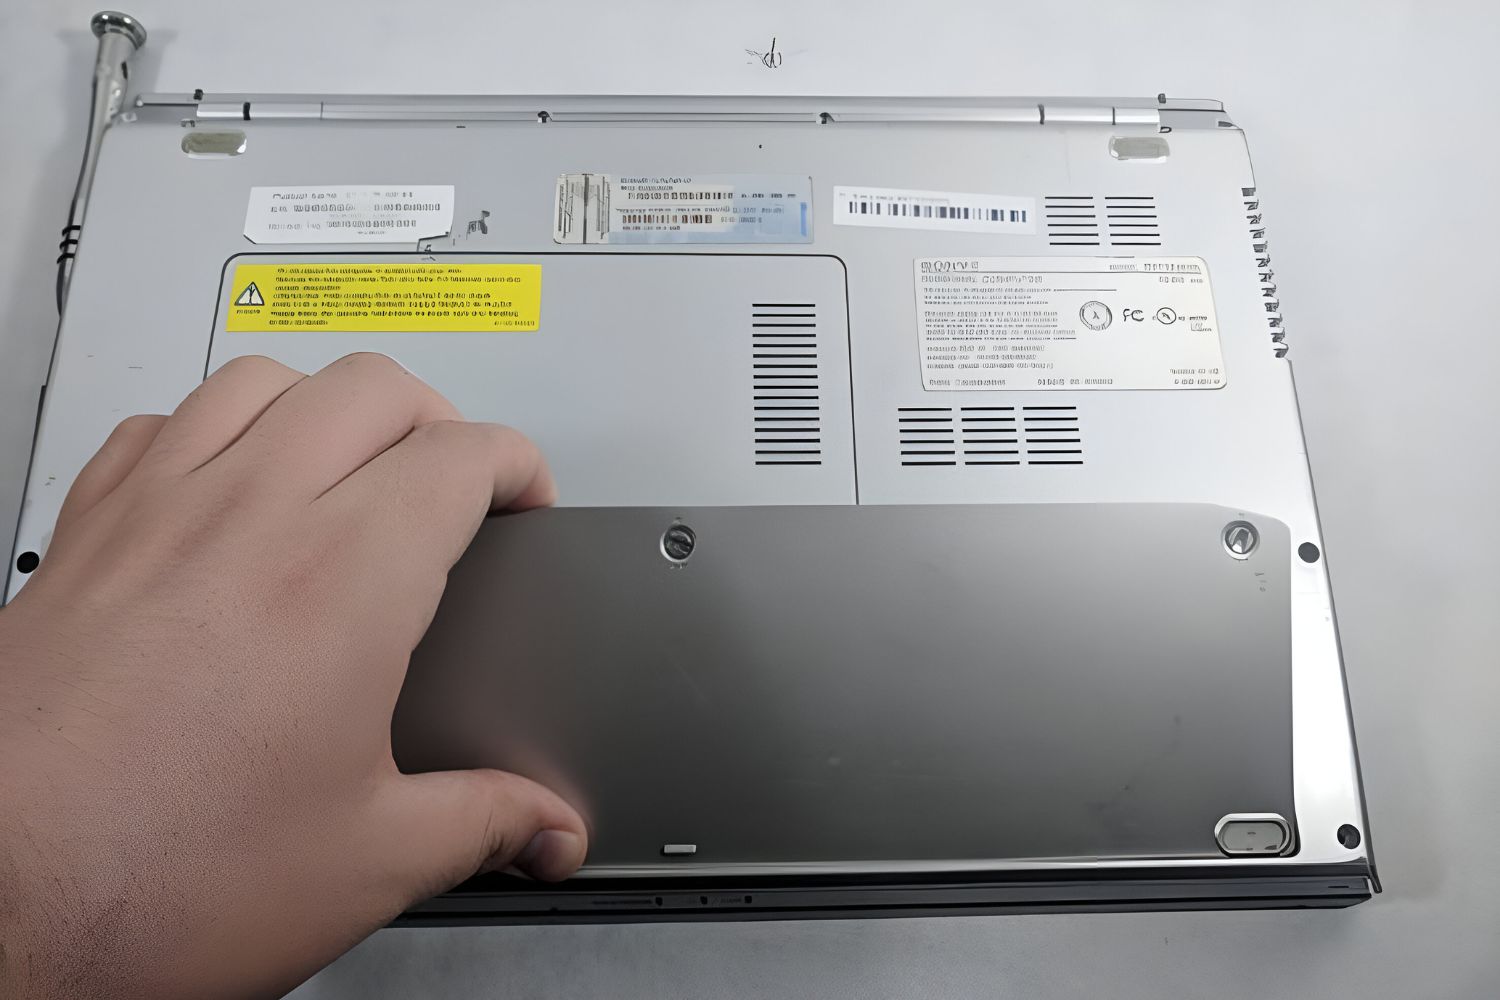
Step 3: Remove the back cover of the Ultrabook
With your Sony Ultrabook properly shut down and the charger unplugged, it’s time to remove the back cover of the Ultrabook. This will allow you to gain access to the internal components, including the existing hard drive.
Follow these steps to remove the back cover:
- Locate the screws: Use a Phillips screwdriver to carefully remove the screws that secure the back cover of your Ultrabook. These screws are usually located on the bottom of the device and are marked with small icons indicating the cover.
- Keep the screws in a safe place: As you remove the screws, make sure to keep them in a secure location so that you don’t lose them. It’s helpful to use a small container or magnetic pad to hold the screws and keep them organized.
- Gently pry open the back cover: Once all the screws are removed, gently pry open the back cover using a plastic opening tool or your fingertips. Be cautious and apply even pressure to prevent any damage to the cover or the internal components.
- Slide the cover off: After loosening the back cover, carefully slide it off the Ultrabook to expose the internal components. Take your time and ensure that no cables or connectors are snagged or damaged during the process.
Removing the back cover gives you access to the internal components, including the hard drive. However, it’s important to exercise caution and not apply excessive force, as this can cause damage to your Ultrabook.
Once you have successfully removed the back cover, you can proceed to the next step: disconnecting the battery cable.
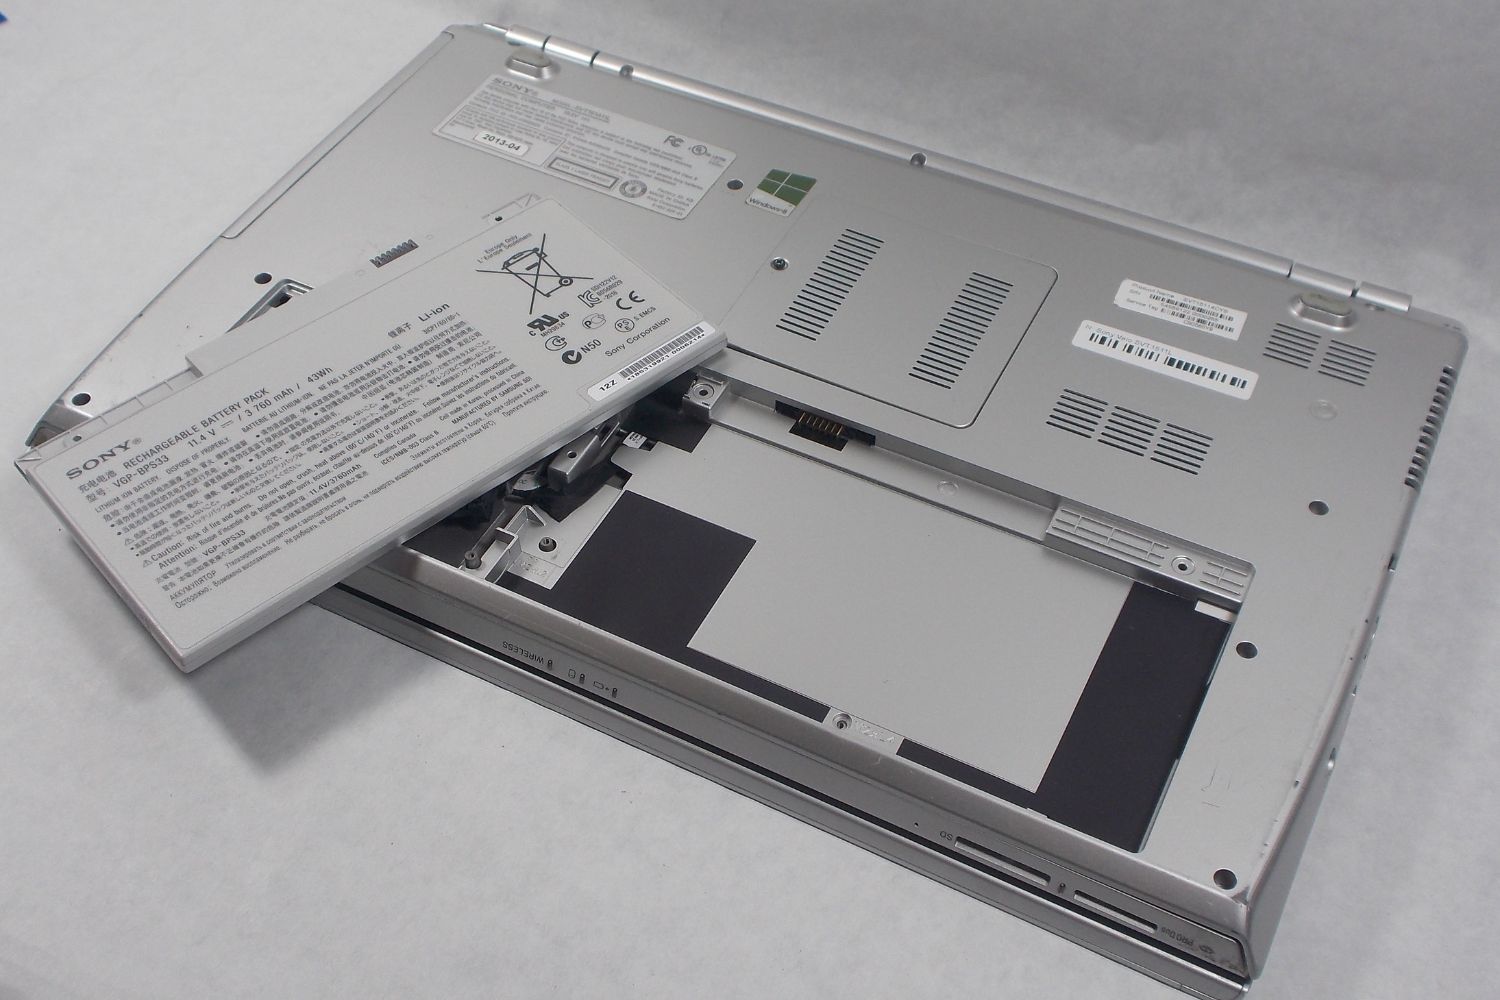
Step 4: Disconnect the battery cable
Before you can safely proceed with replacing the hard drive in your Sony Ultrabook, it is crucial to disconnect the battery cable. This step ensures that there is no power flowing to the device, protecting both you and the internal components from electrical damage.
Follow these steps to disconnect the battery cable:
- Locate the battery connector: Look for the battery connector on the motherboard of your Ultrabook. It is typically located near the center or towards one of the edges.
- Use caution: Before disconnecting the battery cable, it is important to take proper precautions. Ensure that your hands are clean and dry and that you are working on a static-free surface. You may also choose to wear an anti-static wristband for added protection.
- Disconnect the cable: Gently lift the plastic tab on the battery connector and carefully pull the cable away from the connector. Apply even pressure and avoid tugging or pulling forcefully to prevent any damage to the connector or the cable.
- Confirm disconnection: Once the battery cable is disconnected, double-check to ensure that it is completely detached from the connector. This step is essential to guarantee that no power is flowing to the Ultrabook.
By disconnecting the battery cable, you are taking an important safety precaution that allows you to work on your Ultrabook without the risk of electrical shock or damage to the internal components.
Once you have successfully disconnected the battery cable, you are ready to move on to the next step: locating and removing the old hard drive from your Sony Ultrabook.
Step 5: Locate and remove the old hard drive
Now that you have disconnected the battery cable, it’s time to locate and remove the old hard drive from your Sony Ultrabook. This step is crucial for replacing it with a new one and improving the storage capacity and performance of your Ultrabook.
Follow these steps to locate and remove the old hard drive:
- Identify the hard drive: The hard drive is a rectangular-shaped component typically located near the center or side of the internal components. It is usually secured with screws or mounting brackets.
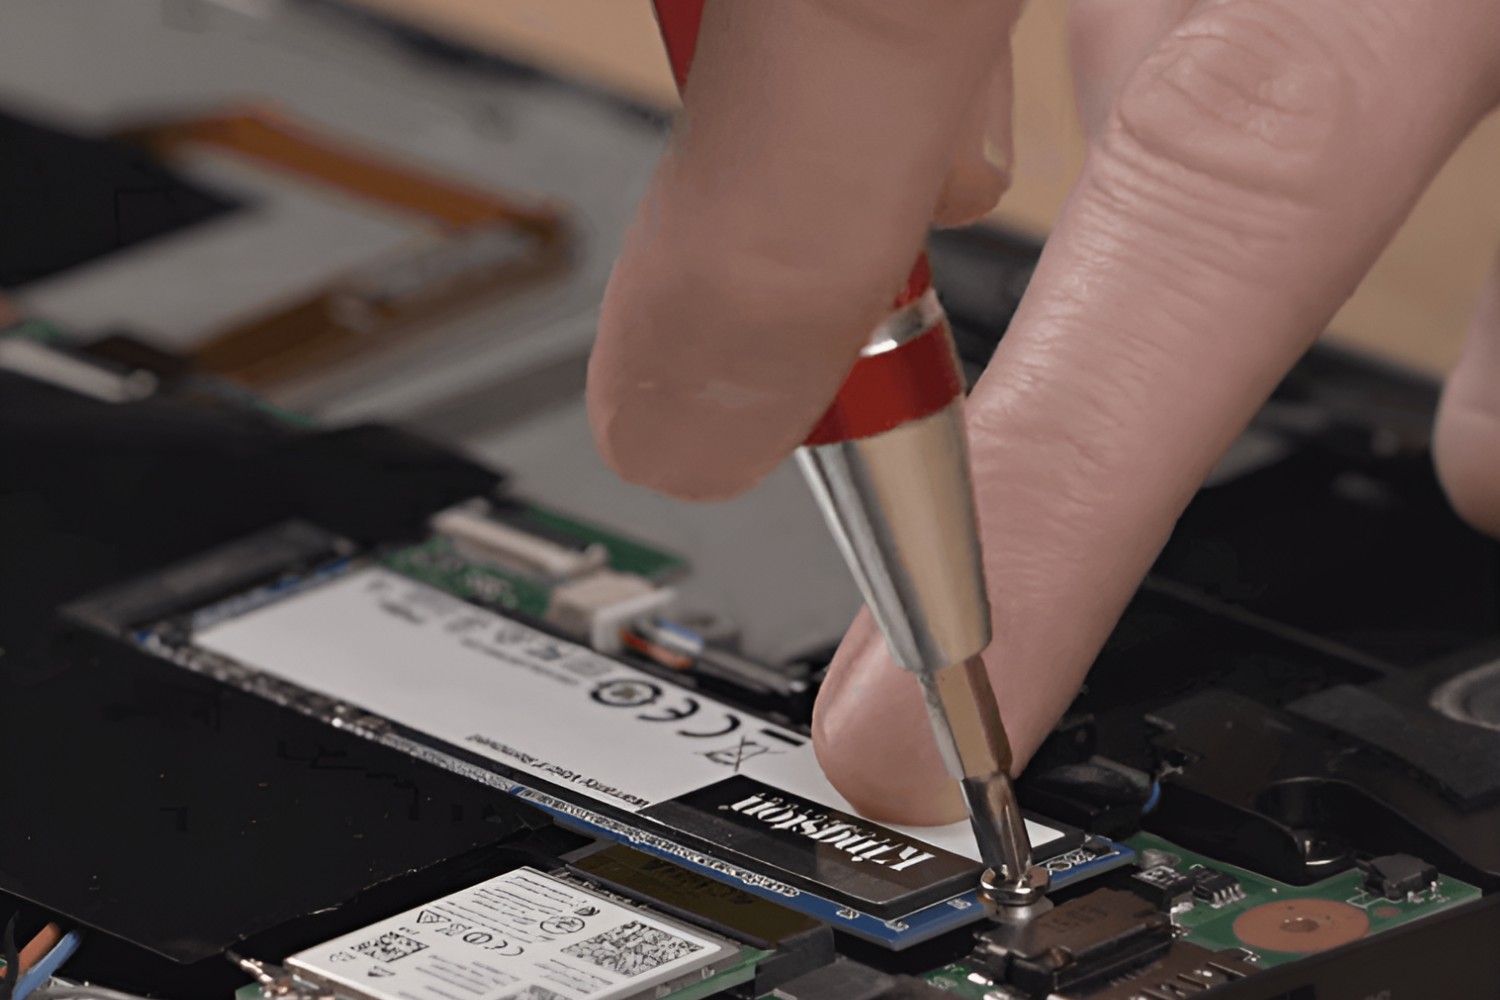
- Remove the screws or brackets: Use a Phillips screwdriver to carefully remove the screws or brackets that secure the old hard drive in place. Keep these screws or brackets in a safe place for later use.
- Disconnect the cables: Depending on the Ultrabook model, there may be a data cable and a power cable attached to the old hard drive. Gently disconnect both cables by carefully pulling them away from the connectors. Take note of the cable orientation to ensure correct reconnection later on.
- Remove the old hard drive: Once the cables are disconnected, carefully slide the old hard drive out of its bay or slot. Be mindful of any obstacles or brackets that may be holding it in place.
Take your time while removing the old hard drive to avoid any damage to the surrounding components or connectors. If you encounter any difficulties, refer to the user manual or search for specific instructions related to your Sony Ultrabook model.
Once you have successfully located and removed the old hard drive, you can proceed to the next step: installing the new hard drive into your Sony Ultrabook.
Step 6: Install the new hard drive into the Ultrabook
With the old hard drive removed, it’s time to install the new hard drive into your Sony Ultrabook. This step is crucial for upgrading the storage capacity and improving the overall performance of your Ultrabook.
Follow these steps to install the new hard drive:
- Prepare the new hard drive: If the new hard drive didn’t come pre-formatted or pre-partitioned, you will need to prepare it before installation. Refer to the manufacturer’s instructions or use disk management software to format and partition the new hard drive.
- Align the new hard drive: Carefully align the new hard drive with the mounting slot or bay in your Ultrabook. Ensure that the connectors on the hard drive are facing the correct direction.
- Insert the new hard drive: Gently slide the new hard drive into the slot or bay until it is firmly seated. If necessary, use gentle pressure to ensure a proper connection.
- Secure the new hard drive: Use the screws or brackets that you previously removed from the old hard drive to secure the new hard drive in place. Tighten the screws with a Phillips screwdriver, making sure not to overtighten them.
- Reconnect the cables: Reconnect the data cable and power cable to the new hard drive. Ensure that the cables are securely attached to their respective connectors and that the orientation matches the markings or indicators.
During the installation process, be cautious and handle the new hard drive with care to prevent any damage. Take note of the proper alignment and connection of the drive to avoid any issues with functionality or performance.
Once the new hard drive is successfully installed, you can move on to the next step: reconnecting the battery cable in your Sony Ultrabook.
Step 7: Reconnect the battery cable
Now that the new hard drive is securely installed in your Sony Ultrabook, it’s time to reconnect the battery cable. This step is essential to restore power to your Ultrabook and ensure that it functions properly with the new hard drive.
Follow these steps to reconnect the battery cable:
- Locate the battery connector: Find the battery connector on the motherboard of your Sony Ultrabook. Ensure that it is clean and free from any dust or debris.
- Align the cable: Gently align the cable connector with the corresponding port on the motherboard. Take care to match the shapes and orientation of the connector and port before proceeding.
- Connect the cable: Once properly aligned, carefully insert the battery cable connector into the port on the motherboard. Apply gentle pressure until it is firmly seated.
- Secure the connection: Double-check that the battery cable is securely connected and properly seated in the port. Ensure that no part of the cable is loose or disconnected.
Reconnecting the battery cable restores power to your Ultrabook after the installation of the new hard drive. It is important to ensure a secure and stable connection to avoid any power-related issues or disruptions.
Once you have successfully reconnected the battery cable, you can move on to the next step: replacing the back cover of your Sony Ultrabook.
Step 8: Replace the back cover of the Ultrabook
Now that the new hard drive is installed and the battery cable is reconnected, it’s time to replace the back cover of your Sony Ultrabook. This step will secure the internal components and protect them from any potential damage.
Follow these steps to replace the back cover of your Ultrabook:
- Align the cover: Carefully align the back cover with the edges of your Ultrabook. Ensure that all the screw holes on the cover align with the corresponding holes on the Ultrabook.
- Press gently: Apply gentle, even pressure to the back cover to secure it in place. Start from one edge and work your way around, ensuring that the cover is fully seated and flush with the Ultrabook’s body.
- Replace the screws: Retrieve the screws you removed earlier and use a Phillips screwdriver to securely fasten them back into their respective screw holes. Ensure that each screw is tightened but not overly tightened.
- Double-check the alignment: Once all the screws are in place, double-check the alignment and fit of the back cover. Ensure that it is snug and secure without any gaps or misalignments.
Replacing the back cover of your Ultrabook restores its original appearance while protecting the internal components. It ensures that everything is properly enclosed and reduces the risk of any accidental damage or exposure.
Now that the back cover is securely in place, you can proceed to the final step: powering on the Ultrabook and installing the operating system on the new hard drive.
Step 9: Power on the Ultrabook and install the operating system
With the back cover securely replaced, it’s time to power on your Sony Ultrabook and install the operating system on the new hard drive. This final step will bring your Ultrabook back to life with improved performance and functionality.
Follow these steps to power on your Ultrabook and install the operating system:
- Plug in the charger: Connect the charger to your Ultrabook and plug it into a power outlet. Ensure that the charger is properly inserted and the connection is secure.
- Press the power button: Locate the power button on your Ultrabook and press it to turn on the device. Wait for the system to boot up and initialize.
- Enter the BIOS or boot menu: Depending on your Ultrabook model, you may need to enter the BIOS or boot menu to change the boot order and prioritize the new hard drive as the boot device. Consult your Ultrabook’s user manual or the manufacturer’s website for specific instructions on accessing the BIOS or boot menu.
- Insert the operating system installation media: If your new hard drive does not come with an operating system pre-installed, insert the installation media, such as a USB flash drive or DVD, that contains the operating system installation files.
- Follow the on-screen prompts: Once the operating system installation media is inserted, follow the on-screen prompts to install the operating system on the new hard drive. Make sure to select the correct hard drive as the destination for the installation.
- Complete the installation process: Follow the installation wizard instructions, including entering any required information, such as license keys or user account details. Wait for the operating system installation process to complete.
- Restart your Ultrabook: After the operating system is successfully installed, restart your Ultrabook. It will now boot from the new hard drive and initialize the operating system.
By powering on your Ultrabook and installing the operating system on the new hard drive, you are completing the final step of the replacement process. Once the operating system is installed and your Ultrabook is fully functional, you can begin enjoying the benefits of the upgraded hard drive.
Congratulations! You have successfully replaced the hard drive in your Sony Ultrabook and completed the installation of the operating system.
Conclusion
Congratulations on successfully replacing the hard drive in your Sony Ultrabook! By following the step-by-step guide provided, you have not only improved the storage capacity of your Ultrabook but also enhanced its overall performance and functionality.
Throughout this process, you learned how to gather the necessary tools and materials, shut down the Ultrabook, remove the back cover, disconnect the battery cable, locate and remove the old hard drive, install the new hard drive, reconnect the battery cable, replace the back cover, power on the Ultrabook, and install the operating system on the new hard drive.
Remember to handle the components with care, follow safety precautions, and refer to the specific instructions for your Sony Ultrabook model if needed. If you ever feel uncertain or uncomfortable, do not hesitate to seek professional assistance.
With the new hard drive installed, you now have increased storage capacity for your files, improved boot times, faster program loading speeds, and overall smoother performance. Whether you use your Ultrabook for work, entertainment, or both, this upgrade will enhance your computing experience.
Don’t forget to keep your old hard drive safely stored in case you need to retrieve any data from it or repurpose it in the future. Additionally, consider regularly backing up your files to prevent data loss and maintain the security of your important data.
Thank you for following this comprehensive guide on how to replace the hard drive in your Sony Ultrabook. Enjoy your enhanced Ultrabook experience with the new hard drive installed!