Introduction
Case fans play a crucial role in keeping our computer systems cool and preventing overheating. However, over time, these fans can become noisy, inefficient, or even stop working altogether. The good news is that in many cases, you can repair them yourself, saving you the cost of buying a new fan.
In this article, we will guide you through the process of repairing a 250mm case fan. Whether you’re a computer enthusiast or just looking to save some money, this step-by-step guide will help you get your case fan back in top shape.
To perform the repair, you will need some basic tools and materials that you likely already have at home. We will walk you through each step, explaining everything in detail, so even if you’re not particularly tech-savvy, you’ll be able to follow along.
Repairing your case fan not only extends its lifespan but also ensures that your computer system operates at optimal performance. A well-functioning fan helps maintain lower temperatures, preventing thermal throttling and potential damage to your hardware components. Plus, a quiet and efficient fan enhances your overall computing experience by reducing noise levels.
Before we begin, it’s important to note that not all case fans can be repaired. In some cases, the damage may be extensive or beyond repair, in which case you may need to replace the fan. However, it’s always worth trying to repair it first, as it has the potential to save you money and reduce electronic waste.
Now that you understand the importance of a properly functioning case fan and the benefits of repairing it, let’s gather our tools and materials and get started with the repair process.
Tools and Materials Needed
Before you begin repairing your 250mm case fan, make sure you have the following tools and materials handy:
- Screwdriver (usually Phillips or Torx, depending on the type of screws)
- Cotton swabs or small brush
- Isopropyl alcohol or mild cleaning solution
- Lubricating oil suitable for fans (such as sewing machine oil or fan-specific lubricant)
- Replacement thermal paste (optional)
- Lint-free cloth
These tools and materials will enable you to properly disassemble, clean, and lubricate the fan components. The screwdriver will help you remove any screws holding the fan in place, while the cotton swabs or brush, along with the cleaning solution, will allow you to safely remove any dust or debris from the fan blades. The lubricating oil will help restore smooth operation to the fan bearings.
If you’re also planning to remove the fan completely from the case, you may need additional tools such as a pair of pliers or wire cutters to disconnect any fan cables securely.
Additionally, while not necessary, you may consider having replacement thermal paste on hand. If you plan to remove the fan from the heat sink or CPU, it’s a good opportunity to replace the thermal paste to ensure efficient heat transfer.
With these tools and materials at your disposal, you’ll be ready to tackle the fan repair process and restore your 250mm case fan to its optimal functioning state.
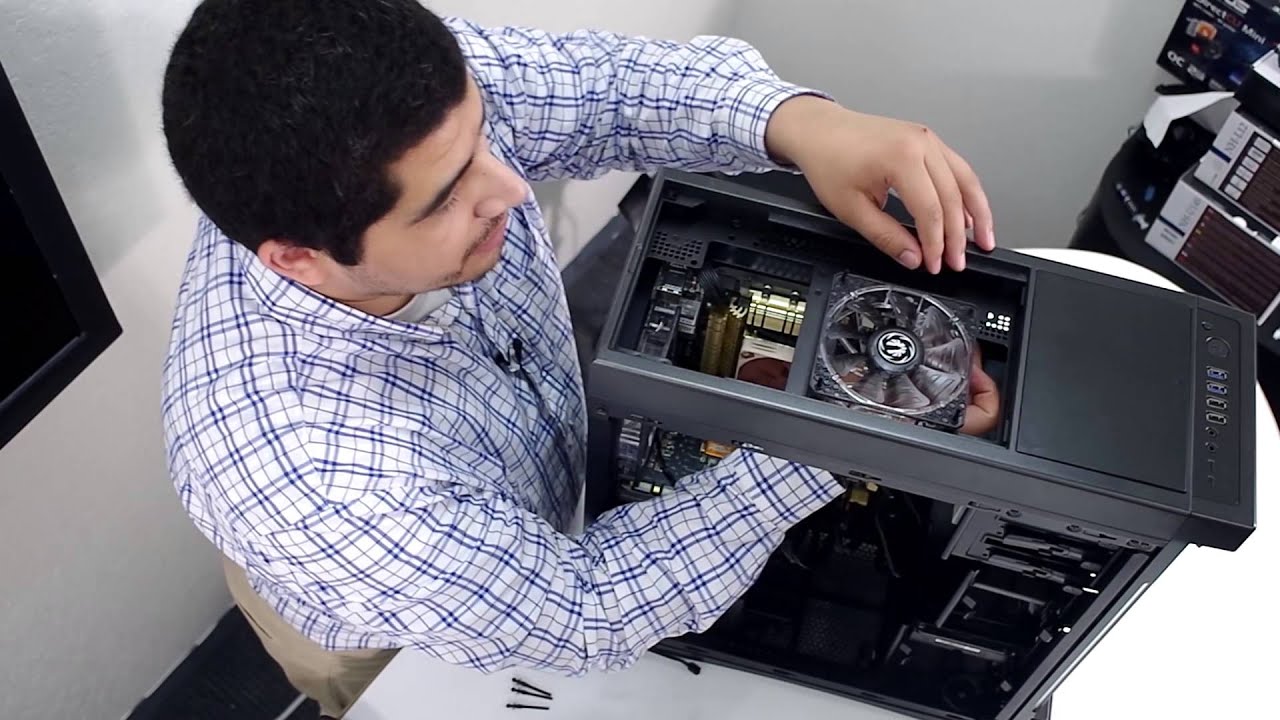
Step 1: Removing the Fan from the Case
The first step in repairing your 250mm case fan is to safely remove it from the computer case. Follow these steps:
- Power off your computer and unplug it from the wall outlet to avoid any electrical accidents.
- Open the computer case panels by locating the screws or latches on the sides or back of the case. Use a screwdriver or follow the case manufacturer’s instructions for panel removal.
- Locate the 250mm case fan within the case. It’s typically positioned on the front or back panel.
- Inspect the fan and identify the screws or clips holding it in place.
- Using the appropriate screwdriver, unscrew the screws or release the clips to detach the fan from the case. Make sure to keep track of the screws for reassembly.
- If the fan has cables connected to the motherboard or a fan controller, gently disconnect them by pressing the tabs or levers and pulling them apart.
- Once the fan is disconnected, carefully remove it from the case, being mindful of any cables or obstructions.
Be cautious when handling the fan to avoid damaging the delicate fan blades or any other components. Take note of how the fan was positioned within the case for easier reinstallation later.
Congratulations! You have successfully removed the 250mm case fan from your computer case. Now, we can move on to the next step, which involves cleaning the fan blades to remove dust and debris.
Step 2: Cleaning the Fan Blades
Once you have removed the 250mm case fan from the computer case, it’s time to clean its blades to remove any accumulated dust and debris. Follow these steps:
- Prepare a cleaning solution by mixing isopropyl alcohol with water or using a mild cleaning solution. Avoid using harsh chemicals as they can damage the fan blades.
- Dip a cotton swab into the cleaning solution or wet a small brush with it. Make sure it’s not dripping wet but just damp enough to clean the blades effectively.
- Gently hold the fan blades with your fingers or use a non-abrasive tool to prevent them from moving while cleaning.
- Slowly and carefully wipe each fan blade with the damp cotton swab or brush, removing any visible dirt or grime. Pay attention to the spaces between the blades and the fan hub.
- If necessary, repeat the process with a fresh cotton swab or brush to ensure all areas of the fan blades are thoroughly cleaned.
- Once you’re satisfied with the cleaning, use a lint-free cloth to gently dry the fan blades. Make sure they are completely dry before proceeding to the next step.
Cleaning the fan blades is essential to maintain proper airflow and prevent dust build-up, which can hinder the fan’s performance. By removing accumulated dust and debris, you can ensure smooth operation and reduce noise from the fan.
Now that you have cleaned the 250mm case fan blades, we can move on to the next step: lubricating the fan bearings to restore optimal functionality.
Step 3: Lubricating the Fan Bearings
After cleaning the fan blades, the next step in repairing your 250mm case fan is to lubricate the fan bearings. Over time, the bearings can dry out or collect dust, causing the fan to become noisy or spin less efficiently. Follow these steps to lubricate the fan bearings:
- Identify the fan bearings, which are usually located at the center of the fan where the blades are attached.
- Using a small dropper, apply a few drops of lubricating oil suitable for fans, such as sewing machine oil or a specific fan lubricant, to the fan bearings. Be careful not to apply too much oil, as it can lead to messy leaks or cause the fan to malfunction.
- Gently rotate the fan blades by hand a few times to distribute the lubricant evenly. This helps ensure that the oil reaches all parts of the bearings.
- Wipe off any excess oil with a clean, lint-free cloth to prevent it from dripping onto other components or causing unnecessary friction.
Lubricating the fan bearings helps reduce friction and allows the fan to spin more smoothly, resulting in quieter operation and improved performance. It’s important to note that not all fans have easily accessible bearings for lubrication. Some fans may be sealed and unable to be lubricated.
Once you have successfully lubricated the fan bearings, we can proceed to the next step: reassembling the fan and preparing it for testing.
Step 4: Reassembling the Fan
Now that you have cleaned the fan blades and lubricated the bearings, it’s time to reassemble the 250mm case fan. Follow these steps to ensure the fan is properly reassembled:
- Inspect the fan housing and locate the screw holes or clips where the fan was originally attached to the case.
- Position the fan back into its original place, aligning the screw holes or clips.
- If there were screws used to secure the fan, use the appropriate screwdriver to carefully tighten them. Avoid over-tightening, as it can damage the fan or the case.
- If the fan was held in place by clips, ensure they are securely engaged to keep the fan in position.
- If the fan has cables, reconnect them to the appropriate connectors on the motherboard or fan controller, ensuring a snug fit.
- Double-check all connections and make sure the fan is securely in place. Verify that there are no loose screws or clips.
With the fan reassembled, it’s important to take a moment to verify that everything is properly aligned and tightened. Make any necessary adjustments before moving on to the final step.
Congratulations! You have successfully reassembled the 250mm case fan. Now, let’s move on to the final step before testing the repaired fan.
Step 5: Testing the Repaired Fan
After completing the cleaning, lubrication, and reassembly process, it’s time to test the repaired 250mm case fan. Follow the steps below to ensure that the fan is functioning properly:
- Reconnect the power cable to your computer and plug it back into the wall outlet.
- Power on your computer and observe the fan as it starts spinning. Listen for any unusual noises or vibrations.
- Monitor the temperature of your computer system to ensure that the fan is effectively cooling the components.
- If you have access to monitoring software or BIOS settings, check the fan speed to verify that it is operating within normal ranges.
- Observe the fan for a few minutes to ensure that it continues to spin smoothly without any interruptions or irregularities.
If the fan is spinning properly, maintaining normal temperatures, and operating quietly, congratulations! You have successfully repaired your 250mm case fan. Enjoy your restored cooling performance and quieter computing experience.
However, if you notice any issues such as excessive noise, sporadic spinning, or high temperatures, you may need to retrace your steps and make sure that the fan was cleaned and reassembled correctly. It’s possible that there may be underlying issues that couldn’t be resolved through basic repairs, in which case it may be necessary to consider replacing the fan.
Remember, regular maintenance and cleaning can help extend the lifespan of your case fan and keep your computer running smoothly. It’s recommended to clean the fan blades and lubricate the bearings every few months or whenever you notice a decline in performance.
By following these steps and performing routine maintenance, you can ensure that your computer stays cool and operates at its best for years to come.
Conclusion
Repairing a 250mm case fan can be a cost-effective solution to improve the cooling performance of your computer system. By following the step-by-step guide outlined in this article, you can successfully clean and lubricate the fan, restoring it to optimal functionality.
Remember to gather the necessary tools and materials before starting the repair process. Cleaning the fan blades and lubricating the bearings are essential steps to ensure smooth operation and reduce noise levels. Proper reassembly and thorough testing are crucial to verify that the fan is functioning correctly.
However, it’s essential to note that not all case fans can be repaired, especially if there are severe damages or issues beyond routine maintenance. If you encounter persistent problems with your fan despite your repair efforts, it may be necessary to consider purchasing a new fan as a replacement.
Regular maintenance is key to prolonging the lifespan of your case fan. Make sure to clean the fan blades periodically and lubricate the bearings to prevent dust accumulation and maintain optimal performance. Keeping your computer system cool not only improves its longevity but also enhances overall performance.
By following the guidelines provided in this article, you can save money on purchasing a new fan and contribute to reducing electronic waste. Take the time to properly care for and repair your 250mm case fan, and enjoy a quieter and more efficiently cooled computer system.