What You Will Need
Before you embark on recording gameplay on your PlayStation, there are a few essential items you’ll need to ensure a smooth and successful recording process. Here’s a list of the items you’ll need:
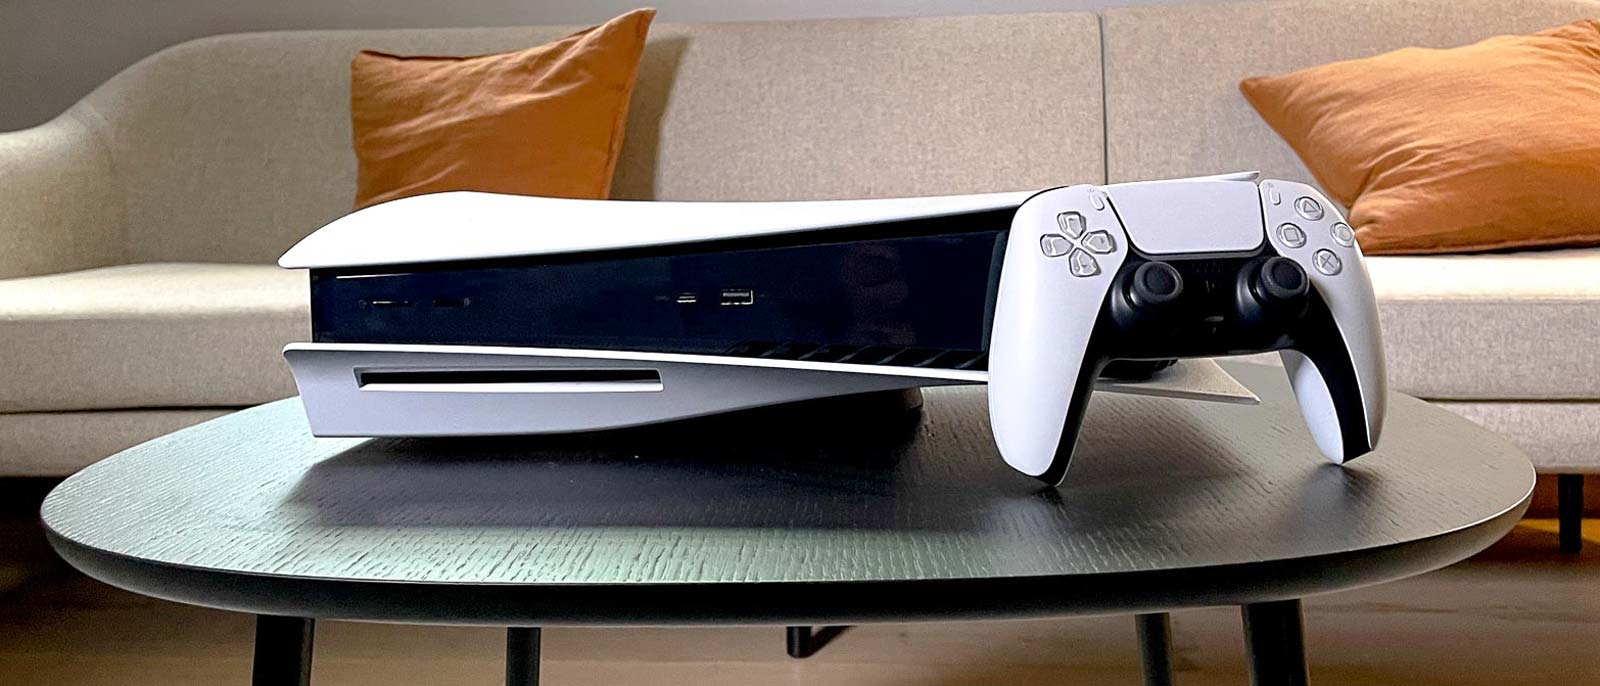
- PlayStation Console: Of course, the centerpiece of this process is your PlayStation console. Whether you have a PlayStation 4 or the latest PlayStation 5, make sure your console is in working condition and connected to your TV or monitor.
- Capture Card: To record gameplay from your PlayStation, you’ll need a capture card. This device connects your console to your computer, allowing you to capture and save gameplay footage. There are various capture cards available on the market, so choose one that is compatible with your console and meets your recording needs.
- Computer: You’ll need a computer to connect your capture card and store your recorded gameplay. Ensure your computer meets the minimum system requirements to handle both the capture card software and the editing software you plan to use.
- Storage Space: Recording gameplay can generate large file sizes, so make sure you have enough storage space available on your computer’s hard drive or an external hard drive. This will ensure you can record and store your gameplay without running out of space.
- Display Device: You need to connect your capture card to a display device, such as a TV or monitor, to view your gameplay while recording. Make sure your display device has an available HDMI input and is compatible with your capture card.
- HDMI Cables: To connect your PlayStation console, capture card, and display device, you’ll need HDMI cables. Ensure you have enough HDMI cables to connect all the necessary devices and that they are of good quality to maintain optimal video and audio signals.
- Microphone (Optional): If you want to provide commentary or capture in-game audio while recording your gameplay, you’ll need a microphone. Choose a microphone that is compatible with your computer and provides clear sound quality.
These are the essential items you’ll need to get started with recording gameplay on your PlayStation. Make sure you have everything set up and ready before moving on to the next steps.
Step 1: Setting up the Required Equipment
To begin recording gameplay on your PlayStation, you need to properly set up the necessary equipment. Follow these steps to ensure everything is connected correctly:
- Connect your PlayStation: Start by connecting your PlayStation console to your TV or monitor using an HDMI cable. Ensure that your display device is properly set to the HDMI input corresponding to your console.
- Connect the capture card: Take the HDMI output from your PlayStation and connect it to the HDMI input on your capture card. Then, connect the capture card’s HDMI output to the HDMI input on your display device. Ensure all connections are secure.
- Connect the capture card to your computer: Use a USB cable to connect the capture card to your computer. Make sure to insert the USB cable into a compatible USB port on your computer.
- Install capture card software: Once your capture card is connected to your computer, install the software provided by the manufacturer. Follow the instructions and prompts to complete the installation process.
- Configure capture card settings: Open the capture card software and navigate to the settings or configuration menu. Adjust the settings to match the desired recording specifications, such as video resolution and frame rate. Consult the user manual or online resources for instructions specific to your capture card.
- Test the connection: Launch the capture card software and ensure that it recognizes the connected PlayStation and displays the gameplay on your computer screen. Verify that both video and audio signals are coming through successfully.
By following these steps, you will have successfully set up the required equipment for recording gameplay on your PlayStation. Ensure all connections are secure and that your capture card software is functioning properly before proceeding to the next steps.
Step 2: Adjusting the Capture Settings on your PlayStation
Once you have set up the necessary equipment, it’s time to adjust the capture settings on your PlayStation. These settings will determine the quality and format of your recorded gameplay. Follow these steps to adjust the capture settings:
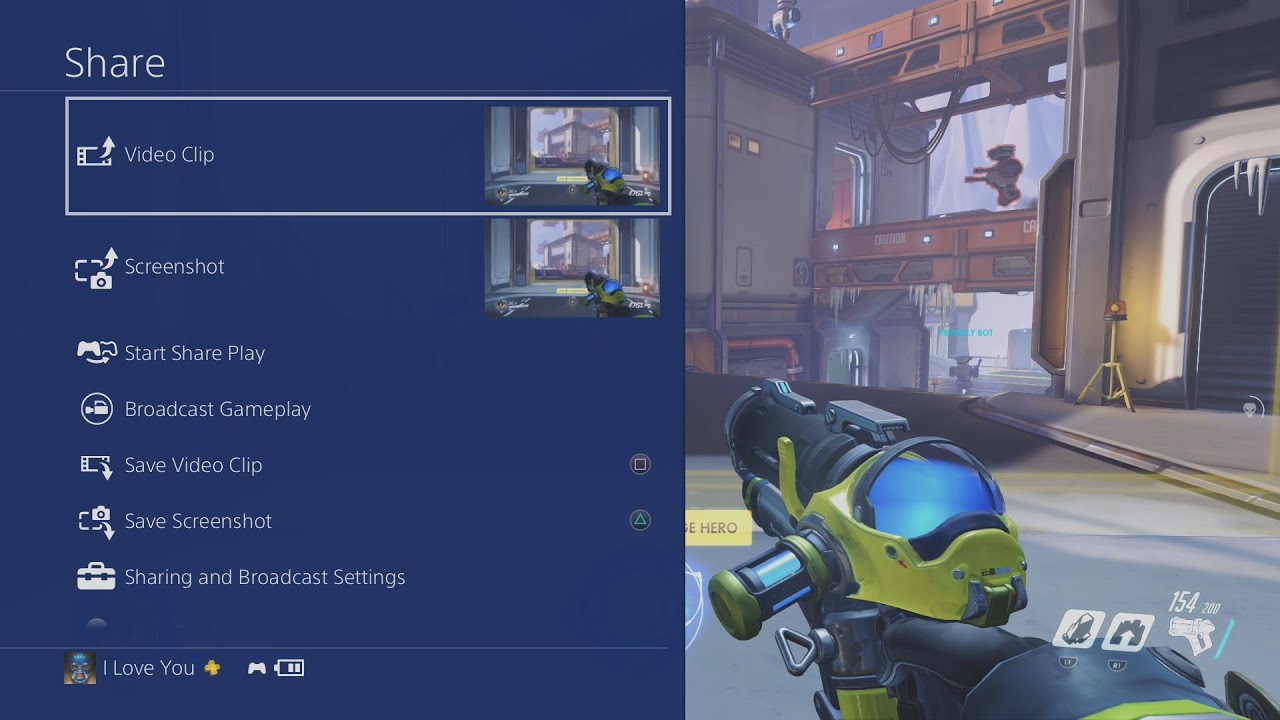
- Access the Share menu: While playing a game, press the Share button on your PlayStation controller to open the Share menu. From here, you can access the capture options.
- Select Capture Gallery: In the Share menu, select “Capture Gallery” to access the capture settings and manage your recorded gameplay.
- Choose Capture Settings: Within the Capture Gallery, select “Options” and then “Capture Settings.” Here, you can adjust various settings related to gameplay recording.
- Video Clip Settings: In the Capture Settings menu, you can adjust the video clip settings. You can choose the maximum length of your video clips, ranging from a few seconds to several minutes. Additionally, you can select the video quality, resolution, and frame rate. Higher quality settings will result in larger file sizes.
- Audio Settings: You can also adjust the audio settings in the Capture Settings menu. This includes options to enable or disable in-game audio recording, as well as microphone audio recording if you have a microphone connected.
- Save your settings: After adjusting the capture settings to your preference, make sure to save the changes. This way, your chosen settings will be applied to future recordings.
By adjusting the capture settings on your PlayStation, you can tailor the recording to meet your specific needs. Experiment with different settings to find the balance between video quality and file size that works best for you.
Step 3: Preparing your Game and Gameplay Settings
Before you start recording your gameplay on the PlayStation, it’s important to make a few adjustments to your game and gameplay settings to ensure a smooth and enjoyable recording experience. Follow these steps to prepare your game and gameplay settings:
- Pause your game: When you are ready to start recording, pause your game to prevent any interruptions or distractions during the recording process.
- Adjust in-game settings: Within the game’s settings menu, check for any specific options related to gameplay recording. Some games offer built-in recording features or options to hide certain elements on the screen, such as HUD (Heads-Up Display) elements or notifications. Explore these settings to customize your recording experience.
- Enable background recording: On some PlayStation consoles, you have the option to enable background recording. This allows you to capture gameplay footage even when you are not actively recording. Check your console’s settings to see if this feature is available.
- Consider performance vs. quality: Depending on your PlayStation console and the specific game you are playing, you may need to strike a balance between performance and recording quality. Some games perform better with specific graphical settings or a lower resolution to maintain smooth gameplay while recording. Experiment with different settings to find the right balance for your game.
- Explore gameplay recording features: Some games have additional gameplay recording features, such as the ability to capture highlights or specific moments during gameplay. Familiarize yourself with these features to enhance your recording experience and capture memorable gameplay moments.
- Preview your recording settings: Take a moment to review and ensure that your chosen capture settings, such as video quality, resolution, and frame rate, are properly configured according to your preferences. This way, you can ensure that your recordings meet your desired specifications.
By adequately preparing your game and gameplay settings, you can optimize your recording experience and capture high-quality gameplay footage on your PlayStation.
Step 4: Selecting the Recording Length
When recording gameplay on your PlayStation, it’s essential to determine the length of your recordings. By choosing the appropriate recording length, you can ensure that you capture the desired gameplay moments without running out of storage space. Follow these steps to select the recording length:
- Consider the purpose of your recording: Think about why you are recording the gameplay. Are you aiming to create short highlight clips or longer gameplay videos? Understanding the purpose will help you determine the ideal recording length.
- Gameplay flow and pace: Take into consideration the pace and flow of the game you are playing. If it’s a fast-paced game with quick action, shorter recording lengths may be more suitable to capture specific moments. Conversely, if the game has a slower pace, longer recording lengths may be necessary to capture the complete gameplay experience.
- Available storage space: Assess the amount of storage space available on your computer or external hard drive. Longer recordings will require more storage space. Ensure that you have enough space to accommodate the desired recording length.
- Experiment and review: It’s recommended to experiment with different recording lengths to find what works best for you. Start with shorter recordings and gradually increase the length until you find the balance between capturing enough gameplay and managing storage space.
- Consider post-processing: Think about how you plan to edit and post-process your recorded gameplay footage. Longer recordings may require more time and effort during the editing process. Keeping this in mind when selecting the recording length can streamline your post-production workflow.
- Be mindful of streaming limitations: If you plan to stream your gameplay live, certain streaming platforms may have limitations on the maximum recording length. Make sure you are aware of these limitations to avoid any disruptions during your streaming session.
By carefully selecting the recording length, you can ensure that you capture the gameplay moments you desire while managing storage space and considering post-production requirements.
Step 5: Start the Recording
Once you have prepared and adjusted all the necessary settings, it’s time to start recording your gameplay on the PlayStation. Follow these steps to begin the recording process:
- Open the capture card software: Launch the capture card software on your computer. Ensure that the software is recognizing the connected PlayStation and displaying the gameplay on your computer screen.
- Position yourself: Get into a comfortable position where you can easily play the game and have access to the controller while keeping an eye on the gameplay displayed on your screen. Ensure that your movements and any commentary or reactions are within the frame of your recording.
- Press the record button: In the capture card software, locate the record button or option. Click or select the record button to begin the recording process. The software will start capturing the gameplay and audio from your PlayStation.
- Start playing the game: Once the recording has started, start playing the game as usual. Enjoy your gaming session and aim to capture the moments you want to highlight or showcase in your recording.
- Monitor the recording: Keep an eye on the capture card software or a separate monitor to ensure that the recording is running smoothly. Check for any issues with video or audio quality and make necessary adjustments if needed.
- Consider adding commentary or reactions (optional): If you want to provide commentary or share your reactions during the gameplay recording, consider using a microphone. Speak clearly and express your thoughts or reactions to enhance the overall viewing experience for your audience.
- End the recording: When you are finished with your gameplay session or have captured the desired gameplay footage, stop the recording in the capture card software. This will finalize the recording and save it as a video file on your computer.
By following these steps, you can easily start recording your gameplay on the PlayStation and capture those epic gaming moments to share with others or save for future memories.
Step 6: Finishing and Saving your Gameplay Recording
Once you have completed the recording of your gameplay on the PlayStation, it’s time to finish the process and save your captured footage. Follow these steps to ensure a successful finish and save your gameplay recording:
- Review the recording: Take the time to watch through your recorded gameplay footage to ensure that it meets your expectations. Look for any sections that you may want to trim or edit.
- Edit the recording (optional): If desired, you can use video editing software to further enhance your gameplay footage. Trim unnecessary parts, add overlays or effects, and make any other adjustments or enhancements.
- Save the final video: Once you are satisfied with the recording and any edits you have made, save the final video. Choose a file name and destination on your computer where you want to store the gameplay recording.
- Consider video compression: If the file size of your recorded gameplay is too large, you may want to compress the video to reduce the file size. This can be especially useful if you plan to upload the video to online platforms that have file size limitations.
- Backup your recording: To prevent any accidental loss of your gameplay recording, it’s a good practice to create a backup copy. Consider copying the saved video to an external hard drive or cloud storage service to ensure its safety and accessibility.
- Organize your recordings: If you plan to create multiple gameplay recordings, it’s helpful to organize them in a dedicated folder or within your video library. This way, you can easily find and access your recordings in the future.
- Share and enjoy: After saving and organizing your gameplay recording, you can now share it with others or simply enjoy watching it yourself. Upload the video to your preferred video sharing platforms or share it with friends and fellow gamers.
By following these steps, you can successfully finish and save your gameplay recording, ensuring that you have a high-quality video of your gaming achievements and experiences.
Tips and Tricks for Better Recording Quality
Want to enhance the quality of your gameplay recordings on the PlayStation? Follow these tips and tricks to capture better footage and elevate your recording experience:
- Optimize lighting conditions: Make sure the room where you’re playing has adequate lighting. Good lighting can enhance the visual quality of your gameplay footage and make it more enjoyable for viewers.
- Reduce background noise: If you’re using a microphone to capture commentary or reactions, ensure that the recording environment is free from excessive background noise. Minimize distractions and use noise-canceling features if available.
- Utilize a stable internet connection: If you’re live streaming your gameplay, a stable internet connection is crucial. Ensure that you have a reliable and fast internet connection to avoid buffering or lagging issues.
- Experiment with different camera angles: If you’re using a camera to capture your reactions or facecam footage, try different angles and positions to find the most visually appealing setup. Consider using a tripod or mounting system for stability.
- Utilize built-in features: Some games offer built-in recording features with additional settings for capturing gameplay. Explore these features to take advantage of specific options, such as slow-motion or time-lapse recording.
- Consider using a green screen: To add a professional touch to your recordings, consider using a green screen. This allows you to replace the background and create a more immersive viewing experience for your audience.
- Manage in-game settings: Experiment with in-game settings to find the optimal balance between graphics quality and performance. Adjusting settings like anti-aliasing, resolution, and texture quality can help improve visual clarity and smoothness.
- Record in high-quality settings: If your PlayStation and capture card support it, aim to record gameplay in the highest quality settings available. This will ensure that you capture crisp and detailed footage for editing or sharing purposes.
- Record in a quiet environment: Minimize external noise during the recording process. Close windows, turn off fans or air conditioning, and reduce any background distractions that can affect the audio clarity of your recording.
- Prepare engaging commentary or narration: If you plan to provide commentary or narration while recording gameplay, take the time to prepare interesting and engaging talking points. This will add depth and entertainment value to your recordings.
By implementing these tips and tricks, you can elevate the quality of your gameplay recordings on the PlayStation and deliver a more immersive and enjoyable experience for your audience.
Troubleshooting Common Recording Issues
While recording gameplay on the PlayStation, you may encounter some common issues that can affect the quality or functionality of your recordings. Here are some troubleshooting steps to help you overcome these issues:
- No video signal: If your capture card is not receiving a video signal from your PlayStation, double-check the HDMI connections. Ensure that the HDMI cables are securely plugged into the correct ports on both the PlayStation and the capture card. Restart both the PlayStation and your computer if necessary.
- No audio: If you’re not getting any audio in your recordings, check the audio settings on your PlayStation and capture card software. Ensure that the audio inputs and outputs are properly configured. Make sure the game audio is not muted or turned down too low in the game settings.
- Low frame rate or lag: If you’re experiencing a low frame rate or lag in your recordings, check your computer’s performance. Ensure that your computer meets the minimum system requirements for recording and playback. Close any unnecessary programs or processes running in the background to free up system resources.
- File size too large: If your gameplay recordings result in large file sizes, consider adjusting the video settings to lower resolution, frame rate, or video quality. Compressing the video using video editing software or dedicated compression tools can also help reduce file size without significant loss in quality.
- Audio and video synchronization issues: If you notice that the audio and video are out of sync in your recordings, check the settings in your capture card software. Look for options related to audio delay or synchronization and adjust them accordingly. If the issue persists, try using different software for recording.
- Interruptions in gameplay: If you experience interruptions or lags in your gameplay while recording, it may be due to the computer’s performance or insufficient resources. Close any unnecessary applications or processes that may be running in the background. Ensure that your computer meets the system requirements for both the game and the capture card software to avoid performance issues.
- Excessive background noise: If there is a significant amount of background noise in your recordings, consider using a noise-cancelling microphone or adjusting the microphone settings in your capture card software. Alternatively, you can record in a quieter environment and minimize background distractions.
- Green screen issues: If you’re using a green screen for chroma keying, ensure that the lighting is even and sufficiently illuminates the green screen. Adjust the camera angle, distance, and settings to avoid any shadows or reflections on the green screen. Calibrate the chroma key settings in your video editing software for best results.
If you encounter any other issues while recording gameplay on your PlayStation, consult the user manual for your capture card, seek assistance from online forums or support communities, or reach out to the manufacturer’s customer support for further help.
Final Thoughts and Recommendations
Recording gameplay on your PlayStation can be an exciting and rewarding experience. By following the steps outlined in this guide, you can capture and share your gaming adventures with others. Here are some final thoughts and recommendations to consider:
1. Practice and experiment: Recording gameplay takes practice, so don’t be discouraged if your first few recordings don’t turn out as expected. Experiment with different settings, angles, and techniques to find what works best for you.
2. Engage with your audience: Consider creating a YouTube or Twitch channel to share your gameplay recordings. Interact with your audience through comments, live chats, or social media to foster a community around your content.
3. Continuously improve: As you gain more experience in recording gameplay, seek ways to improve and refine your skills. Pay attention to feedback from your audience and embrace opportunities for growth.
4. Explore additional features: Beyond basic gameplay recording, explore other features offered by your capture card or editing software. This can include adding overlays, integrating facecam footage, or using advanced editing techniques to enhance your recordings.
5. Connect with fellow gamers: Join online gaming communities or forums to connect with other gamers who share similar interests. Engaging with like-minded individuals can provide inspiration, tips, and support along your recording journey.
6. Keep backups of your recordings: It’s essential to regularly back up your recorded gameplay footage to prevent any accidental loss. Store copies of your recordings on external hard drives, cloud storage, or other reliable backup solutions.
Remember, the most important aspect of recording gameplay is to have fun and enjoy the process. Be authentic and let your passion for gaming shine through in your recordings. With dedication and practice, you can create captivating gameplay footage that resonates with your audience and showcases your gaming skills. Happy recording!


