Introduction
Recording a video on your PC can be a valuable skill to have, whether you’re creating educational content, recording a presentation, or simply capturing a memorable moment. Fortunately, with the right software and settings, recording a video on your PC is easier than ever.
In this guide, we will explore the step-by-step process of recording a video on your PC. From choosing the appropriate video recording software to adjusting your computer’s audio and video settings, this article will provide you with all the information you need to get started.
Before we dive into the steps, it’s important to note that the specific instructions may vary depending on the video recording software and operating system you are using. However, the general principles discussed in this guide are applicable to most common recording setups.
So, if you’re ready to begin recording your videos on your PC, let’s get started with step one: choosing a video recording software.
Step 1: Choose a Video Recording Software
When it comes to recording a video on your PC, the first step is to select the right video recording software. There are numerous options available, each with its own set of features and capabilities. Here are a few popular software options to consider:
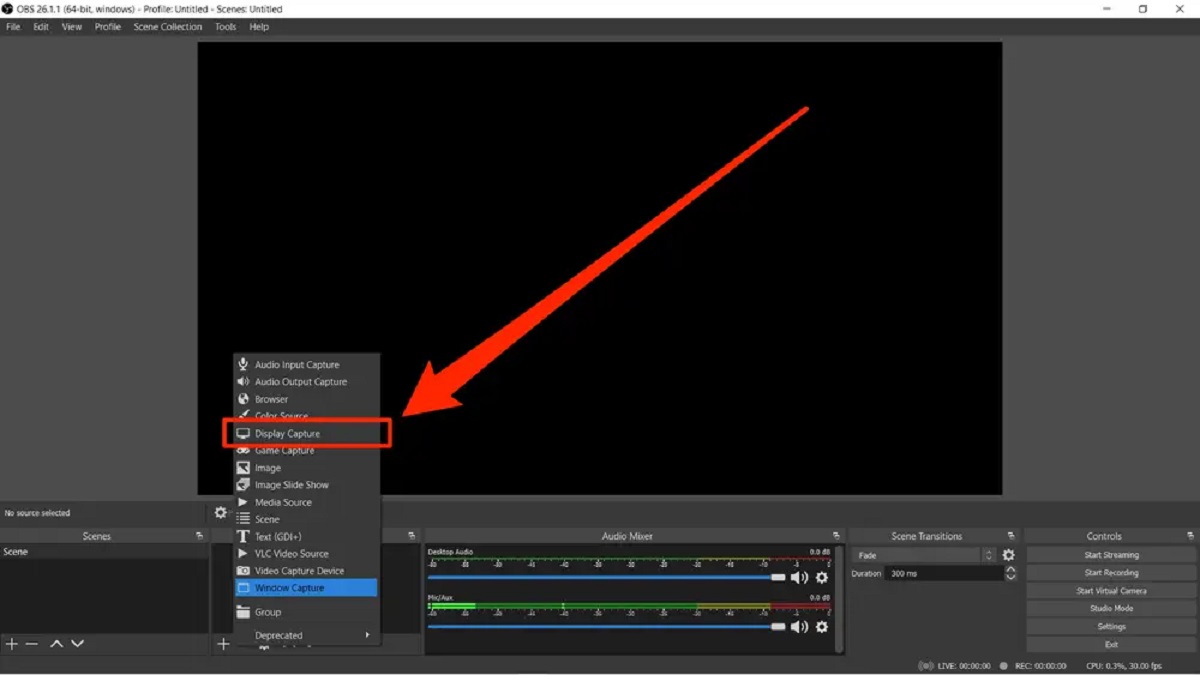
1. OBS Studio
OBS Studio, short for Open Broadcaster Software, is a free and open-source video recording and streaming software. It is highly customizable and offers advanced features such as scene composition, audio mixing, and video transitions. OBS Studio is compatible with Windows, Mac, and Linux, making it a versatile option for all users.
2. Camtasia
Camtasia is a premium video recording and editing software. It offers a user-friendly interface and powerful editing tools, making it popular among content creators. With Camtasia, you can easily record and edit your videos, add captions, annotations, and even create professional-looking video tutorials. Camtasia is available for both Windows and Mac users.
3. Bandicam
Bandicam is another popular software for video recording on PC. It provides high-quality video and audio recording, with the ability to capture gameplay, webcam footage, and computer screen. Bandicam offers real-time drawing tools, scheduled recordings, and various video codecs for optimal recording. It is compatible with Windows operating systems.
These are just a few examples of video recording software available for PC. It’s important to consider your specific needs and preferences when selecting the right software for you. Take into account factors such as ease of use, compatibility, and the features offered by each software.
Once you have chosen the video recording software that best suits your needs, you can move on to the next step: checking your computer’s audio and video settings.
Step 2: Check Your Computer’s Audio and Video Settings
Before you start recording your video, it’s crucial to ensure that your computer’s audio and video settings are properly configured. This will help you capture high-quality audio and video content. Here are some key aspects to consider:
1. Microphone Settings
Check if your microphone is working correctly by going to your computer’s audio settings. Make sure the microphone is properly connected and set as the default recording device. Adjust the microphone volume levels and test it by speaking into the microphone to ensure that the audio is clear and without any distortion.
2. Camera Settings
If you plan to record using an external camera, ensure that it is connected to your computer and recognized by the system. Test your camera in the video settings to ensure that the image quality is clear and properly framed. Adjust the camera settings if necessary, such as brightness, contrast, and white balance, to achieve the desired recording quality.
3. Recording Software Settings
If you have chosen a specific video recording software, open its settings menu and check the audio and video settings within the software itself. Ensure that the software is set to record from the correct audio input source and that the video resolution and frame rate are appropriate for your needs.
4. Test Recording
Once you have checked and adjusted your computer’s audio and video settings, it’s important to do a test recording. This will allow you to verify that everything is working as expected. Record a short sample video and review the playback to ensure that both the audio and video quality meet your requirements.
By taking the time to check and optimize your computer’s audio and video settings, you can ensure that your recordings will be of the highest quality. Once you are satisfied with the settings, you can proceed to the next step: setting up your recording area.
Step 3: Set Up Your Recording Area
Creating an optimal recording area plays a vital role in capturing high-quality videos. Follow these guidelines to set up your recording area:
1. Find a Quiet Location
Choose a quiet area where external noises are minimized. Background noise can be distracting and affect the overall quality of your video. Find a space with minimal ambient noise to ensure clear audio in your recordings.
2. Consider the Lighting
Good lighting is essential for high-quality videos. Natural light is usually the best option, so position yourself or your subject near a window. If natural light is not available or insufficient, consider using soft and diffuse lighting sources such as lamps or studio lights. Avoid harsh lighting that casts strong shadows or creates glare on the subject.
3. Background and Set Design
Select a clean and clutter-free background that complements the content of your video. Remove any distracting objects or personal items that may draw attention away from the main subject. If needed, add simple props or decorations to create a visually appealing setup that enhances the overall presentation.
4. Camera Position and Stability
Position your camera or webcam at eye level to create a more natural viewing angle. Ensure that the camera is stable and securely mounted to avoid shaky footage. You can consider using a tripod or other camera support equipment for added stability.
5. Test Framing and Composition
Before you start recording, test the framing and composition of your shots. Make sure that you and your subject are well-positioned within the frame. Take into account the rule of thirds, where the main subject is positioned along the intersections of the imaginary grid lines, for a more visually appealing composition.
By putting effort into setting up your recording area, you can create a professional and visually pleasing backdrop for your videos. Once you have successfully set up your recording area, you are ready to move on to the next step: adjusting the recording settings.
Step 4: Adjust the Recording Settings
Adjusting the recording settings on your PC will help you optimize the quality and performance of your video recordings. Follow these steps to ensure your settings are properly configured:
1. Resolution and Frame Rate
Select the appropriate resolution and frame rate for your recordings. Higher resolutions, such as 1080p or 4K, provide a clearer and more detailed image, but also require more processing power and storage space. Choose a resolution and frame rate that matches your needs and the capabilities of your computer.
2. Audio Settings
Adjust the audio settings to ensure optimal sound quality. Consider the bitrate, sample rate, and audio format that best suit your requirements. It’s recommended to use a higher bitrate for better audio quality, but keep in mind that larger file sizes may result.
3. Video Codec
Choose the appropriate video codec for your recordings. Different codecs offer varying levels of compression and quality. Popular codecs include H.264 and HEVC (H.265). Take into account the compatibility of the codec with your editing software and the playback devices you plan to use for your videos.
4. File Format
Select the file format that is compatible with your video recording software and editing workflow. Common video file formats include MP4, AVI, and MOV. Research the specifications and requirements of your chosen software to ensure it supports the file format you plan to use.
5. Recording Hotkeys
Check if your video recording software allows you to set up hotkeys for starting, pausing, and stopping recordings. Hotkeys can make it more convenient and efficient to control the recording process, especially if you need to start and stop frequently or capture specific moments during your video.
By adjusting the recording settings, you can optimize the quality of your video recordings and ensure they are compatible with your editing software and playback devices. Once you have configured the settings, it’s time to move on to the next step: testing your recording setup.
Step 5: Test Your Recording
Before you start your actual video recording, it’s essential to test your setup to ensure everything is working as intended. Follow these steps to conduct a thorough recording test:
1. Check Audio and Video Inputs
Verify that your microphone, camera, and any other audio or video inputs are properly connected and detected by your recording software. Check the audio and video source settings within the software to confirm that the correct inputs are selected.
2. Adjust Levels and Settings
Make any necessary adjustments to the audio and video settings based on your testing preferences. Check the microphone levels to ensure that your voice is captured clearly without any distortion. Adjust camera settings such as focus, exposure, or white balance if needed.
3. Record a Test Segment
Start a test recording and speak naturally to simulate the actual recording scenario. Pay attention to the audio quality, video clarity, and overall performance. Evaluate the lighting, background, and framing to ensure they meet your desired standards.
4. Review the Test Recording
Once the test recording is complete, review it carefully. Pay attention to the audio quality, video resolution, and any potential issues such as background noise, poor lighting, or framing problems. Take note of any areas that need improvement.
5. Practice and Repeat
If any issues or areas for improvement are identified, make the necessary adjustments and conduct additional test recordings. Practice speaking clearly and confidently to ensure your message comes across effectively. Repeat the process until you are satisfied with the test recordings.
Testing your recording setup allows you to identify and address any potential issues before you start your actual recording. It ensures that you have a clear understanding of how your equipment and settings perform, setting you up for a successful recording session. Once you have completed the testing stage, you can move on to the next step: starting your recording.
Step 6: Start Your Recording
With your setup tested and confirmed, it’s time to start recording your video. Follow these steps to begin your recording:
1. Prepare Yourself and the Environment
Ensure that you’re ready to start recording by taking a moment to gather your thoughts and compose yourself. Double-check that the recording area is set up as desired and free from any distractions.
2. Position Yourself Accordingly
Position yourself or your subject within the frame as planned during the setup process. Consider your body language, facial expressions, and overall posture to convey your intended message effectively.
3. Start Recording Software
Open your chosen video recording software and navigate to the recording interface. Familiarize yourself with the buttons or controls for starting and stopping the recording.
4. Begin Recording
Once you’re ready to begin, click the “record” button or use the designated hotkey to start the recording. Ensure that your recording software displays a timer or other indicator to confirm that the recording is in progress.
5. Maintain a Steady Performance
Throughout your recording, maintain a consistent level of energy, clarity, and engagement. Speak clearly and enunciate your words. Maintain eye contact with the camera or your subject if applicable.
6. Monitor the Recording
Monitor the recording as you go to ensure that everything is being captured as intended. Keep an eye on audio levels, video quality, and ensure that the recorded content aligns with your planned objectives.
7. Pause or Stop the Recording
If needed, use the designated hotkey or button to pause or stop the recording temporarily. This can be useful if you need to take a break, adjust settings, or address any unforeseen issues.
Remember, mistakes or minor interruptions can happen during recording sessions. Don’t be discouraged if you need to repeat certain sections or take breaks. The key is to remain calm, maintain your focus, and adjust as necessary.
Once you have completed your recording, you can move on to the next step if desired: adding any necessary effects or edits to enhance your video.
Step 7: Add Any Necessary Effects or Edits
After completing your video recording, you may want to enhance it by adding effects or making edits to improve the overall quality or visual appeal. Here are some possible steps to consider:
1. Trim and Cut
You may have recorded portions of your video that are not relevant or contain mistakes. Use video editing software to trim or cut these sections to ensure a smooth and concise final product.
2. Add Transitions
Transitions can help create a seamless flow between different segments of your video. Use transitions such as fades, wipes, or dissolves to enhance the overall viewing experience.
3. Incorporate Visual Effects
If appropriate, you can add visual effects to make your video more engaging and visually appealing. These effects might include text overlays, lower thirds, or animated graphics.
4. Adjust Audio Levels
Ensure that the audio levels are consistent throughout your video. Use audio editing tools to adjust the volume, balance, or add background music to enhance the listening experience.
5. Apply Color Corrections
If needed, make color corrections to ensure that your video has accurate and vibrant colors. Adjust the brightness, contrast, saturation, and white balance as necessary.
6. Add Captions or Subtitles
If your video contains spoken content, consider adding captions or subtitles to make it more accessible to a wider audience. This is especially important for educational or informational content.
7. Review and Preview
Once you have added the necessary effects or edits, review your video to ensure everything is aligned with your original intentions. Preview the video to ensure that the changes have improved the overall quality.
Remember, the extent of the effects and edits you apply will depend on your specific goals and the nature of your video. The aim is to enhance the viewing experience and deliver your message effectively.
Once you are satisfied with the effects and edits you have made, you’re ready for the final step: saving and exporting your video.
Step 8: Save and Export Your Video
After adding the necessary effects and making any edits, it’s time to save and export your video. Follow these steps to ensure a smooth finalization process:
1. Choose the Format and Settings
Select the desired video format and settings for your exported file. Consider factors such as file size, compatibility with playback devices, and the resolution you want to maintain.
2. Name and Specify the Destination
Give your video a descriptive name and specify the destination folder where you want to save the exported file. This will make it easier to locate and manage your videos in the future.
3. Configure Quality and Compression
Adjust the quality and compression settings based on your preferences and the platform where the video will be hosted or shared. Strike a balance between maintaining a high-quality video and keeping the file size manageable.
4. Export the Video
Initiate the export process using your video editing software. This may involve clicking an “Export” or “Render” button and waiting for the software to process the video based on your chosen settings.
5. Monitor the Exporting Process
During the export, keep an eye on the progress and ensure that there are no errors or interruptions. This will help avoid any potential issues and ensure a successful export.
6. Test the Exported Video
Once the export is complete, play back the exported video to ensure that it appears as intended. Check the audio, video quality, and overall playback experience to verify that everything is in order.
7. Make Backup Copies
It’s always a good practice to make backup copies of your video files. Store them on external hard drives, cloud storage, or other reliable storage options to ensure their long-term preservation.
By carefully saving and exporting your video, you can maintain the quality and integrity of your final product. You can now share your video with others, upload it to your preferred platform, or continue with any additional post-production tasks as desired.
Conclusion
Recording a video on your PC may seem like a daunting task at first, but with the right software, settings, and techniques, it can be a rewarding and straightforward process. By following the steps outlined in this guide, you can ensure that your video recordings are of high quality and effectively convey your message.
We started by discussing the importance of choosing the right video recording software for your needs. OBS Studio, Camtasia, and Bandicam are just a few examples of the many options available. Remember to consider factors such as compatibility, features, and ease of use when making your selection.
Next, we explored the significance of checking and configuring your computer’s audio and video settings. Properly set microphone and camera settings are essential for capturing clear and professional-sounding audio and high-quality video.
Creating an optimal recording area, including considering factors such as lighting, background, and camera stability, ensures a visually pleasing and distraction-free recording environment. Testing your recording setup prior to your actual recording helps identify any issues that need to be addressed.
Once you’ve completed the setup and testing, you’re ready to start your recording. Remember to maintain a steady performance, monitor the recording, and utilize pause or stop functions as needed.
After the recording is complete, you may want to enhance your video by adding effects or making edits. Trimming, incorporating transitions, adjusting audio levels, and applying color corrections are just a few ways you can enhance the visual and auditory impact of your video.
Finally, saving and exporting your video with the appropriate settings and formats ensures that your video is properly preserved and ready to be shared or uploaded. Don’t forget to name your file, specify the destination, and make backup copies for future use.
With the completion of these steps, you have successfully gone through the process of recording a video on your PC. Whether you’re producing educational content, sharing moments with loved ones, or creating engaging presentations, these skills will be invaluable in many areas of your personal and professional life.
Remember to be creative, experiment with different techniques, and refine your skills with each recording. Happy recording!