Introduction
Welcome to our comprehensive guide on how to program a smart TV remote. As technology continues to evolve, smart TVs have become a popular choice for entertainment enthusiasts looking for a seamless and interactive viewing experience. However, navigating the abundance of features and apps on these sophisticated devices can be overwhelming without an intuitive remote control.
Fortunately, programming a smart TV remote is a relatively simple process that can be accomplished in just a few steps. Whether you’ve recently purchased a new smart TV or need to reprogram your existing remote, we’ve got you covered. In this guide, we will walk you through the process of programming your smart TV remote to ensure that you can fully utilize its features and enjoy a hassle-free entertainment experience.
Before we dive into the step-by-step instructions for programming your smart TV remote, it’s essential to understand the importance of gathering the necessary information. Each smart TV brand and model may have different remote programming methods, so having the relevant details at hand will make the process smoother.
In the following sections, we will cover how to turn on your smart TV remote, put it in pairing mode, press the pairing button on the TV, wait for the remote and TV to pair, test the remote’s functionality, and troubleshoot any common issues that may arise during the programming process. So let’s get started and get your smart TV remote up and running!
Step 1: Gather the necessary information
Before you jump into programming your smart TV remote, it’s important to gather some essential information. This will ensure that you have all the necessary details at hand, making the process smoother and more efficient.
The first piece of information you need is the brand and model of your smart TV. This is crucial because different TV brands use different methods for remote programming. So, knowing the make and model will enable you to find the specific instructions for your TV.
You can usually find the brand and model information on the back of your TV or in the user manual that came with your device. If you’re unable to locate the model number, you can try checking the TV’s settings menu. Most smart TVs have an option that displays the model and serial number.
In addition to the brand and model, ensure that you have fresh batteries for your remote. Weak or depleted batteries can hinder the programming process or cause the remote to malfunction. It’s always a good idea to have a set of spare batteries on hand, just in case.
Furthermore, familiarize yourself with the remote control itself. Take note of any buttons or features that may be specific to your remote. This knowledge will be helpful during the programming process and when troubleshooting any issues that may arise.
Lastly, if your remote has any additional features, such as voice control or a touchpad, make sure you understand how to use them. While these features may not be directly related to the programming process, it’s always helpful to be aware of all the capabilities of your smart TV remote.
Once you have gathered all the necessary information, you are ready to proceed to the next step: turning on your smart TV remote. So let’s move on to Step 2 and get your remote powered up!
Step 2: Turn on the smart TV remote
Now that you have gathered all the necessary information, it’s time to turn on your smart TV remote. This step is essential before you can proceed with the programming process.
Most smart TV remotes have a dedicated power button located either at the top or on the side of the remote. Look for a button with a power icon or the word “power” written on it. Press and hold this button until you see the remote’s LED indicator light up, indicating that it is now powered on.
If your smart TV remote has a touchpad or a display screen, it may require slightly different steps to turn it on. Consult the user manual or manufacturer’s website for specific instructions on how to power on your particular remote model.
Ensure that the batteries in the remote are inserted correctly and have enough power. If the LED indicator does not light up, the batteries may need to be replaced. Refer to the user manual for instructions on how to replace the batteries or consult the manufacturer’s website for troubleshooting steps.
Once your smart TV remote is powered on, you are now ready to move on to the next step: putting the remote in pairing mode. It is in this mode that the remote will search for and connect to your smart TV. So let’s proceed to Step 3 and pair your remote to the TV!
Step 3: Put the smart TV remote in pairing mode
Once your smart TV remote is powered on, the next step is to put it in pairing mode. Pairing mode allows the remote to establish a connection with your smart TV, enabling seamless communication between the two devices.
The method for putting your smart TV remote in pairing mode may vary depending on the brand and model. However, the most common way is to press and hold a specific combination of buttons on the remote.
Consult the user manual or the manufacturer’s website for your remote’s specific pairing mode instructions. Look for a section that explains how to put the remote in pairing mode. It may involve pressing and holding certain buttons, or there may be a dedicated pairing or sync button on the remote that needs to be pressed.
Once you have identified the correct buttons or sequence, follow these steps to put your smart TV remote in pairing mode:
- Locate the buttons or the dedicated pairing button on the remote.
- Press and hold the buttons or the pairing button for a few seconds until you see a confirmation light or hear a beep sound.
- The LED indicator on the remote may start blinking, indicating that it is now in pairing mode.
If you are unsure about the specific pairing mode instructions for your remote, you can try searching online for your remote model’s pairing mode instructions. Many manufacturers provide downloadable user manuals and FAQs on their websites.
It’s worth noting that some smart TVs may automatically enter pairing mode when they detect a new remote nearby. If this is the case, ensure that your remote is in close proximity to the TV during the pairing process.
Once your smart TV remote is in pairing mode, you are ready to proceed to the next step: pressing the pairing button on your smart TV. So let’s move on to Step 4 and continue with the programming process!
Step 4: Press the pairing button on the smart TV
With your smart TV remote in pairing mode, it’s now time to initiate the pairing process on your smart TV itself. This step is crucial for establishing a connection between the remote and the TV.
The location of the pairing button on your smart TV can vary depending on the brand and model. Typically, it is located on the back panel of the TV or in the settings menu.
Follow these steps to press the pairing button on your smart TV:
- Locate the pairing button on your smart TV. It may be labeled as “Pair” or “Sync,” or it may have an icon that resembles two arrows forming a circle.
- Press the pairing button on your smart TV. The TV may display a message or an indicator light may illuminate, indicating that it is ready to pair with a remote.
It’s worth noting that some smart TVs may automatically enter pairing mode when they detect a new remote nearby, so you may not need to press a separate pairing button. In such cases, make sure that your smart TV is within range of the remote and wait for the TV to recognize the remote in pairing mode.
If you are unsure about the pairing button’s location or how to initiate the pairing process on your smart TV, refer to the user manual or visit the manufacturer’s website for specific instructions. They may have step-by-step guides or video tutorials available to assist you.
With the pairing button on your smart TV pressed, your TV is now ready to establish a connection with the remote. The next step is to wait for the remote and TV to successfully pair, which we will cover in Step 5. So, let’s move on and complete the programming process!
Step 5: Wait for the remote and TV to pair
After pressing the pairing button on your smart TV, it’s time to wait for the remote and TV to establish a successful pairing. This process may take a few moments as the devices communicate and sync with each other.
During this waiting period, it’s important to keep your smart TV remote in close proximity to the TV. This ensures a strong and uninterrupted signal between the two devices. Avoid moving the remote too far away or obstructing the line of sight between the remote and the TV.
On your smart TV, you may see a message or an on-screen prompt indicating that the remote is being paired. This confirms that the TV has recognized the remote and is attempting to establish a connection.
During the pairing process, the LED indicator on your smart TV remote may blink or change color. This is normal and indicates that the remote is actively attempting to pair with the TV.
It’s important to remain patient during this step, as the duration of the pairing process can vary depending on the smart TV and remote model. While waiting, avoid pressing any buttons on the remote that are not specifically mentioned in the pairing instructions, as this may interrupt the process.
If the pairing process takes longer than expected or if the remote and TV fail to connect, refer to the troubleshooting section of your remote’s user manual or visit the manufacturer’s website for assistance. They may provide helpful tips or additional steps to troubleshoot and resolve any pairing issues.
Once the pairing process is complete, you will notice that the LED indicator on your smart TV remote will remain steady or turn off. This indicates a successful pairing between the remote and the TV.
Now that the remote and TV have successfully paired, it’s time to move on to Step 6: testing the remote’s functionality. We will ensure that all the buttons on the remote are working correctly and that you can control your smart TV without any issues. So, let’s proceed and put your remote to the test!
Step 6: Test the remote’s functionality
With your smart TV remote successfully paired to your TV, it’s time to test its functionality. This step ensures that all the buttons on the remote are working correctly and that you can control your smart TV without any issues.
Start by pointing the remote towards your smart TV and pressing the various buttons to test their functionality. Begin with the basic navigation buttons, such as arrow keys and the OK or Enter button, to navigate through menus and select options.
Test the volume buttons to check if they control the volume level on your TV. Additionally, try the mute button to see if it mutes the sound as expected.
If your smart TV remote has dedicated buttons for specific functions like accessing apps or adjusting picture settings, try them out to ensure they work accordingly. Each button should trigger the intended action on the TV.
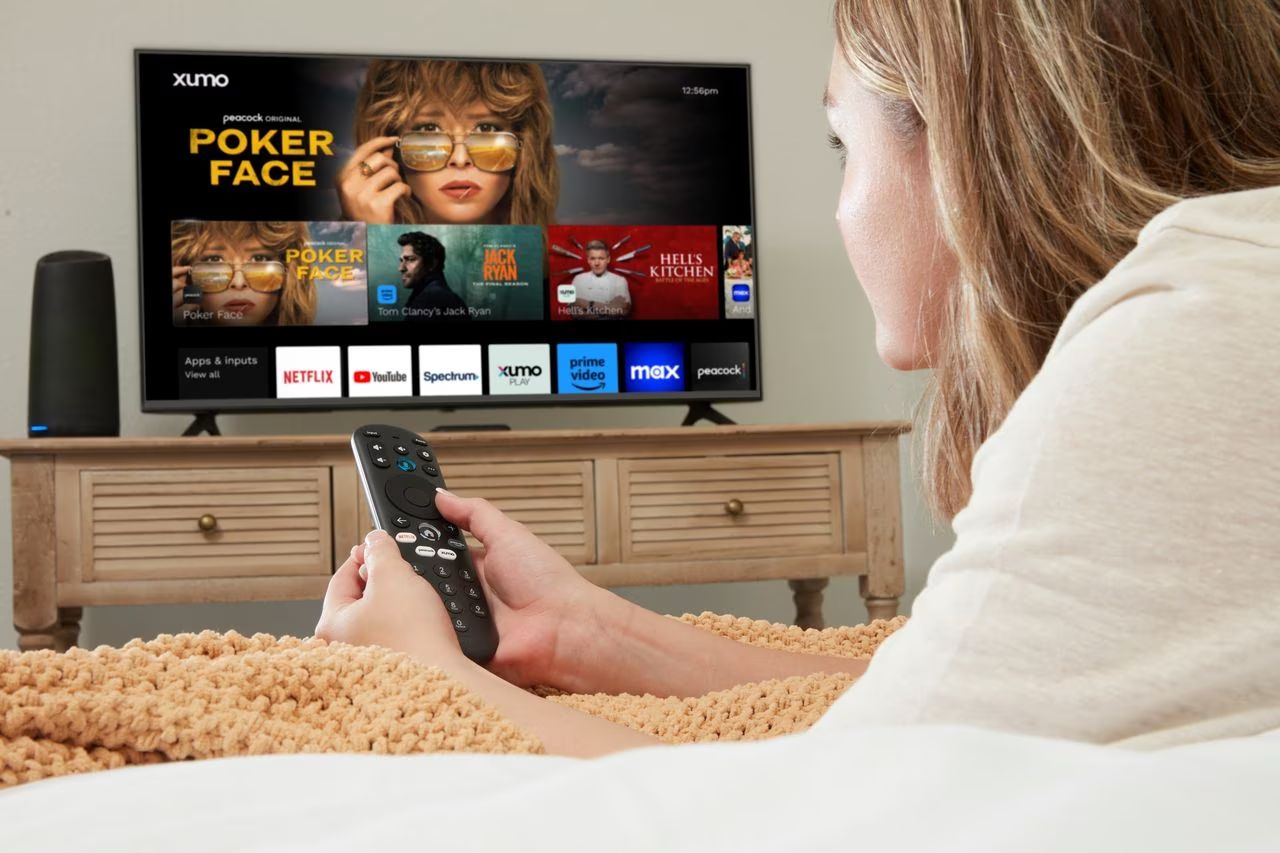
Many smart TV remotes also have dedicated buttons for popular streaming services like Netflix, YouTube, or Amazon Prime Video. Press these buttons to launch the respective apps directly on your TV.
Furthermore, if your smart TV remote supports voice control or has a built-in microphone, test its functionality by issuing voice commands. Try commands like “open Netflix,” “search for action movies,” or “adjust the volume,” and see if the TV responds accurately.
If any buttons on the remote are not functioning or are not performing the expected actions, consult the user manual or manufacturer’s website for troubleshooting steps. It is possible that some buttons may require additional configuration or mapping to the correct functions on your specific TV model.
Once you are satisfied with the functionality of your smart TV remote and all the buttons are working correctly, you can proceed to Step 7 for troubleshooting common issues. However, if you encounter any problems during this testing phase, refer to the troubleshooting section of your user manual or seek assistance from the manufacturer’s support team.
With the remote successfully tested, you have successfully completed Step 6. In Step 7, we will cover some common issues that may arise during the programming process and provide troubleshooting tips to help you overcome them. So, let’s move on and address any potential roadblocks!
Step 7: Troubleshooting common issues
While the process of programming a smart TV remote is usually straightforward, there may be instances where you encounter common issues that can hinder the pairing or functionality of the remote. In this step, we will address some of these common issues and provide troubleshooting tips to help you overcome them.
Issue 1: Remote not pairing with the TV
If your smart TV remote is not successfully pairing with the TV, try the following troubleshooting steps:
- Ensure that both the remote and TV are in pairing mode and are within close proximity of each other.
- Check the batteries in the remote and make sure they’re inserted correctly and have enough power.
- Power off the TV and remove the power cord from the outlet. Wait for a few minutes, then plug it back in and power on the TV. Retry the pairing process.
- If the issue persists, consult the user manual or contact the manufacturer’s support for further assistance.
Issue 2: Some buttons on the remote not functioning
If certain buttons on the remote are not working as intended, try the following troubleshooting steps:
- Check if the buttons require additional configuration or mapping for your specific TV model. Consult the user manual for instructions on button customization.
- Ensure that there are no obstructions between the remote and the TV, as this can affect the signal strength.
- Replace the batteries in the remote, even if they seem to have some power left. Weak batteries can cause certain buttons to malfunction.
- If the issue persists, contact the manufacturer’s support for further assistance.
Issue 3: Voice control not working
If the voice control feature on your smart TV remote is not functioning as expected, try the following troubleshooting steps:
- Check if the remote needs to be connected to the internet for voice control to work. Verify your network connection and ensure that the remote is connected to the same Wi-Fi network as the TV.
- Ensure that the microphone on the remote is not blocked or obstructed. Clear any dust or debris that may be affecting the microphone’s functionality.
- Restart both the remote and the TV and retry the voice commands.
- If the issue persists, consult the user manual or contact the manufacturer’s support for further assistance.
If you encounter any other issues or problems during the programming process, refer to the troubleshooting section of your remote’s user manual or visit the manufacturer’s website for assistance. They may provide specific troubleshooting steps or have a support team available to help you.
With the troubleshooting steps in mind, you should now be equipped with the knowledge to overcome common issues that may arise during the programming of your smart TV remote. Congratulations on successfully completing all the steps!
Conclusion
Programming a smart TV remote can initially seem like a daunting task, but with the right guidance, it becomes a straightforward process. In this comprehensive guide, we have walked you through the step-by-step instructions to program your smart TV remote successfully. From gathering the necessary information to troubleshooting common issues, each step has been designed to help you navigate through the process with ease.
Remember, the key to a successful remote programming experience is to gather the relevant information, such as the brand and model of your smart TV, and ensure that your remote is in pairing mode. Taking these preliminary steps will set the stage for a seamless connection between your smart TV and remote.
We also covered the importance of testing the functionality of the remote after programming. By thoroughly testing each button and feature, you can ensure that your remote is fully equipped to control your smart TV effectively.
In the event that you encounter any issues during the programming process, we provided troubleshooting tips to help you overcome common problems. By following these troubleshooting steps and referencing your user manual or contacting the manufacturer’s support team, you can address any obstacles that arise.
Now that your smart TV remote is programmed and functioning optimally, you can enjoy the convenience and control it offers. Use your remote to navigate through apps, adjust settings, and explore the wide range of entertainment options available to you on your smart TV.
If you ever need to reprogram your smart TV remote or assist others in doing so, feel free to refer back to this guide for a quick and efficient process.
Thank you for using our guide, and we hope it has been helpful in programming your smart TV remote. Enjoy your enhanced TV viewing experience!