Introduction
Welcome to the exciting world of playing the keyboard! If you’re a beginner looking for a fun and easy song to start with, “Twinkle Twinkle Little Star” is a great choice. Not only is it a beloved nursery rhyme, but it’s also a fantastic way to practice your keyboard skills and familiarize yourself with the keys.
Playing “Twinkle Twinkle Little Star” on the keyboard is a beginner-friendly task that will help you learn the basics of finger placement, hand coordination, and reading sheet music. Whether you’re a complete novice or have some experience with the keyboard, this iconic melody will take you on an enjoyable musical journey.
In this article, we’ll guide you step-by-step on how to play “Twinkle Twinkle Little Star” on your keyboard. We’ll cover everything from the basic melody to adding chords for a fuller sound. We’ll also provide tips on transitioning smoothly between the different sections and offer suggestions on how to practice and refine your performance.
So, get ready to embark on your musical adventure and let’s dive into the world of “Twinkle Twinkle Little Star” on the keyboard!
Getting Started
Before we start playing “Twinkle Twinkle Little Star” on the keyboard, let’s make sure you have everything you need to get started. Here are the essentials:
- A Keyboard: If you don’t already have one, you’ll need a keyboard or a digital piano. It’s ideal to have a full-sized keyboard with 88 keys, but a smaller keyboard with at least 61 keys will work as well.
- Sheet Music or Notation: You can find the sheet music for “Twinkle Twinkle Little Star” online or in beginner keyboard lesson books. Alternatively, you can use keyboard notation or a teach-yourself keyboard guide.
- Keyboard Stand: Make sure you have a sturdy and comfortable stand for your keyboard to ensure proper posture while playing.
- Headphones: While not mandatory, having a pair of headphones can be helpful if you want to practice without disturbing others.
Once you have these essential items, find a quiet and comfortable place to practice. Ensure that your keyboard is set at a proper height, with your feet flat on the ground, and your posture relaxed yet upright.
Now that you’re all set up, let’s move on to learning the basics of playing “Twinkle Twinkle Little Star” on the keyboard.
The Basics of Playing Twinkle Twinkle Little Star
Before we dive into learning the melody of “Twinkle Twinkle Little Star,” let’s familiarize ourselves with the keyboard layout and the basics of reading sheet music. This will make the learning process much easier and more enjoyable.
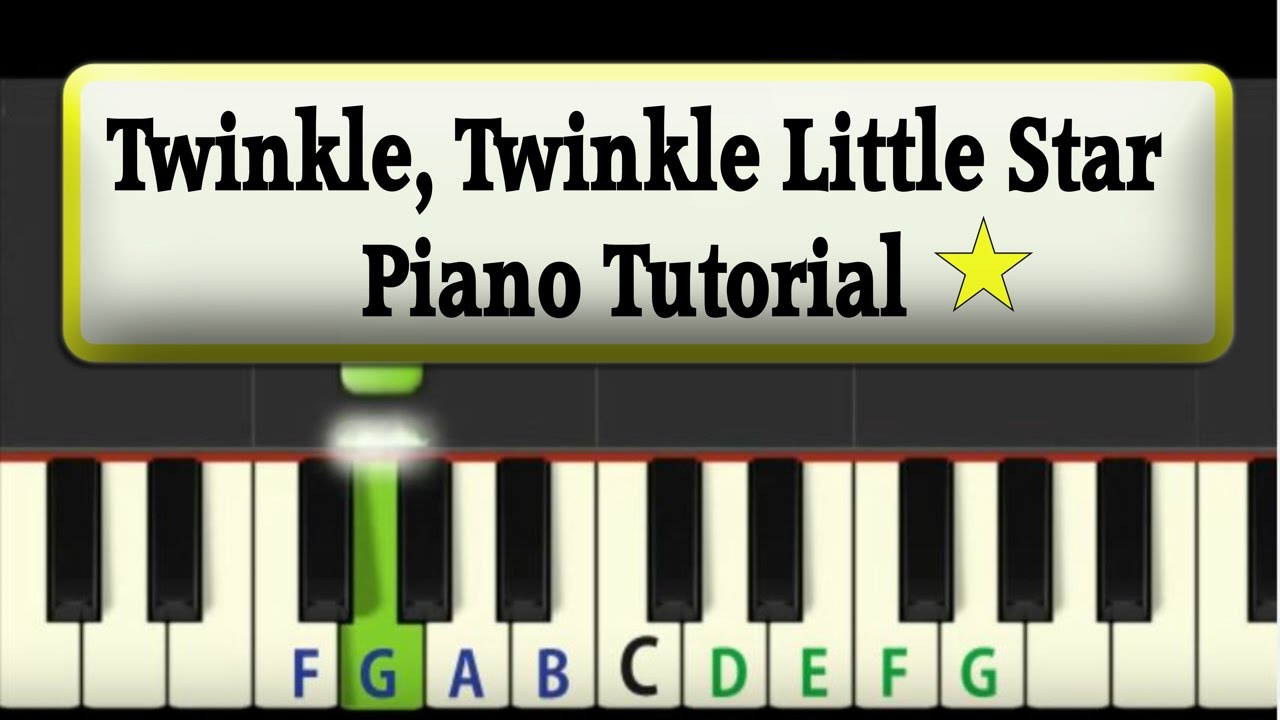
The keyboard is made up of a series of white and black keys, arranged in repeating patterns of groups of twos and threes. The white keys represent the natural notes (A, B, C, D, E, F, G), while the black keys represent the sharps and flats (the notes in between the natural notes).
Now, when it comes to reading sheet music, you’ll see a set of lines and spaces, known as the staff. Each line and space represents a different note on the keyboard. The higher the note on the staff, the higher the pitch of the sound.
In the case of “Twinkle Twinkle Little Star,” you’ll find the melody written on the staff. Each note on the staff corresponds with a specific key on the keyboard, which you’ll play with your fingers. The sheet music will indicate which fingers to use for each note, using numbers from 1 to 5, with 1 being the thumb and 5 being the pinky finger.
As you begin playing the melody of “Twinkle Twinkle Little Star,” start by locating the starting note on your keyboard. Follow the sheet music and play each note in sequence, using the designated fingers. Pay attention to the length of the notes indicated by the sheet music; some notes are held for longer durations, while others are played quickly.
Remember to start slowly and play each note accurately. Take your time to read the sheet music and familiarize yourself with the finger positions. With practice, you’ll gain more confidence and become more comfortable playing the melody.
Now that you understand the basics of how to read sheet music and play the notes on the keyboard, let’s move on to the step-by-step guide for playing “Twinkle Twinkle Little Star.”
Step-by-Step Guide to Playing the Melody
Now that you’re familiar with the basics, it’s time to dive into the step-by-step process of playing the melody of “Twinkle Twinkle Little Star” on the keyboard. Follow these instructions to play the song smoothly and accurately:
- Position your hands on the keyboard: Start by placing your right thumb (1 finger) on the middle C, which is the white key located directly to the left of the two black keys in the middle of the keyboard. Position your remaining fingers on the adjacent white keys, going from right to left, using your pinky finger (5 finger) on the G key.
- Play the opening phrase: Begin by playing the following notes consecutively: C, C, G, G, A, A, G. Use the indicated fingers for each note as per the sheet music. Ensure that you give each note its proper duration, following the rhythm indicated on the sheet music.
- Transition to the next phrase: After playing the opening phrase, transition smoothly to the next set of notes: F, F, E, E, D, D, C. Again, use the designated fingers to play each note and pay attention to the rhythm.
- Play the final phrase: The last phrase consists of the notes G, G, F, F, E, E, D. Maintain a steady tempo and play each note accurately, following the sheet music.
- Repeat the melody: Once you’ve played the entire song, feel free to repeat it multiple times to practice and increase your familiarity with the melody.
Remember to start slowly and gradually increase your speed as you become more comfortable with the fingering and rhythm. It may take some time and practice to play the melody smoothly, but don’t be discouraged – it will eventually become second nature.
Now that you’ve learned how to play the melody of “Twinkle Twinkle Little Star” on the keyboard, let’s take it a step further and add chords to enhance the overall sound of the song.
Adding Chords for a Fuller Sound
While playing the melody of “Twinkle Twinkle Little Star” on the keyboard is delightful, adding chords can bring a fuller and more dynamic sound to your rendition. Chords provide a harmonic foundation that complements the melody and adds depth to your playing.
When adding chords, you’ll play multiple notes simultaneously with your left hand while your right hand continues to play the melody. Here’s a simple and common chord progression you can use for “Twinkle Twinkle Little Star” in the key of C major:
- C major chord: The C major chord consists of the notes C, E, and G. You can play this chord by pressing all three keys simultaneously with your left hand while playing the melody with your right hand.
- G major chord: The G major chord consists of the notes G, B, and D. Play this chord in the same manner as the C major chord, by pressing all three keys together with your left hand.
- F major chord: The F major chord consists of the notes F, A, and C. Press these three keys simultaneously with your left hand to play this chord.
As you progress through the song, incorporate these chords at appropriate points to enhance the sound and create a more captivating performance. For instance, you can play the C major chord when you reach the C notes in the melody, the G major chord when you encounter G notes, and the F major chord when you come across F notes.
Don’t be afraid to experiment with different chord progressions and inversions to find what sounds best to you. If you’re feeling adventurous, you can even try adding arpeggios or additional chord variations to further enrich the sound.
Remember to maintain a balance between the melody and the chords. The melody should always be prominent, with the chords serving as a supporting layer. You want to achieve a harmonious blend between the two elements.
With practice, you’ll develop a sense of when and how to incorporate chords into your performance, creating a beautifully layered rendition of “Twinkle Twinkle Little Star” on the keyboard.
Now that you’ve grasped the basics of playing the melody and adding chords, let’s delve into some tips for transitioning smoothly between the different sections of the song.
Tips for Smoothly Transitioning Between the Different Sections
Transitioning between different sections of a song can sometimes be challenging, especially for beginner keyboard players. To help you navigate through the various parts of “Twinkle Twinkle Little Star” smoothly, here are some tips:
- Practice each section separately: Break down the song into its different parts – the opening phrase, the middle phrase, and the final phrase. Practice each section individually before attempting to play the entire song. This will allow you to focus on specific areas that need improvement and develop muscle memory for smoother transitions.
- Focus on hand coordination: Pay close attention to the coordination between your hands. The right hand plays the melody, while the left hand handles the chords. Practice playing the melody without chords, and then gradually add in the chords once you feel comfortable. This will help develop coordination between your hands and make the transitions feel more natural.
- Use proper finger positioning: Ensure that you’re using the correct finger positioning as indicated in the sheet music. This will help you play the notes with precision and transition smoothly between different sections. Spend extra time practicing any challenging finger transitions to make them seamless.
- Master the tempo: Pay attention to the tempo of the song and maintain a steady rhythm throughout. Practice playing the song at a slower tempo at first to ensure accuracy, and gradually increase the speed as you become more confident. A consistent tempo will make the transitions between sections sound fluid and professional.
- Visualize the transitions: In your mind, visualize each transition from one section to another before actually playing it. This mental preparation can help you anticipate the upcoming notes and make the transitions smoother. Visualization is a powerful technique that can enhance your overall performance.
- Practice with a metronome: Using a metronome can be incredibly helpful for maintaining a steady tempo and improving your timing during transitions. Set the metronome to a comfortable tempo and practice playing the song, focusing on seamless transitions between sections.
Remember, transitioning smoothly between different sections takes time and practice. Be patient with yourself and celebrate small improvements along the way. The more you practice, the more natural and effortless your transitions will become.
Now that we’ve covered tips for smooth transitions, let’s move on to the important topic of practicing and refining your performance.
Practicing and Refining Your Performance
Practicing is essential when it comes to mastering any musical piece, including “Twinkle Twinkle Little Star” on the keyboard. Here are some tips to help you practice effectively and refine your performance:
- Establish a practice routine: Set aside dedicated time each day to practice. Consistency is key to improving your skills. Even if you can only practice for a short period, regular practice will yield better results than sporadic, longer practice sessions.
- Break it down: If you’re struggling with a particular section or transition, break it down into smaller segments. Focus on practicing those sections individually until you feel comfortable, and then gradually put them back together. This approach allows you to tackle challenging areas more effectively.
- Slow and steady: When learning a new piece or working on difficult sections, practice at a slower tempo. This will help you develop accuracy and control. As you become more comfortable, gradually increase the speed without compromising accuracy.
- Record yourself: Use your smartphone or a recording device to record yourself playing. Listen to the recording carefully, paying attention to any areas that need improvement. This will help you identify weaknesses, refine your technique, and track your progress over time.
- Seek feedback: If possible, share your performance with a knowledgeable musician or a music teacher. Their feedback and guidance can provide valuable insights and help you refine your technique and musical interpretation.
- Practice with different dynamics: Experiment with playing various sections of the song with different dynamics. Explore the softer and louder parts to add contrast and expression to your performance. This will make your rendition more captivating and dynamic.
- Play along with recordings: Find recordings of “Twinkle Twinkle Little Star” played on the keyboard and practice playing along with them. This will help you develop a sense of timing and phrasing, as well as provide inspiration for your own interpretation.
Remember, consistent and focused practice is the key to refining your performance. Embrace the process and enjoy the journey of improving your skills on the keyboard.
Now that we’ve covered various tips and techniques for practicing and honing your abilities, let’s wrap up with some final thoughts and provide additional resources for further exploration.
Final Thoughts and Additional Resources
Congratulations on learning how to play “Twinkle Twinkle Little Star” on the keyboard! With practice and dedication, you’ve unlocked the joy of creating beautiful music on a delightful nursery rhyme. Remember to continue exploring and expanding your repertoire as you grow as a keyboard player.
If you’re hungry for more keyboard knowledge and further musical exploration, here are some additional resources that can help you on your musical journey:
- Online tutorials and lessons: Explore websites and platforms offering online tutorials and lessons specifically designed for beginners learning the keyboard. These resources provide step-by-step instructions, video demonstrations, and interactive exercises to help you progress.
- Keyboard method books: Consider investing in keyboard method books, designed for beginners, which systematically guide you through learning and mastering essential keyboard techniques.
- Music theory resources: Dive deeper into music theory and keyboard techniques by studying resources that cover topics such as note reading, scales, chords, and more. These resources can provide a solid foundation for your musical understanding.
- Join a community or take lessons: Consider joining a local music community or taking private keyboard lessons to receive tailored instruction and connect with fellow musicians. This will provide valuable insights, guidance, and opportunities for growth.
- Expand your repertoire: Explore and learn to play other songs and melodies on the keyboard. This will keep your practice sessions enjoyable and help you develop a diverse skill set.
Remember, learning any musical instrument takes time and patience. Embrace the process, practice regularly, and allow yourself to make mistakes. Enjoy the journey of music-making and celebrate your progress along the way.
Now, go forth and continue your musical exploration. Happy playing!


