Introduction
Welcome to this handy guide on how to open the silver HP Pavilion Gaming Laptop. Whether you’re looking to upgrade your laptop’s components or simply want to clean the internals, this step-by-step tutorial will walk you through the process with ease.
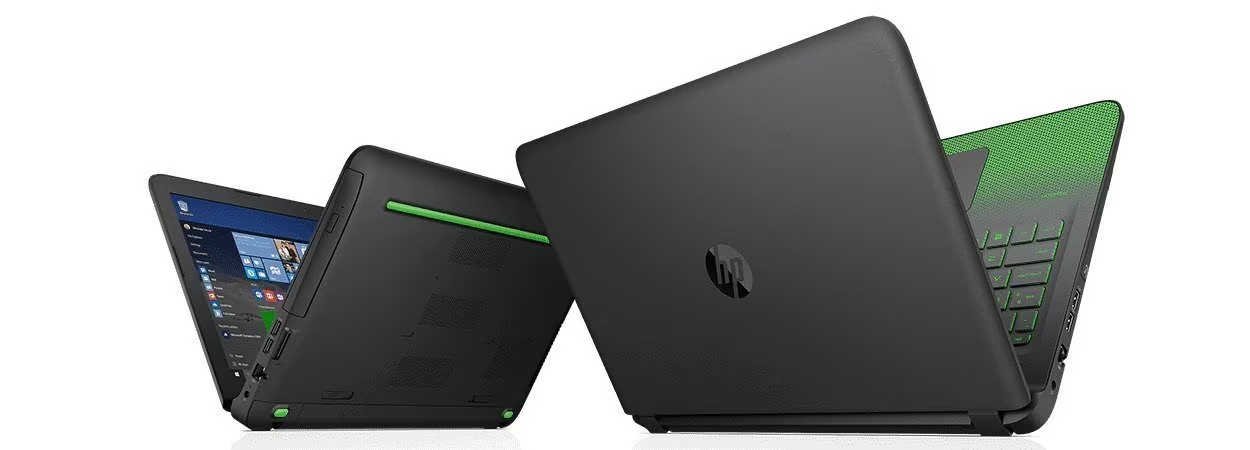
The HP Pavilion Gaming Laptop is known for its sleek design and powerful performance. Opening the laptop may seem intimidating at first, but with the right tools and instructions, it can be a straightforward task. By following these steps, you’ll gain access to the laptop’s internal components, allowing you to upgrade the RAM, replace the hard drive, or perform any necessary maintenance.
Before we begin, it’s important to note that opening your laptop may void the warranty. If your laptop is still under warranty, it’s best to consult with HP or an authorized service center before proceeding. Additionally, make sure to gather all the necessary tools and work in a clean and static-free environment to prevent any damage.
This guide applies specifically to the silver version of the HP Pavilion Gaming Laptop, but the general steps should be similar for other models. Without further ado, let’s get started!
Tools Needed
Before you begin opening your silver HP Pavilion Gaming Laptop, it’s essential to gather the necessary tools. Having the right equipment on hand will make the process much smoother and help prevent any accidental damage. Here are the tools you’ll need:
- Small Phillips-head screwdriver: This will be used to remove the screws that secure the laptop’s cover and internal components. Make sure to use a small screwdriver that fits snugly into the screws to avoid stripping them.
- Anti-static wrist strap: This strap will help discharge any static electricity on your body, preventing it from damaging the laptop’s sensitive components. It’s important to wear the strap throughout the process, especially when handling the motherboard and other internal parts.
- Plastic spudger or pry tool: This non-metallic tool will come in handy when removing delicate cables and connectors without causing any damage. It’s crucial to use a plastic tool to prevent scratches or electrical issues.
- Clean and soft microfiber cloth: This cloth is useful for wiping away any dust or fingerprints on the components or the screen. Always make sure to use a gentle cloth to avoid scratching the laptop’s surface.
- Optional: Compressed air canister: If you’re planning to clean the internal parts, a canister of compressed air will help remove any accumulated dust. This step is not mandatory but recommended for optimal performance.
Make sure to have all these tools readily available before you start the process. It’s important to work methodically and carefully when handling delicate components. Now that you have everything you need, let’s move on to the next step: shutting down the laptop.
Step 1: Shutting Down the Laptop
Before you begin opening your silver HP Pavilion Gaming Laptop, it’s essential to properly shut it down. This ensures that you can safely work on the internal components without the risk of data loss or hardware damage. Follow these steps to shut down your laptop:
- Save your work and close any open applications or programs.
- Click on the Start Menu in the bottom left corner of your screen.
- Select the Power icon.
- Choose Shut down from the drop-down menu.
Wait for the laptop to completely power off before proceeding to the next step. It’s crucial to give it enough time to ensure that all processes are finished and the hardware is no longer active.
Now that your laptop is safely shut down, you’re ready to move on to the next step: disconnecting the power cord and removing the battery.
Step 2: Disconnecting the Power Cord and Removing the Battery
Before you start working on the internal components of your silver HP Pavilion Gaming Laptop, it’s crucial to disconnect the power cord and remove the battery. This step ensures your safety and prevents any potential electrical damage. Follow these steps to disconnect the power cord and remove the battery:
- Locate the power cord at the back of your laptop.
- Unplug the power cord from the laptop and disconnect it from the power source.
- Turn your laptop over and locate the battery release latch.
- Slide the battery release latch to the unlock position.
- While holding the release latch, remove the battery by gently sliding it out of the battery compartment.
Make sure to handle the battery with care and avoid applying excessive force. If you encounter any resistance, double-check that you have fully released the latch and try again. Once the battery is removed, set it aside in a safe place away from any potential hazards.
By disconnecting the power cord and removing the battery, you have effectively eliminated the risk of electrical shocks and damage. Now you’re ready to move on to the next step: unscrewing the bottom cover.
Step 3: Unscrewing the Bottom Cover
With the power cord disconnected and the battery removed, you can now proceed to unscrew the bottom cover of your silver HP Pavilion Gaming Laptop. The bottom cover provides access to the internal components and is where you’ll begin your journey of upgrading or cleaning your laptop. Follow these steps to unscrew the bottom cover:
- Place your laptop on a flat and stable surface.
- Locate the screws securing the bottom cover. They are usually marked with small icons or arrows indicating their position.
- Using a small Phillips-head screwdriver, carefully unscrew each of the screws. Be sure to keep track of the screws and their placement to avoid confusion during reassembly.
- Once all the screws are removed, set them aside in a safe place.
- Gently pry open the bottom cover using a plastic spudger or a pry tool. Begin at one corner and slowly work your way around the edges, releasing the clips securing the cover.
- Continue prying open the bottom cover until it is completely detached.
Take care not to apply excessive force while prying open the bottom cover to avoid damaging any delicate components. If you encounter resistance, double-check that all screws have been removed before proceeding.
With the bottom cover successfully removed, you now have a clear view of the internal components of your HP Pavilion Gaming Laptop. In the next step, you’ll learn how to remove the screws from the RAM and hard drive cover.
Step 4: Removing the Screws from the RAM and Hard Drive Cover
Now that you have successfully opened the bottom cover of your silver HP Pavilion Gaming Laptop, it’s time to remove the screws that secure the RAM and hard drive cover. This step will allow you to access and upgrade these components as needed. Follow these steps to remove the screws:
- Locate the screws that secure the RAM and hard drive cover. They are usually marked with small icons or labels.
- Using a small Phillips-head screwdriver, carefully unscrew each of the screws. As with the bottom cover, make sure to keep track of the screws and their placement for smooth reassembly later.
- Set the screws aside in a safe place.
- Once all the screws are removed, you can now lift the RAM and hard drive cover. It may have clips or tabs holding it in place, so gently pry it open using a plastic spudger or similar tool if necessary.
Take caution not to damage any delicate cables or components while lifting the cover. If you encounter resistance, double-check that all the screws have been removed before continuing.
With the RAM and hard drive cover open, you have gained access to these crucial components. In the next step, you’ll learn how to remove the RAM module from your HP Pavilion Gaming Laptop.
Step 5: Removing the RAM Module
Now that you have accessed the RAM module in your silver HP Pavilion Gaming Laptop, you can proceed with removing it. Upgrading or replacing the RAM can significantly improve your laptop’s performance. Follow these steps to safely remove the RAM module:
- Locate the RAM module, which is a small rectangular circuit board typically secured by clips on each side.
- Gently press down on the clips on either side of the RAM module to release it. The module should pop up at an angle.
- Hold the RAM module by its sides and carefully lift it out of its slot.
- If you’re planning to install a new RAM module, align the notch on the module with the slot on the motherboard and insert it at a slight angle. Press down firmly until the clips on the sides of the slot lock the RAM module in place.
- If you’re not replacing the RAM module, set it aside in a safe place to avoid damage.
Remember to handle the RAM module with care and avoid touching the gold contacts to prevent any static discharge or damage. If you encounter any difficulties, double-check that you have fully released the clips and try again.
Now that you have successfully removed the RAM module, you can proceed to the next step: removing the hard drive from your HP Pavilion Gaming Laptop.
Step 6: Removing the Hard Drive
Removing the hard drive from your silver HP Pavilion Gaming Laptop gives you the opportunity to upgrade to a larger capacity drive or replace a faulty one. Follow these steps to safely remove the hard drive:
- Locate the hard drive, which is a small rectangular or square-shaped metal or plastic component.
- Identify the screws or brackets that secure the hard drive in place.
- Using a small Phillips-head screwdriver, carefully unscrew the screws or remove the brackets that secure the hard drive.
- Once the screws or brackets are removed, gently slide the hard drive out of its slot.
- If you’re installing a new hard drive, align the connectors on the new drive with the corresponding ports on the laptop’s motherboard, and slide it into the slot. Secure the drive with the screws or brackets.
- If you’re not replacing the hard drive, set it aside in a safe place to avoid any damage.
Take care not to apply excessive force when removing or inserting the hard drive to avoid causing any damage to the connectors or other components. If the hard drive doesn’t slide out easily, double-check that you have removed all the necessary screws or brackets.
With the hard drive successfully removed, you now have the opportunity to upgrade or replace it as needed. In the next step, you’ll learn how to remove other components, such as the Wi-Fi card, if necessary.
Step 7: Removing the Wi-Fi Card and Other Components
In addition to the RAM module and hard drive, there may be other components in your silver HP Pavilion Gaming Laptop that you may need to remove or replace, such as the Wi-Fi card. Follow these steps to safely remove the Wi-Fi card and other components:
- Identify the Wi-Fi card, which is a small circuit board with antennas attached to it.
- Locate the screws or connectors that secure the Wi-Fi card in place.
- Using a small Phillips-head screwdriver, carefully unscrew the screws or gently disconnect the connectors that secure the Wi-Fi card.
- Once the screws or connectors are removed, carefully lift the Wi-Fi card out of its slot.
- If you’re installing a new Wi-Fi card, align the connectors on the new card with the corresponding ports on the motherboard, and carefully insert it into the slot. Secure the card with the screws or connectors.
- If you’re not replacing the Wi-Fi card, set it aside in a safe place.
- If there are other components you need to remove, such as the CMOS battery or additional expansion cards, follow the same process of identifying and removing the screws or connectors carefully.
When removing components, be cautious not to apply excessive force, and always handle them by their edges to avoid any damage. Take note of the placement and orientation of each component for reassembly purposes.
With the Wi-Fi card and other components successfully removed, you now have the freedom to upgrade or replace them as needed. In the next step, you’ll learn how to remove the keyboard and palm rest of your HP Pavilion Gaming Laptop.
Step 8: Removing the Keyboard and Palm Rest
In this step, you will learn how to remove the keyboard and palm rest from your silver HP Pavilion Gaming Laptop. This allows you to access and clean or replace these components if necessary. Follow these steps:
- Locate the screws or clips that secure the keyboard and palm rest.
- Using a small Phillips-head screwdriver, carefully unscrew the screws or release the clips holding the keyboard and palm rest in place.
- Once the screws are removed or the clips are released, gently lift the keyboard and palm rest assembly from the laptop’s base.
- Be mindful of any attached cables or connectors that may be connected to the motherboard.
- If there are any cables or connectors attached, use a plastic spudger or a gentle pulling motion to detach them from the motherboard.
- Set aside the keyboard and palm rest assembly in a safe place, making sure it is protected from any potential damage.
When removing the keyboard and palm rest, take care to avoid putting excessive pressure on the keys or other delicate components. If you encounter any resistance or difficulty, double-check that all the screws or clips have been properly removed.
With the keyboard and palm rest successfully removed, you now have access to the internal components beneath them. In the next step, you’ll learn how to disconnect the display cable and remove the LCD assembly.
Step 9: Disconnecting the Display Cable and Removing the LCD Assembly
In this step, you will learn how to disconnect the display cable and remove the LCD assembly from your silver HP Pavilion Gaming Laptop. This step is necessary if you need to replace a damaged screen or perform any maintenance on the display components. Follow these steps:
- Locate the display cable connected to the motherboard near the back of the laptop’s base.
- Use a gentle pulling motion or a plastic spudger to carefully disconnect the display cable from its connector on the motherboard.
- Take note of any adhesive or tape that may be securing the display cable to the chassis and gently remove it to free the cable.
- Next, locate the hinges on either side of the laptop that connect the LCD assembly to the base.
- Loosen any screws or brackets securing the hinges to the base.
- Carefully lift the LCD assembly from the base, ensuring that there are no cables or connectors still attached.
Take caution when handling the display cable and connectors to prevent any damage. If there are any adhesive strips or tape, be gentle and peel them off slowly to avoid tearing the cable or damaging the connectors.
Once the display cable is disconnected and the LCD assembly is removed, you have successfully gained access to the display components. In the next step, you will learn how to remove the motherboard and other internal components of your HP Pavilion Gaming Laptop.
Step 10: Removing the Motherboard and Other Internal Components
In this step, you will learn how to remove the motherboard and other internal components from your silver HP Pavilion Gaming Laptop. Removing the motherboard can be a more advanced step and should be approached with caution. Follow these steps:
- Identify and disconnect any cables or connectors that are connected to the motherboard. These may include power cables, data cables, and ribbon cables.
- Use a small Phillips-head screwdriver to carefully unscrew the screws that secure the motherboard to the laptop’s base.
- Gently lift the motherboard from the base, keeping in mind any attached cables or connectors that may still be connected.
- Set aside the motherboard in a safe place, making sure it is protected from any potential damage.
- If there are any other internal components that you need to remove or replace, such as the processor or graphics card, consult your laptop’s user manual or manufacturer’s guide for specific instructions.
When handling the motherboard and other internal components, exercise caution to avoid static electricity discharge or causing damage to delicate parts. Take note of the connections and orientation of the cables and connectors for reassembly.
With the motherboard and other internal components successfully removed, you have full access to the internals of your HP Pavilion Gaming Laptop. In the final step, you will learn how to reassemble the laptop back together.
Step 11: Assembling the Laptop Back Together
Now that you have completed the necessary upgrades or maintenance on your silver HP Pavilion Gaming Laptop, it’s time to reassemble the laptop. Follow these steps to put everything back together:
- Starting with the motherboard, carefully place it back into the laptop’s base, ensuring all cables and connectors are properly aligned.
- Secure the motherboard in place by screwing in the screws that were previously removed.
- Next, reattach any other internal components that were removed, such as the processor or graphics card, following the specific instructions provided by the manufacturer.
- Connect the display cable to the corresponding connector on the motherboard. Ensure it is securely in place.
- Lower the LCD assembly back onto the base, aligning the hinges with their respective slots.
- Secure the hinges in place by tightening any screws or brackets that were previously loosened.
- Reconnect any other cables or connectors that were detached during disassembly, such as the keyboard and palm rest.
- Carefully position the keyboard and palm rest assembly back onto the base and secure it using screws or clips.
- Double-check that all cables and connectors are firmly connected and properly aligned.
- Finally, replace the bottom cover of the laptop, aligning the edges and gently pressing it into place. Secure the cover by tightening the screws.
Take your time during the reassembly process to ensure that all components are correctly positioned and securely fastened. Test the laptop after reassembling to ensure everything is working properly.
Congratulations! You have successfully assembled your silver HP Pavilion Gaming Laptop back together after performing upgrades or maintenance. Enjoy your improved laptop experience!
Conclusion
Congratulations on successfully opening and exploring the internals of your silver HP Pavilion Gaming Laptop! By following the step-by-step instructions in this guide, you have learned how to safely remove various components, from the bottom cover to the motherboard, in order to perform upgrades or maintenance on your laptop.
Remember, opening your laptop may void the warranty, so it’s essential to proceed with caution and consult the manufacturer or an authorized service center if your laptop is still covered. Working in a clean and static-free environment with the appropriate tools will help prevent any accidental damage.
Whether you opted to upgrade the RAM, replace the hard drive, or clean the internal components, these steps have provided you with the knowledge and skills to confidently navigate the internals of your laptop. Always handle the components with care and double-check connections and alignments during reassembly to ensure everything is functioning properly.
We hope this guide has empowered you to take control of your HP Pavilion Gaming Laptop, allowing you to enhance its performance and prolong its lifespan. Enjoy the improved functionality and experience that comes with the upgrades or maintenance you have performed.
Thank you for following this guide, and may your silver HP Pavilion Gaming Laptop continue to provide you with countless hours of gaming and productivity!