Introduction
Welcome to this step-by-step guide on how to open the hard disk drive in a MacBook. Whether you need to replace a faulty hard drive or upgrade to a larger storage capacity, knowing how to access the hard drive is essential. This guide will walk you through the process, ensuring that you can successfully open the hard disk drive of your MacBook.
Before we begin, it’s important to note that opening your MacBook may void your warranty. If your MacBook is still covered by AppleCare or any other warranty, it’s recommended to reach out to an authorized service provider for assistance. However, if you’re confident in your abilities and don’t mind the potential risk, let’s get started!
To open the hard disk drive, you’ll need a few tools. These include a small Phillips screwdriver, an anti-static wrist strap (optional but recommended), and a clean, well-lit workspace. The anti-static wrist strap helps protect your MacBook from static electricity, which can damage sensitive components.
Before proceeding, make sure to back up all your important files and safely shut down your MacBook. This will prevent any data loss or damage to your system during the process. It’s also important to disconnect all cables and peripherals, including the power source.
Once you’re ready, follow the step-by-step instructions below to open the hard disk drive in your MacBook. Take your time, be patient, and ensure you handle the components with care to avoid any accidental damage.
Tools Needed
Before you begin opening the hard disk drive in your MacBook, it’s important to gather the necessary tools:
- Small Phillips screwdriver: You’ll need this to remove the screws holding the MacBook base cover in place.
- Anti-static wrist strap (optional): While not required, an anti-static wrist strap is highly recommended. It helps prevent any static electricity discharge that could potentially damage the internal components of your MacBook.
- Clean, well-lit workspace: Find a suitable workspace where you can comfortably work on your MacBook. Make sure the area is clean and well-lit to help you see the components clearly.
Having the right tools ensures that you can safely and effectively open your MacBook without causing any unnecessary damage. Remember, it’s crucial to handle your MacBook and its components with care throughout the process.
Once you have all the necessary tools ready, you can proceed to the next step of shutting down your MacBook and disconnecting all cables and power sources.
Step 1: Shut Down Your MacBook
The first step in opening the hard disk drive of your MacBook is to shut it down properly. Following these instructions will help prevent any data loss or potential damage to your system.
- Save your work: Ensure that you save any open files and close all applications before proceeding with the shutdown process.
- Click on the Apple menu: Located in the top left corner of your screen, click on the Apple logo to open the drop-down menu.
- Select “Shutdown”: From the drop-down menu, click on the “Shutdown” option. This will initiate the shutdown process for your MacBook.
- Wait for the shutdown to complete: Give your MacBook a few seconds to complete the shutdown process. The screen will go black, and all activity will cease.
It’s important to note that shutting down your MacBook properly ensures that the hard disk drive is not actively in use when you begin the process of opening it. This minimizes the risk of causing any damage to your data or internal components.
With your MacBook now shut down, you can safely proceed to the next step of disconnecting all cables and power sources.
Step 2: Disconnect All Cables and Power Source
Before you proceed with opening the hard disk drive in your MacBook, it is crucial to disconnect all cables and power sources. This ensures your safety and helps prevent any accidental damage to your MacBook or its components.
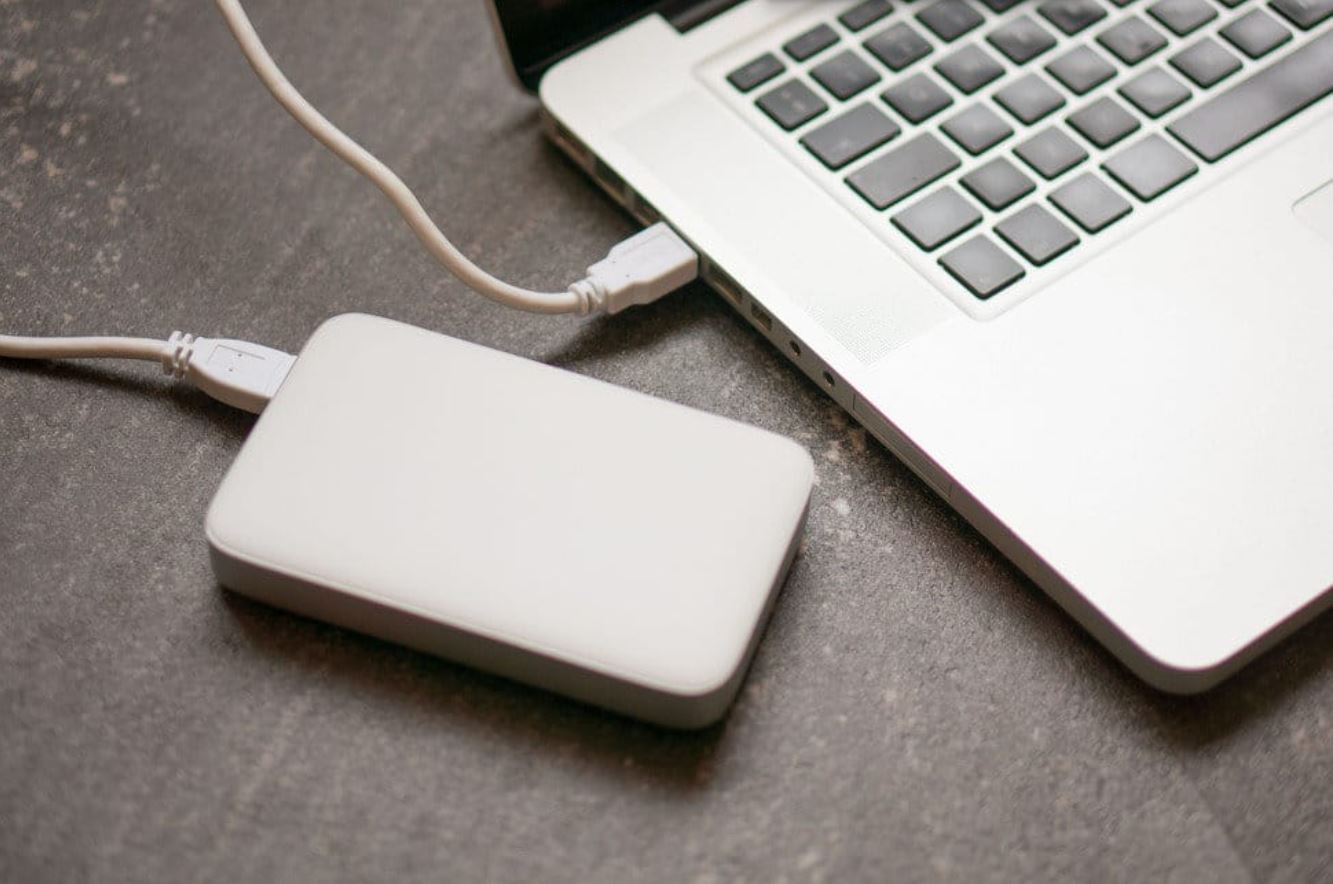
- Unplug all external devices: Disconnect any peripheral devices such as USB drives, external hard drives, or headphones that may be connected to your MacBook.
- Disconnect the power adapter: If your MacBook is connected to the power adapter, unplug it from the wall socket and disconnect it from your MacBook.
- Remove any other cables: Look for any other cables connected to your MacBook, such as Ethernet cables or display cables, and disconnect them.
By disconnecting all cables and power sources, you eliminate any potential risk of electrical shock or damage during the process of opening the hard disk drive.
Once you have disconnected all cables and power sources, you are ready to proceed with the next step of removing the MacBook base cover.
Step 3: Remove the MacBook Base Cover
Now that you have shut down your MacBook and disconnected all cables and power sources, it’s time to remove the MacBook base cover. This will grant you access to the internal components, including the hard disk drive.
- Place your MacBook on a soft, clean surface: Find a suitable workspace where you can comfortably work on your MacBook. It’s recommended to place a soft cloth or towel underneath to protect the surface.
- Locate the screws on the base cover: Flip your MacBook over and carefully observe the bottom cover. You will notice several small screws holding it in place.
- Use a small Phillips screwdriver: With your small Phillips screwdriver, start unscrewing the screws one by one. Remember to keep the screws in a safe place to prevent misplacement.
- Remove the base cover: Once all the screws have been removed, gently lift the base cover from the MacBook. Be cautious and apply even pressure to avoid any damage.
With the base cover removed, you now have a clear view of the internal components of your MacBook, including the hard disk drive. It’s important to handle the components with care while working inside your MacBook.
Now that you’ve successfully removed the MacBook base cover, you can proceed to the next step of locating the hard drive.
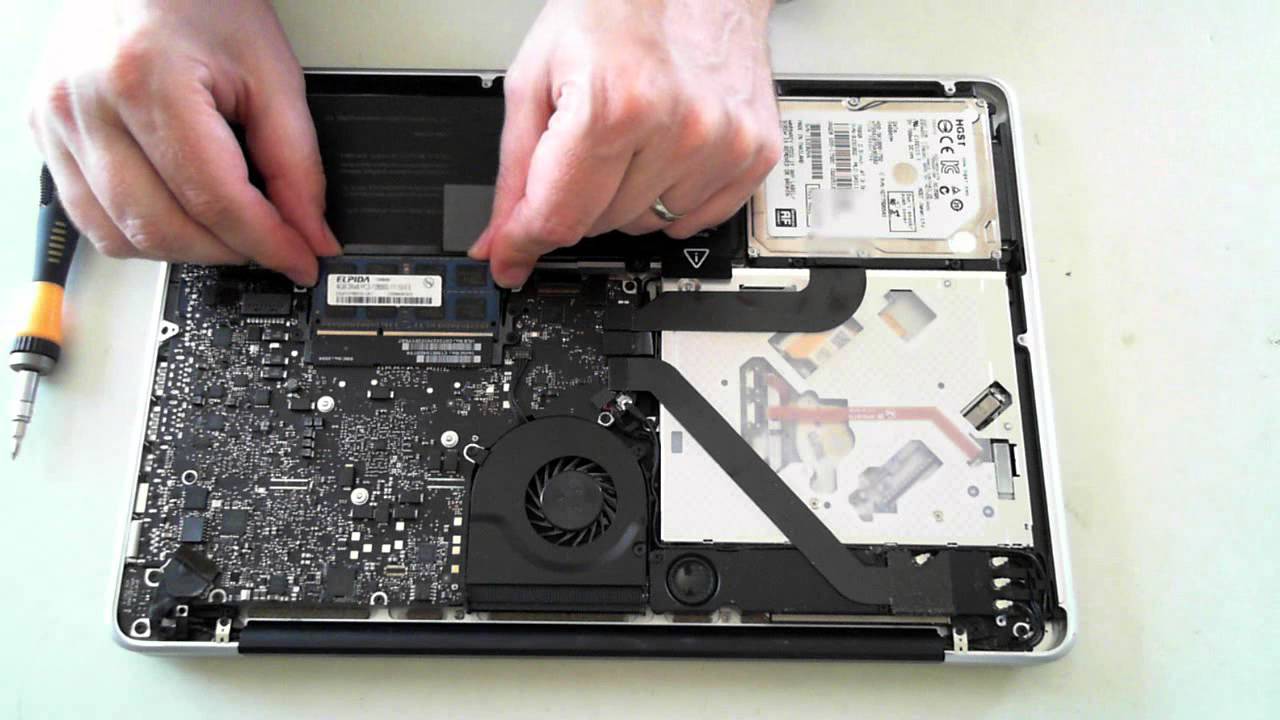
Step 4: Locate the Hard Drive
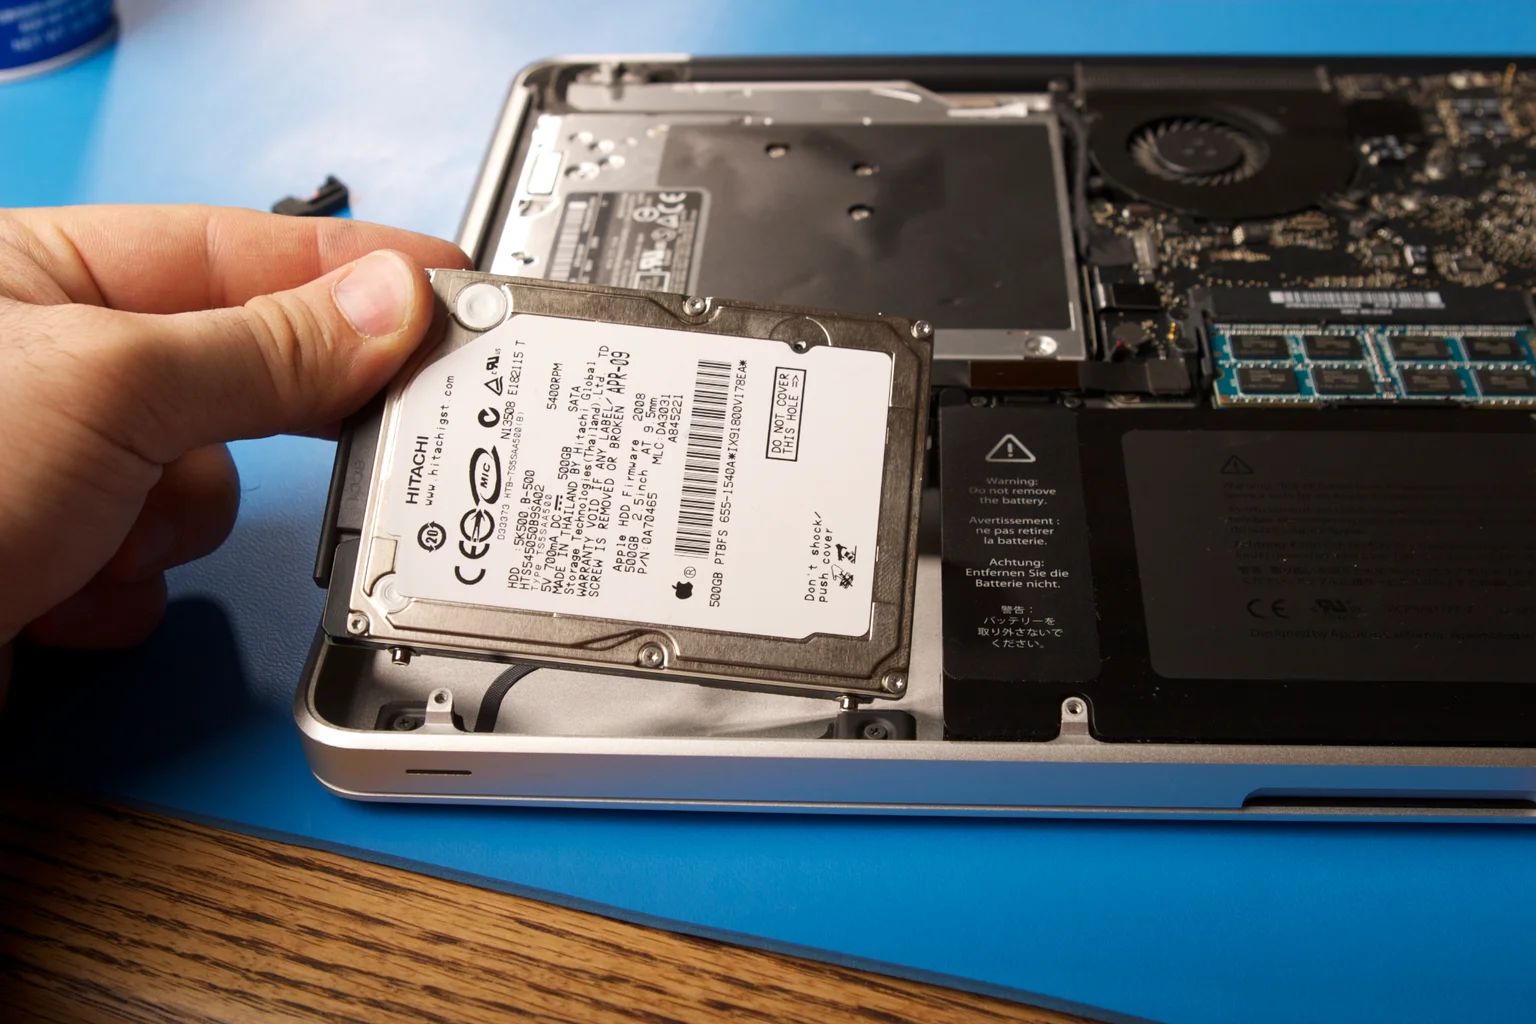
With the MacBook base cover removed, you can now locate the hard drive inside your MacBook. The hard drive is where all your files and data are stored, so it’s crucial to identify its location before proceeding further.
- Identify the rectangular metal plate: Look for a rectangular metal plate that houses the hard drive. It is usually located towards the center or side of your MacBook.
- Inspect for any labels or markings: The metal plate may have labels or markings indicating the manufacturer or the capacity of the hard drive. Take note of any relevant information for future reference.
It’s important to note that the exact location of the hard drive may vary depending on the model and year of your MacBook. If you are unsure about its location, referring to the user manual or searching for specific instructions online can provide you with the necessary guidance.
Once you have located the hard drive, you are ready to proceed with the next step of disconnecting the hard drive cable.
Step 5: Disconnect the Hard Drive Cable
Now that you have located the hard drive inside your MacBook, it’s time to disconnect the hard drive cable. This will allow you to safely remove the hard drive from its current position and proceed with the necessary steps.
- Locate the hard drive cable: The hard drive cable is a thin, flat ribbon cable that connects the hard drive to the logic board of your MacBook. It is usually connected to a small connector on the side or top of the hard drive.
- Gently unplug the cable: Using your fingertips, carefully disconnect the hard drive cable from its connector on the hard drive. Apply gentle pressure and wiggle it slightly if necessary.
Be sure to handle the cable with caution to avoid any damage to the delicate connector pins. Take note of the orientation and position of the cable for reattaching it later during the reassembly process.
With the hard drive cable successfully disconnected, you can now proceed to the next step of removing the hard drive bracket.
Step 6: Remove the Hard Drive Bracket
Now that you have disconnected the hard drive cable, the next step is to remove the hard drive bracket. The bracket secures the hard drive in place and ensures its stability within the MacBook.
- Identify the hard drive bracket: The hard drive bracket is a metal or plastic frame that holds the hard drive firmly in position. It is typically located on top of the hard drive.
- Remove the screws securing the bracket: Using your small Phillips screwdriver, carefully unscrew the screws that secure the hard drive bracket to the MacBook’s frame. Keep the screws in a safe place for reassembly.
- Lift off the bracket: Once the screws have been removed, gently lift the hard drive bracket off the hard drive. Be cautious and apply even pressure to avoid damaging any components.
At this stage, you should have successfully removed the hard drive bracket, and the hard drive is now free from any surrounding attachments. Handling the bracket and hard drive with care is essential to prevent any accidental drops or damage during the process.
Now that the hard drive bracket has been removed, you are ready to proceed with the next step of sliding out the hard drive from the MacBook.
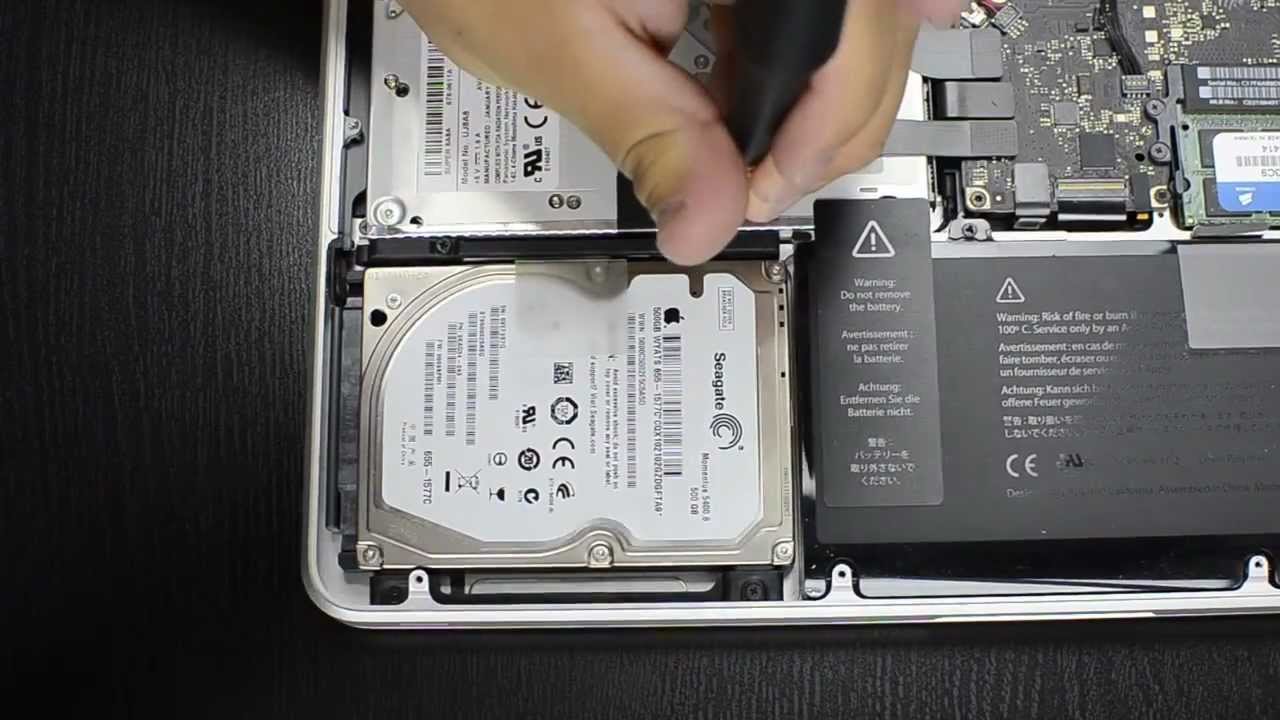
Step 7: Slide Out the Hard Drive
With the hard drive bracket removed, it’s time to slide out the hard drive from its current position within the MacBook. This step will allow you to easily access and replace the hard drive, or perform any necessary maintenance or upgrades.
- Gently slide the hard drive outwards: Hold the sides of the hard drive and carefully slide it outwards from its bay. Apply even pressure and make sure to support the hard drive to prevent any accidental drops.
- Take note of the orientation: As you slide out the hard drive, pay attention to how it’s oriented and positioned within the MacBook. This will be crucial when inserting the new hard drive or reattaching the existing one.
- Make room for the hard drive to slide out: Depending on the model of your MacBook, you may need to move any cables or components that obstruct the path of the hard drive. Ensure there’s enough space for the hard drive to slide out smoothly.
It’s essential to exercise caution and avoid putting excessive force on the hard drive or any surrounding components. Make sure to handle the hard drive with care to prevent any accidental damage.
With the hard drive successfully slid out from the MacBook, you can now proceed to the next step of inserting the new hard drive or reassembling the existing one.
Step 8: Insert the New Hard Drive
After removing the old hard drive, it’s time to insert the new hard drive into your MacBook. Whether you’re upgrading to a larger storage capacity or replacing a faulty hard drive, this step will help ensure your MacBook is equipped with the necessary storage for optimal performance.
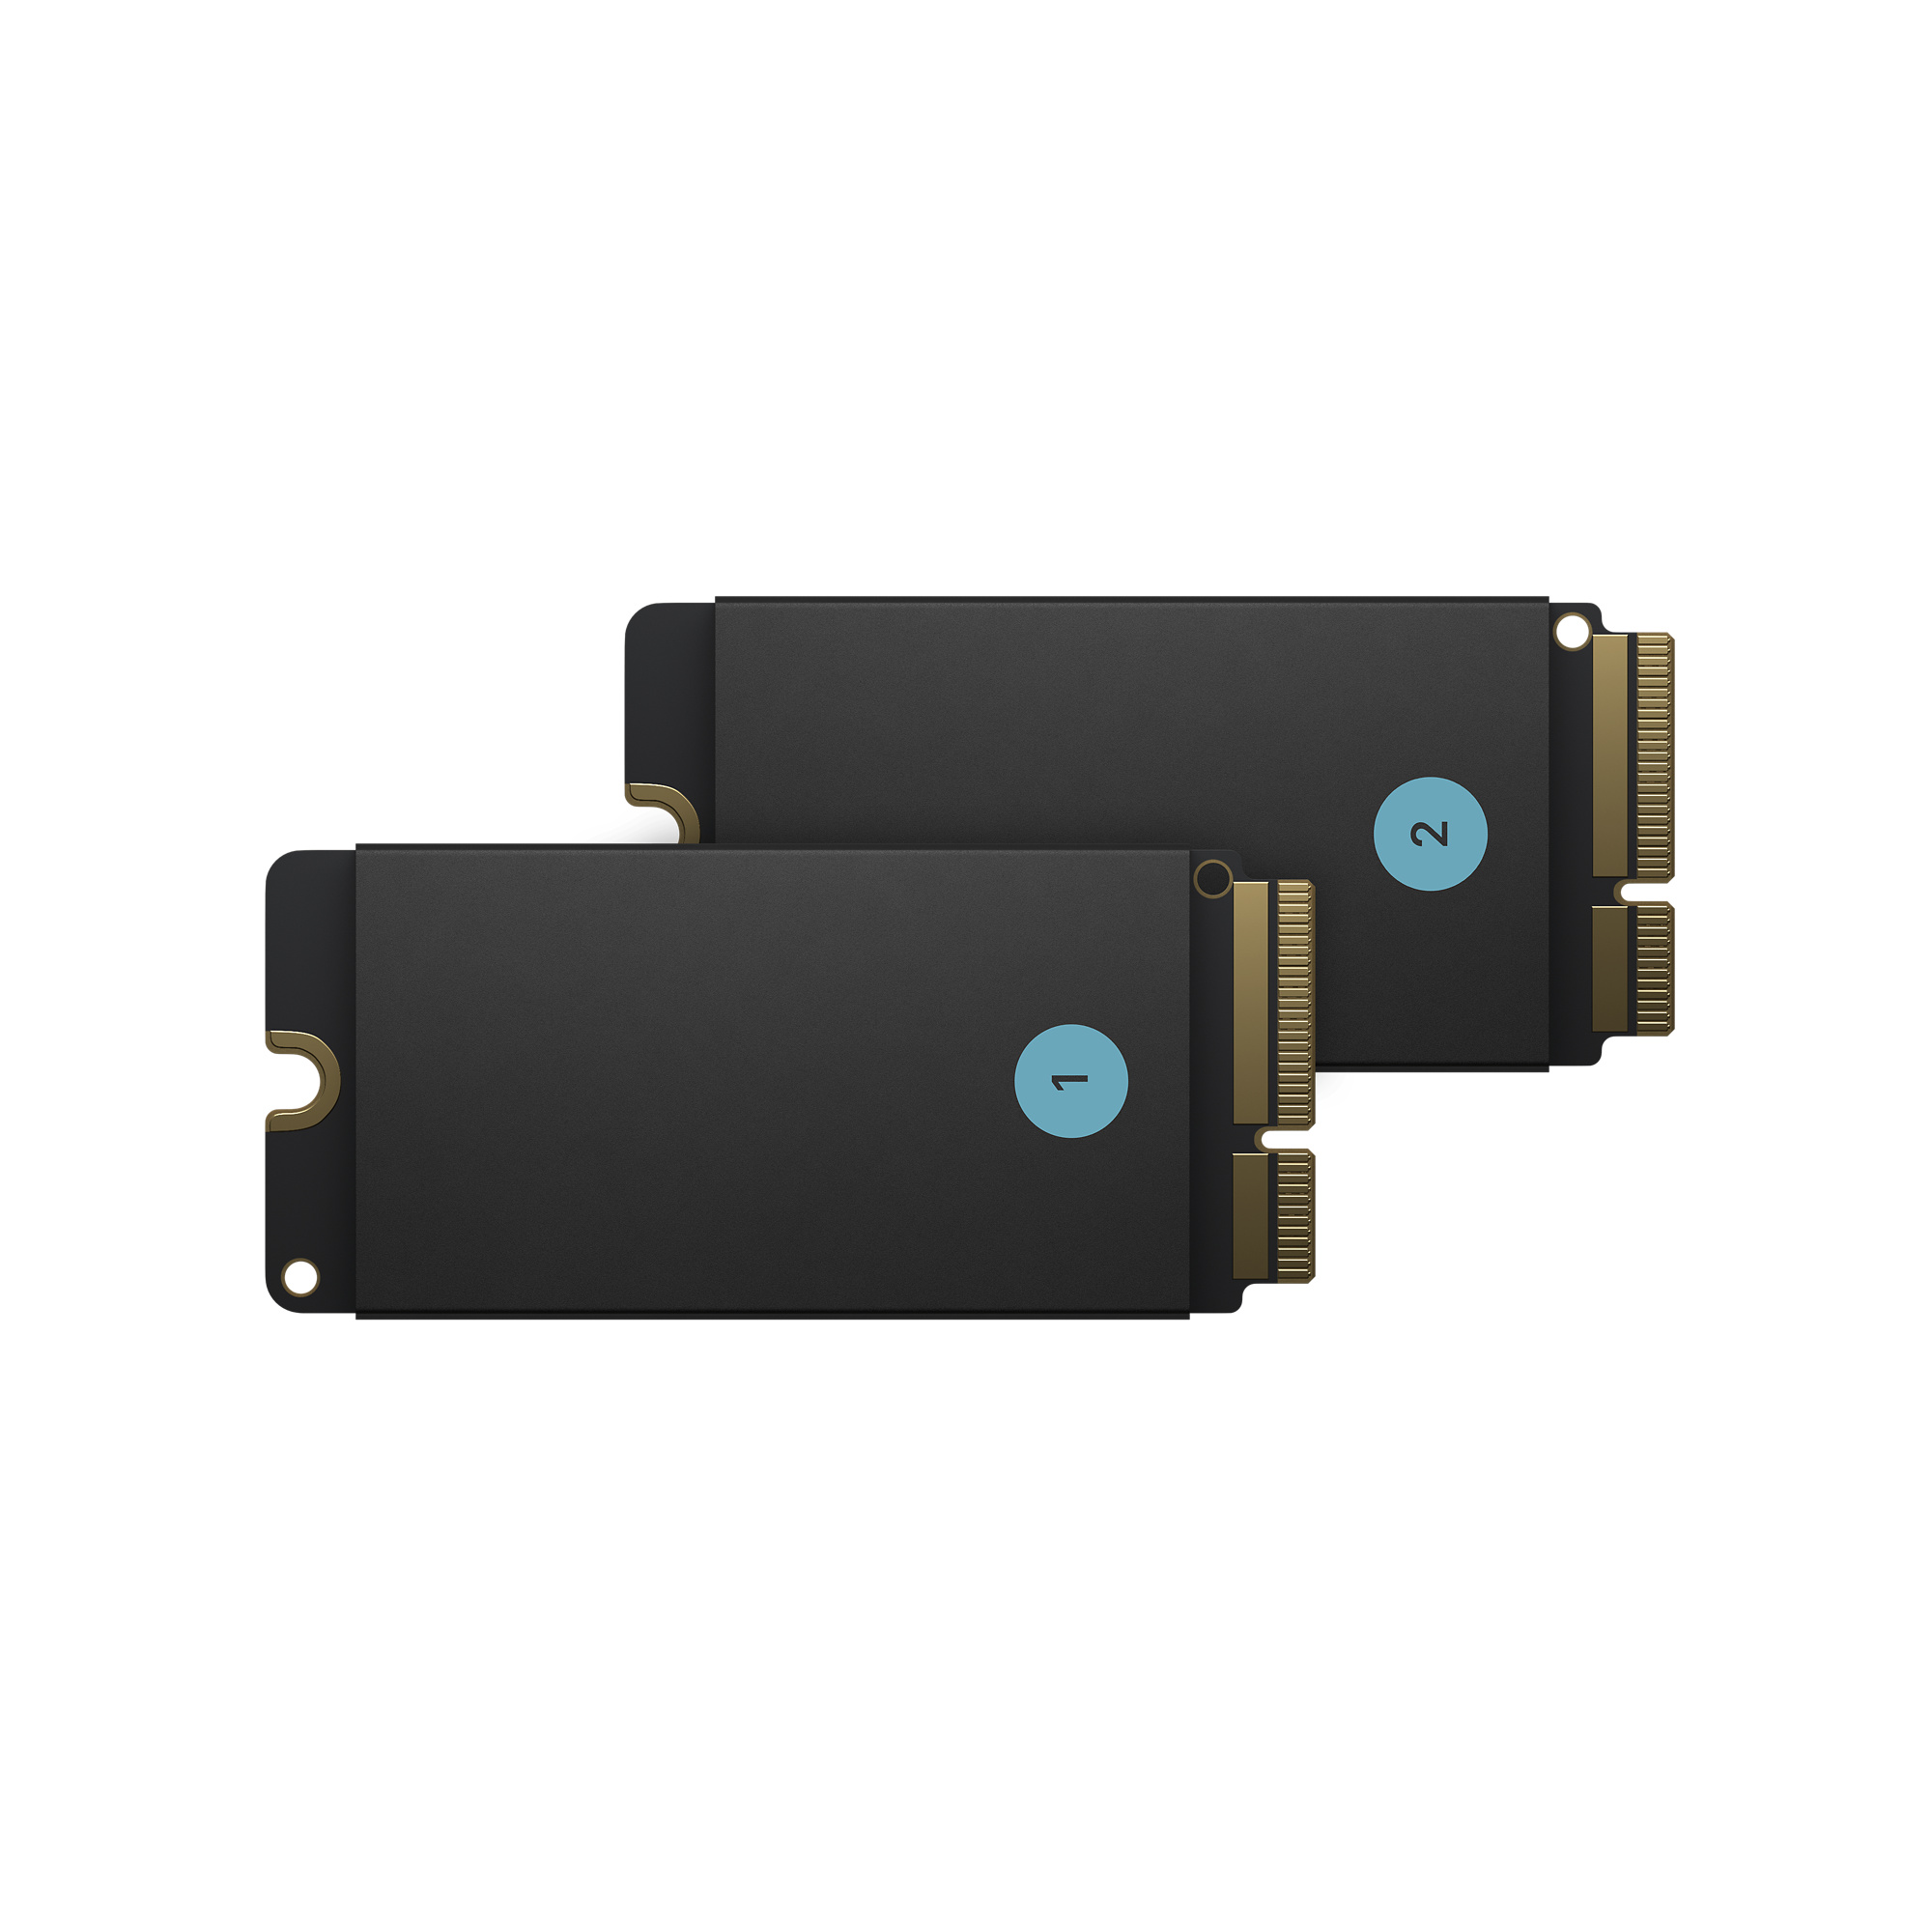
- Prepare the new hard drive: Before inserting the new hard drive, ensure it is compatible with your MacBook model and meets the necessary specifications. Remove any packaging or protective covers from the hard drive.
- Align the new hard drive: Orient the new hard drive correctly by aligning it with the slot or bay in your MacBook. Make sure the connectors on the hard drive match the corresponding connectors in the MacBook.
- Gently slide the new hard drive in: Carefully slide the new hard drive into its designated slot or bay, ensuring it fits snugly. Apply even pressure and avoid using excessive force to prevent any damage to the hard drive or surrounding components.
- Verify the connection: Once the new hard drive is inserted, double-check that the connectors are fully and securely connected. Ensure the hard drive is firmly in place and properly seated.
It’s crucial to handle the new hard drive with care, avoiding any sudden movements or impacts. Treat the hardware delicately to prevent any potential damage during the insertion process.
With the new hard drive successfully inserted and connected, you can proceed to the next step of reattaching the hard drive bracket to secure the hard drive in place.
Step 9: Reattach the Hard Drive Bracket
Now that you have inserted the new hard drive into your MacBook, it’s time to reattach the hard drive bracket. The bracket helps secure the hard drive in place, ensuring it remains stable and protected within the MacBook.
- Retrieve the hard drive bracket: Locate the hard drive bracket that you removed earlier during the disassembly process. Ensure it is clean and free from any debris or damage.
- Position the hard drive bracket: Align the hard drive bracket over the new hard drive, ensuring it fits snugly onto the designated mounting points.
- Secure the bracket with screws: Using your small Phillips screwdriver, carefully insert and tighten the screws that secure the hard drive bracket to the MacBook’s frame. Be cautious not to overtighten the screws, as it may damage the bracket or the MacBook.
- Double-check the alignment and stability: Verify that the hard drive and bracket are properly aligned and securely fastened. Gently wiggle the hard drive to ensure it does not move or come loose.
Take your time during this step to ensure the hard drive is properly secured. Failing to reattach the hard drive bracket correctly may result in instability or damage to the hard drive and other components of your MacBook.
With the hard drive bracket reattached, you’re ready to move on to the next step of reconnecting the hard drive cable.
Step 10: Reconnect the Hard Drive Cable
After securely attaching the hard drive bracket, the next step is to reconnect the hard drive cable. This step ensures that the hard drive is properly connected to the logic board of your MacBook, enabling it to function correctly.
- Locate the hard drive cable connector: Find the connector on the hard drive where the cable needs to be attached. It is usually a thin, flat ribbon cable with a small connector.
- Align the cable with the connector: Orient the hard drive cable correctly, matching the connector pins with the corresponding slots on the hard drive. Ensure it is aligned properly to ensure a secure connection.
- Gently insert the cable connector: With the alignment in place, gently insert the cable connector into the corresponding slot on the hard drive. Apply a slight amount of pressure until the connector is fully seated.
- Check the connection: After connecting the hard drive cable, double-check to ensure it is securely attached. Confirm that the connector is fully inserted and properly aligned with the hard drive.
Take extra care when handling the hard drive cable to prevent any damage. Avoid pulling or tugging on the cable excessively, and make sure to connect it with a steady hand.
With the hard drive cable successfully reconnected, you are ready to proceed to the next step of replacing the MacBook base cover.
Step 11: Replace the MacBook Base Cover
With the hard drive cable reconnected, it’s time to replace the MacBook base cover. The base cover helps protect the internal components of your MacBook and provides a sleek and unified appearance.
- Align the base cover: Take the MacBook base cover and align it with the bottom of your MacBook. Make sure it sits flush with the edges and the screw holes align properly.
- Secure the screws: Using your small Phillips screwdriver, start screwing in the screws that hold the base cover in place. Start with one screw and continue until all the screws are securely fastened.
- Tighten the screws evenly: As you screw in the screws, make sure to tighten them evenly to avoid any warping or misalignment of the base cover. Apply gentle pressure and avoid overtightening the screws.
It’s important to note that the base cover should fit snugly and securely without any gaps or loose sections. Ensure that all the screws are properly tightened but avoid applying excessive force.
With the base cover successfully replaced, your MacBook should now be fully reassembled. Congratulations! You have completed the process of opening the hard disk drive in your MacBook. Now, you can proceed to reconnect the power source and start using your MacBook again.
Step 12: Reconnect the Power Source
Now that you’ve successfully replaced the MacBook base cover, the final step is to reconnect the power source. This will allow your MacBook to receive power and function properly.
- Retrieve the power adapter: Locate the power adapter that you disconnected earlier during the disassembly process.
- Plug in the power adapter: Connect the power adapter to an electrical outlet and plug it into the MacBook’s charging port.
- Check the charging indicator: Once the power adapter is connected, check for the charging indicator on your MacBook. It should indicate that your MacBook is receiving power.
Ensuring a proper power connection is essential for the functioning of your MacBook. Make sure the power adapter is securely connected and that there are no loose connections.
With the power source successfully reconnected, you can now power on your MacBook and verify that everything is working as expected. If there are any issues, double-check the connections and review the steps you followed during the process.
Congratulations! You have completed the entire process of opening the hard disk drive in your MacBook and replacing it with a new one. By following these steps carefully and patiently, you have gained the ability to upgrade or maintain your MacBook’s storage capacity.
Remember to properly dispose of any old or faulty hard drives and keep your MacBook in good condition to ensure optimal performance in the future.
Conclusion
Opening the hard disk drive of your MacBook may seem like a daunting task, but with the right tools and careful execution, it can be successfully accomplished. By following the step-by-step guide outlined in this article, you can gain access to the hard drive for various purposes, such as upgrading to a larger storage capacity or replacing a faulty drive.
Throughout the process, it’s crucial to handle your MacBook and its components with care to avoid any accidental damage. Take your time, be patient, and ensure proper alignment and connection of cables and screws. Remember to back up your data, shut down the MacBook, and disconnect all cables and power sources before beginning the disassembly process.
Opening the hard disk drive of your MacBook grants you the ability to maintain and upgrade your storage capacity, which can greatly improve the performance and functionality of your device. However, it’s important to note that opening your MacBook may void your warranty, so exercise caution and consider seeking professional assistance if your MacBook is still covered by warranty.
By successfully completing the steps outlined in this guide, you can open the hard disk drive of your MacBook and perform necessary maintenance or upgrades. The ability to replace or upgrade your hard drive gives you more flexibility in managing your data and ensures your MacBook continues to meet your storage needs.
Remember to always follow proper safety precautions, such as wearing an anti-static wrist strap and working in a clean and well-lit workspace. If you encounter any difficulties or have concerns, it’s recommended to consult official documentation or seek assistance from authorized service providers.
With the knowledge gained from this guide, you can confidently open the hard disk drive of your MacBook and embark on a journey of expanding your storage capacity or maintaining your device. Enjoy the enhanced performance and functionality that comes with a properly functioning and upgraded hard drive!