Introduction
Have you ever wanted to expand your gaming experience by moving your game to another monitor? Whether you’re seeking a larger display, better visual immersion, or multitasking capabilities, having the ability to play games on a different monitor can greatly enhance your gaming setup. In this guide, we will walk you through the steps to successfully move your game to another monitor.
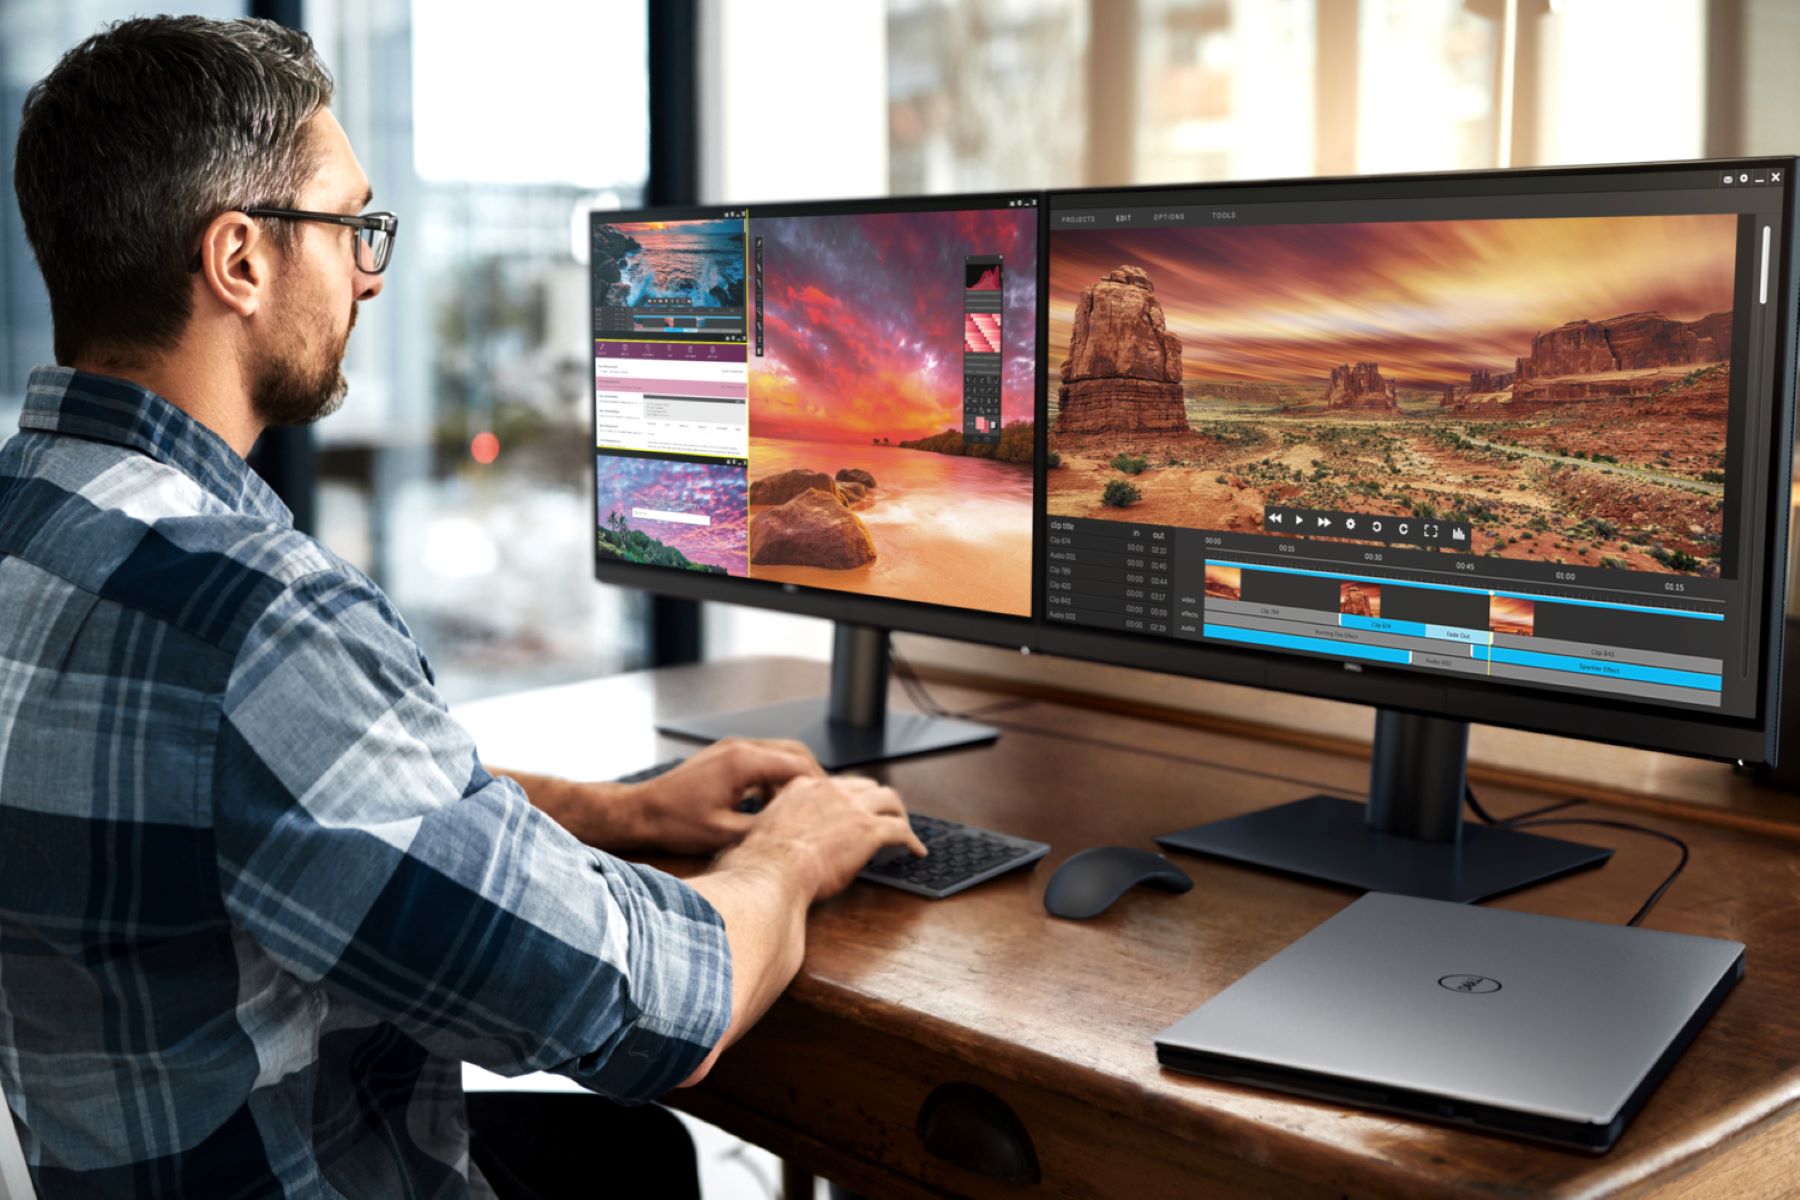
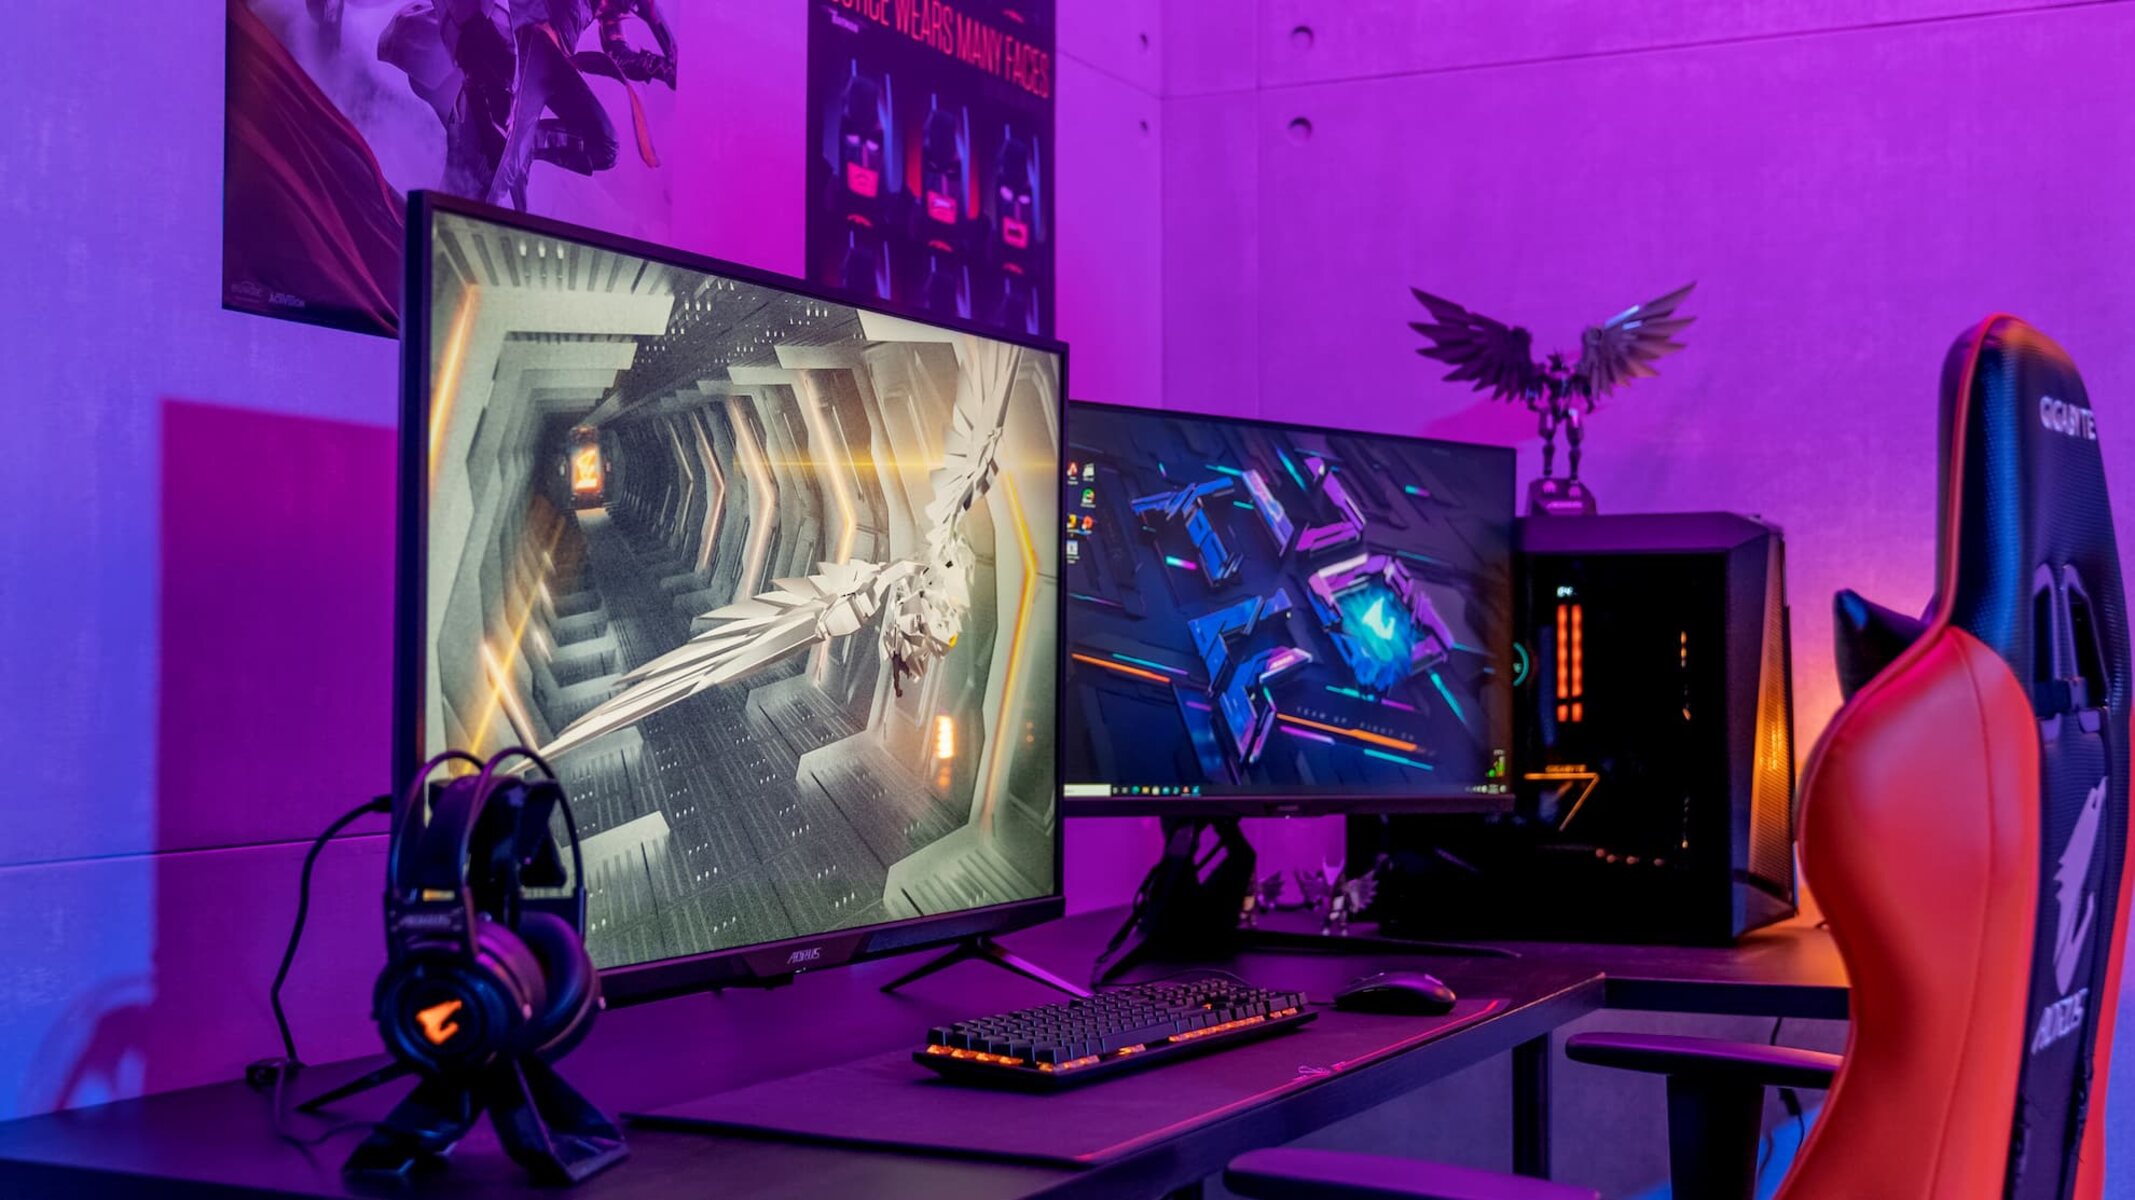
With the advancements in technology, multi-monitor setups have become increasingly popular among gamers. By using multiple monitors, you can expand your gaming experience beyond a single screen, allowing for a more immersive and seamless gameplay.
However, shifting a game from one monitor to another can sometimes be a daunting task, especially for those who are new to the concept. But fear not, as we have got you covered! In this article, we will provide you with a step-by-step guide on how to move your game to another monitor, ensuring that you can enjoy your gaming sessions to the fullest.
Before we dive into the specifics, it is important to note that the process of moving a game to another monitor may vary depending on your operating system and the game you are playing. Therefore, it is recommended to read through the entire guide to ensure that you follow the steps that are relevant to your particular setup.
Now, without further ado, let’s get started with the steps to move your game to another monitor and unlock a whole new world of gaming possibilities!
Step 1: Check your monitor settings
The first step in moving your game to another monitor is to ensure that your monitor settings are configured correctly. This step is crucial as it allows your computer to recognize and utilize the additional display effectively.
To begin, connect your second monitor to your computer using the appropriate cables (such as HDMI, VGA, or DisplayPort). Once connected, make sure both monitors are turned on and powered up.
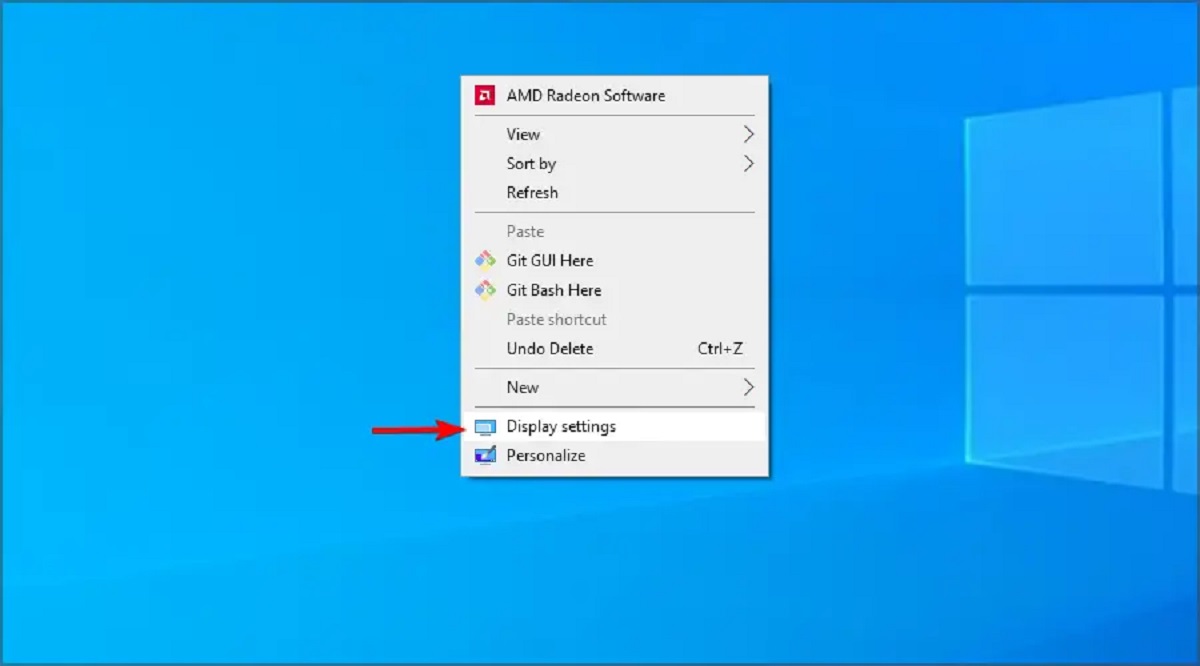
Next, access your computer’s display settings. On Windows, you can right-click on the desktop and select “Display settings” from the context menu. On macOS, navigate to “System Preferences” and click on “Displays.”
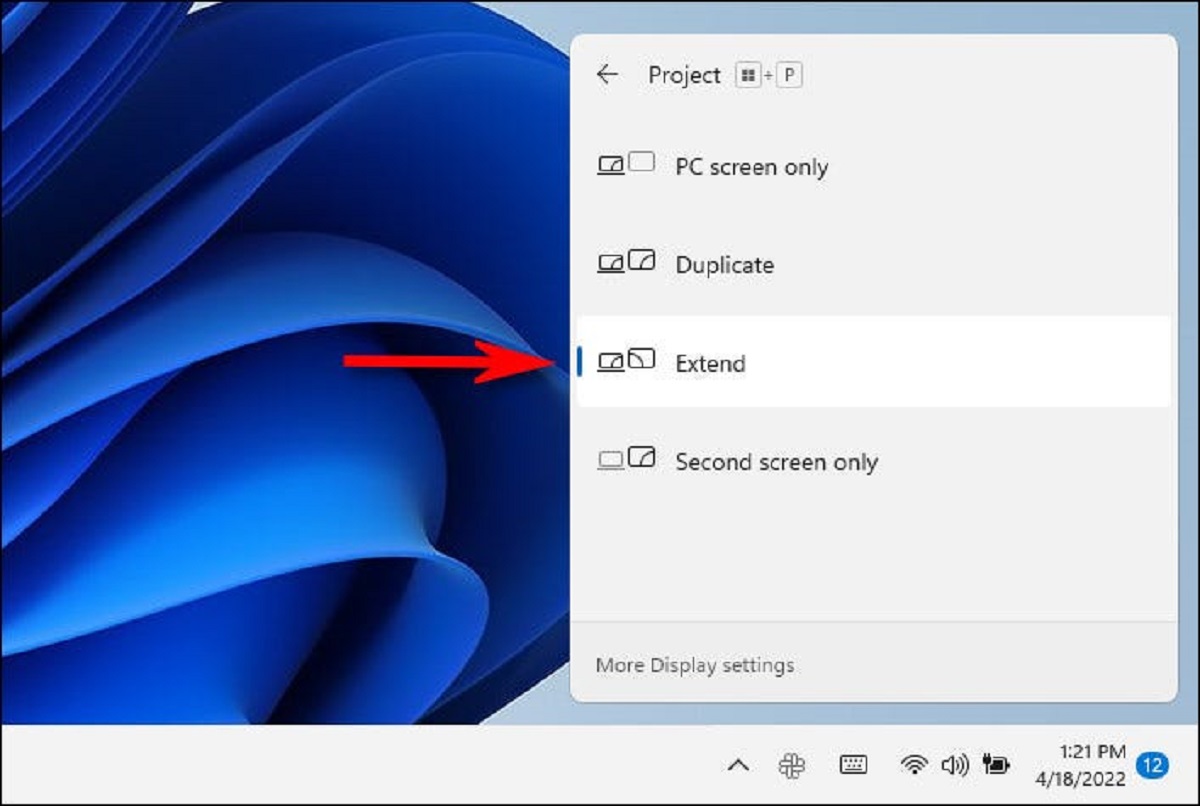
In the display settings, you should see an option labeled “Multiple displays” or “Multiple monitors.” Here, you can configure how your computer utilizes the additional monitor. You can choose to extend your desktop, duplicate the display, or use it as the primary display.
Select the desired option based on your preferences. If you want to have the game displayed solely on the second monitor, choose the “Extend” option. This will allow the game to run on the second monitor while keeping your desktop and other applications accessible on the primary monitor.
Additionally, check the display resolution of both monitors to ensure they are set correctly. It is important to match the resolution of your game with the native resolution of the monitor you wish to use. This will help prevent any stretched or distorted graphics.
After adjusting the settings, click “Apply” or “OK” to save the changes. Your computer will then configure the monitors accordingly.
Now that you have checked and configured your monitor settings, you are ready to move on to the next step. In the following section, we will discuss how to adjust the game resolution to match the display settings of your second monitor.
Step 2: Adjust the game resolution
Once you have configured your monitor settings, the next step is to adjust the game resolution to match the display settings of your second monitor. This step is crucial to ensure that the game is displayed correctly and optimally on the new monitor.
To begin, launch the game you want to move to the second monitor. Once the game is running, navigate to the settings or options menu within the game. Look for a section related to display or graphics settings.
Within the display or graphics settings, you should find an option to adjust the game resolution. The available resolution options may vary depending on the game, but they typically include common resolutions such as 1920×1080 (Full HD), 2560×1440 (WQHD), or 3840×2160 (4K Ultra HD).
Select the resolution that matches the native resolution of your second monitor. This ensures that the game will be displayed in its intended aspect ratio and without any distortion. If the resolution you desire is not available, you may need to check your graphics card settings or update your drivers to enable additional resolutions.
Once you have selected the appropriate resolution, save the changes and exit the settings menu. The game will now be running at the desired resolution on your second monitor.
It’s worth noting that adjusting the game resolution may impact performance, especially if you are running the game on a lower-end system. If you experience any performance issues or reduced frame rates, you can try lowering the game resolution or adjusting other graphics settings within the game to achieve a better balance between performance and visual quality.
With the game resolution adjusted, you have successfully completed the second step in moving your game to another monitor. Now, in the next section, we will explore how to use the built-in display settings in your operating system to further customize the arrangement and appearance of the game on your second monitor.
Step 3: Use Display Settings in Windows
Windows provides built-in display settings that allow you to further customize the arrangement and appearance of your game on the second monitor. These settings can help you fine-tune the gaming experience to your liking.
To access the display settings in Windows, right-click on the desktop and select “Display settings” from the context menu. This will open the display settings menu.
In the display settings, you will see a visual representation of your monitors. You can identify the primary monitor by a number “1” and the secondary monitor by a number “2”.
Click on the number “2” monitor and scroll down to the section labeled “Multiple displays.” Here, you can choose how you want the game to be displayed on the second monitor.
If you want the game to occupy the entire screen of the second monitor, select the “Show only on 2” option. This will make the game exclusive to the second monitor, while the primary monitor remains free for other tasks and applications.
If you want the game to span across both the primary and second monitor, select the “Extend these displays” option. This will create a single virtual desktop that seamlessly spans both monitors, allowing you to move your game window freely between them.
Furthermore, you can adjust the orientation of the monitors if needed. By clicking on the drop-down menu labeled “Orientation,” you can choose whether the second monitor is positioned to the left, right, above, or below the primary monitor.
Additionally, Windows allows you to specify which monitor is the main display. This is the monitor where your desktop icons and taskbar will appear. To set the primary monitor, click on the monitor number and check the box labeled “Make this my main display.”
Once you have made the desired adjustments, click “Apply” or “OK” to save the changes. Windows will reconfigure the display settings accordingly.
With the display settings in Windows adjusted to your preference, you have completed the third step in moving your game to another monitor. In the next section, we will explore the use of third-party software that can offer additional customization options and features.
Step 4: Utilize third-party software
If you’re looking for more advanced customization options or additional features to enhance your multi-monitor gaming experience, utilizing third-party software can be a great solution. There are several software options available that offer comprehensive control over multiple displays and gaming setups.
One popular third-party software is DisplayFusion. DisplayFusion provides a wide range of features, including customizable monitor profiles, taskbar management, and window snapping. With DisplayFusion, you can create specific profiles for each game, allowing you to automatically adjust monitor settings, resolution, and other display options when launching a game.
Another useful software is Actual Multiple Monitors. This software offers various features for managing multiple monitors, such as individual taskbars, desktop profiles, and hotkeys. Actual Multiple Monitors also provides additional gaming-oriented features like the ability to lock the mouse cursor to a specific monitor or prevent accidentally minimizing the game when clicking on the second monitor.
Ultramon is another popular choice among gamers using multiple monitors. It offers features such as multi-monitor taskbars, customizable shortcuts, and quick settings for moving windows between monitors. Ultramon also supports hotkeys, allowing you to quickly adjust display settings or switch between different multi-monitor configurations on the fly.
When selecting third-party software, make sure to research and choose the one that best suits your needs and is compatible with your operating system. Additionally, consider reading user reviews and forums to get insight into the software’s performance and compatibility with your specific hardware and games.
After installing the third-party software, familiarize yourself with its features and customization options. Most software will provide an intuitive interface where you can configure display settings, manage taskbars, and create profiles specific to each game you play.
Remember to consult the software’s documentation or online resources for detailed instructions on how to set up and configure the software for optimal performance.
By utilizing third-party software, you can take your multi-monitor gaming experience to the next level, enjoying advanced customization options and features not available with standard display settings.
Now that you have learned about using third-party software to enhance your multi-monitor gaming experience, it’s time to move on to the next step. In the following section, we will discuss the importance of ensuring game compatibility with a multi-monitor setup.
Step 5: Ensure game compatibility with multi-monitor setup
Before fully diving into gaming on your multi-monitor setup, it is crucial to ensure that your games are compatible with this type of configuration. While most modern games support multi-monitor setups, some older or less common games may not provide native support. In this step, we will discuss how to check and ensure game compatibility.
The first step is to review the game’s system requirements and official documentation. Look for information regarding multiple monitors or display configurations. Game developers often provide instructions or recommendations for setting up the game on multiple monitors.
If the game natively supports multi-monitor setups, you can proceed with configuring the game settings. However, if the game does not have native support, there are several third-party applications that can help overcome this limitation.
One popular option is Dual Monitor Tools, which provides various features to enhance multi-monitor functionality, including the ability to force the game into full-screen mode on a specific monitor or adjust window placement.
Another option is Borderless Gaming, which allows you to run games in borderless windowed mode, making them compatible with multiple monitors. This tool creates a borderless window around the game, enabling you to move it freely between monitors without impacting performance.
Additionally, some graphics card control panels, such as NVIDIA Control Panel or AMD Radeon Settings, offer options to force games into spanning multiple monitors, even if they don’t have native support. These options can be found under the display or multi-display settings within the control panel.
However, keep in mind that forcing a game to span across multiple monitors may not always provide an optimal experience. Some games may have user interface elements or cutscenes that are not designed to work with multi-monitor setups, resulting in stretched or distorted elements.
Therefore, it is always recommended to test the game in your multi-monitor setup after making the necessary adjustments. Ensure that the game runs smoothly, displays correctly, and that you’re satisfied with the overall experience.
If you encounter issues or limitations with a specific game, it is beneficial to consult game-specific forums or communities. Other players may have already found workarounds or solutions to make the game compatible with multi-monitor setups.
By ensuring game compatibility with your multi-monitor setup, you can enjoy a seamless and immersive gaming experience across multiple displays. With this step completed, we are now ready to discuss how to manage game launch options in the next section.
Step 6: Manage game launch options
Managing game launch options allows you to further customize how a game runs on your multi-monitor setup. By adjusting launch options, you can optimize performance, resolution, and other display settings specific to each game.
Launch options can be accessed through the game’s properties or launch settings within the respective gaming platform, such as Steam, Epic Games Store, or GOG Galaxy.
Start by right-clicking on the game in your gaming platform’s library and selecting “Properties” or “Settings.” Look for a tab or section related to launch options or command-line arguments.
Within the launch options, there are various commands you can use to modify the game’s behavior. Some common launch options for multi-monitor setups include:
- -windowed: Forces the game to launch in windowed mode instead of full-screen.
- -w [width] -h [height]: Sets the game’s resolution to the specified width and height.
- -adapter [number]: Specifies the display adapter or GPU to use for rendering the game.
- -startwindowed: Similar to -windowed, but also launches the game in the same position and size as the previous launch.
These are just a few examples, and the availability and functionality of launch options can vary depending on the game.
When using launch options, it’s essential to refer to the game’s documentation or consult game-specific forums for the correct syntax and available options for that particular game.
Additionally, some gaming platforms offer launchers or launch managers that allow you to set up specific configurations for each game. These configurations can include display settings, resolution, and even specific hardware profiles.
By managing game launch options, you can fine-tune each game’s behavior to your liking on your multi-monitor setup. This step helps ensure that each game performs optimally, providing an immersive gaming experience.
Now that you have learned how to manage game launch options, we are ready to proceed to the final step. In the next section, we will discuss testing and fine-tuning your settings for the best gaming experience.
Step 7: Test and fine-tune the settings
After taking all the necessary steps to move your game to another monitor, the final step is to test and fine-tune the settings to ensure the best gaming experience possible.
Start by launching your game on the second monitor and observe how it performs. Pay attention to the graphics quality, frame rates, and overall smoothness of gameplay.
If you encounter any issues, such as graphical glitches, performance drops, or compatibility problems, consider adjusting specific settings to optimize the game’s performance on your multi-monitor setup.
First, try adjusting the graphics settings within the game itself. Lowering graphical settings, such as texture quality, anti-aliasing, or shadow details, can help improve performance without sacrificing too much visual fidelity.
Additionally, consider adjusting the game’s resolution. Lowering the resolution can significantly improve performance, especially if you are running graphics-intensive games on a lower-end system.
Experiment with different display options, such as windowed mode, fullscreen, or borderless windowed mode, to find the setting that works best for you. Different games may perform better or have better compatibility with different display options.
During this testing phase, it’s also a good idea to check for any potential issues with multi-monitor support in specific game scenes or menus. Some games may have user interfaces or cutscenes that do not scale correctly or stretch across multiple monitors. If you encounter any such issues, consider adjusting the game’s settings or consulting with the game’s community for possible workarounds.
Once you have made adjustments, play the game for an extended period to thoroughly test its performance and compatibility on your multi-monitor setup. Take note of any improvements or areas that may still need fine-tuning.
Remember, every game and multi-monitor setup is unique, so your ideal settings may differ from others. Take the time to experiment and find the sweet spot that provides the best balance between visuals, performance, and compatibility for your specific games.
By testing and fine-tuning the settings, you can ensure that your multi-monitor gaming experience is optimized for each game, providing a seamless and immersive environment across all displays.
With this final step completed, you have successfully learned how to move your game to another monitor and optimize it for an enhanced gaming experience. Now, go ahead and enjoy the benefits of gaming on a multi-monitor setup!
Conclusion
Moving your game to another monitor can greatly enhance your gaming experience, providing a larger display, improved immersion, and increased multitasking capabilities. In this guide, we have walked you through the steps to successfully move your game to another monitor, allowing you to fully enjoy your gaming sessions.
We began by checking and configuring the monitor settings, ensuring that both monitors were recognized and set up correctly. Then, we adjusted the game resolution to match the display settings of the second monitor, preventing any stretched or distorted graphics.
We then explored the use of built-in display settings in Windows, allowing for further customization and arrangement of the game on the second monitor. Additionally, we discussed the benefits of utilizing third-party software to enhance multi-monitor functionality and provide additional customization options.
Ensuring game compatibility with a multi-monitor setup was our next focus, as not all games have native support. We discussed various methods to overcome compatibility limitations, including the use of third-party applications and graphics card control panel settings.
Managing game launch options allowed us to optimize each game’s behavior on the multi-monitor setup, adjusting settings specific to each game’s requirements. Finally, we emphasized the importance of testing and fine-tuning the settings to achieve the best gaming experience.
By following these steps and taking the time to customize and optimize your multi-monitor gaming setup, you can truly unlock the full potential of your games and enjoy an immersive and immersive gaming experience.