Introduction
Upgrading your computer’s operating system to Windows 7 was a great decision. However, as technology progresses, it’s time to take another leap forward and migrate your Windows 7 installation to a solid state drive (SSD). This upgrade will significantly boost your system’s performance, allowing for faster boot times, quicker application launches, and improved overall responsiveness.
But how do you go about migrating your Windows 7 installation to an SSD? Don’t worry, we’ve got you covered. In this article, we’ll guide you through the step-by-step process to ensure a seamless and successful migration.
Before we start, keep in mind that migrating your Windows 7 installation to an SSD requires careful planning and preparation. It’s important to back up your files, choose the right SSD, create a system image, and follow the necessary steps to clone the image to the SSD. Additionally, we’ll discuss how to optimize your SSD for optimal performance.
By the end of this article, you’ll have a speedy and efficient Windows 7 installation running on your brand new solid state drive. So, let’s get started with the preparations.
Preparations
Before you embark on the process of migrating your Windows 7 installation to a solid state drive (SSD), there are a few important preparatory steps that you need to follow. These steps will help ensure a smooth and successful migration, allowing you to make the most of your new SSD.
Step 1: Backup Your Files: Before making any changes to your system, it’s crucial to back up all your important files and data. This will help safeguard your information and provide a restore point in case anything goes wrong during the migration process. You can use an external hard drive, cloud storage, or any other backup method of your choice.
Step 2: Choose the Right SSD: Selecting the right SSD is crucial for optimal performance. Consider factors such as storage capacity, read and write speeds, and reliability. Look for SSDs from trusted manufacturers with good reviews and warranties. It’s also recommended to choose an SSD with enough storage capacity to accommodate your Windows 7 installation and other essential programs.
Step 3: Create a System Image: Creating a system image is an essential step before migrating to an SSD. This image will capture your entire Windows 7 installation, including the operating system, applications, and settings. By creating a system image, you’ll have a comprehensive backup that can be easily restored onto the new SSD.
Step 4: Connect the SSD to Your Computer: Once you’ve chosen the SSD and created a system image, it’s time to physically connect the SSD to your computer. Depending on your system’s specifications, you can connect the SSD internally via SATA cables or externally using a USB enclosure. Make sure to power off your computer and follow the manufacturer’s instructions for safe installation.
Step 5: Clone the System Image to the SSD: After connecting the SSD, it’s time to clone the system image onto it. There are several software options available that can help with this process, such as Acronis True Image, Macrium Reflect, or Clonezilla. Follow the instructions provided by the software to clone the system image onto the SSD. This process may take some time, so be patient.
By following these preparatory steps, you’ll be well-prepared for the migration process. In the next sections, we’ll delve into the specific steps required to successfully migrate Windows 7 to your newly installed solid state drive. Stay tuned!
Step 1: Backup Your Files
The first and most crucial step before migrating your Windows 7 installation to a solid state drive (SSD) is to create a backup of all your important files. This ensures that you have a copy of your data in case anything goes wrong during the migration process.
There are several methods to back up your files, depending on your preferences and available resources:
External Hard Drive: One of the easiest and most common methods is to use an external hard drive. Simply connect the external hard drive to your computer and copy all the files you want to back up onto it. Make sure to organize your files and create separate folders if needed to keep everything organized.
Cloud Storage: Another convenient option is to utilize cloud storage services such as Google Drive, Dropbox, or OneDrive. These services provide you with a certain amount of free storage space, and you can access your files from any device with an internet connection. Simply upload your important files and ensure they are synced before proceeding with the migration.
Network Attached Storage (NAS): If you have a network attached storage device, you can use it to back up your files. NAS devices provide centralized storage and can be accessed by multiple devices connected to your local network. Copy your files to the NAS device and verify that they are safely stored before moving on.
Remember to back up not just your personal files like documents, photos, and videos, but also any important settings or configurations specific to your system or applications. This includes email account settings, browser bookmarks, and any customizations you have made to your Windows 7 installation.
Keep in mind that the backup process may take some time, especially if you have a large amount of data. It’s essential to be patient and ensure that all your files are successfully backed up before proceeding to the next step.
Once you have completed the backup process and double-checked that all your files are safely stored, you can proceed with confidence to the next steps of migrating your Windows 7 installation to your new SSD.
Step 2: Choose the Right SSD
Choosing the right solid state drive (SSD) is crucial for a successful migration of your Windows 7 installation. With numerous options available on the market, it’s important to consider a few key factors to ensure optimal performance and compatibility.
Storage Capacity: The first thing to consider is the storage capacity of the SSD. Assess your storage needs and choose an SSD that offers enough space to accommodate not only your Windows 7 operating system but also other essential programs and files. It’s advisable to go for an SSD with a capacity larger than the current used space on your existing hard drive to avoid potential storage limitations.
Read and Write Speeds: SSDs are known for their lightning-fast read and write speeds, which significantly enhance the overall performance of your computer. Look for SSDs with high read and write speeds, as this will ensure faster boot times, quicker application launches, and improved system responsiveness.
Reliability and Endurance: Reliability is an essential consideration when choosing an SSD. Look for renowned manufacturers that have a reputation for producing reliable and durable SSDs. Additionally, pay attention to the endurance rating, which refers to the total amount of data that can be written to the SSD over its lifespan. Higher endurance ratings indicate a longer lifespan and better performance over time.
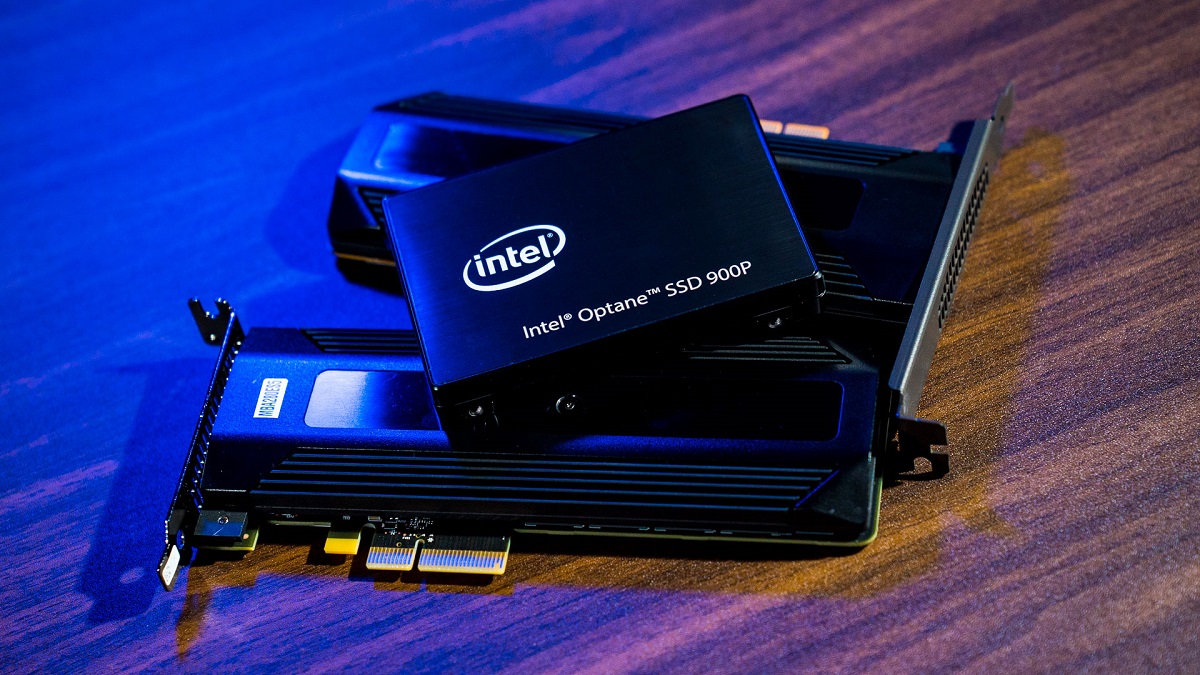
Form Factor and Interface: Consider the form factor and interface of the SSD to ensure compatibility with your computer. Most SSDs come in the standard 2.5-inch form factor, making them compatible with most laptops and desktop computers. Additionally, check the interface type (e.g., SATA, NVMe) and ensure that your computer supports the corresponding interface.
Price: While price is not the sole determining factor, it’s essential to consider your budget when choosing an SSD. SSD prices have significantly decreased in recent years, making them more affordable. However, higher-capacity and higher-performing SSDs may still come at a premium. Take into account your budget constraints while also prioritizing the performance and reliability of the SSD.
Research different SSD models, read reviews, and compare specifications to make an informed decision. Determine the SSD that best aligns with your specific requirements and budget. Once you’ve selected the right SSD, you can proceed confidently to the next steps of migrating your Windows 7 installation to your new solid state drive.
Step 3: Create a System Image
Creating a system image is a crucial step before migrating your Windows 7 installation to a solid state drive (SSD). A system image is a complete backup of your entire operating system, including your installed programs, system settings, and personal files. With a system image, you can easily restore your Windows 7 installation onto the new SSD, ensuring a seamless transition.
To create a system image, follow these steps:
1. Open the Backup and Restore Tool: Click on the Windows Start button, type “backup and restore” in the search bar, and select “Backup and Restore” from the search results.
2. Select “Create a System Image”: In the Backup and Restore tool, click on the “Create a System Image” option in the left pane. This will launch the System Image Backup wizard.
3. Choose the Backup Location: You will need an external storage device, such as an external hard drive or a set of DVDs, to store the system image. Connect the external storage device to your computer and choose it as the backup location when prompted by the wizard.
4. Select the Drives to Include in the Backup: The system image should include the drive where your Windows 7 installation is located, as well as the system reserved partition if it exists. Select the appropriate drives and click “Next”.
5. Start the Backup Process: Review the backup settings and click on the “Start Backup” button to begin the process. Depending on the size of your Windows 7 installation and the speed of your computer, the backup process may take some time. Be patient and let it complete.
Once the system image creation process is finished, you will have a copy of your Windows 7 installation saved as a system image. It’s important to keep this backup image in a safe place, ensuring that it is easily accessible when needed.
Having a system image provides a safety net in case anything goes wrong during the migration process. If any issues arise or if you encounter compatibility problems with the new SSD, you can restore your Windows 7 installation from the system image, reverting your system back to its previous state.
With the system image ready, you are now prepared to proceed to the next steps of connecting the SSD to your computer and cloning the system image onto the new solid state drive.
Step 4: Connect the SSD to Your Computer
With your system image backed up, it’s time to physically connect the solid state drive (SSD) to your computer. This step is crucial for preparing the SSD to receive the cloned Windows 7 installation.
Here’s how to connect the SSD to your computer:
1. Power Off Your Computer: Before connecting any hardware, it’s important to power off your computer properly. Shut down your computer through the Windows Start menu or by pressing the power button and selecting “Shutdown”. Wait for your computer to turn off completely.
2. Choose the Connection Method: Depending on your computer’s specifications and available ports, you have a few options for connecting the SSD:
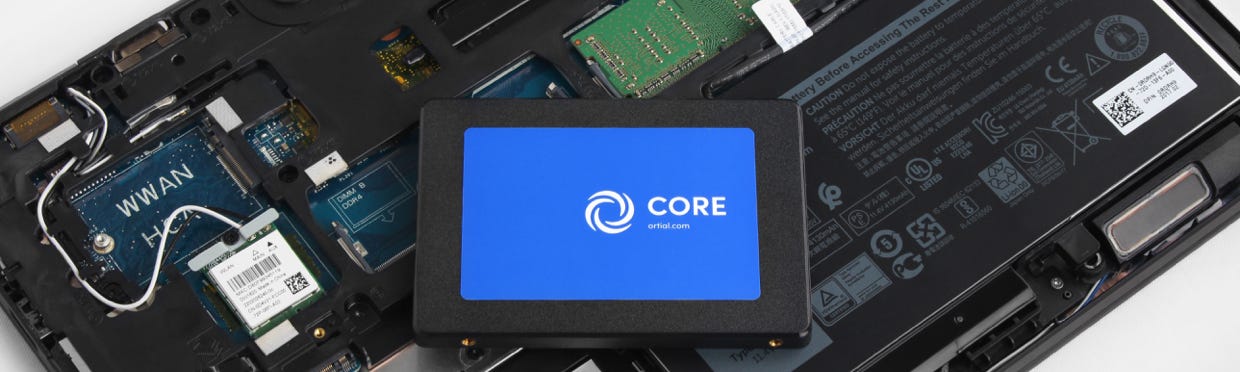
- Internal Connection: If your computer has available SATA ports and power cables, you can install the SSD internally. Open your computer case by removing the side panel and locate an empty 2.5-inch or 3.5-inch drive bay. Connect the SATA data cable and power cable to the SSD, ensuring a secure connection.
- External Connection: If you don’t have available internal drive bays or prefer a temporary solution, you can connect the SSD externally using a USB enclosure. Insert the SSD into the enclosure and connect it to your computer via a USB cable. Make sure the enclosure supports SSDs and has appropriate USB connectivity.
3. Securely Mount the SSD: If you’re installing the SSD internally, carefully place the SSD into an empty drive bay and secure it with screws or other mounting mechanisms provided by your computer case. Ensure the SSD is firmly but gently secured in place to prevent any movement or disconnection.
4. Close Up Your Computer: If you installed the SSD internally, reattach the side panel to your computer case and ensure it is securely closed. This will protect your computer’s components and ensure proper airflow for cooling.
Now that you have successfully connected the SSD to your computer, you are ready to proceed with the next step: cloning the system image onto the new SSD. This process will transfer your Windows 7 installation from the backup onto the SSD, ensuring a smooth transition to the faster and more efficient solid state drive.
Step 5: Clone the System Image to the SSD
Now that your solid state drive (SSD) is successfully connected to your computer, it’s time to clone the system image onto the SSD. Cloning the system image will transfer your entire Windows 7 installation, including your operating system, applications, and settings, onto the new SSD.
Follow these steps to clone the system image onto the SSD:
1. Launch Disk Cloning Software: There are several disk cloning software options available, such as Acronis True Image, Macrium Reflect, or Clonezilla. Choose the software that best suits your needs and launch the disk cloning program.
2. Select the Source Drive: In the cloning software, select the drive where your Windows 7 installation is currently located. This is usually your existing hard drive. Confirm that the selected drive contains the system image you created earlier.
3. Select the Target Drive: Choose the SSD as the target drive where you want to clone your Windows 7 system image. Make sure the SSD is correctly recognized by the cloning software and is displayed as the destination for the clone operation.
4. Configure Cloning Options: Some disk cloning software allows you to configure additional cloning options. For most users, the default settings should suffice. However, if you have specific requirements, such as resizing partitions or excluding certain files from the cloning process, make the necessary adjustments before initiating the cloning process.
5. Start the Cloning Process: Once all the settings are configured, start the cloning process by clicking the appropriate button in the disk cloning software. The software will then begin copying the system image from the source drive (existing hard drive) to the target drive (SSD). The process may take some time, depending on the size of your system image and the speed of your computer.
6. Verify and Confirm the Cloning Process: After the cloning process is completed, it’s essential to verify the cloned data on the SSD. Compare file sizes, ensure that all files and folders are present, and check that the overall capacity of the SSD matches your expectations. This step helps ensure that the cloning process was successful and that no data was lost or corrupted during the transfer.
Once you have verified the cloned system image on the SSD, you are almost ready to start using your Windows 7 installation on the new solid state drive. However, there are a few more steps to follow to ensure a smooth transition, including setting the SSD as the boot drive and updating drivers and software.
Step 6: Set the SSD as the Boot Drive
With the system image successfully cloned onto your solid state drive (SSD), it’s time to set the SSD as the boot drive. This step ensures that your computer starts up from the new SSD containing your Windows 7 installation, allowing you to enjoy faster boot times and improved overall performance.
Follow these steps to set the SSD as the boot drive:
1. Restart Your Computer: Save any open files and restart your computer. Depending on your system, you may need to press a specific key (e.g., F12, Del, Esc) to access the BIOS or boot menu.
2. Access the BIOS or Boot Menu: During the startup process, look for a message indicating the key or keys to access the BIOS or boot menu. This is typically displayed on your screen for a brief moment. Press the corresponding key to enter the BIOS or boot menu.
3. Locate the Boot Options: In the BIOS or boot menu, navigate to the boot options or boot priority settings. The process of locating these settings may vary depending on your computer’s manufacturer and model.
4. Set the SSD as the First Boot Device: In the boot options or boot priority settings, find the option to select the boot device order. Set the SSD as the first boot device by selecting it from the list of available devices. This ensures that your computer starts up from the SSD.
5. Save and Exit: Once you have set the SSD as the first boot device, save your changes and exit the BIOS or boot menu. You may be prompted to confirm your changes before exiting. Choose the option to save and exit.
Upon restarting your computer, it should boot directly from the SSD, allowing you to access your newly migrated Windows 7 installation. You’ll immediately notice faster boot times and a more responsive system overall.
If your computer does not boot from the SSD or if you encounter any issues, restart your computer and enter the BIOS or boot menu again. Verify that the SSD is correctly set as the first boot device. If necessary, consult your computer’s documentation or the manufacturer’s website for specific instructions on changing boot device settings.
Now that your SSD is set as the boot drive, you’re ready to move on to the next steps of the migration process, which include updating drivers and software to ensure compatibility and optimizing your SSD for optimal performance.
Step 7: Update Drivers and Software
Now that your Windows 7 installation is running smoothly on your new solid state drive (SSD), it’s important to update your drivers and software to ensure optimal performance and compatibility. Updating drivers and software ensures that your computer’s hardware and applications can take full advantage of the SSD’s capabilities and work seamlessly together.
Follow these steps to update your drivers and software:
1. Windows Update: Start by checking for Windows updates. Go to the Windows Start menu, type “Windows Update” in the search bar, and select “Windows Update Settings” from the search results. Click on the “Check for updates” button and install any available updates for your system. This includes important system updates as well as driver updates provided by Microsoft.
2. Manufacturer’s Support Website: Visit the website of your computer’s manufacturer to find and download the latest drivers for your hardware components. Pay special attention to drivers related to storage devices, such as SATA or NVMe drivers. Download and install the appropriate drivers for your specific hardware configuration from the manufacturer’s support website.
3. Application Updates: Check for updates for your commonly used applications and software. Most software developers provide regular updates to improve performance, fix bugs, and enhance compatibility. Visit the official websites of your applications and download the latest updates or use built-in update features within the applications themselves.
4. Firmware Updates: Check if there are any firmware updates available for your SSD specifically. SSD manufacturers often release firmware updates to address performance issues, improve reliability, and add new features. Visit the manufacturer’s website or use their software tools to check for firmware updates and follow the instructions provided to install them.
5. Restart Your Computer: After updating your drivers and software, it’s recommended to restart your computer. This ensures that all updates take effect and that your system is fully optimized to work with the new SSD.
Updating your drivers and software is an essential step to ensure a smooth and efficient experience with your Windows 7 installation on the SSD. It helps prevent compatibility issues, improves performance, and ensures that your computer runs at its best.
With your drivers and software up to date, you can now move on to the final step: optimizing your SSD for optimal performance. This step will further enhance the speed and responsiveness of your Windows 7 installation on the solid state drive.
Step 8: Optimize your SSD
Once you have successfully migrated your Windows 7 installation to a solid state drive (SSD), it’s important to optimize the SSD to ensure optimal performance and longevity. SSD optimization involves a few key steps that help maximize the speed, efficiency, and lifespan of your SSD.
Follow these steps to optimize your SSD:
1. Enable TRIM: TRIM is a feature that helps maintain the long-term performance of your SSD. It ensures that the SSD’s memory cells are consistently and efficiently utilized. To check if TRIM is enabled, open the Windows Start menu, type “cmd” in the search bar, and select “Command Prompt.” Type the command “fsutil behavior query DisableDeleteNotify” and press Enter. If the result is “DisableDeleteNotify = 0”, TRIM is enabled. If it’s “DisableDeleteNotify = 1”, you need to enable TRIM. To enable TRIM, type the command “fsutil behavior set DisableDeleteNotify 0” and press Enter.
2. Disable Disk Defragmentation: Since SSDs don’t benefit from traditional mechanical disk defragmentation, it’s best to disable this feature. Open the Windows Start menu, type “defrag” in the search bar, and select “Defragment and Optimize Drives” from the search results. In the “Optimize Drives” window, uncheck the SSD from the list and click on “OK”.
3. Disable Superfetch and Prefetch: Superfetch and Prefetch are Windows services designed to optimize storage performance for traditional hard drives. However, they are not necessary for SSDs and can actually hinder performance. Open the Windows Start menu, type “services.msc” in the search bar, and press Enter. In the “Services” window, locate “Superfetch” and “Prefetch” services, right-click each of them, select “Properties,” and change the startup type to “Disabled”.
4. Enable AHCI Mode: AHCI (Advanced Host Controller Interface) is a mode that allows the SSD to perform at its best. To enable AHCI mode, restart your computer and enter the BIOS or UEFI settings. Navigate to the SATA or Storage configuration and set the SATA mode to AHCI. Save the changes and exit the BIOS or UEFI settings.
5. Optimize Power Management: Adjusting power management settings can help prolong the lifespan of your SSD. Open the Windows Start menu, type “power options” in the search bar, and select “Power Options” from the search results. In the “Power Options” window, select the “High performance” power plan or create a custom power plan and adjust settings to prevent the SSD from entering low-power modes too frequently.
6. Keep your SSD Firmware Updated: Regularly check for firmware updates provided by the SSD manufacturer. Firmware updates often contain important performance improvements and bug fixes. Visit the manufacturer’s website or use their software tools to check for firmware updates and follow the instructions provided to install them.
By following these optimization steps, you can ensure that your SSD performs at its best, delivering fast and efficient performance for your Windows 7 installation. With these optimizations in place, you can enjoy the full benefits of your new SSD and prolong its lifespan.
Conclusion
Congratulations! You have successfully migrated your Windows 7 installation to a solid state drive (SSD). By following the step-by-step process outlined in this guide, you have unlocked faster boot times, improved application performance, and an overall more responsive computing experience.
Throughout the migration process, you learned the importance of backing up your files, choosing the right SSD, creating a system image, connecting the SSD to your computer, cloning the system image, setting the SSD as the boot drive, updating drivers and software, and optimizing your SSD for peak performance.
Remember to regularly update your drivers and software to ensure compatibility and security. Additionally, keep an eye out for firmware updates from the SSD manufacturer to improve performance and reliability.
As you enjoy the benefits of your new SSD, you may even consider further optimizing your Windows 7 installation by configuring startup programs, cleaning out unnecessary files, and organizing your data for even better efficiency.
Migrating your Windows 7 installation to an SSD is an investment that pays off with enhanced productivity and a seamless computing experience. Enjoy the lightning-fast speed and responsiveness of your Windows 7 operating system powered by your new solid state drive!