Introduction
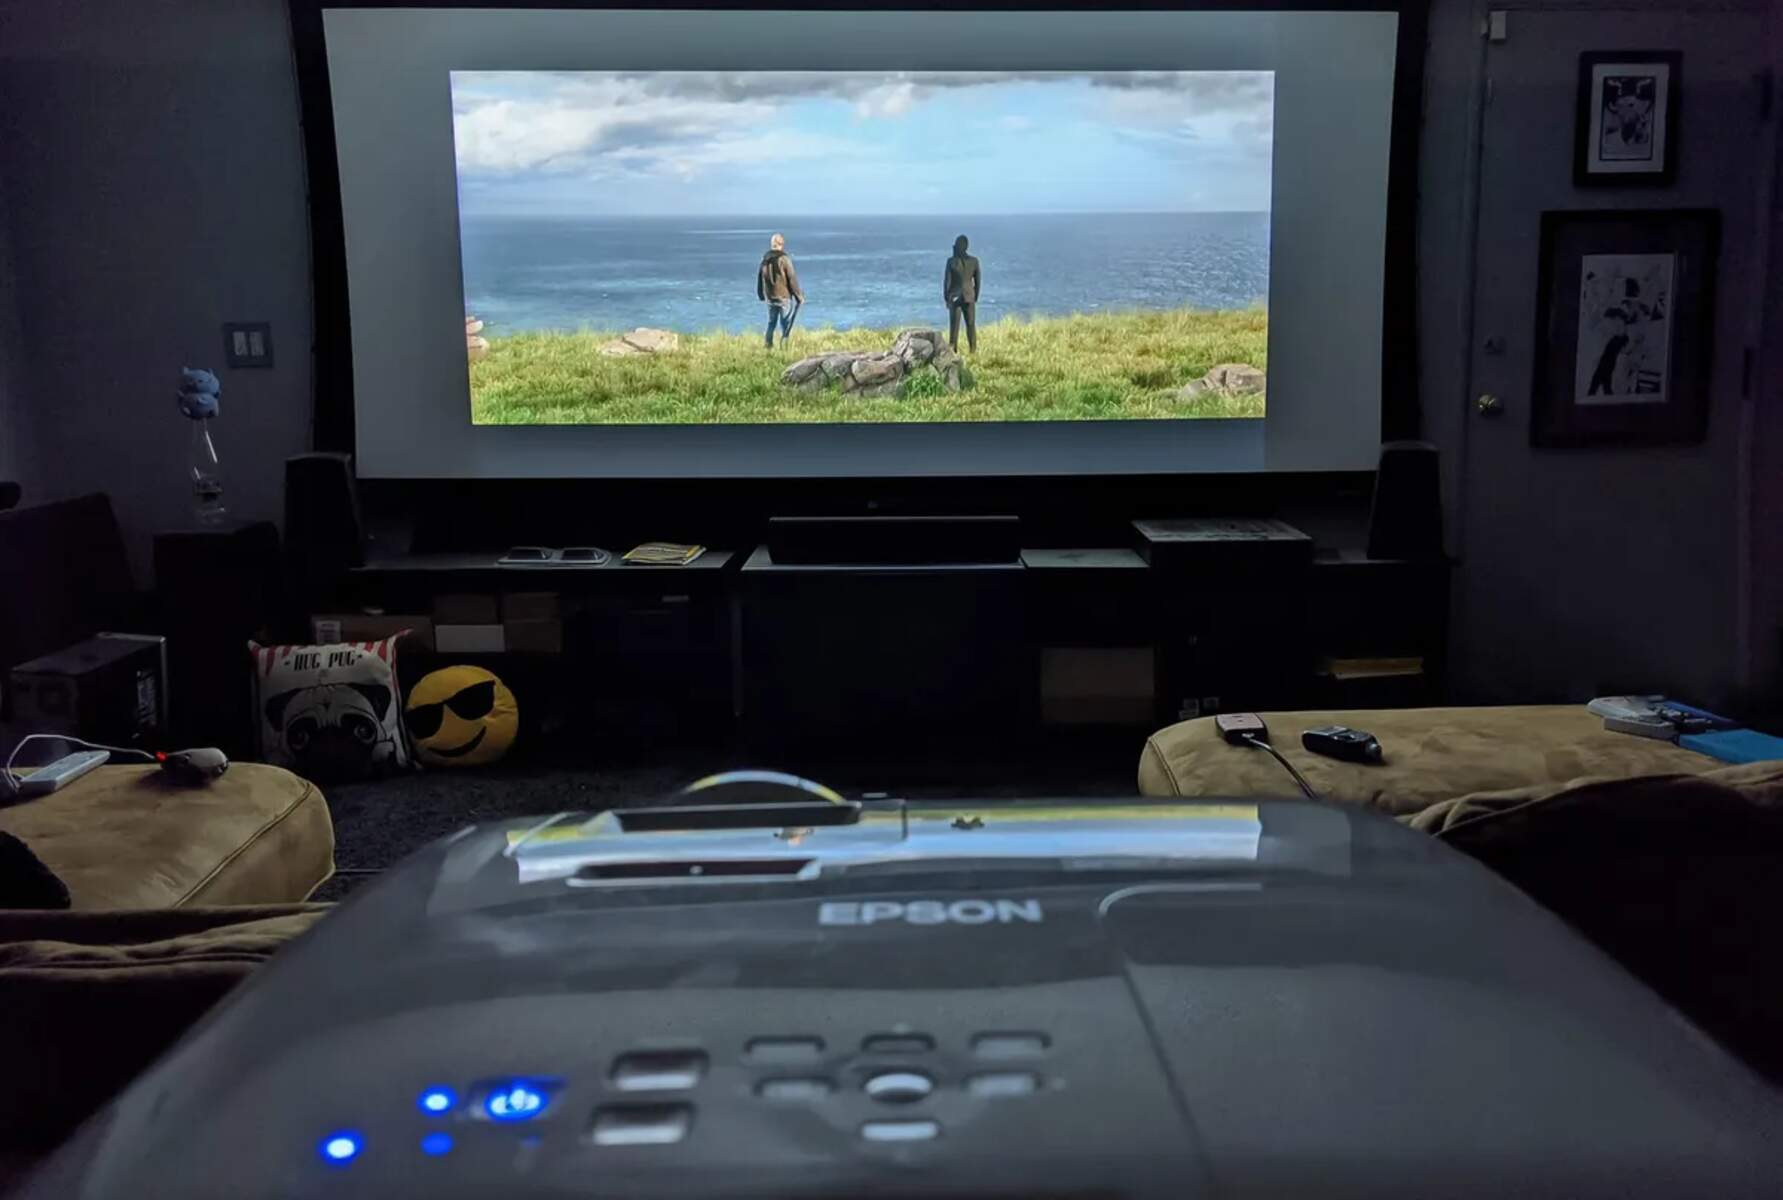
Projectors are a fantastic way to enjoy an immersive viewing experience in the comfort of your own home or for delivering impactful presentations in a professional setting. However, if the projected image is not clear and sharp, it can significantly diminish the overall quality of your viewing or presentation. Luckily, there are several steps you can take to make your projector’s image more clear and vibrant.
In this article, we will explore various techniques and tips to enhance the clarity of your projector’s image. From cleaning the lens and adjusting the focus to optimizing the positioning and lighting in the room, we will cover everything you need to know to improve your viewing experience or presentation quality.
Whether you’re using a projector for movies, gaming, or business presentations, these tips will help you achieve the best possible image clarity. So, without further ado, let’s dive into the steps you can take to make your projector’s image clearer and more focused.
Clean the Lens
One of the most common causes of a blurry projector image is a dirty lens. Over time, dust, fingerprints, and smudges can accumulate on the lens surface, reducing the clarity and sharpness of the projected image. Therefore, it is essential to regularly clean the lens to maintain optimal image quality.
To clean the lens, start by turning off the projector and allowing it to cool down. Use a soft, lint-free cloth or a lens cleaning brush to gently remove any loose dust particles from the lens surface. Avoid using harsh chemicals or abrasive materials, as they can damage the lens coating.
If there are fingerprints or stubborn smudges on the lens, dampen the cloth with a small amount of lens cleaning solution or isopropyl alcohol. Gently wipe the lens surface in a circular motion, taking care not to apply too much pressure. Once the lens is clean, use a dry cloth to remove any moisture or residue.
Remember to clean the lens regularly, especially before important presentations or movie nights. By keeping the lens clean, you can ensure that the projector’s image remains clear and sharp, providing you with the best viewing experience possible.
By following these simple steps, you can easily improve the clarity and sharpness of your projector’s image. However, cleaning the lens is just the first step. Let’s move on to the next technique to further enhance the image quality of your projector.
Adjust the Focus
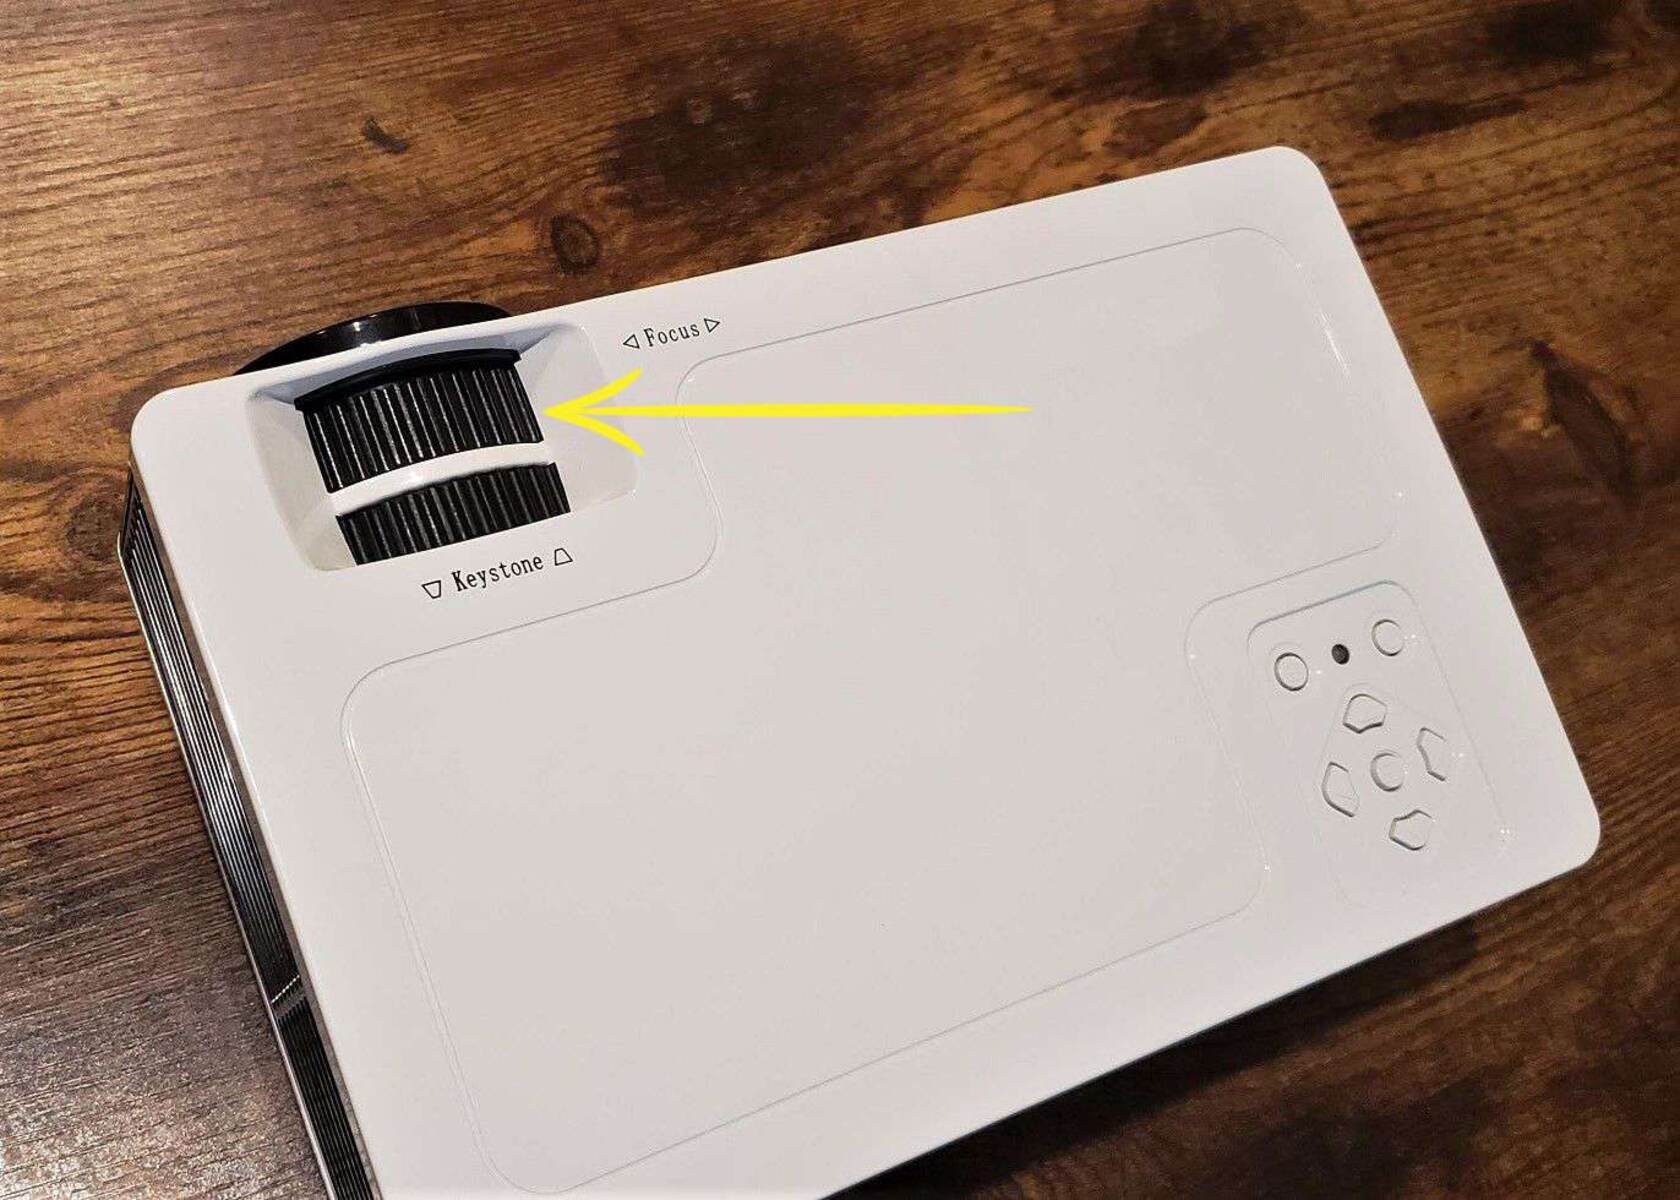
Another crucial factor in ensuring a clear and sharp projector image is adjusting the focus properly. If the image appears blurry or out of focus, it may be due to incorrect focus settings. Luckily, most projectors come with a focus adjustment feature that allows you to fine-tune the sharpness of the projected image.
To adjust the focus, start by displaying a high-quality image or text on the screen. Sit at your preferred viewing distance from the screen and slowly rotate the focus ring on the projector lens. Keep making minor adjustments until the image becomes as sharp and clear as possible.
It’s essential to take your time while adjusting the focus and find the optimal setting for your specific viewing distance. If the image is still not clear, try moving closer or farther away from the screen and readjusting the focus accordingly. By experimenting with different settings, you can achieve the desired sharpness and clarity.
In addition to the focus ring on the lens, some projectors also have a digital focus adjustment feature accessible through the on-screen menu. If your projector offers this option, explore the menu settings and make any necessary adjustments to further enhance the focus.
Remember, proper focus adjustment may differ depending on the content you’re projecting, the screen size, and the viewing distance. Take the time to experiment and find the sweet spot that delivers the clearest and sharpest image for your specific setup.
Now that we’ve covered cleaning the lens and adjusting the focus, let’s move on to the next section, where we’ll discuss the importance of positioning the projector correctly.
Position the Projector Correctly
The positioning of your projector plays a crucial role in the clarity and sharpness of the projected image. Proper placement ensures that the image is displayed evenly and without any distortions. Here are a few tips to help you position your projector correctly.
First and foremost, ensure that the projector is placed on a stable surface. Avoid placing it on wobbly or uneven surfaces, as this can cause vibrations that affect the image quality. If possible, use a tripod or a projector mount to secure it firmly in place.
Next, consider the distance between the projector and the screen. Each projector model has a recommended projection distance range. Refer to your projector’s manual or specifications to determine the optimal distance for your setup. Placing the projector too close or too far from the screen can result in a blurry or distorted image.
Furthermore, make sure that the projector is aligned perpendicular to the screen. Tilting the projector can cause keystone distortion, where the projected image takes on a trapezoidal shape instead of a rectangle. Most projectors have a keystone correction feature that allows you to electronically correct the distortion. However, it is best to maintain a straight alignment to avoid relying heavily on keystone correction.
In addition, consider the position of the audience or viewers. Make sure that the projector is positioned at a height and angle that allows everyone to have an unobstructed view of the screen. If necessary, adjust the projector’s angle or use a tilt-adjustable mount to achieve the desired projection angle.
Lastly, take into account any ambient light or glare in the room. Direct light sources or reflections can wash out the projected image and reduce its clarity. Consider using blackout curtains or blinds to minimize ambient light, and position the projector away from direct light sources to enhance image quality.
By carefully positioning your projector and taking these factors into consideration, you can ensure that the image is clear, sharp, and free from distortions.
Now that we’ve discussed the importance of proper positioning, let’s move on to the next section where we’ll explore techniques to improve the lighting in the room.
Improve the Lighting in the Room
The lighting conditions in the room where you are using your projector can greatly impact the clarity and visibility of the projected image. Here are some tips to help you improve the lighting in the room and enhance the quality of your projector’s display.
First and foremost, consider the overall brightness of the room. Excessively bright ambient lighting can wash out the projected image and make it appear less clear. To address this, dim the lights or use blackout curtains to create a darker environment that allows the projected image to stand out.
If you’re using your projector during the day or in a room with natural light, consider investing in light-blocking curtains or blinds to minimize the entry of sunlight. This will help reduce glare and ensure a more focused and defined projected image.
In addition, avoid placing the projector directly in front of a light source, such as a window or a lamp. The direct light can cause unwanted reflections or shadows that can affect the image quality. Instead, position the projector in a way that minimizes the impact of light sources on the screen.
Another way to improve the lighting in the room is to use ambient lighting strategically. Soft, indirect lighting can create a comfortable viewing environment without causing distractions or interfering with the projected image. Consider using floor lamps or LED strip lights placed around the room to create a pleasant and non-intrusive ambiance.
Furthermore, consider the color temperature of the light in the room. Cooler tones, such as daylight or white light, tend to produce a crisper and more vibrant image, while warmer tones can give the image a softer and more relaxed feel. Experiment with different color temperatures to find the one that enhances the clarity and sharpness of your projected image.
By improving the lighting conditions in the room, you can help create an optimal environment for enjoying a clear and visually stunning projection. Now that we’ve covered lighting, let’s move on to the next section where we’ll discuss adjusting the resolution settings of your projector.
Adjust the Resolution Settings
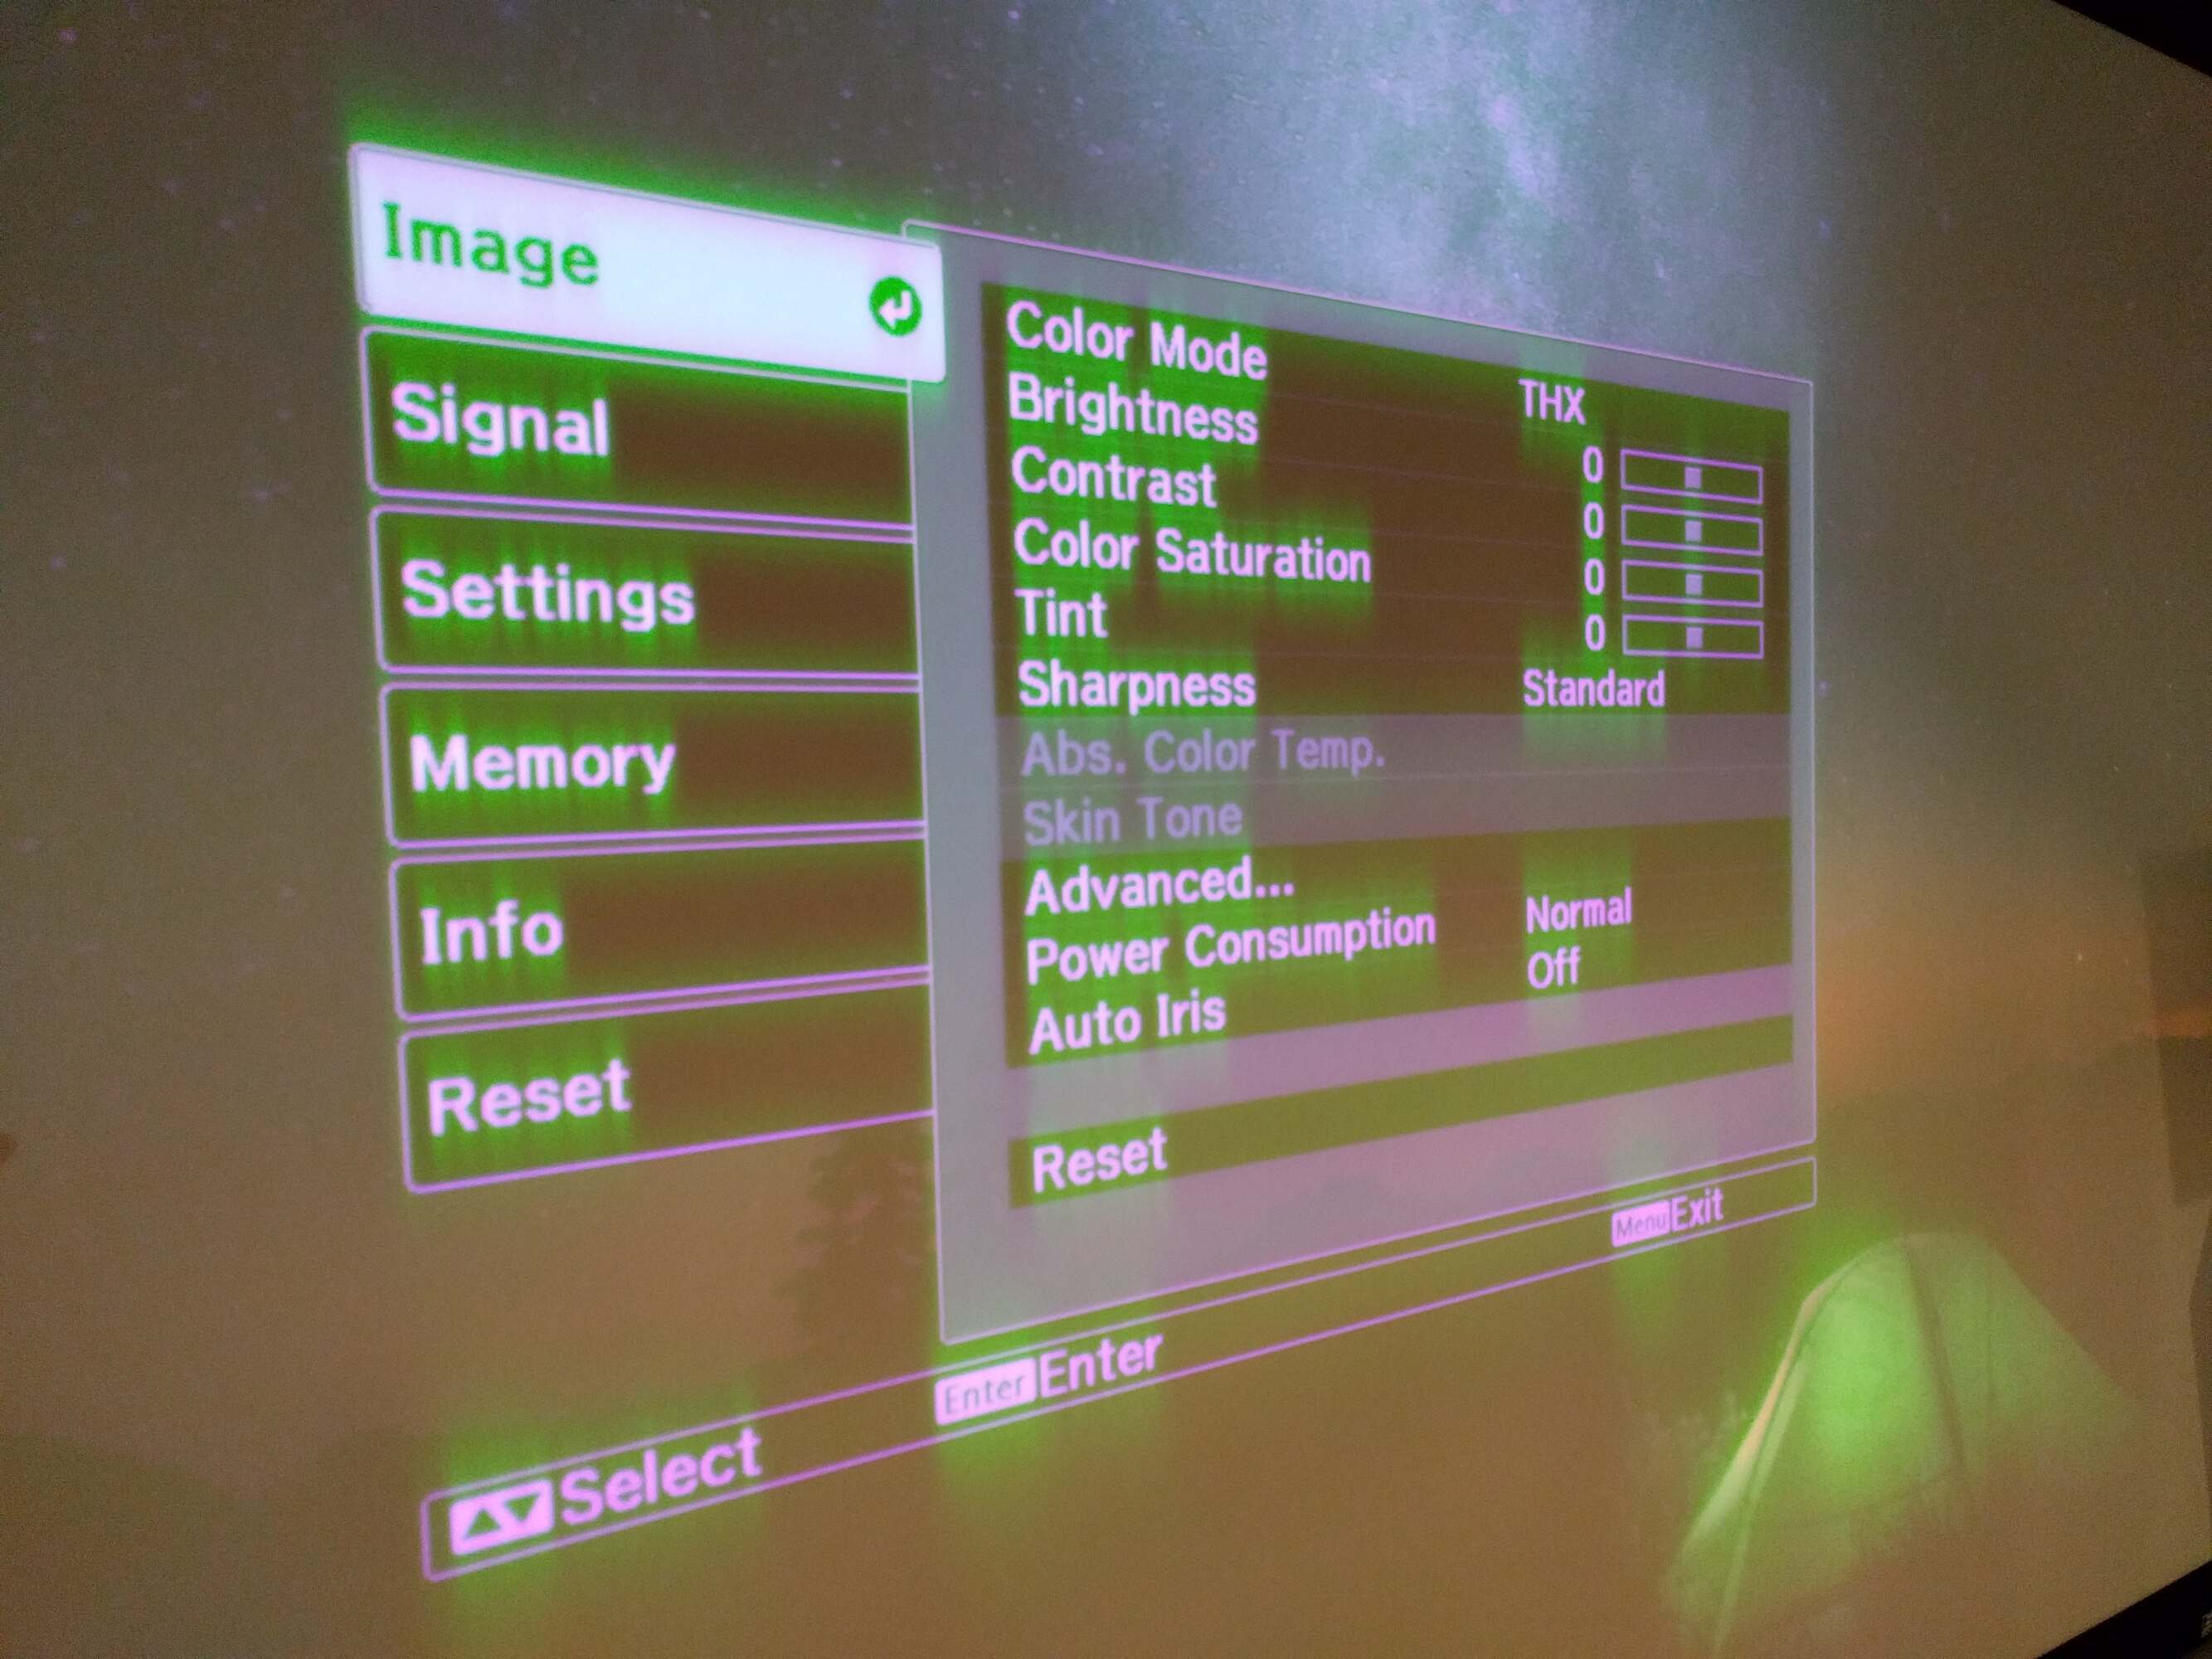
The resolution settings of your projector can significantly impact the clarity and sharpness of the projected image. Most modern projectors offer a range of resolution options to suit different requirements. By adjusting the resolution settings correctly, you can enhance the visual quality and ensure a crisp and clear image.
Start by accessing the menu options on your projector and navigate to the resolution settings. Here, you will find a list of available resolutions that your projector supports. Ideally, you want to select the native resolution of your projector, which is the highest resolution that it can display without any scaling or compression.
If you’re projecting from a computer or a media device, make sure the output resolution matches the native resolution of the projector. Mismatched resolutions can result in a blurry or pixelated image. Adjust the settings on your device to ensure that the output resolution matches the native resolution of the projector for optimal clarity.
In some cases, you may need to lower the resolution to compensate for lower-quality content or older video sources. However, keep in mind that lowering the resolution can result in a loss of sharpness and detail. It is generally recommended to use the native resolution to achieve the best image quality.
Additionally, consider the aspect ratio of the content you are projecting. The aspect ratio refers to the proportional relationship between the width and height of the image. Most projectors support common aspect ratios such as 16:9 (widescreen) or 4:3 (standard). Select the appropriate aspect ratio based on your content to ensure that the image is displayed correctly and without any stretching or distortion.
By adjusting the resolution settings to match the native resolution of your projector and the aspect ratio of your content, you can optimize the image clarity and ensure a sharp and detailed projection.
Now that we’ve covered adjusting the resolution settings, let’s move on to the next section where we’ll discuss the importance of using a premium HDMI cable.
Use a Premium HDMI Cable
The quality of the HDMI cable you use to connect your projector to the video source can have a significant impact on the clarity and sharpness of the projected image. Using a premium HDMI cable ensures a high-quality data transmission, resulting in a clear and vibrant projection.
When it comes to HDMI cables, not all are created equal. Lower-quality or generic HDMI cables may not provide the necessary bandwidth and signal integrity required for high-resolution content, leading to a loss of image clarity and detail. Investing in a premium HDMI cable can help mitigate these issues and deliver the best possible image quality.
Look for HDMI cables that support the latest HDMI standards, such as HDMI 2.0 or HDMI 2.1. These standards offer higher bandwidth capabilities, allowing for the transmission of 4K Ultra HD or even 8K content with optimal clarity. It’s important to note that the HDMI version of both the projector and the source device should be compatible with the cable to achieve the desired results.
Furthermore, consider the cable length. Longer HDMI cables may introduce signal degradation or interference, resulting in a loss of image quality. It’s best to choose an HDMI cable that is the appropriate length for your setup to minimize signal loss and preserve the integrity of the video transmission.
Lastly, ensure a secure and snug connection between the HDMI cable and the ports on the projector and the video source. Loose connections can result in a loss of signal or intermittent dropouts, affecting the overall image quality. Make sure the HDMI cable is inserted firmly into the ports and consider using cable management solutions to keep the cables tidy and prevent any accidental disconnections.
By using a premium HDMI cable that supports the latest standards and ensuring a proper connection, you can maximize the clarity and sharpness of the projected image, resulting in a more immersive viewing experience.
Now that we’ve discussed the importance of using a premium HDMI cable, let’s move on to the next section where we’ll explore avoiding the use of digital zoom.
Avoid Using Digital Zoom
While it may be tempting to use the digital zoom feature on your projector to enlarge the image, it can actually decrease the clarity and sharpness of the projected content. Digital zoom works by magnifying the pixels of the image, which can result in a loss of detail and introduce pixelation.
Unlike optical zoom, which adjusts the lens physically to zoom in or out, digital zoom merely enlarges the existing image by cropping and stretching the pixels. This process leads to a decrease in image quality and can make the projected content appear blurry or pixelated.
If you need to adjust the size of the projected image, it is recommended to do so by physically moving the projector closer or farther away from the screen. This maintains the native resolution of the projector and preserves the original image quality.
Instead of relying on digital zoom, ensure that you have chosen the appropriate projection distance and screen size during the initial setup. This way, you can achieve the desired image size without sacrificing clarity and sharpness.
If you find that the projected image is too small, consider using a projector screen or a smooth, flat wall surface. These surfaces can help enhance the perceived brightness and sharpness of the image, making it more enjoyable to view.
By avoiding the use of digital zoom and focusing on maintaining the native resolution and image quality of your projector, you can ensure a clear and detailed projection that enhances your overall viewing experience.
Now that we’ve covered the importance of avoiding digital zoom, let’s move on to the next section where we’ll discuss reducing the image size to improve clarity.
Reduce the Image Size
Reducing the image size on your projector can significantly improve the clarity and sharpness of the projected content. When an image is stretched to fill a larger screen, it can result in a loss of detail and make the image appear less clear. By adjusting the image size appropriately, you can enhance the overall image quality.
One way to reduce the image size is by physically moving the projector closer to the screen. This allows the projector to produce a smaller image that fits the screen dimensions more accurately. By keeping the image within the native resolution of the projector, you can ensure that the details are preserved and the image remains sharp and clear.
Alternatively, most projectors offer a zoom feature that allows you to adjust the image size without sacrificing quality. Instead of using digital zoom, which can result in pixelation, use the optical zoom function if your projector supports it. Optical zoom adjusts the lens physically and maintains the image’s clarity and sharpness even when adjusting the image size.
If your projector doesn’t have a zoom feature, you can also adjust the image size by changing the projection distance. Moving the projector farther away from the screen will reduce the image size, while moving it closer will increase the size. Experiment with different distances until you achieve the desired image size without compromising the clarity.
Another option to consider is using the aspect ratio settings on your projector or video source. If the image appears distorted or stretched, adjusting the aspect ratio can help maintain the proper proportions and improve the image quality.
Remember, reducing the image size on your projector allows for better pixel-to-pixel representation, resulting in a crisper and more detailed image. By optimizing the image size and aspect ratio, you can ensure that every detail of your content is displayed with utmost clarity.
Now that we’ve explored reducing the image size, let’s move on to the next section where we’ll discuss the benefits of using a projector screen.
Use a Projector Screen
Using a dedicated projector screen can significantly enhance the clarity and sharpness of your projected image. While projecting onto a plain wall surface may seem convenient, a projector screen is designed to optimize the viewing experience and improve image quality.
One of the key advantages of using a projector screen is its reflective surface. Unlike a wall, which may have an uneven texture or color variations, a projector screen offers a smooth and uniform surface. This helps to minimize any distortions or irregularities that could affect the clarity of the projected image.
Projector screens are also designed to enhance contrast and brightness. They have a special coating or material that helps to reflect and distribute light more evenly, resulting in a more vibrant and well-defined image. This improves both the dark and bright areas of the projection, enhancing the overall visual experience.
Another benefit of using a projector screen is that it enhances the perceived brightness of the image. By reflecting the projected light back to the viewer, projector screens can create a more immersive and engaging viewing experience. This is particularly important if you are projecting in a room with ambient lighting, as the screen helps to preserve the image quality even in brighter conditions.
Additionally, projector screens offer flexibility in terms of placement. They can be easily mounted on a wall or ceiling, allowing for optimal positioning and adjustment to achieve the desired image size and aspect ratio. This ensures that the projected image is displayed correctly and without any distortions, further enhancing clarity and sharpness.
When choosing a projector screen, consider factors such as screen material, size, and aspect ratio compatibility with your projector. Whether you opt for a tensioned screen, fixed-frame screen, or portable screen, investing in a dedicated projector screen will undoubtedly improve the image quality and provide a more satisfying viewing experience.
Now that we’ve explored the benefits of using a projector screen, let’s move on to the next section where we’ll discuss the importance of upgrading the projector bulb.
Upgrade the Projector Bulb
The quality and performance of the projector bulb can have a significant impact on the clarity and brightness of the projected image. Over time, projector bulbs can become dim or wear out, resulting in a decrease in image quality. Upgrading the projector bulb to a higher-quality or newer model can greatly improve the overall clarity and sharpness of the projection.
When selecting a new projector bulb, consider the specifications of your projector and choose a bulb that is compatible with your model. Look for bulbs that offer higher lumens (brightness) and a longer lifespan. This ensures that your projector produces a vibrant and clear image while minimizing the need for frequent bulb replacements.
Replacing the projector bulb is relatively straightforward. Refer to your projector’s user manual for instructions on how to safely replace the bulb. Follow the recommended steps and allow the projector to cool down before handling the bulb.
It’s important to note that projector bulbs are sensitive to fingerprints and oil, which can affect their performance. When installing the new bulb, use gloves or a clean cloth to handle it, and avoid touching the glass surface. This helps to maintain the quality of the bulb and prevent any residue from impairing the projected image.
By upgrading the projector bulb, you ensure that the projector is operating at its optimal level. The increased brightness and clarity provided by a new bulb can greatly enhance your viewing experience, allowing you to enjoy clear and sharp images.
Now that we’ve discussed upgrading the projector bulb, let’s move on to the final section where we’ll explore the importance of keeping the projector ventilated and cool for optimal performance.
Keep the Projector Ventilated and Cool
Proper ventilation and cooling are essential for maintaining optimal performance and image quality of your projector. Overheating can lead to a variety of issues, including reduced brightness, color distortion, and decreased overall clarity. Here are some tips to ensure your projector stays ventilated and cool for the best projection experience.
Firstly, make sure that the projector has enough space around it to allow for proper airflow. Avoid placing it in enclosed spaces or placing objects directly in front of the vents. This allows for better air circulation and prevents the projector from overheating.
Regularly clean the air filters of the projector. Dust and dirt can accumulate on the filters, obstructing airflow and causing the projector to heat up. Refer to the user manual for instructions on how to clean and maintain the filters properly. By keeping the filters clean, you ensure that the projector receives adequate cooling.
Consider the ambient temperature of the room where the projector is located. Operating a projector in high-temperature environments can lead to overheating and decreased performance. Ideally, the room’s temperature should be within the recommended range specified by the manufacturer. If necessary, use a fan or air conditioning to help maintain a cooler temperature around the projector.
In addition to proper ventilation, it’s beneficial to use features such as eco-mode or power-saving mode on your projector. These modes adjust the projector’s fan speed and power consumption to help manage heat effectively, prolonging the life of the bulb and maintaining optimal performance.
Lastly, if you plan to use your projector for an extended period, consider using a projector cooling system or an external cooling fan. These accessories can provide additional airflow and cooling, especially in situations where the projector is used in a high-demand environment or for extended periods.
By prioritizing ventilation and cooling, you can ensure that your projector operates at its best and maintains optimal image clarity. Keeping the projector cool prevents overheating-related issues, ensuring a crisp and clear projection for an enhanced viewing experience.
Now armed with these eleven tips, you have a comprehensive understanding of how to make your projector image clearer and sharper. Implement these techniques based on your specific setup and requirements to maximize the visual quality and enjoy an immersive viewing or presentation experience.
Conclusion
Achieving a clear and sharp image from your projector is essential for an enjoyable viewing experience or a successful presentation. By following the techniques and tips outlined in this article, you can enhance the clarity and sharpness of your projector’s image.
Start by cleaning the lens and adjusting the focus to ensure that the image is sharp and well-defined. Properly positioning the projector and improving the lighting in the room will further enhance the clarity and visibility of the projection. Adjusting the resolution settings, using a premium HDMI cable, and avoiding digital zoom will help maintain the image quality and prevent any pixelation or loss of detail.
Reducing the image size, using a dedicated projector screen, and upgrading the projector bulb are additional steps you can take to enhance the image clarity and sharpness. Lastly, keeping the projector ventilated and cool is crucial to maintain optimal performance and prevent overheating-related issues.
By implementing these tips and techniques, you can ensure that your projector delivers a clear and vibrant image, whether you’re using it for movies, gaming, or professional presentations. Remember to consider your specific setup and requirements when applying these techniques for the best results.
Now it’s time to put these strategies into action and enjoy the improved clarity and sharpness of your projector’s image. Sit back, relax, and immerse yourself in a stunning visual experience.