Introduction
Welcome to the fascinating world of holographic projectors! Whether you’re a tech enthusiast or simply curious about optical illusions, building your own holographic projector can be a fun and rewarding DIY project. With a few carefully chosen materials and some basic construction skills, you can create a mesmerizing device that brings holographic images to life right before your eyes.
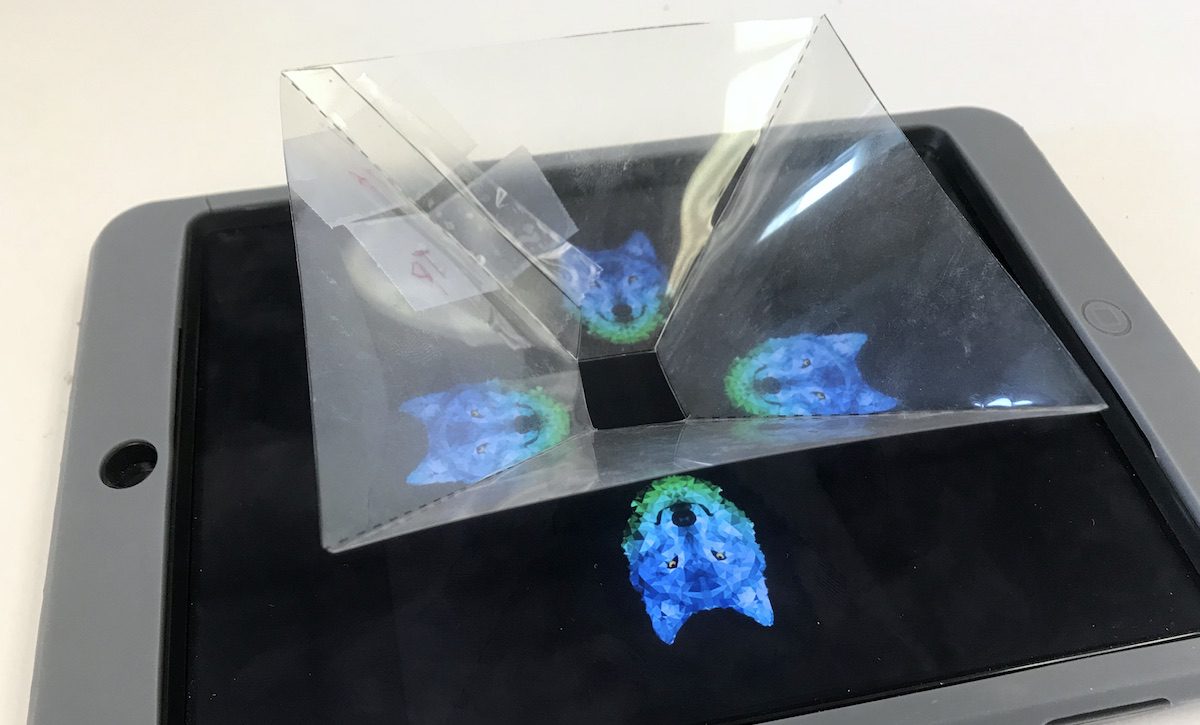
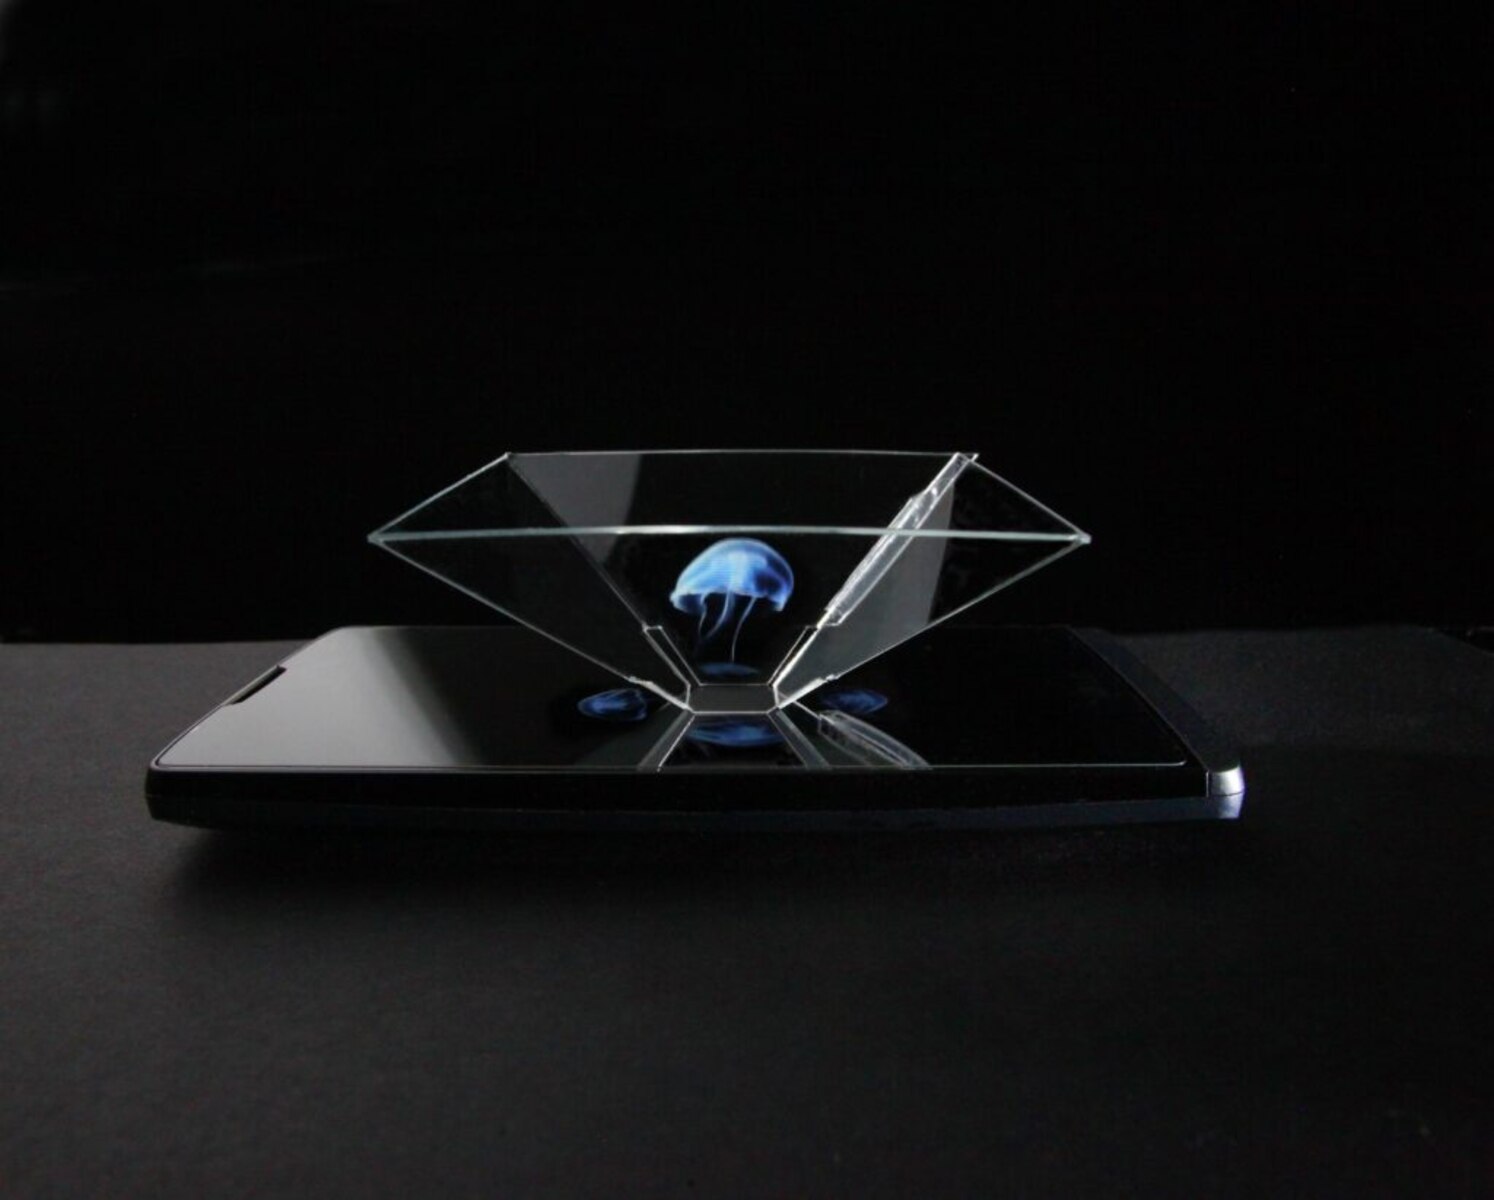
A holographic projector is a device that uses light and optics to project three-dimensional images or videos. It creates the illusion of a physical object floating in mid-air by reflecting light off a specially designed projection surface. The result is a stunning visual display that captivates viewers and sparks their imagination.
In this article, we will guide you through the step-by-step process of creating your very own holographic projector. We’ll cover everything from choosing the right materials to constructing the projection surface, ensuring that you have all the information you need to bring your project to life. So, let’s dive in and embark on this exciting journey into the world of holographic projections!
Choosing the Right Materials
Before you begin building your holographic projector, it’s essential to gather all the necessary materials. Choosing the right components will ensure that your projector performs optimally and provides stunning holographic images. Here are the key materials you’ll need:
- Transparent Material: To construct the holographic projection surface, you’ll need a transparent material that can reflect light. Plexiglass or acrylic sheets are popular choices due to their clarity and ease of use. Make sure to select a piece that is large enough for the size of hologram you want to create.
- LED Lights: LED lights are the primary source of illumination for your holographic projector. Look for high-quality LEDs with bright and focused beams. RGB (Red, Green, Blue) LEDs are often used as they allow for a wider range of colors. Additionally, consider using individually addressable LEDs for more advanced control over the visuals.
- Power Supply: You’ll need a suitable power supply to provide electricity to the LEDs. Ensure that the power supply can handle the required voltage and amperage to avoid any electrical issues.
- Controller Board: A controller board is necessary to control the LEDs and create dynamic holographic effects. Arduino or Raspberry Pi boards are commonly used for this purpose. These boards allow you to program and control the lights to display various patterns and animations.
- Frame Material: The frame of the holographic projector provides structural support. Opt for lightweight and durable materials such as wood or plastic. You’ll need to cut and assemble the frame according to the dimensions of your hologram.
- Reflective Film: A reflective film is applied to the transparent projection surface to enhance the visibility and vividness of the holographic image. Look for specialized holographic films designed for projection purposes.
It’s important to remember that the quality of the materials you choose will significantly impact the performance and visual appeal of your holographic projector. Invest in high-quality components for the best results. Additionally, consider researching and exploring different materials to experiment and customize your projector according to your preferences.
Building the Frame
Now that you have gathered all the necessary materials, it’s time to start building the frame of your holographic projector. The frame provides structural support and stability to the device, ensuring that it stands firmly during operation. Follow these steps to construct the frame:
- Measurements and Design: Begin by determining the size of your holographic projection surface. Measure and mark the dimensions on your chosen transparent material. Plan the overall design of the frame, taking into consideration the size and shape of the hologram you wish to create.
- Cutting the Frame: Using a saw or appropriate cutting tools, cut the frame material according to the dimensions determined earlier. Make sure you have enough pieces to form the desired shape of the frame. Sand down any rough edges to ensure a clean finish.
- Assembly: Assemble the frame pieces using suitable fasteners such as screws, nails, or adhesives. Follow your designed layout, ensuring that each piece aligns correctly. Reinforce the joints with additional brackets or corner braces for added stability.
- Adjustments: Double-check the squareness and alignment of the frame to ensure it is level and balanced. Make any necessary adjustments to ensure the frame is sturdy and ready for the next steps.
Building a well-constructed frame is crucial for the stability and longevity of your holographic projector. Take your time during this step to ensure precise measurements and solid construction. A strong frame will provide the necessary support for the projector components and maintain the integrity of the holographic image.
Installing the LED Lights
Installing the LED lights is a key step in building your holographic projector. These lights will provide the illumination necessary to bring your holographic images to life. Follow these guidelines to ensure a successful installation:
- Placement: Determine the placement of the LED lights on the frame. Ideally, they should be evenly spaced around the perimeter of the transparent projection surface. This will ensure uniform illumination and optimal projection quality.
- Wiring: Attach the positive and negative wires of the LED lights to the appropriate terminals on the controller board. Use soldering or electrical connectors to establish a secure connection. Ensure that the wiring is organized and free from any entanglements.
- Power Supply: Connect the power supply to the controller board, following the manufacturer’s instructions. Make sure the power supply is compatible with the voltage requirements of the LEDs. Check for proper grounding to avoid electrical hazards.
- Testing: Before mounting the LED lights onto the frame, perform a test to ensure they are functioning correctly. Turn on the power supply and verify that all LEDs illuminate without flickering or dimming. Troubleshoot any issues to ensure the lights are working reliably.
- Mounting: Securely attach the LED lights to the frame using adhesive strips, brackets, or clips. Place them as close as possible to the transparent projection surface for maximum light reflection. Ensure that the lights are firmly mounted and will not shift during operation.
Proper installation of the LED lights is crucial for achieving vibrant and captivating holographic projections. Take the time to ensure precise wiring and secure mounting. This will ensure that your projector functions reliably and delivers stunning visual effects.
Creating the Holographic Image
Now that you have set up the foundation of your holographic projector, it’s time to focus on creating the holographic image itself. The holographic image is what brings your projector to life and captivates viewers. Follow these steps to create a mesmerizing holographic effect:
- Selecting the Image: Choose an image or video that you want to transform into a hologram. It could be a simple graphic, a 3D model, or even a pre-made holographic video. Keep in mind that the image should have a high contrast and be suitable for projection.
- Converting the Image: Use specialized software or online tools to convert your selected image into a holographic format. These tools often use algorithms to split the image into multiple frames or layers that create the illusion of depth when projected.
- Adjusting the Layers: Fine-tune the layers of the holographic image to achieve the desired visual effect. You can alter the transparency, position, and size of each layer to create a more dynamic hologram. Experiment with different settings to find the perfect balance.
- Rendering the Image: Once you’re satisfied with the adjustments, render the holographic image or video. This process converts the modified image into a format compatible with your holographic projector and allows it to be projected effectively.
- Transferring the Image: Transfer the rendered holographic image to a storage device or the controller board of your holographic projector. Ensure that the image files are in the correct format and are organized for easy access.
- Testing and Refining: Test the projection of your holographic image on the projection surface. Take note of any inconsistencies or areas that need improvement. Adjust the settings and image layers as necessary to achieve the best possible holographic effect.
Creating the holographic image requires a combination of creativity and technical skill. Take the time to experiment with different images and settings to achieve the desired result. Remember to keep refining and fine-tuning the holographic image to deliver a truly captivating visual experience.
Constructing the Projection Surface
The projection surface is a critical component of your holographic projector, as it is responsible for reflecting the light and creating the illusion of a three-dimensional image. Follow these steps to construct the projection surface for optimal holographic projection:
- Prepare the Transparent Material: Take the transparent material you selected earlier, such as plexiglass or acrylic sheets, and clean it thoroughly with a soft cloth to remove any dust or debris. Ensure that the surface is free from scratches or smudges that could affect the image quality.
- Apply the Reflective Film: Cut the reflective film to the dimensions of the transparent material. Carefully apply the film onto one side of the material, ensuring it is even and free from air bubbles. Smooth out any wrinkles or imperfections in the film to maintain a clear and reflective surface.
- Mount the Projection Surface: Attach the projection surface to the frame of the holographic projector. Use adhesive strips or brackets to securely hold the surface in place. Ensure that it is positioned at an angle to allow for proper reflection of the projected image.
- Calibrate the Angle: Experiment with different angles of the projection surface to find the optimal position for projection. Adjust the tilt or elevation until the holographic image appears clear and sharp from the desired viewing angle.
- Set up the Projector: Mount or position the controller board and LED lights in a way that they align with the projection surface. Refer to the instructions provided with your specific projector setup for the best configuration. Connect the projector components and power supply as per the manufacturer’s guidelines.
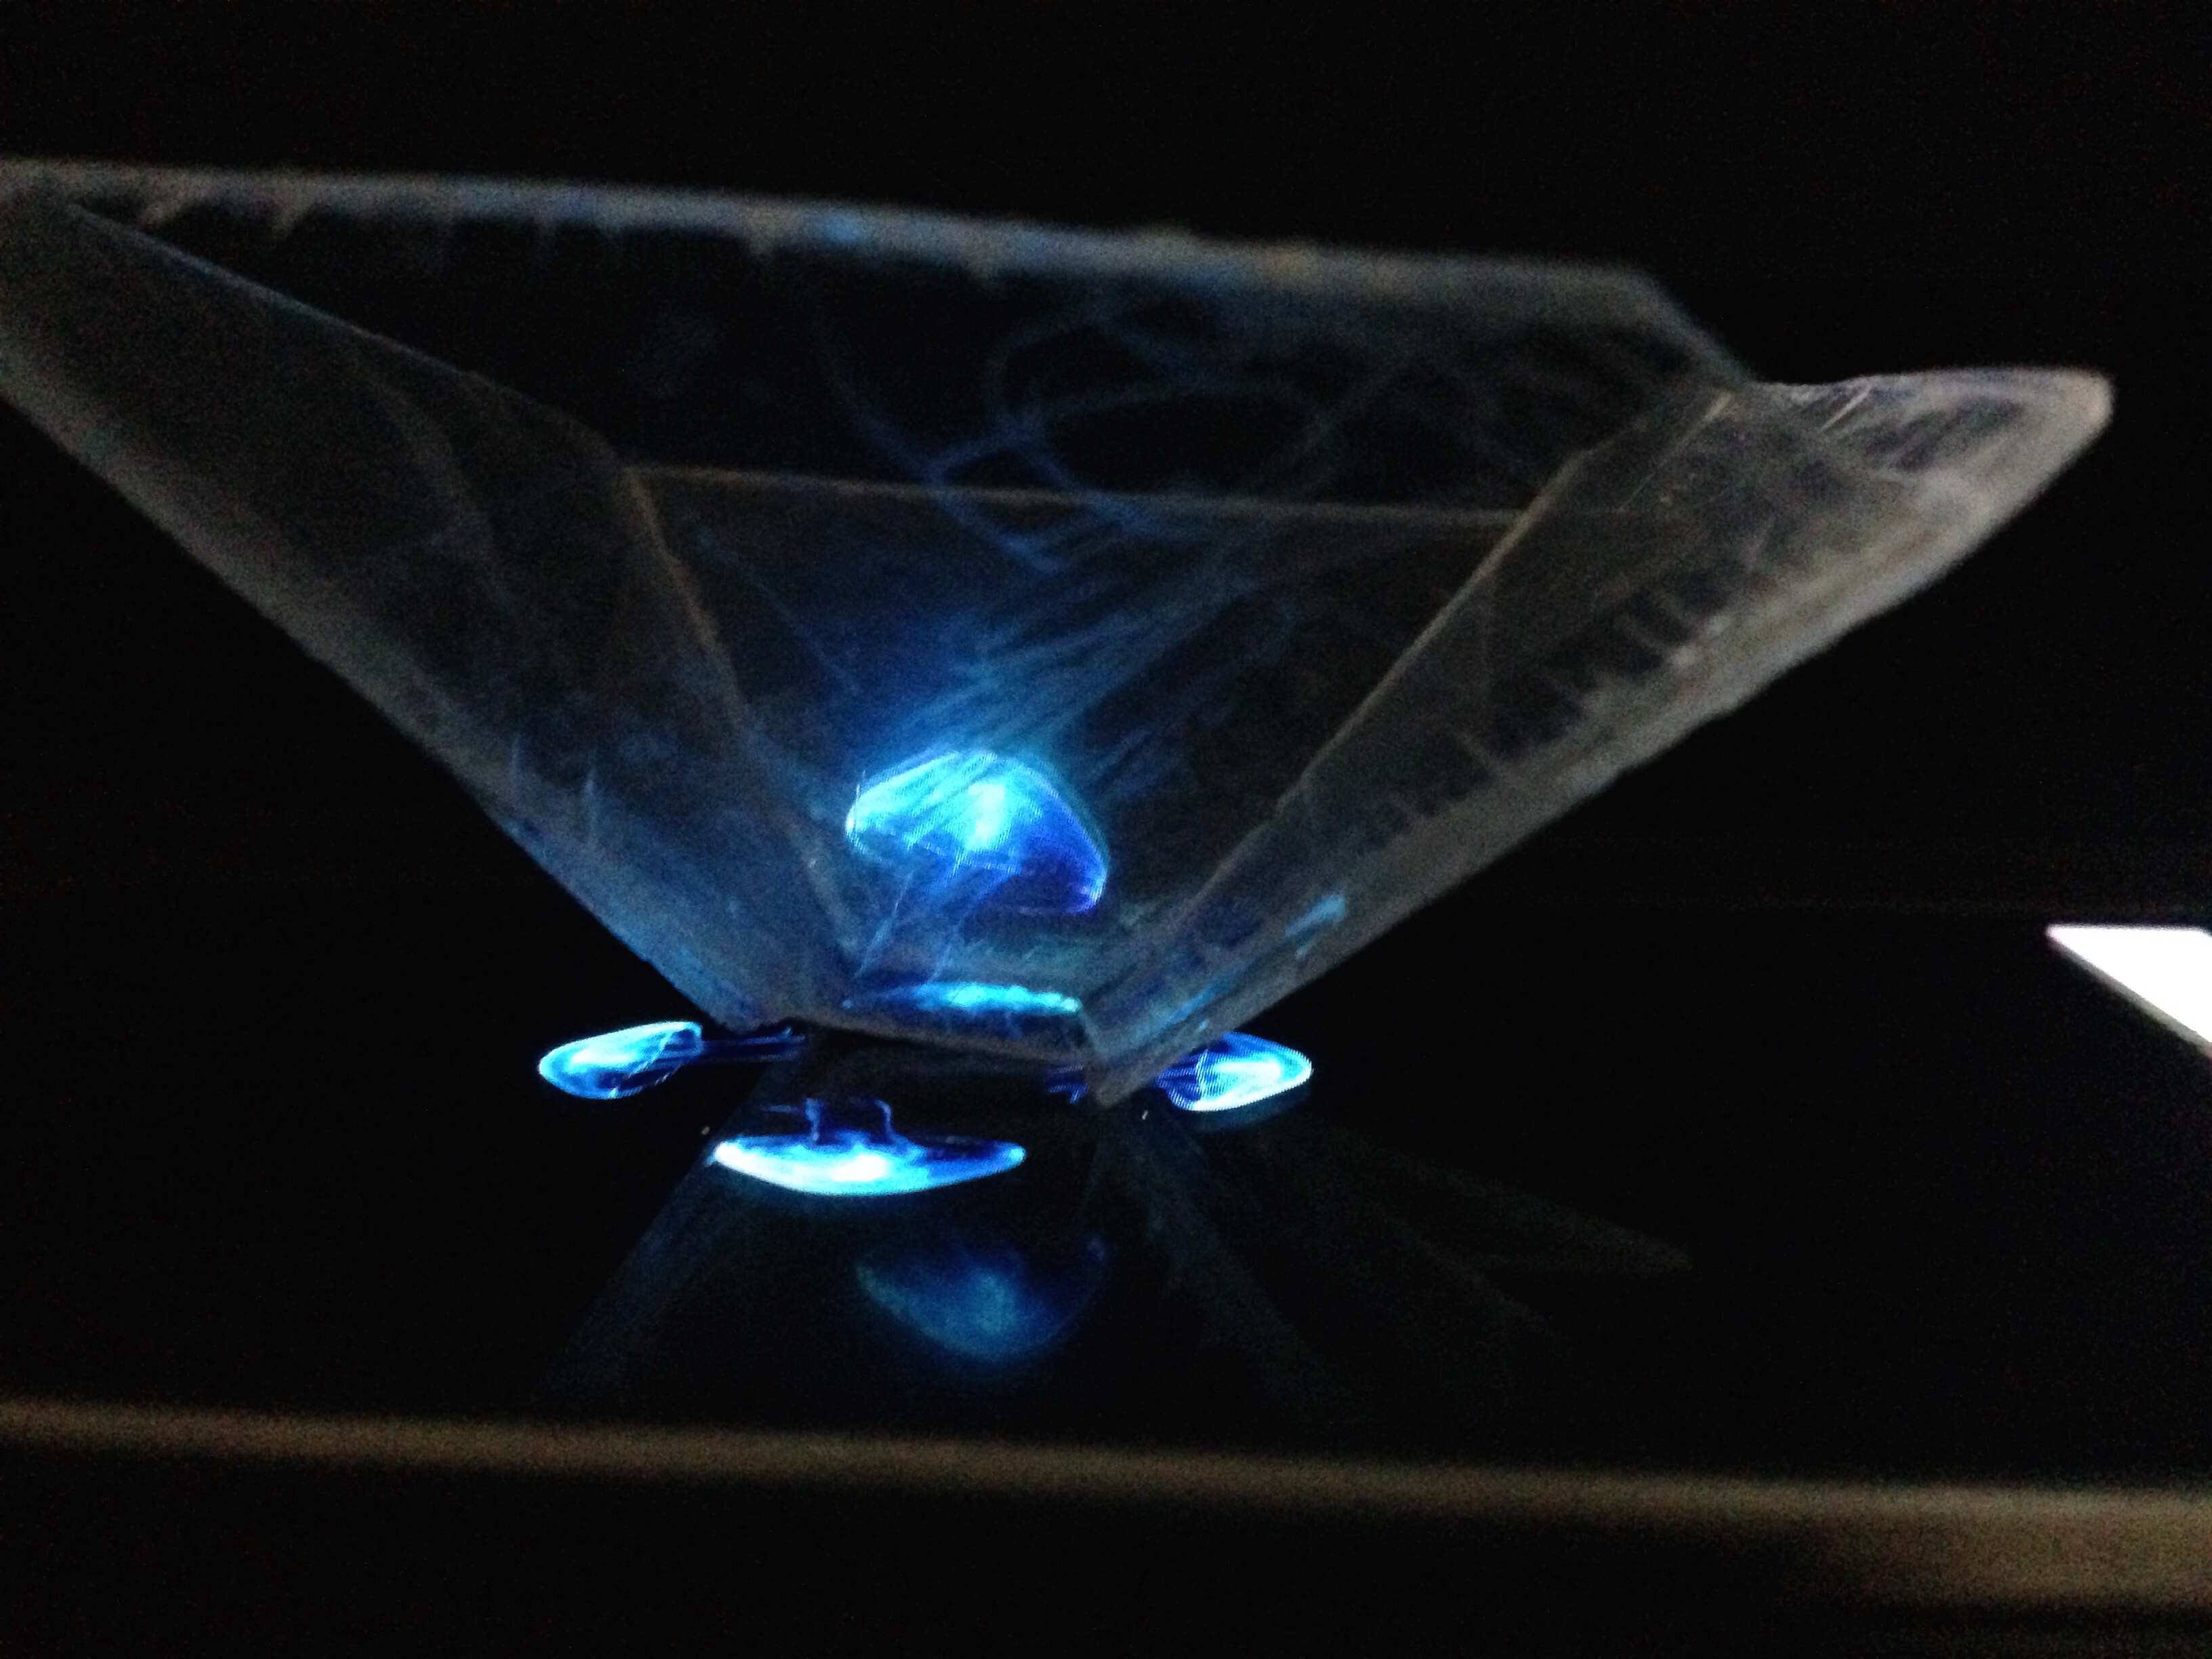
- Test the Projection: Turn on the power supply and project the holographic image onto the projection surface. Adjust the lighting and settings as needed to achieve the desired brightness and clarity of the hologram. Fine-tune the projection surface alignment if necessary.
Constructing a high-quality projection surface is essential for obtaining clear and vibrant holographic images. Take your time during this step to ensure that the reflective film is applied correctly and the surface is firmly mounted. A well-constructed projection surface will greatly enhance the visual impact of your holographic projector.
Completing the Holographic Projector
Now that you have assembled the key components and constructed the necessary parts, it’s time to bring everything together and complete your holographic projector. Follow these final steps to ensure your projector is fully functional:
- Secure the Components: Ensure that all the components, including the frame, LED lights, controller board, and power supply, are securely fastened and properly connected. Double-check all the wiring and connections to avoid any loose or faulty connections.
- Organize the Cables: Neatly organize the cables and wires to prevent them from getting tangled or obstructing the projection. Consider using cable ties, clips, or cable management solutions to keep the cables organized and out of sight.
- Test the Functionality: Power on the holographic projector and test its functionality. Verify that the LED lights are illuminating correctly and that the holographic image is projected onto the projection surface. Test the responsiveness of the controller board and ensure that it accurately displays the desired holographic effects.
- Make Adjustments: If any issues or inconsistencies arise during testing, troubleshoot and make the necessary adjustments. This may involve fine-tuning the positioning, adjusting the settings on the controller board, or further calibrating the projection surface.
- Enhance the Aesthetics: Consider adding finishing touches to the holographic projector to enhance its aesthetics. You may choose to paint the frame, add decorative elements, or incorporate additional design features to personalize your projector.
- Document and Share: Once your holographic projector is fully completed and functioning, document your journey and share your creation with others. Take photos or videos, write about your experience, and showcase your holographic projections to inspire and educate others.
Completing your holographic projector is an exciting moment, marking the culmination of your hard work and creativity. Take pride in your creation and enjoy the captivating holographic images that it brings to life.
Conclusion
Congratulations on completing your own holographic projector! Through careful selection of materials, building the frame, installing the LED lights, creating the holographic image, constructing the projection surface, and finalizing the projector, you have brought to life a device capable of mesmerizing holographic displays.
Building a holographic projector is not only a fun and rewarding DIY project but also a fascinating exploration into the world of optics and visual illusions. By following the steps outlined in this guide and using your creativity, you have transformed simple materials into a device that can project three-dimensional images and videos.
With your holographic projector now complete, you have the power to showcase stunning visuals and spark the imagination of those who witness its magic. Whether you use it for educational purposes, artistic expressions, or simply as a conversation starter, your holographic projector is sure to leave a lasting impression on all who experience it.
Keep in mind that there is always room for experimentation and improvement. Feel free to explore different materials, try out new holographic effects, and push the boundaries of what your projector can do. The journey of discovery and innovation is an ongoing one.
Lastly, don’t forget to document and share your experiences with others who may be inspired to embark on their own holographic projector journey. Share your creations, tips, and insights to contribute to the ever-growing community of holographic enthusiasts.
Enjoy the world of holographic projections and the endless possibilities that your newly constructed projector brings. Let your imagination run wild as you explore this fascinating realm of visual technology.