Introduction
Welcome to the exciting world of holographic displays for smartphones! With just a few materials and a little creativity, you can create your very own DIY hologram for your smartphone. Imagine watching videos and images projected in 3D, right in the palm of your hand.
Holograms have long been a fascination for technology enthusiasts, but you no longer need expensive equipment or specialized knowledge to experience them. This simple DIY project allows you to transform your smartphone into a captivating holographic display, bringing your favorite media to life in a whole new dimension.
In this guide, we will take you through the step-by-step process of creating your DIY smartphone hologram. We will cover everything from preparing the template to assembling the holographic pyramid and testing it with your smartphone. By the end, you’ll be able to enjoy your very own holographic display with minimal effort and cost.
So, grab your supplies and get ready to delve into the world of holography. It’s time to bring some futuristic magic to your smartphone screen!
Materials Needed
Before we dive into the step-by-step process of creating a DIY hologram for your smartphone, let’s gather all the materials you’ll need to bring this project to life. Don’t worry, you won’t need any rare or expensive items – most of them can be found around your house or easily purchased.
Here’s a list of the materials you’ll need:
- A clear plastic CD case or DVD case
- A pen or marker
- A ruler
- A sharp utility knife or scissors
- A cutting mat or a thick piece of cardboard
- Transparent tape or glue
- A smartphone with a bright display
The clear plastic CD or DVD case will serve as the main component for creating the holographic pyramid. You can recycle an old case or purchase a new one from a local store. The pen or marker and ruler will be used to measure and mark the template shapes on the plastic case. A sharp utility knife or scissors will be necessary for cutting out the shapes, so make sure to exercise caution and supervise younger participants.
A cutting mat or a sturdy piece of cardboard will provide a safe surface for cutting the plastic case, protecting both your table and the blade. Transparent tape or glue will be used to hold the trapezoid shapes together, forming the pyramid structure. Finally, you’ll need a smartphone with a bright display to project the holographic images onto the pyramid.
With these materials in hand, you’re ready to embark on the journey of creating your very own smartphone hologram. So, let’s move on to the next step and prepare the template for our holographic pyramid.
Step 1: Prepare the template
The first step in creating your DIY hologram for your smartphone is to prepare the template that will be used to cut out the shapes for the holographic pyramid. This template will provide the guidelines for creating the trapezoid shapes that will later be assembled into a pyramid structure.
To begin, take your clear plastic CD or DVD case and open it up. Lay it flat on a table or a cutting mat. Make sure the smooth side of the case is facing up, as this will be the side facing your smartphone screen when the hologram is in use.
Using a pen or marker, measure and mark out four trapezoid shapes on the smooth side of the plastic case. The trapezoids should be identical and have the following dimensions: a 3 cm base, a 1 cm top, and a height of 6 cm. You can use a ruler to ensure accurate measurements and straight lines.
Be careful when marking and measuring the shapes to ensure they are aligned properly. Precision is important as any inconsistencies in the trapezoid shapes can affect the quality of the holographic display.
Once you have marked out the four trapezoid shapes, you’re ready to move on to the next step. In the following step, we will cut out the trapezoids from the plastic case and prepare them for assembly. So, grab a sharp utility knife or scissors and let’s bring our holographic pyramid one step closer to reality.
Step 2: Cut out the four trapezoid shapes
Now that you have marked out the trapezoid shapes on your plastic case, it’s time to carefully cut them out. This step is crucial as it will determine the overall shape and stability of the holographic pyramid.
Before you begin cutting, make sure you have a steady hand and a sharp utility knife or a pair of scissors. If you’re using a knife, place a cutting mat or a thick piece of cardboard underneath the plastic case to ensure a clean and safe cutting surface.
Start by cutting along the marked lines of one trapezoid shape. Slowly and steadily guide the knife or scissors along the line, applying even pressure. Take your time and be mindful of your fingers and the direction of the blade. Repeat this process for the remaining trapezoids until you have four separate shapes.
After cutting out the trapezoids, you may notice some rough edges or sharp corners. You can gently sand down these imperfections using sandpaper or a nail file to ensure a smooth finish. This will enhance both the aesthetic appeal and the structural integrity of the holographic pyramid.
Once you have cut out and refined all four trapezoid shapes, you are ready to move on to the next step. In the following step, we will fold the trapezoid shapes to prepare them for assembly into a pyramid structure. So, let’s proceed and give our holographic pyramid its distinctive shape.
Step 3: Fold the trapezoid shapes
Now that you have cut out the four trapezoid shapes for your holographic pyramid, it’s time to fold them to create the distinctive shape necessary for the holographic effect. This step will bring your DIY hologram one step closer to reality.
To begin, take one of the trapezoid shapes and fold it in half along the longer base. Use your fingers to create a crisp, clean fold, ensuring that the edges align perfectly. This will give you a triangular shape with a crease down the center.
Next, fold the two adjacent sides of the trapezoid towards the center crease, overlapping them slightly. This will create a narrow triangular shape with two sides forming a V-shape at the top. Repeat this folding process for the remaining three trapezoid shapes, ensuring that each one is folded in the same manner.
It is important to take your time and be precise in your folding. The accuracy of the folds will contribute to the stability and shape of the holographic pyramid. If you’re struggling to keep the shape intact, you can use transparent tape or glue to secure the folds temporarily before proceeding to the next step.
Once all four trapezoid shapes are properly folded, you’re ready to move on to the next step. In the following step, we will assemble the folded trapezoids to create the pyramid structure. So, gather your folded shapes and let’s bring our holographic display one step closer to completion.
Step 4: Attach the trapezoids to create a pyramid shape
Now that you have folded the trapezoid shapes, it’s time to assemble them and create the pyramid structure for your DIY hologram. This step will give our holographic display its three-dimensional form and set the stage for the captivating visual effects to come.
Start by taking one of the folded trapezoids and applying a small amount of transparent tape or glue along one of the shorter sides. Press the adjacent side of another folded trapezoid against the taped or glued side, ensuring that they form a straight edge and are securely attached. Repeat this process with the remaining two folded trapezoids until all four are connected in a pyramid shape.
Take a moment to double-check that the trapezoids are aligned properly, creating a symmetrical pyramid structure. Adjust and reinforce the connections with additional tape or glue if necessary. It is crucial to ensure the stability of the pyramid, as any loose or misaligned trapezoids may compromise the holographic effect.
As you attach the trapezoids, you’ll notice that the pyramid shape naturally forms. Take your time and be gentle to avoid damaging the trapezoids or breaking the connections. Once all four trapezoids are securely attached, you can reinforce the edges and corners with additional strips of tape or small dots of glue for added stability.
Now that you have successfully created the pyramid shape, give it a gentle shake to ensure that it’s secure and sturdy. Congratulations! You’ve reached a significant milestone in the creation of your DIY hologram. In the subsequent steps, we will explore how to test and enjoy the fascinating holographic effect on your smartphone. So, let’s move on to the next step and see our holographic display come to life.
Step 5: Test the holographic effect
Now that you have assembled the pyramid shape using the folded trapezoids, it’s time to test the holographic effect and see your DIY creation in action. This step will enable you to determine if the pyramid is positioned correctly and if the holographic images appear as intended.
Find a well-lit area in your home and place the holographic pyramid on a flat surface. Make sure the smooth side of the pyramid, where the trapezoids are attached, is facing up.
Next, open an internet browser on your smartphone and search for “hologram videos” or “hologram projections.” You’ll find a plethora of options to choose from, ranging from mesmerizing abstract patterns to popular characters and objects.
Select a hologram video that appeals to you and play it on your smartphone. Adjust the brightness and volume settings to your preference.
Carefully position your smartphone at the center of the holographic pyramid, with the screen facing down towards the open space within the pyramid. Make sure the screen is centered and aligned with the edges of the pyramid.
Once your smartphone is in position, dim the room lights or create a semi-dark environment for optimal holographic viewing. This will enhance the visual impact of the holographic projections.
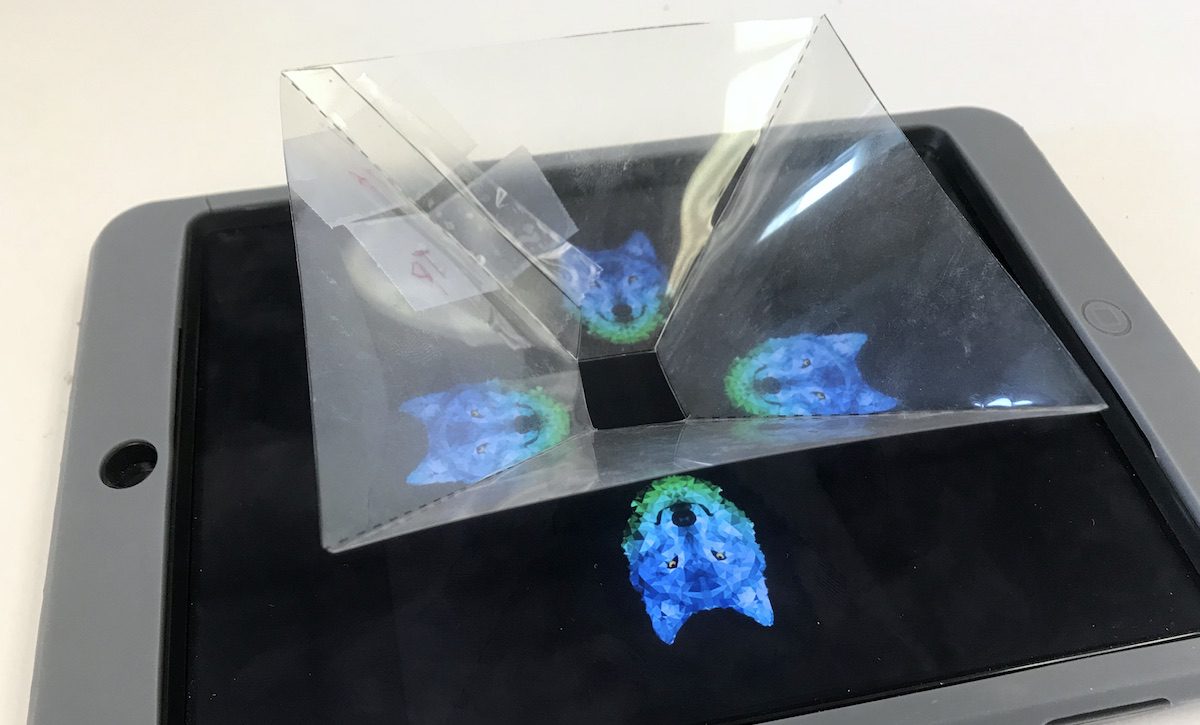
Press play on the hologram video and let the magic unfold. Watch as the holographic images come to life within the pyramid, creating a mesmerizing and three-dimensional effect. Take a moment to observe how the images change as you move around the pyramid to different viewing angles.
If the holographic effect isn’t as pronounced as you expected, adjust the positioning of your smartphone within the pyramid or experiment with different hologram videos. You may also try increasing the brightness level of your smartphone screen for a more vivid display.
Take your time to enjoy the holographic projections and explore the stunning visuals. Congratulations on successfully testing the holographic effect of your DIY creation!
In the following steps, we will learn how to place the pyramid on your smartphone screen and enjoy the holographic display from various angles. So, let’s continue on with the next step and delve deeper into the holographic experience.
Step 6: Place the pyramid on your smartphone screen
Now that you have experienced the holographic effect of your DIY creation, it’s time to take it a step further by placing the pyramid directly onto your smartphone screen. This will enhance the visibility and immersion of the holographic display, allowing you to enjoy it from various angles and perspectives.
Start by ensuring your smartphone is powered on and the screen is unlocked. Select a hologram video or image that you would like to view using the pyramid.
Position your smartphone on a flat surface, such as a table or desk, with the screen facing up. Make sure the smartphone is centered and stable.
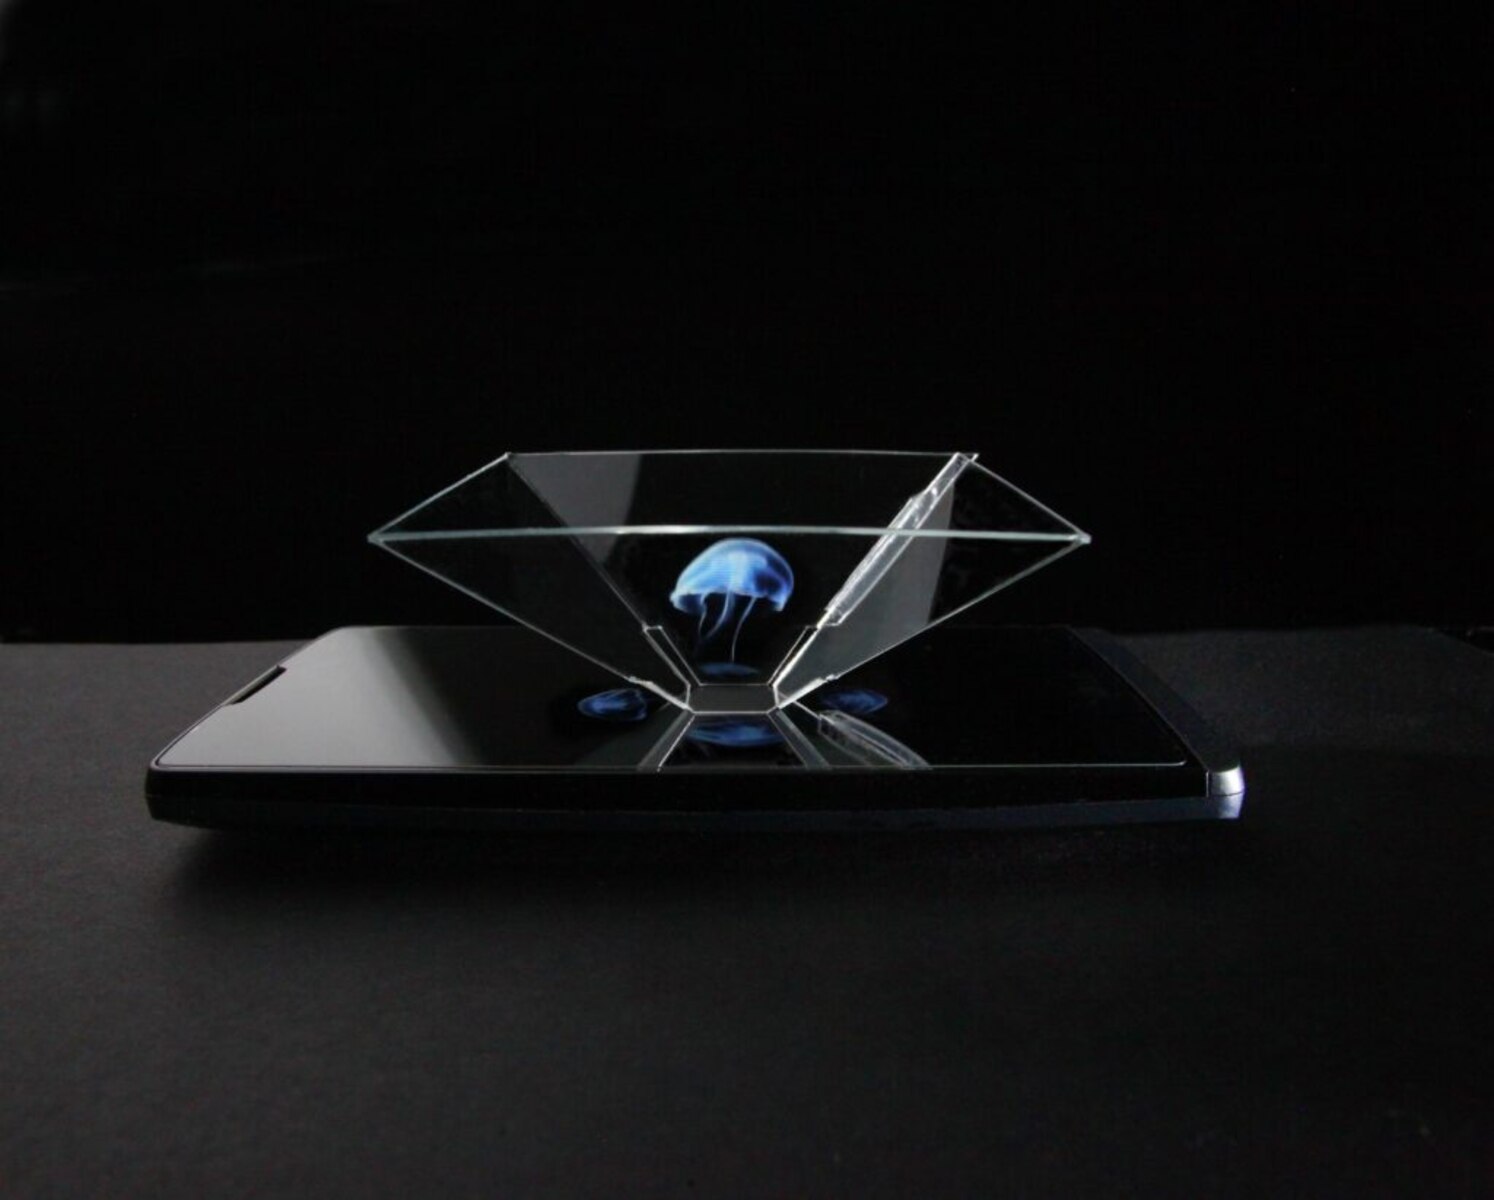
Take your holographic pyramid and gently place it right at the center of the smartphone screen, with the trapezoids facing down. Align the edges of the pyramid with the edges of the screen for a perfect fit.
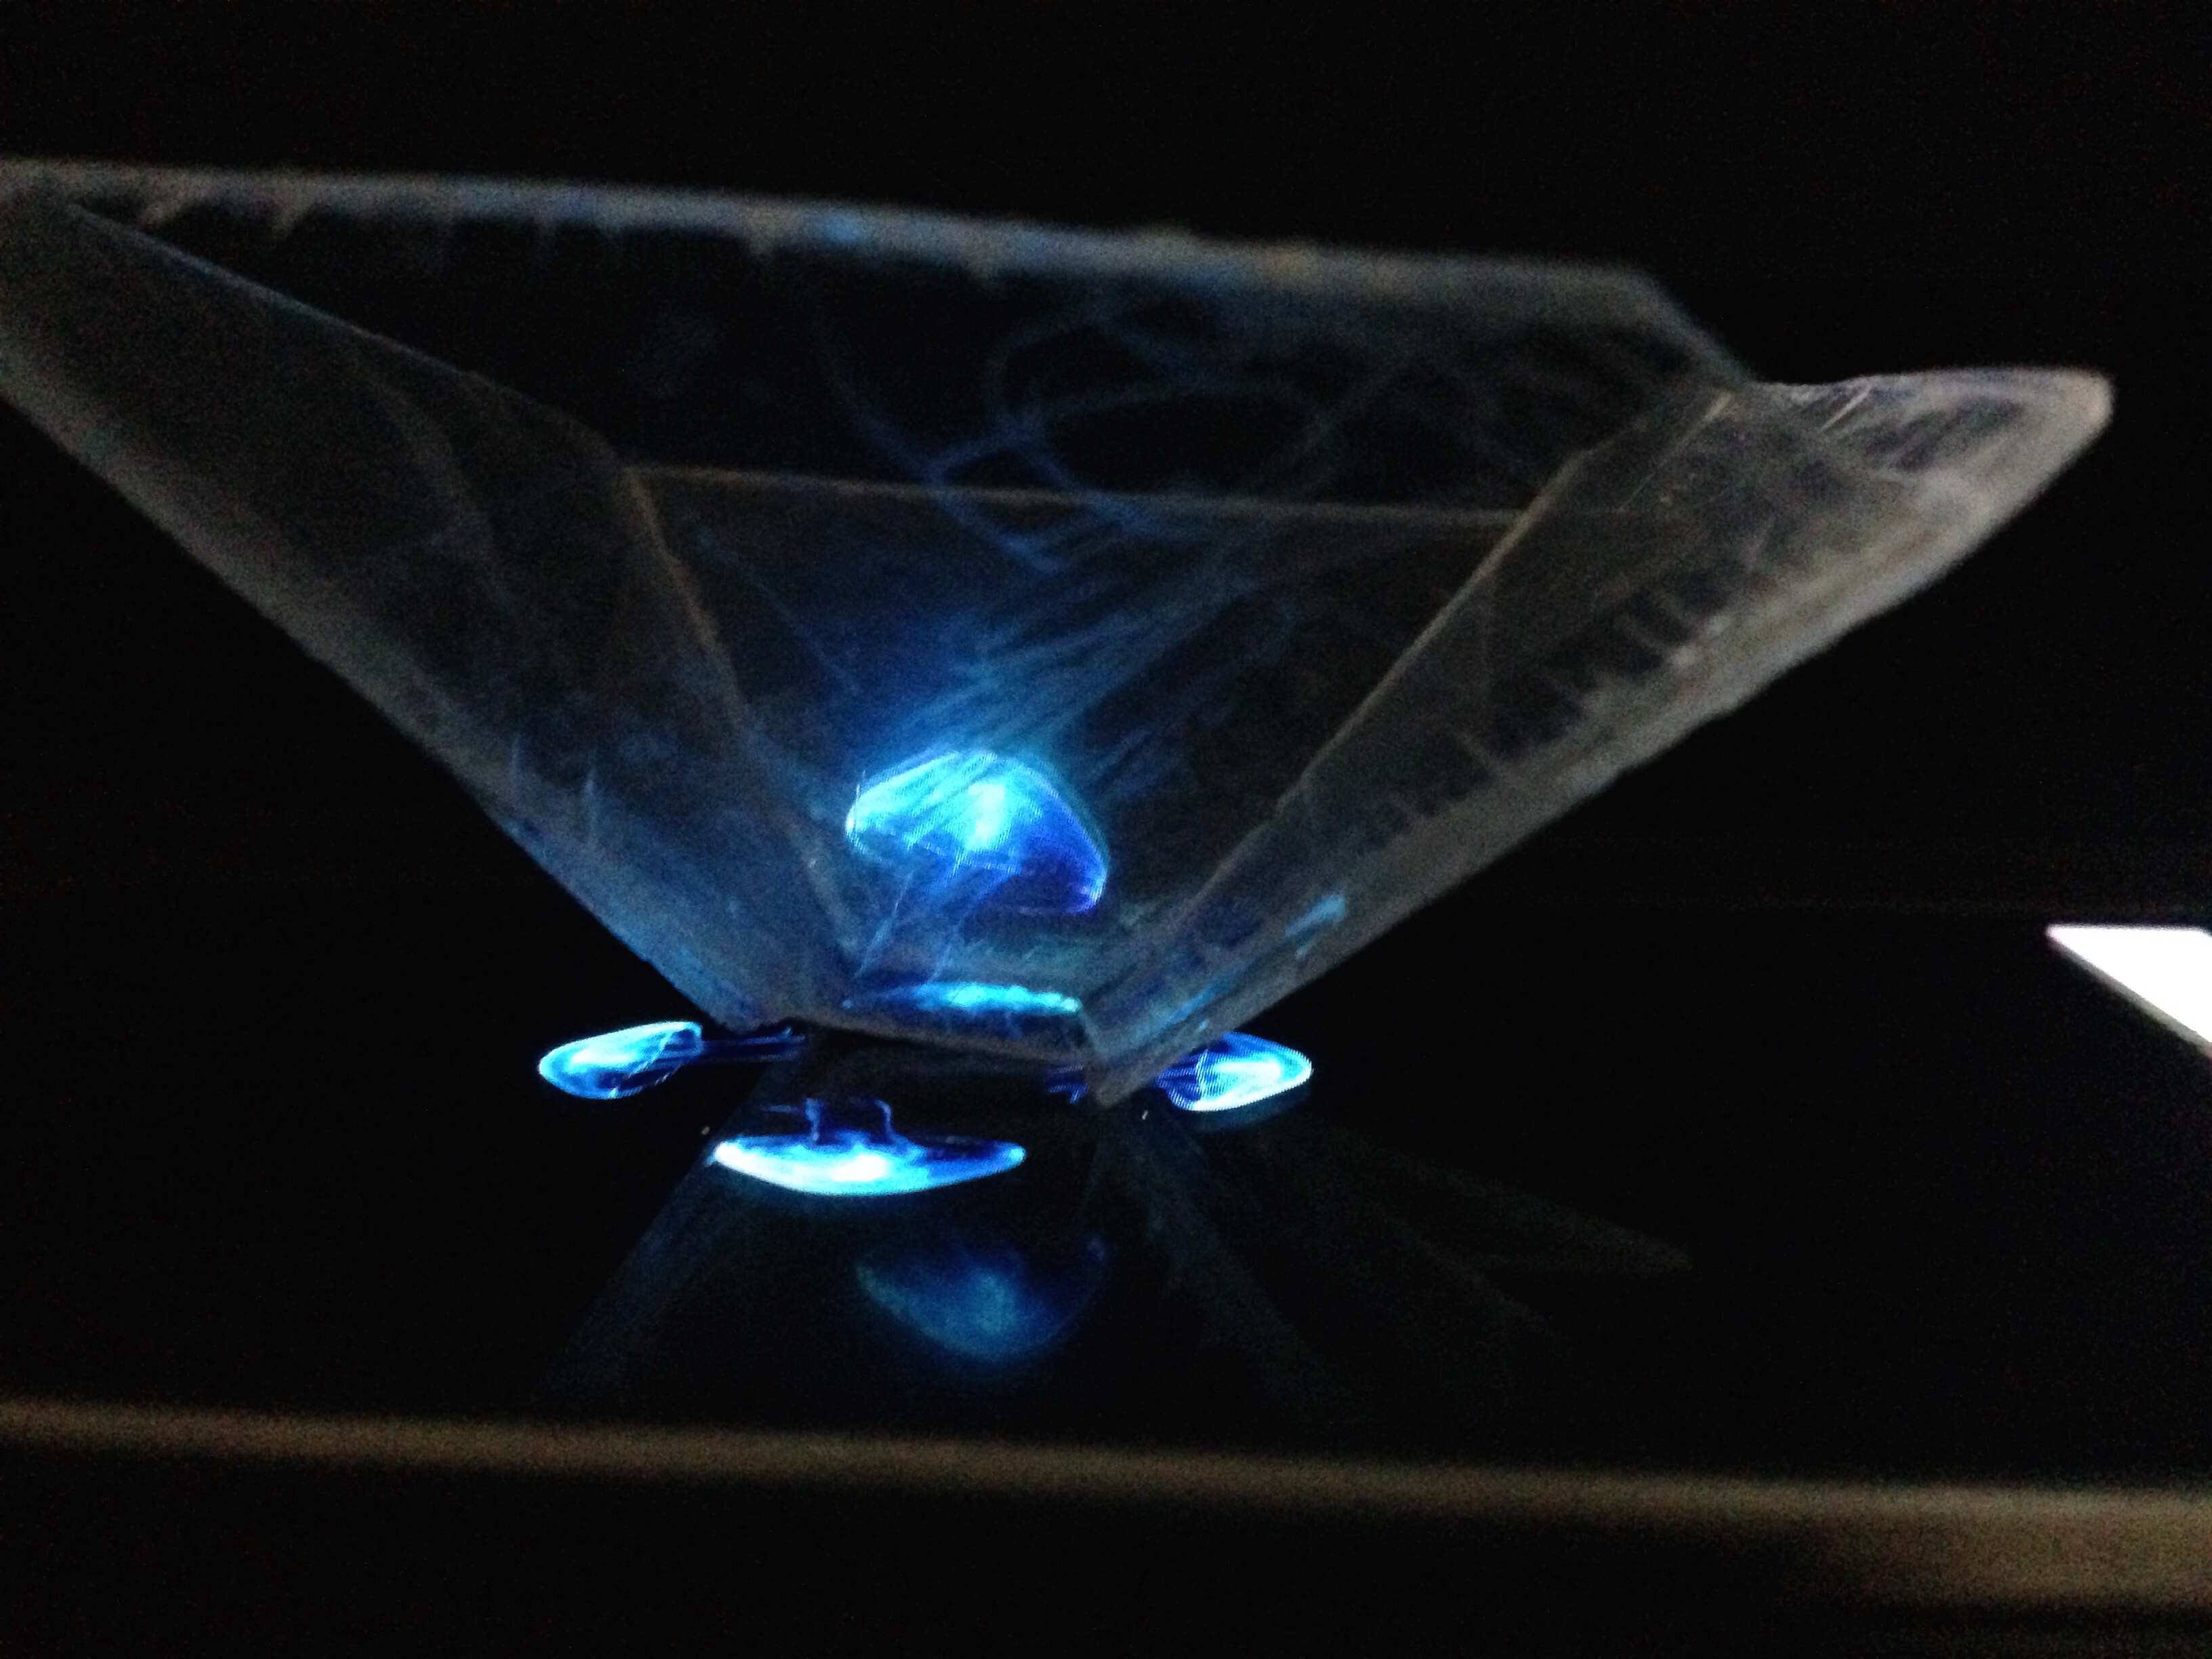
Press play on your chosen hologram video or image and marvel at the captivating display that emerges. With the pyramid acting as a projector, the holographic images will now be amplified and projected upward, creating a stunning 3D effect.
Feel free to experiment with different angles and positions of the pyramid on the screen. You will notice that the holographic projection varies depending on the viewing angle and where you position yourself in relation to the pyramid. Move around the display area to explore the holographic effect from different perspectives.
It’s important to note that the holographic effect works best in a dark or dimly lit environment. Lowering the ambient light will enhance the visibility and clarity of the holographic projections.
Now that you have successfully placed the pyramid on your smartphone screen, sit back, relax, and enjoy the mesmerizing holographic experience. Immerse yourself in the awe-inspiring visuals and let your imagination soar.
In the final step, we’ll provide you with some useful tips and tricks to further enhance your DIY holographic experience. So, let’s move on and uncover the secrets to taking your hologram display to the next level.
Step 7: Enjoy the holographic display
Congratulations! You have reached the final step of creating and experiencing your DIY holographic display for your smartphone. Now it’s time to sit back, relax, and immerse yourself in the captivating world of holographic visuals.
With the holographic pyramid securely placed on your smartphone screen, take a moment to explore various hologram videos and images. Engage in different genres, from nature scenes to futuristic animations, to find the ones that captivate your imagination the most.
Experiment with different lighting conditions to see how it affects the holographic projections. Try dimming the lights or creating a cozy ambiance with soft, indirect lighting. You’ll notice that the holographic images appear even more vibrant and lifelike in a darker environment.
As you enjoy the holographic display, take the time to appreciate the unique visual depth and three-dimensionality of the projections. Move around the display area to observe how the hologram changes from different angles, offering new perspectives and enhancing the immersive experience.
Share the magic of your DIY holographic display with friends and family. Invite them to witness the captivating visuals and let them experience the wonder and excitement of the holographic projections.
To keep your holographic pyramid and smartphone screen in optimal condition, handle them with care. Avoid placing heavy objects on top of the pyramid or applying excessive pressure to the smartphone screen. Store the holographic pyramid in a safe place when you’re not using it to prevent any damage or distortion.
Lastly, have fun and let your creativity flow. Consider creating your own custom holographic content using various graphic design software or experimenting with different shapes and sizes for the holographic pyramid. The possibilities are endless, and you can continue to explore and expand your holographic experience.
We hope this step-by-step guide has provided you with the knowledge and inspiration to create and enjoy your very own DIY holographic display for your smartphone. Now it’s time to immerse yourself in the captivating world of holography and embrace the magic of visual storytelling right in the palm of your hand.
Tips and Tricks
Creating your DIY holographic display is an exciting project, and here are some helpful tips and tricks to enhance your experience and ensure the best results:
- Choose a clear plastic CD or DVD case without any scratches or smudges. A clean surface will optimize the holographic effect.
- Ensure that the dimensions and angles of the trapezoids are accurate. Precision in cutting and folding is essential for a stable and effective holographic pyramid.
- Experiment with different hologram videos and images to find the ones that provide the most visually stunning and immersive experience for you.
- Dim the lights in the room or create a darker environment to enhance the visibility and clarity of the holographic projections.
- Consider using a smartphone with a bright display to maximize the impact of the holographic effect.
- Position the pyramid on the smartphone screen carefully, aligning the edges for a perfect fit. This will ensure optimal projection and minimize any distortion.
- Invite others to join in and experience the holographic display to share the excitement and amazement with friends and family.
- Take proper care of the holographic pyramid and smartphone screen to prevent damage and maintain the quality of the holographic experience.
- Explore creating your own holographic content using graphic design software or experiment with different shapes and sizes for the holographic pyramid.
- Go beyond the standard hologram videos and images by exploring holographic games and interactive applications that are available for smartphones.
Remember, the more you experiment and immerse yourself in the world of holography, the more you will uncover the full potential of your DIY holographic display. Let your imagination run wild and enjoy the endless possibilities that holographic technology offers.
Conclusion
Congratulations on successfully creating your DIY holographic display for your smartphone! By following the step-by-step guide and utilizing inexpensive materials, you have unlocked a world of captivating 3D visuals right at your fingertips. This creative project has allowed you to immerse yourself in the wonders of holography without the need for expensive equipment or specialized knowledge.
Through the process of preparing the template, cutting out the trapezoid shapes, folding them, and assembling the pyramid structure, you have transformed a simple plastic case into a mesmerizing holographic projector. By placing the pyramid on your smartphone screen and exploring different hologram videos and images, you have experienced the breathtaking effect of objects coming to life in three dimensions.
Remember to explore different lighting conditions, experiment with various holographic content, and share the magic with others. By following the tips and tricks provided, you can enhance your holographic experience and unlock even more possibilities.
Now that you have the knowledge, creativity, and power to delve into the world of holography, there are endless opportunities for you to customize and expand on your DIY holographic display. Whether you create your own holographic content or discover new applications and games, your journey into the realm of holography has just begun.
Embrace the wonder and magic of holography, and continue to explore and innovate, as this technology evolves and becomes even more immersive and engaging. Share your experiences with others and inspire them to embark on their own holographic adventures.
Thank you for joining us on this exciting journey of creating your own DIY holographic display. We hope you have enjoyed the process and are now ready to enjoy the captivating world of holography right in the palm of your hand. Have fun and explore the limitless possibilities of holographic technology!