Introduction
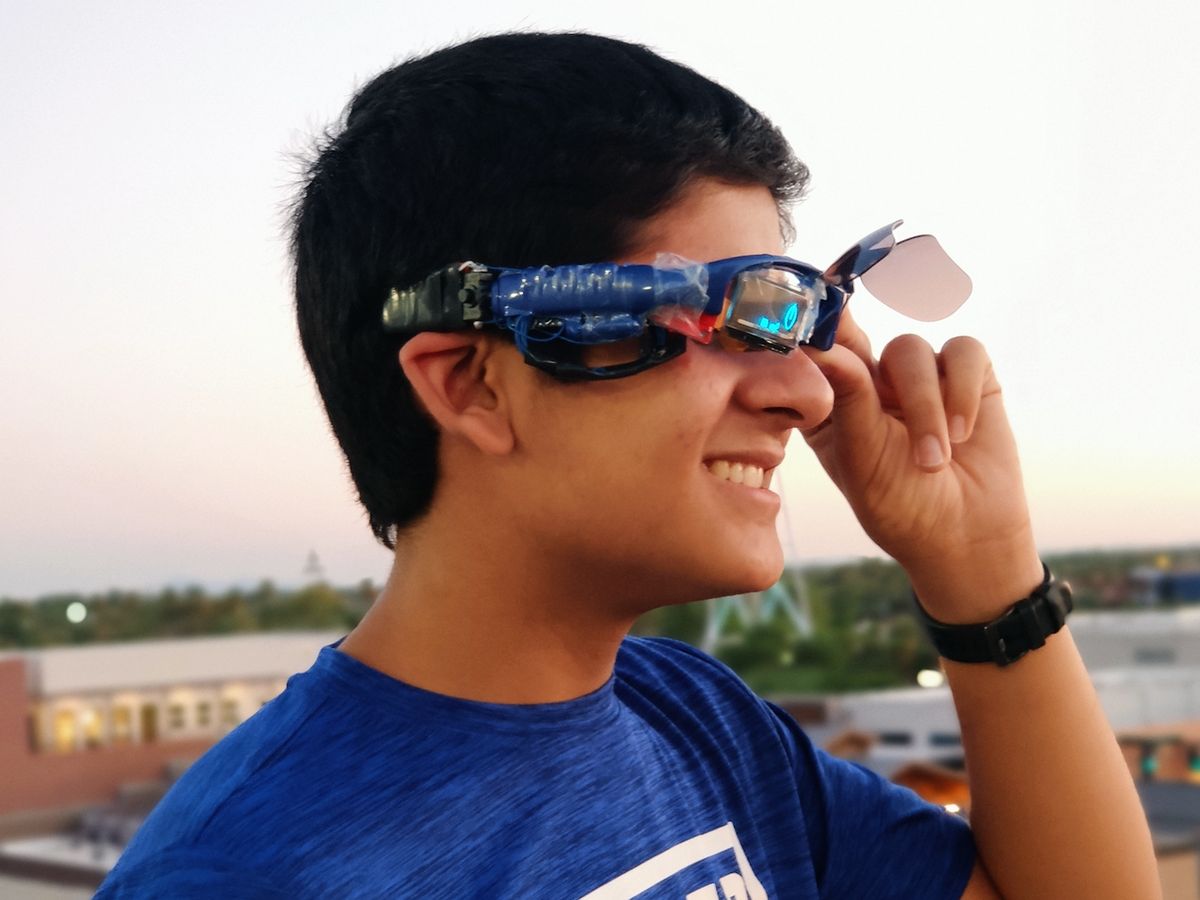
Welcome to the world of smart glasses! With the rapid advancements in technology, smart glasses have become a fascinating innovation. These futuristic eyewear devices combine the functionality of a computer and the convenience of eyeglasses, resulting in a hands-free and interactive experience.
Smart glasses provide users with a wide range of features such as augmented reality, virtual reality, fitness tracking, and even real-time information display. They can be a valuable tool for education, gaming, healthcare, and many other industries.
In this tutorial, we will explore how to create your own smart glasses using Arduino – an open-source electronics platform known for its versatility and ease of use. By following this guide, you will learn the necessary steps to set up an Arduino, connect a display, program it, add sensors, power the glasses, and assemble them to create your very own personalized smart glasses.
Whether you are a hobbyist, a tech enthusiast, or a creative individual looking to explore the world of wearable technology, this tutorial will provide you with the knowledge and guidance you need to embark on this exciting journey.
So, grab your Arduino, put on your creative hat, and let’s dive into the world of smart glasses!
What are Smart Glasses?
Smart glasses, also known as augmented reality (AR) glasses or wearable displays, are a type of eyewear that integrate digital information and virtual objects into the real-world environment that the wearer sees. These technologically advanced glasses offer a range of features and functionalities that go beyond traditional eyeglasses.
One of the key features of smart glasses is augmented reality (AR) technology, which overlays virtual images, videos, and data onto the wearer’s real-world vision. This creates an immersive and interactive experience, allowing users to interact with digital content while still maintaining awareness of their surroundings.
Smart glasses can also provide virtual reality (VR) capabilities, transporting users to entirely virtual environments where they can experience games, simulations, and other virtual content. This makes them an excellent tool for gaming, training, and immersive entertainment experiences.
In addition to AR and VR capabilities, smart glasses often come equipped with various sensors such as accelerometers, gyroscopes, and GPS, enabling them to gather real-time data about the user’s movements, location, and orientation. This opens up possibilities for fitness tracking, navigation assistance, and contextual information display.
Furthermore, smart glasses can be integrated with other smart devices, such as smartphones and smartwatches, allowing for seamless connectivity and synchronization. They can receive notifications, control smart home devices, make phone calls, and perform a range of other tasks, all without the need for hands-on interaction.
Smart glasses have the potential to revolutionize numerous industries, including healthcare, education, manufacturing, and logistics. In healthcare, they can provide doctors with immediate access to patient information and medical records. In education, they can enhance classroom learning through interactive visual aids. In manufacturing and logistics, they can improve efficiency and safety by providing real-time instructions and data visualization.
Overall, smart glasses are an exciting and rapidly evolving technology that offers a multitude of possibilities. They combine the benefits of eyewear and advanced digital technology, providing users with a unique and transformative experience. With the ability to enhance our perception of the world, smart glasses have the potential to shape the way we live, work, and interact in the future.
Components Required
Before you start building your own smart glasses, let’s take a look at the essential components you will need:
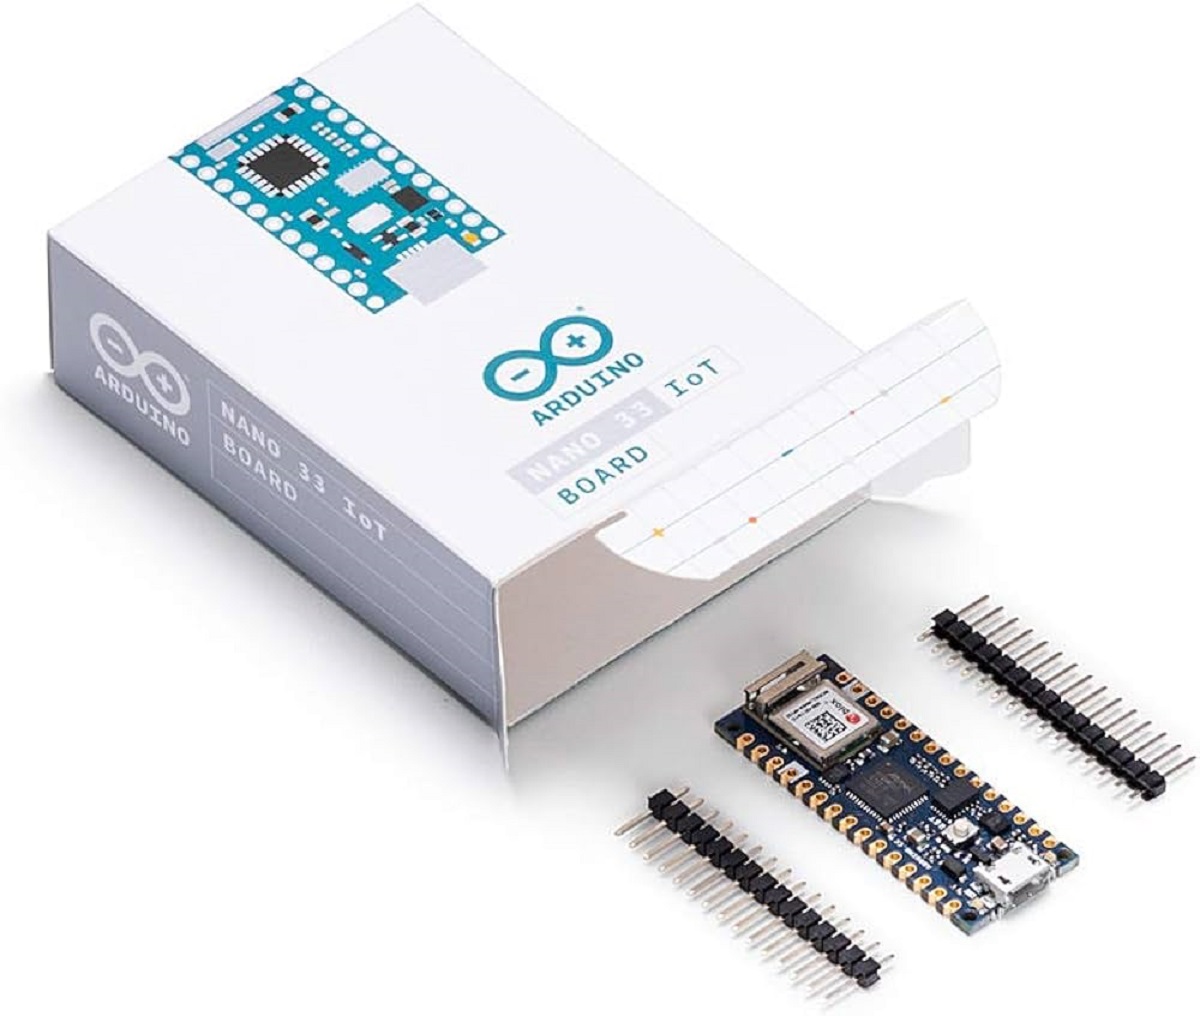
- Arduino board: The heart of your smart glasses project, the Arduino board is a microcontroller that allows you to control and interact with various electronic components.
- Display module: You will need a display module to provide the visual output for your smart glasses. Options include OLED displays, LCD displays, or small screens.
- Power source: To power your smart glasses, you will need a suitable power source. This can be a rechargeable battery, a power bank, or any other portable power solution.
- Sensors: Depending on the features you want to incorporate into your smart glasses, you may need additional sensors such as accelerometers, gyroscopes, temperature sensors, or proximity sensors.
- Connectivity modules: If you want your smart glasses to have wireless connectivity, you may require modules such as Bluetooth or Wi-Fi to enable communication with other devices.
- Enclosure: To protect and house all the components, you will need an enclosure that fits the size and design of your smart glasses. This can be made from plastic, 3D printed, or any other suitable material.
- Wires and connectors: You will need various wires and connectors to connect the components together.
- Tools: Basic tools such as a soldering iron, screwdrivers, and wire cutters will be necessary for assembly and troubleshooting.
It is important to note that the specific components you require may vary depending on the design and functionality you envision for your smart glasses. Research and planning will help you determine the most appropriate components for your project.
Now that you have an idea of the components needed, let’s move on to setting up the Arduino board and preparing it for the development of your smart glasses.
Setting up Arduino
Setting up the Arduino board is the first step towards creating your own smart glasses. Here’s a step-by-step guide to get you started:
- Download the Arduino IDE: Visit the official Arduino website and download the Arduino IDE (Integrated Development Environment) for your operating system. The IDE allows you to write, compile, and upload code to your Arduino board.
- Install the Arduino IDE: Once the download is complete, run the installer and follow the instructions to install the Arduino IDE on your computer.
- Connect the Arduino board: Use a USB cable to connect your Arduino board to your computer. Make sure the cable is securely connected to both the Arduino board and the USB port of your computer.
- Select the board and port: Launch the Arduino IDE and go to the “Tools” menu. Select the appropriate board from the “Board” dropdown menu (e.g., Arduino Uno) and choose the correct port from the “Port” menu.
- Upload a test sketch: To ensure everything is working properly, upload a simple test sketch to your Arduino board. Open the “File” menu, select “Examples,” choose a test sketch from the list (e.g., Blink), and click on the “Upload” button.
- Verify the upload: After the upload is complete, verify that the sketch is running successfully. The on-board LED should blink according to the programmed pattern.
Congratulations! You have successfully set up your Arduino board. It is now ready to execute your desired functionalities for your smart glasses project. You can now proceed to connect the display module to your Arduino board and begin programming it.
Keep in mind that this is a general guide for setting up an Arduino board. The exact steps may vary depending on the specific Arduino model you are using and your operating system. Refer to the documentation and resources provided by Arduino for more detailed instructions tailored to your setup.
Connecting the Display
Now that you have set up your Arduino board, it’s time to connect the display module. The display will serve as the visual output for your smart glasses. Follow these steps to connect the display:
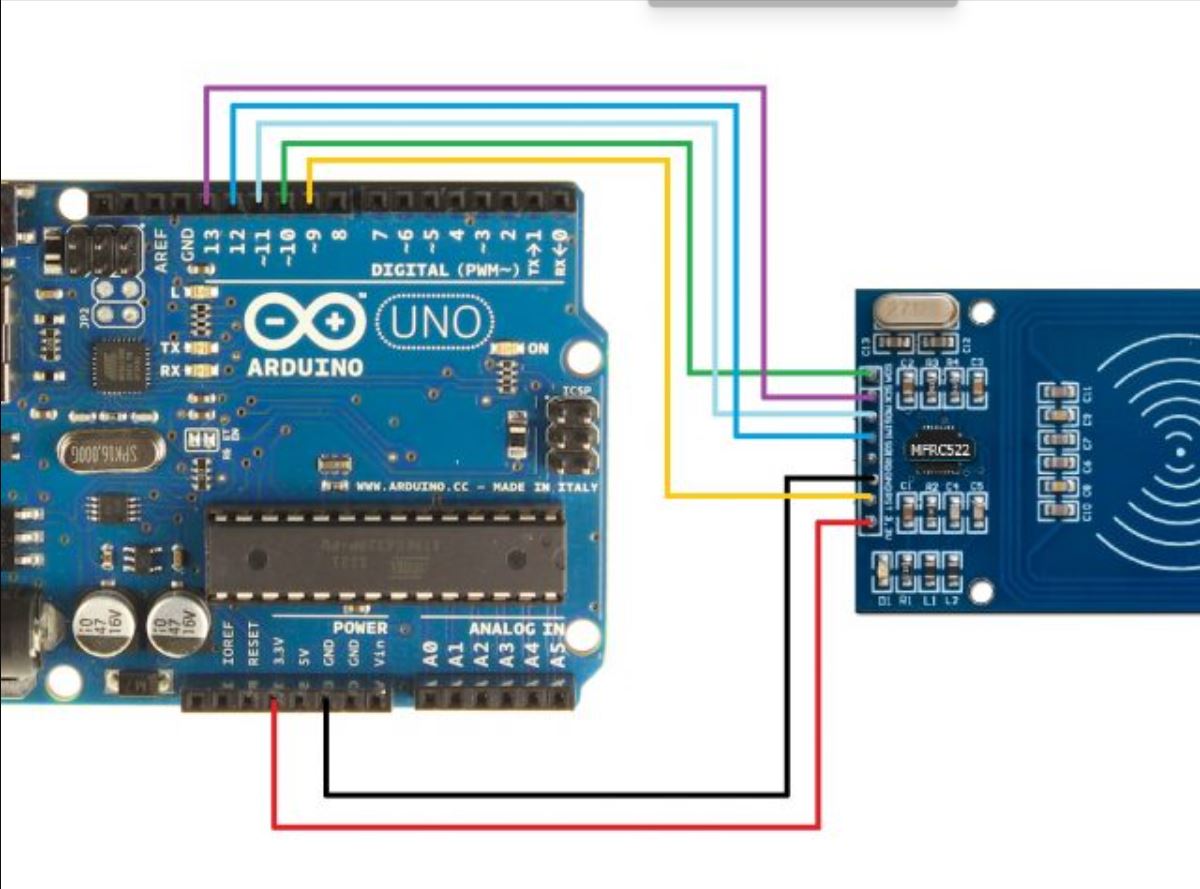
- Identify the display pins: Examine the datasheet or documentation that came with your display module to identify the pinout and necessary connections.
- Prepare the wires: Cut and strip wires to the appropriate lengths, ensuring that you have enough length to connect the display to the Arduino board.
- Connect power and ground: Connect the power (VCC) and ground (GND) pins of the display module to the corresponding power and ground pins on the Arduino board.
- Connect the data pins: Depending on the type of display module, you may need to connect data pins such as SDA (Serial Data) and SCL (Serial Clock) for I2C communication, or specific digital pins for parallel communication.
- Verify connections: Double-check all the connections to ensure they are secure and properly aligned. Loose or incorrect connections can result in display malfunctions.
Once you have connected the display module to the Arduino board, you can proceed to the next step – programming the Arduino to control the display and create the desired visual output for your smart glasses.
Note that the specific wiring and connections may vary depending on the type of display module you are using. Refer to the documentation provided with your specific display for detailed instructions on the pinout and connection requirements.
Programming Arduino
Now that you have connected the display module to your Arduino board, it’s time to program the Arduino to control the display and create the desired visual output for your smart glasses. Follow these steps to program your Arduino:
- Open the Arduino IDE: Launch the Arduino IDE on your computer.
- Start a new sketch: Click on File > New to start a new sketch.
- Write the code: In the Arduino IDE, write the code that will control the display module. This code will vary depending on the specific display module you are using and the functionalities you want to incorporate into your smart glasses.
- Include the necessary libraries: If your display module requires any specific libraries or dependencies, make sure to include them at the beginning of your code. This will allow you to access the required functions and features.
- Upload the code to the Arduino: Connect your Arduino board to your computer using a USB cable. Click on the Upload button in the Arduino IDE to upload the code to the Arduino board. Ensure that the correct board and port are selected.
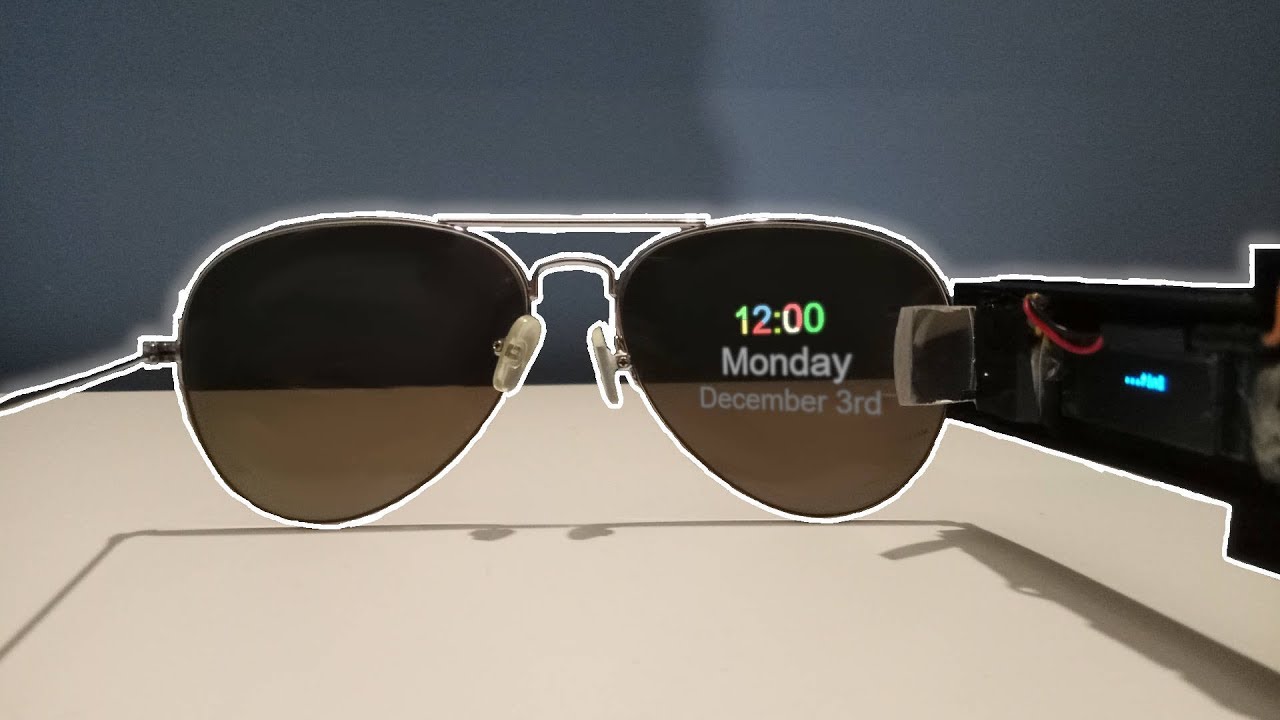
- Verify the code execution: Once the code is uploaded, verify that it is executing correctly by checking the output on the display module. The display should show the desired visual output or perform the intended functions.
Remember to test your code incrementally and make any necessary adjustments along the way. Be sure to check for any error messages or warnings during the compilation and upload process, and consult the Arduino documentation and community forums for troubleshooting guidance if needed.
With the Arduino programmed and the display functioning as desired, you are one step closer to creating your own smart glasses. The next section will delve into adding sensors to further enhance the functionality and interactivity of your smart glasses project.
Adding Sensors
Adding sensors to your smart glasses project can greatly enhance the functionality and interactivity of your device. Sensors can provide valuable input data and enable your smart glasses to respond to various environmental factors. Here are the steps to add sensors to your smart glasses:
- Select the desired sensors: Identify the specific sensors you want to incorporate into your smart glasses. Some commonly used sensors include accelerometers, gyroscopes, temperature sensors, proximity sensors, and ambient light sensors.
- Research sensor specifications: Gather information about the sensors you have chosen, including their pin configurations, communication protocols, and programming requirements. Consult the datasheets and documentation provided by the sensor manufacturers.
- Wire the sensors: Follow the pinout information from the sensor datasheets and connect the sensors to the appropriate pins on your Arduino board. Use jumper wires or soldering, depending on the project’s complexity.
- Install sensor libraries: Install the necessary libraries for the sensors you are using. These libraries provide prewritten functions and code examples that simplify the sensor integration process.
- Write code for sensor communication: Write code to initialize and communicate with the sensors. This involves configuring the sensor settings, reading sensor data, and performing actions based on the sensor readings.
- Test the sensor functionality: Upload the code to your Arduino board and test the functionality of each sensor. Verify that the sensor readings are accurate and that your smart glasses respond accordingly.
By adding sensors to your smart glasses, you can implement features such as gesture recognition, head tracking, temperature monitoring, and proximity detection. These sensors can enhance the user experience and enable more intuitive interactions with your smart glasses.
Remember to consult the sensor documentation and online resources for detailed information on their usage and programming. Additionally, make sure to allocate the necessary power and consider the placement of sensors within your smart glasses design to optimize their functionality.
With the sensors integrated, your smart glasses now have the capability to gather real-time data from the environment and provide a more immersive and interactive experience. The next section will cover the power source options for your smart glasses project.
Powering the Glasses
Powering your smart glasses is a crucial aspect of your project. Without a reliable power source, your device won’t be able to function properly. Here are some considerations for powering your smart glasses:
Choose a suitable power source: Select a power source that is compact, lightweight, and can provide sufficient power for all the components in your smart glasses. Common options include rechargeable lithium-ion batteries, power banks, or even small coin cell batteries for low-power applications.
Calculate power requirements: Determine the power requirements of your components, including the Arduino board, display module, sensors, and any other peripherals. This will help you choose an appropriate battery capacity or power supply voltage.
Optimize power consumption: Design your smart glasses to be energy-efficient. Implement power-saving techniques, such as putting the Arduino board and display into sleep mode when not in use, or using sensors only when necessary. This will help extend battery life and reduce the frequency of recharging.
Consider charging options: If you’re using rechargeable batteries, consider how you will recharge them. You may need to incorporate a charging circuit into your smart glasses or use an external charger for the batteries. Make sure to follow proper charging guidelines to avoid safety hazards.
Integrate a power management system: For more complex smart glasses projects, you may want to include a power management system that regulates and distributes power to different components. This can help prevent power fluctuations and optimize the efficiency of your device.
Ensure safety: Pay attention to safety precautions when working with batteries and power sources. Use proper insulation, protect against short circuits, and follow manufacturer guidelines to prevent overheating or damage to your smart glasses.
Remember to test and validate the power system before finalizing your smart glasses. Check for any voltage drops, excessive heat, or unexpected power consumption. It’s also important to consider user comfort and weight distribution to ensure the power source doesn’t hinder the overall usability of the glasses.
By carefully selecting and managing the power source for your smart glasses, you can ensure a reliable and long-lasting operation of your device, allowing you to fully enjoy the functionalities and benefits it offers.
Now that you have a power source for your smart glasses, the next section will guide you through the process of assembling the various components to create your finished product.
Assembling the Glasses
Assembling the various components is the final step in creating your smart glasses. Proper assembly ensures that all the components are securely connected and positioned, providing a functional and wearable device. Here’s a step-by-step guide to help you assemble your smart glasses:
- Prepare the enclosure: If you have an enclosure for your smart glasses, make any necessary modifications or adjustments to accommodate the components. This may include drilling holes for buttons, sensors, and connectors.
- Position the display module: Place the display module securely in the designated area of the enclosure. Use screws, adhesive, or other appropriate methods to secure it in place.
- Mount the Arduino board: Attach the Arduino board inside the enclosure, making sure it is positioned correctly and securely. Use standoffs, adhesive, or other mounting options to hold the board in place.
- Connect the components: Connect the various components together according to their respective pin configurations. This includes wiring the display module, sensors, and any additional modules you may have.
- Secure the wiring: Ensure that the wires are neatly arranged and secured to avoid tangling or accidental disconnections. Consider using cable ties or adhesive clips to keep the wiring organized and prevent strain on the connections.
- Test the connections: Double-check all the connections to ensure they are properly inserted and making good contact. Test the functionality of the components to verify that they are working as expected.
- Close the enclosure: Once you are satisfied with the connections and functionality, close the enclosure securely. Use screws, latches, or other suitable methods to keep the enclosure shut.
Throughout the assembly process, take care to avoid damaging any components or misaligning the wiring. Following the proper alignment and positioning guidelines will ensure a more professional and functional end result.
Remember to consider ergonomics and user comfort during assembly. Ensure that the glasses fit properly and are comfortable to wear for extended periods. Test the weight distribution and make adjustments as needed.
By following these steps and paying attention to detail, you can assemble your smart glasses with confidence. With the components securely connected and properly positioned, you are now ready to test and troubleshoot your smart glasses in the next section.
Testing and Troubleshooting
Once you have assembled your smart glasses, it is important to thoroughly test them to ensure proper functionality. Here are some steps to help you test and troubleshoot your smart glasses:
- Power on your smart glasses: Connect the power source and turn on your smart glasses to check if all the components are receiving power and functioning.
- Test the display: Verify that the display is showing the desired visual output clearly and without any distortions or artifacts. Check for any flickering or display issues that may require further troubleshooting.
- Test sensor functionality: Interact with the sensors to ensure they are working as expected. Verify that they are providing accurate readings and responding appropriately to their respective inputs.
- Verify inter-component communication: If your smart glasses have wireless connectivity or communication between different components, test this functionality to ensure seamless operation.
- Test user interactions: If your smart glasses include buttons, touch sensors, or other input methods, verify that they are responsive and trigger the intended actions or functionalities.
- Troubleshoot issues: If you encounter any issues during testing, refer to the error messages, review your code, and check the connections. Look for potential sources of error, such as loose wires, incorrect wiring, or programming mistakes.
- Consult online resources: If troubleshooting on your own doesn’t resolve the issues, consult online forums, documentation, and Arduino communities. Fellow DIY enthusiasts and developers may have encountered similar challenges and can provide guidance.
- Iterate and refine: Make necessary adjustments based on the results of your testing and troubleshooting. Revise the code, refine connections, or replace faulty components as required.
Testing and troubleshooting are iterative processes. It may take several rounds of testing, refining, and retesting to ensure that your smart glasses are functioning flawlessly.
Remember to document any modifications or tweaks you make to the code, wiring, or components during the testing and troubleshooting process. This documentation will be valuable if you need to retrace your steps or share your project with others.
With thorough testing and effective troubleshooting, you can identify and resolve any issues in your smart glasses, ensuring that they deliver the desired functionality and user experience.
Once you are satisfied with the testing and troubleshooting phase, you can now confidently enjoy your fully functional and personalized smart glasses.
Conclusion
Congratulations on successfully creating your own smart glasses using Arduino! Throughout this tutorial, we explored the exciting world of smart glasses, discussed the necessary components, and provided step-by-step instructions for setting up Arduino, connecting the display, programming the board, adding sensors, powering the glasses, and assembling the final product.
Smart glasses offer a wide range of possibilities, combining the functionality of a computer with the convenience of eyewear. By leveraging Arduino’s versatility and the wealth of available sensors and modules, you have the opportunity to create a unique and personalized wearable device. Whether you are a hobbyist, a tech enthusiast, or a creative individual, this project allows you to explore the fusion of technology and fashion.
Remember, the customization options for your smart glasses are virtually endless. You can further enhance the functionality by integrating additional features such as wireless connectivity, voice control, or even incorporating augmented reality experiences. The choice is yours!
As with any DIY project, troubleshooting and testing are integral parts of the process. It is normal to encounter challenges along the way, but don’t get discouraged. By consulting online resources, seeking guidance from the Arduino community, and persevering through testing and refinement, you can overcome these obstacles.
Now that you have completed your smart glasses, it’s time to don them and enjoy the seamless integration of technology and fashion. Explore the possibilities, showcase your creation to others, and let your imagination guide you to new and exciting applications for your smart glasses.
Remember to continue to learn, experiment, and innovate. With Arduino as your platform, you have a world of opportunities to explore and create new projects that merge technology and creativity.
With your newfound knowledge and skills, there’s no limit to what you can achieve. So, keep inventing, keep exploring, and keep pushing the boundaries of wearable technology!